How much tile do you need? You’ll know in just 4 quick steps . . .
1. Measure Your Surface
Measure the dimensions of the surface you would like to mosaic and calculate the area using the formulas from elementary school:
RECTANGLE AREA = length x width
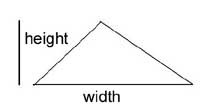
TRIANGLE AREA = 1/2 x width x height
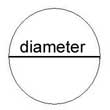
CIRCLE AREA = 0.785 x diameter x diameter
To get the area of a triangle you multiply the height by the width, and then divide by two.
To get the area of a circle you square the diameter and then multiply the result by 0.785
Keep in mind that 1 ft2 is 144 in2.
If you get your answer in square inches, just divide by 144 to get the answer in square feet.
We have help with the formulas at the bottom of the page if you need it.
2. Look Up An Estimate
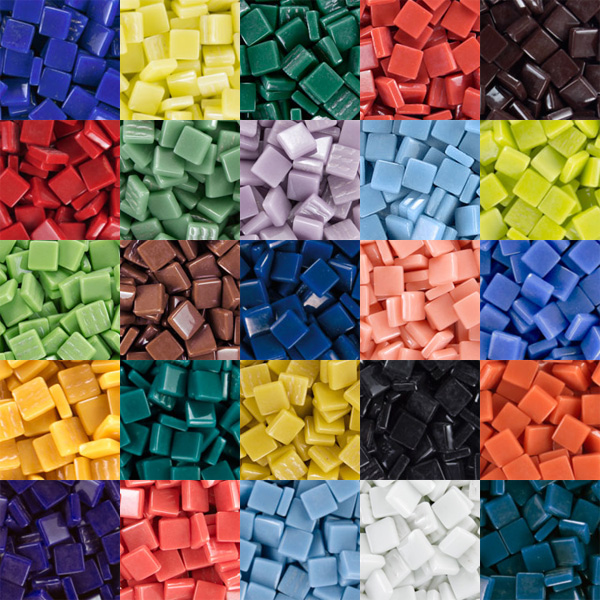
Now look up an estimate of the number of mosaic tiles you need based on square footage. Except for 8mm and 3/8 inch tile, these estimates assume a grout spacing of 1/16 inch between the tiles. The 8mm and 3/8 inch numbers are based on a smaller grout gap of 1/32 inch. The first three columns refer to mosaic marble stone of different types. The fourth column refers to 3/4-inch glass mosaic tile. Remember that 1 ft2 is 144 in2.
Mosaic Area
8mm (5/16″)
10mm (3/8″)
12mm (1/2″)
15mm (9/16″)
20mm (3/4″)
1 ft²
1225
872
508
369
218
2 ft²
2450
1744
1016
737
436
3 ft²
3675
2616
1524
1106
654
4 ft²
4900
3488
2032
1475
873
5 ft²
6125
4360
2540
1843
1091
6 ft²
7350
5232
3048
2212
1309
7 ft²
8575
6104
3556
2580
1527
8 ft²
9800
6976
4064
2949
1745
9 ft²
11025
7848
4572
3318
1963
10 ft²
12250
8720
5080
3686
2181
3. Are you cutting the tiles?
Cutting a mosaic tile in pieces theoretically decreases the amount of tile you need. How is this so? You will have more pieces, so there will be more grout lines in the mosaic. More grout lines means more grout and less mosaic tile. The effect can be significant. For example, it requires 218 of the 3/4″ glass mosaic tiles to cover 1 square foot with a grout spacing of about 1/16 inch, but if you cut the tiles into pieces, you might only need 200 tiles. On the other hand, people who cut tile probably should budget a little extra as waste. That’s why we use 218 per square foot as a rule of thumb for 3/4″ mosaic tile.
4. Consider the Spacing Between Tiles
Tile coverage is determined as much by the grout spacing between the tiles as it is by the area you are covering. All of the calculations in our tables assume a standard grout spacing for that particular size. Grout gaps of standard size ensure that grout penetrates between the tiles and covers the adhesive underneath, while the hairline crack between “touching” tiles can never be grouted reliably. Standard size grout gaps are also optimal for aesthetic reasons, while using no grout gap between tiles of similar color does not look like distinct pieces at a distance. For advice about choosing a grout color, see our page of Mosaic Instructions.
Note that 3/4″ glass mosaic tile sometimes comes face-mounted on paper so that the installer can glue the whole sheet to a wall and then peel the paper off the face of the tile and then grout. These sheets are made according to metric standards, so that the grout spacing is slightly larger than 1/16″. Typically there are 225 tiles mounted on a sheet that is 1.15 square feet. Our metallic glass mosaic tiles and swirled glass mosaic tiles are cut from such sheets. Most artists remove the tiles from the sheets before using, so this doesn’t matter.
12mm Recycled Glass Mosaic Tile by Elementile are sold by the 1/2 pound (approximately 185 pieces), which covers slightly over 1/3 of a square foot. The glass has a glossy finish and solid color throughout, and it is opaque when mounted on an opaque surface. The tiles are hard, durable, and they can be used for the exteriors of commercial buildings. They are made from 97% recycled powdered glass in a fusing process referred to as “warm glass” or “pate de verre” or “enamel glass.” Mounting grids are available.
Coverage
With no grout gap, a 1/2-pound bag of tile (approximately 185 pieces) will cover approximately 41 square inches or 0.29 square feet. With a standard grout gap of 1/16 inch, a 1/2-pound bag of tile will cover approximately 53 square inches or 0.37 square feet. (Think of covering a square 7 inch x 7 inch.) Use our tile estimator to calculate how much you need for your project.
Note that dry indoor mosaics do not have to be grouted (and thus you can simply mount the tiles tightly together), but outdoor and wet mosaics must have grout to prevent water from penetrating behind the tiles. The best way to ensure that the gaps between the tiles is to leave a 1/16-inch gap instead of pressing them tightly together, and this point seems counterintuitive to some people. Consider this: you can never mount them so closely together that water can’t penetrate it, but you can accidentally put them so close that grout doesn’t get adequately pressed into the crack during the grouting process.
Compatibility
Tile thickness is 1/8 inch nominal, the same as the 3/8-inch and 3/4-inch glass mosaic tile we sell. Note that the 12mm Elementile has the same color names as the 8mm Elementile, but you should never assume that two sizes of a particular color will be identical because they may have come from different manufacturer batches.
Cutting Elementile 12mm Glass Mosaic Tile
This product cuts extremely well with the mosaic glass cutters that we sell. In fact, the homogeneous nature of pate de verre glass means that it cuts better than most types of glass tile and produces more useful pieces with fewer splinters and dust and waste.
Use in Mosaic Art
Elementile’a rich color palette make it a professional rendering tool that can be used for photo-realist portraiture and fine art mosaic. The colors available are more like the canonical hues of artist oil paint and less like the arbitrary mixed hues of most lines of architectural tile.
The 12mm (~1/2 inch) size is sufficiently large for conventional applications, but the material cuts very cleanly into small pieces that can be used for micromosaic artwork.
Thinset is used for outdoor mosaics, or mosaics which may come into contact with water, such as in a shower enclosure.
This page explains how to mix and use thinset mortar for detailed work with glass mosaic tile and other tesserae for outdoor and wet mosaics where PVA adhesives such as Weldbond should be avoided.
These instructions are written for doing detailed work one-tile-at-a-time by hand, and so this page might make using thinset sound more difficult than it really is. For mounting sheets of tile on mesh or paper, it’s a lot simpler: Spread the mortar on the wall with a notched trowel, butter the back of the sheet of tile, and then press the sheet to the wall.
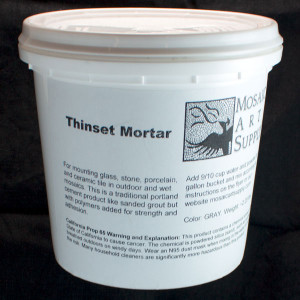
What Is Thinset Mortar?
For outdoor and wet mosaics, thinset is recommended instead of adhesives. Thinset is a bonding mortar, which means it is a portland cement (the same as used in concrete) with polymers added to make it sticky and extra strong. This is particularly important when working with glass mosaic tile, which is non-porous and difficult to bond securely.
We use Versabond brand, which we buy at Home Depot, and I suspect your local contractors are using the same or something more or less the same. HOWEVER, if you live some place with extreme cold or extreme wet, it never hurts to go to your local building material store and ask what contractors are using in your area before choosing a paint or a roofing material or a sealant or anything like that.
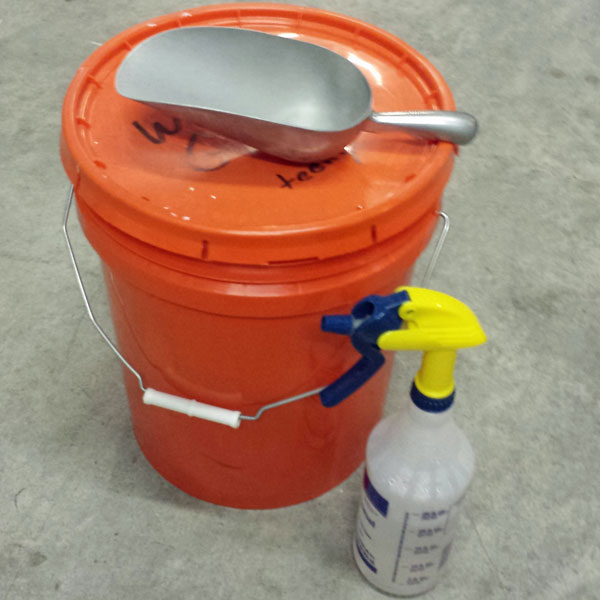
How To Handle Large Bags?
Thinset Mortar comes in 25-pound bags. Go ahead and buy a 5-gallon bucket with a snap on lid and keep your material in there. Bags leak. Buckets with lids don’t. Slide the bag into the bucket and shake it until the bag fits into the bucket. Avoid pouring the bag into the bucket, which would make a large dust cloud. Keep a recycled plastic yogurt tub in the bucket and use that to scoop out material. Wear a dust mask and do this outside. Mist with a spray bottle to control dust.
For an artist setting up a studio to do small mosaic projects, a 5-gallon bucket with snap on lid should be purchased at the same time you by the 50-lb bag. Buy a spray bottle for misting if you don’t own one already and control dust at the source. You don’t need a scoop. You can use a recycled plastic cottage cheese container for that. Keep it in the bucket of thinset.
Mixing Thinset Mortar
The thinset bag has mixing instructions on the label, but those were written for mixing the entire bag. For detailed mosaic artwork where you are placing each tile by hand, you will probably want to mix 1 to 3 pounds at most. You can find what amount of water to add per pound by dividing the amount of water recommended for the entire package by the weight of the package.
Mixing Ratio: 4 oz Water to 1 lb Thinset
For Versabond thinset, we add 1/2 cup or 4 oz of water per 1 pound of dry thinset powder. You can use that same ratio of 1 part water to 4 parts thinset to mix up tiny batches of thinset, such as 1 ounce of water plus 4 ounces of thinset.
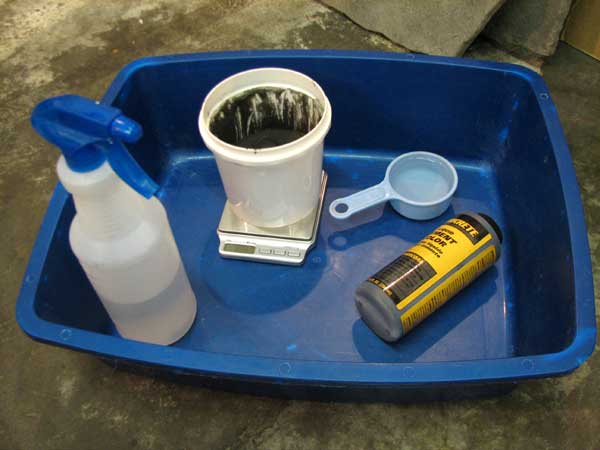
Mix Outdoors and Control Dust
We use a small kitchen scale or postal scale for weighing out the thinset and the water. Alternatively, a measuring cup can be used for the water, with 1/2 cup being the equivalent of 4 ounces weight. Although you should wear a dust mask when scooping and mixing the thinset powder, it is best to control dust at the source by slow careful scoops and stirs and never pouring or dumping the powder.
Use a spray bottle at its finest setting to mist your work area with water as you stir and scoop. There is only a tiny amount of water in a fine mist, and so you don’t have to worry about it messing up your unused thinset or throwing off your measurements, but it is highly effective at getting the dust out of the air. Keep in mind that you can create a lot of dust after the water is added to the powder by stirring to rapidly. Stir slowly until the powder is wetted, and make use of your spray bottle as needed.
An aluminum ice scoop or a large steel kitchen spoon can be used to scoop out the thinset powder, but you can also use a recycled plastic container (such as used for cottage cheese or yogurt) and just store this improvised scoop in your bucket of thinset.
Here is a list of items recommended for mixing thinset:
plastic bucket or plastic container for mixing.
smaller plastic containers for scooping and weighing
dust mask
small kitchen scale or postal scale
measuring cup (optional)
paint paddle or sturdy rod for stirring
trowel for scraping buckets and stirring tools
spray bottle for misting
Most of the tools needed to mix thinset.
Mixing Buckets: Size Matters
For small batches of 1 pound or less, we mix it up in a 32-ounce plastic yogurt container and use a putty knife or old butter knife to stir. For larger batches, we mix in a 5-gallon bucket so that we can mix vigorously without slinging out any material. A smaller bucket (2 gallon) can also be used, but keep in mind that you don’t want to fill any container more than half way full, ideally a quarter full or less. It helps to control dust if all the mixing happens near the bottom of the bucket.
Stirring
You have to pour the water in gently and stir slowly at first to avoid creating dust before the powder is wetted. Use a clean paint paddle or sturdy rod to stir, and make sure that your stirrer is stout enough for the job. This is concrete not cookie dough! You can break the plastic handle off your wife’s favorite spoon or bend a thin piece of pipe in a hurry if the batch is large enough. In all seriousness, you will notice that it takes some strength to mix up larger batches. We have a concrete mixing attachment that fits into our electric drill, and we use it for batches of 5 pounds or more.
Mix the mortar until it has the consistency of dough with no lumps. Take care to mix all the way to the bottom of the bucket and scrape the edges to make sure that no powder, lumps or clumps remain. Then the mortar is allowed to sit for 5 to 10 minutes, and then it is mixed again for a minute or two.
A margin trowel is very useful for scraping the sides of the bucket and making sure there aren’t pockets of unmixed powder down in the edges of the bottom of the bucket. The scraping power of the trowel comes in handy during clean up too. Thinset is very sticky, and if it has set for more than a few minutes, it will likely take more than a squirt nozzle to remove it. Scraping with a trowel is the best way to remove the crust of thinset that forms on buckets and stirrers.
Dyeing Thinset?
After the thinset is mixed, concrete dye can be blended into it if the thinset will be used for grouting and a custom color is desired. (Versabond thinset is sold in white and gray.) Most thinset is used only for attaching tiles, and so there is no need to dye the thinset if it will not be visible. Also, you need to test your dye with your thinset to make sure that it doesn’t affect the bond strength or hardness. (A good test is to cement a few rocks together, wait about 6 days, and then bust them apart with a hammer and look for crumbly material or a lack of adhesion.) Recently we added a liquid concrete dye to Versabond thinset, and we used many, many times the recommended dosage for concrete without any noticeable loss in bond strength or hardness as far as we could tell, although we make no guarantees. Keep in mind that we used a concrete dye and not acylic paint or some other source of pigment that might interfere with the adhesive additive.
Detailed Mosaic Artwork
Thinset is extremely sticky and meant to be spread with a trowel to mount large tiles or sheets of tile, but with a little care and planning, you can use it mount tile one piece at a time for detailed mosaic artwork similar to how glue is normally used in that mode of working.
As with glue, thinset can be used in either of two ways: It can be spread on a small area on which tiles are then placed, or it can be applied to the back of each tile individually. For either technique, a painter’s palette knife is the ideal tool for handling the thinset. (Although improvised tools such as an old butter knife can be used for this work, the benefits of the palette knife become obvious in just a few minutes. The pallet knife was ergonomically designed to manipulate pastes on flat surfaces WITH MINIMAL BENDING OF THE WRIST and makes a butter knife just seem clumsy.)
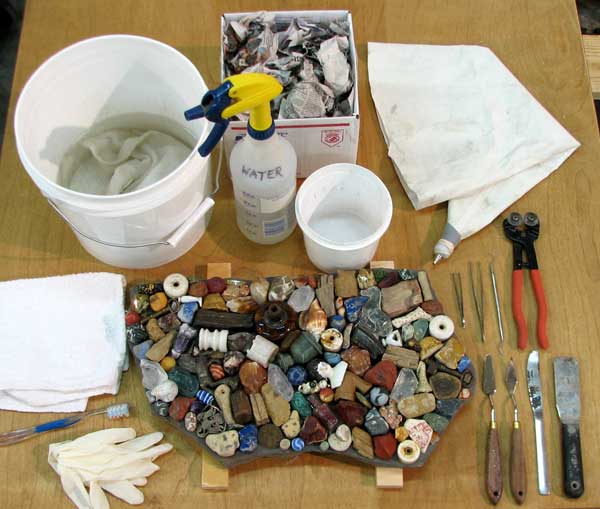
Whether your spread the thinset or apply it to each individual tile, you will need a way of keeping your hands clean and a way of cleaning up random drops and smears. We use the following materials to keep the work clean and efficient:
painter’s pallet knives
putty knife or margin trowel
small plastic lid or tray
tweezers
spray bottle
dirty rag
wet rag floating in a bucket 1/4 full of water
clean rag
medical examination gloves (recommended)
old work surface or shop table.
wadded newspapers in garbage can
This workstation is ready for thinset application.
The plastic tray or recycled container lid holds a small amount of thinset for use. Scoop a small amount of thinset into the tray and keep the rest of the thinset in the mixing bucket. Keep the bucket covered and use the putty knife or margin trowel to scrap the sides of the bucket so that all the thinset is in a blob and doesn’t dry out. Mist the thinset sparingly if you see it drying. We can use thinset for up to 4 or 5 hours this way.
Whether you spread the thinset in small patches or put a smear of thinset on the backside of each tile will depend on your style and pace of work. If you are improvising your design as you go along, you may find that you use both techniques.
Keeping Fingers Clean
No matter how you handle the thinset, you will occasionally get some on your fingers. If you are sloppy in how you clean your fingers (gloved or ungloved), you will use up tons of rags. Use this procedure to use only 3 rags:
Scrape fingers off on the wadded newspaper in the garbage can.
Use the DIRTY rag if needed, but try to use as little as possible.
Thinset, grout, concrete, and other products that contain portland cement are mildly caustic and can dry out the skin very rapidly and cause irritation. For this reason, we wear medical examination gloves while we work with thinset. The nitril gloves we sell are ideal for this purpose because they are latex-free and powder free and are more durable than the latex medical examination gloves we used to sell. Note that these gloves are much thinner and offer much more dexterity than the thick grouting gloves.
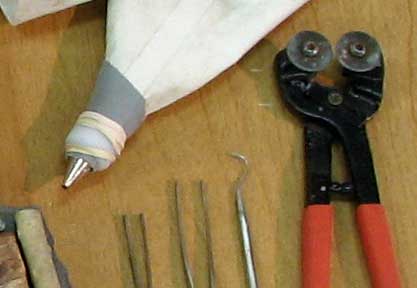
Grouting Bag Fitted With Icing Nipple
For found-object mosaic, we sometimes use a grouting bag fitted with a Wilton brand cake icing nipple. The grouting bag with nipple allows us to dispense the thinset in a very controlled way as if from a bottle of glue. This technique can also be used for flat tile.
We use a rubber band to help hold the plastic collar over the metal nozzle of the grouting bag.
Clean Up
Make sure you clean up outside and do not pour unused thinset down drains. Even the sand in grout and thinset is enough to stop up some plumbing systems. Try to dispose of most of your unused thinset as solid waste. Rinse away any residue with enough water so that you don’t leave a white limestone scum on the grass, which could kill it if conditions are dry.
Reinforced concrete sculptures can be made from materials readily available from your local building material store, and these make great long-lasting bases for mosaic sculpture. In fact, if you thoroughly seal the finished mosaic with an outdoor concrete sealer, then the mosaic could last as long as anything made by the ancient Greeks or Romans.
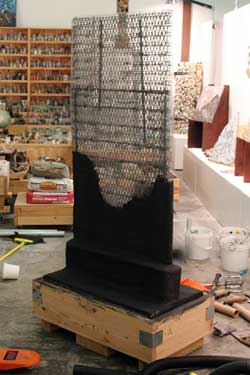
Work in progress shot of the sculpture.
Another great thing about using reinforced concrete as the base for your mosaic sculpture is that there are many techniques and materials that you can use, and you can even make hollow shapes like spheres.
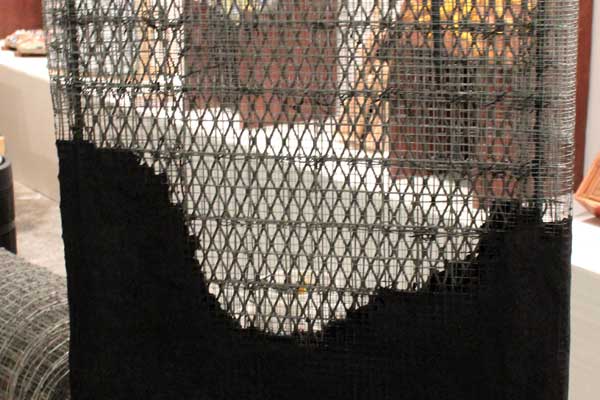
The first step in making a sculpture is to build a load-bearing frame, usually out of welded rebar or angle iron (or whatever scrap steel is available), but people without access to a welder can simply drill holes in the angle iron and bolt their frame together. Expanded metal is also useful for flat shapes.
The next step is to cover the frame with wire mesh, usually either chicken wire or hardware cloth, both of which are available at most any building material store. The chicken wire or hardware cloth is “tied” to the frame with bare wire. We usually use fencing wire ties, which are sold for wiring fencing to fence posts, or concrete wire ties, which are sold for holding rebar in place. You can use whatever bare steel wire you have on hand, but I would avoid aluminum or copper because these metals will corrode steel over time. Usually 1 or 2 layers of hardware cloth are sufficient to form a surface upon which concrete can be spread, but 3 or more layers of chicken wire may be needed before your surface is firm enough. It really all depends on whether or not you are making a hollow sculpture or one that will be filled with concrete.
For hollow sculptures, expanding foam (from the building material store) can be squirted in to fill the void inside your wire frame shape. The advantage of using expanding foam is that once the foam hardens, you will have something inside the wire-mesh skin of your sculpture when you start spreading concrete on it so that the wet concrete doesn’t just fall through. Another reason to use the foam is that it will prevent moist air and water from rusting your steel frame from the inside over time. One thing you have to watch out for with expanding foam is the potential to use too much and have it expand into the wire mesh skin. Keep in mind that the wire mesh skin needs to be encased in concrete and not be merely underneath a layer of concrete. If the concrete is just sitting on top of the wire-mesh skin and not integrate with it, then it will probably break off over time like a piece of eggshell. On way to prevent the foam from expanding into the wire-mesh skin is to squirt the foam inside a trash bag inside the frame. The foam will expand inside the bag, and bag will keep it from extruding through the wire-mesh skin.
Concrete is traditionally spread with trowels, and trowels are useful for scooping up concrete and pressing it onto the surface of your mosaic, but you will probably find that working it into the wire by hand works best. The wire tends to puncture even the heaviest of rubber gloves, so we use a cheap pair of work gloves.
Ordinary concrete isn’t the best choice for sculptures because ordinary concrete isn’t sticky enough, and it isn’t strong enough in terms of tensile strength (in spite of having great compressive strength). The authors of most mosaic books explain how to add latex additives to portland cement to make a sticky concrete, but why would you do that when you could just go buy a bag of thinset mortar? I suspect these authors are just trying to posture as artists and demonstrate their technical competence, but I think they forget how many people they discourage by making things harder than they need to be. We use thinset mortar mixed with pea gravel in a 2:1 ratio (thinset:pea gravel). We sieve the pea gravel to remove all the bigger pieces that won’t fit into the wire-mesh skin.
There are a lot of different techniques used by various artists, including coating rags with thinset and layering these rags onto the frame like paper mache. You can find additional instructions and ideas online.
Rebar was used for the frame and then covered in steel mesh to get the basic shape of the sculpture.
In recent years people have begun using hollow fiberglass shapes as bases for outdoor mosaic sculptures. Fiberglass bases might have the advantage of being lighter than traditional concrete bases, but fiberglass bases can’t as easily be made using local materials and fiberglass work requires noxious chemicals. That is why when you see a mosaic sculpture made on fiberglass base, the base was almost always pre-made in a factory in a mold, which isn’t of much use to an artist wanting to create his or her own vision. Also, hollow fiberglass mosaic shapes can flex slightly while mosaic tile and grout cannot, so the durability of mosaic sculptures made on fiberglass bases is questionable, at least in my opinion.
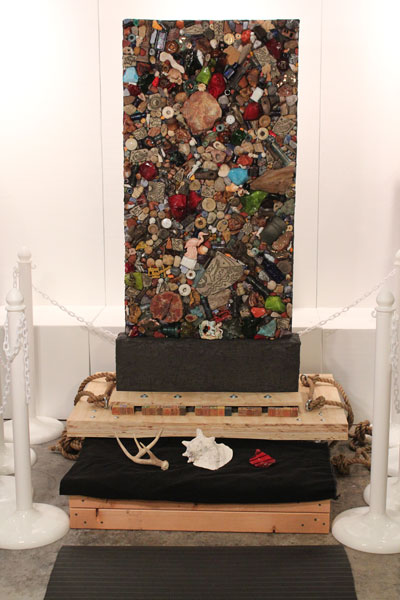
This is the finished “Solstice Door” found-object mosaic stele.
While it is possible to make some amazing art using only one type of material, the decision to use multiple materials in the same mosaic tends to stimulate the imagination, often in unexpected ways, in ways that leave the artist wanting to make a series of mosaics to capture just a mere fraction of what might be possible. This is because mosaic is dimensional. The artist might begin by thinking only in terms of the image to be rendered, but merely by handling the materials, the curious mind can’t help but think of what might be.
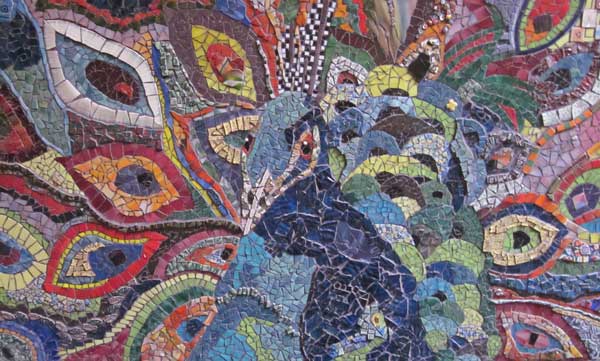
Troi O’Rourke’s fabulous Struttin’ Peacock.
Troi O’Rourke’s fabulous Struttin’ Peacock is a great example of how tile of different thickness can be used in the same mosaic. Note that the fact that the surface isn’t flush is not a problem. To the contrary, the slight changes in elevation add a whole new dimension (literally) to the mosaic and help to set off the different fields of color.
Playing With Patterns
With mixed materials, there are differences in texture, size and shape (in addition to color), and with found objects such as seashells and artifacts, there is the significance of what those objects actually are in real life. And then there are all the different ways in which the materials could be arranged or grouped to contrast each other. The materials really do present an infinite regress for the artistic mind. I have gone into the studio very focused on a very specific design only to spend the entire session playing with different arrangements and variations. Sometimes I think I could live to be a thousand years old and not be able to complete all the designs I have already thought about. Thus is the nature of mixed-media mosaic art.
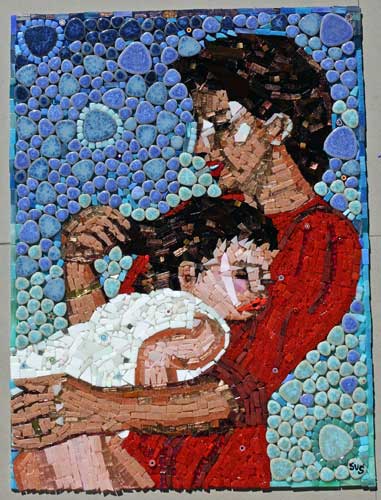
Mixed-media mosaic art by Susanne Sorogon.Susanne Sorogon demonstrates great artistic sophistication by using decorative tile and flourishes in a mosaic that still manages to render an image naturalistically. (I have created a separate page where you can learn more about mosaic portraits and photo-realistic mosaics.)
Mixed-media mosaic seahorses by Laurie Gilson.
Laurie Gilson’s mosaic includes fused-glass seahorses and seaweed, which she created herself, with collected seashells. Note that the water in Laurie’s mosaic isn’t just space to be filled. Instead, she contrasts iridized and matte materials arranged in rows that suggest the flow of the water. Parallel arrangements of of contrasting materials usually make strong patterns.
Groupings of Similar Items
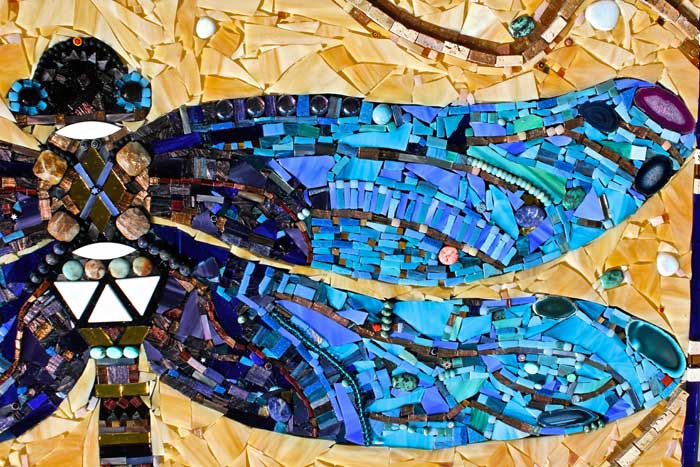
Mixed-media mosaic dragonfly detail by Susanne Sorogon.
Susanne Sorogon’s dragonfly is more of a departure from naturalistic rendering and makes greater use of mixed-media materials: beads, geode slices, millefiori, decorative tile and stained glass. Again, notice that the wings are not merely space to be filled but are used instead to play with patterns and groupings. The warm honey background and the intense blues of the figure make for a very effective contrast and are further proof of Sorogon’s skill as an artist. Note that this mosaic is ungrouted.
What to use for a backer is determined by how the mosaic will be displayed. For example, you could use a piece of sanded plywood as a backer for a small mosaic plaque or trivet, but you could NOT use plywood as backer for a mosaic floor because wood is compressible. Similarly, you could NOT use plywood as a backer for an outdoor mosaic or wet mosaic because plywood warps over time due to changes in humidity.
The best all-around mosaic backer is concrete backer board, such as that used in bathrooms as the sub-floor for tile floors. Concrete backer board is cheap, cuts easily, comes in 1/4″ and 1/2″ thick sheets, and is available at almost any building material store. Drywall can be removed easily and replaced with a sheet of concrete backer board. The 1/2″ thickness is recommended for floors, and we only use the 1/4″ size when laminating it to plywood.
Using Concrete Backer Board for Wall Art or Plaques
A small piece of concrete backer board can be used to strengthen a piece of hanging wall art or a plaque. 1/4″ backer board can be laminated to a piece of plywood and then the edges sanded with a belt sander (wear a mask!) to make the sides look even. The backer board will provide a rigid and waterproof layer for the mosaic to rest on while the plywood behind it can be used to anchor the screws in that are needed for the hanging wire.
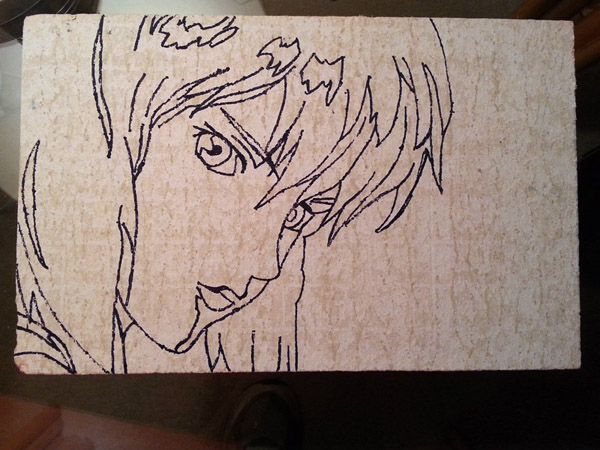
Mosaic artist Natalija Moss began this mosaic by laminating a piece of 1/4″ backer board to a piece of plywood. She used Weldbond mosaic glue and some clamps to laminate the plywood to the backerboard over night. Then she drew the pattern for the mosaic using a marker onto the backer board side of the piece.
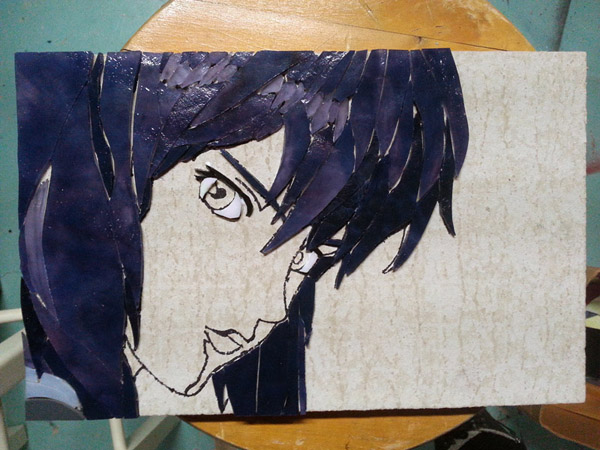
Using the direct method, Natalija then started cutting and gluing pieces of stained glass directly to the backer board surface. Backer board may bond to the glue more quickly than other surfaces such as plywood, so make sure you have your pieces exactly where you want them or you may have to scrape them off with a flathead screwdriver which could damage nearby tiles, especially stained glass. Always wear safety glasses when mosaicing, but especially if you find yourself scraping off tiles.
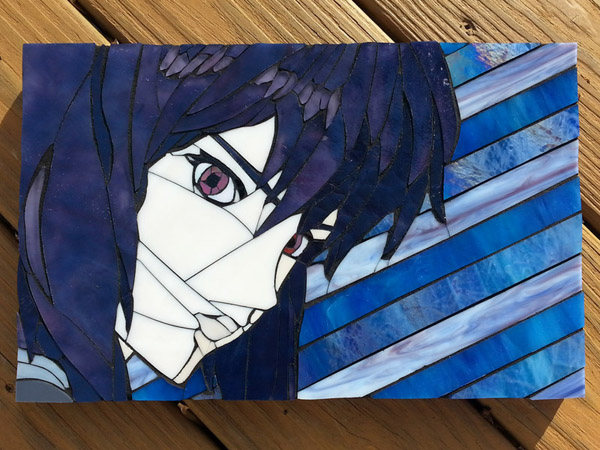
The finished piece. There are two screws in the back of the plywood with a hanging wire tied to them. The plywood behind the backer board is about 1/2″ thick so she used short screws so as not to penetrate the backer board and damage the mosaic. It is also possible to cut a keyhole slot using a plunge router, but that should be done at the beginning before any glass is put down.
Durable, Strong, Inflexible, and Clean
Mosaic backings should be durable, strong, inflexible and clean.
Durable
Durable means resistant to water and moisture. Over the years, humidity in the air can turn plywood and particle board into splinters. Long before this happens, the tiles will begin popping off as the plywood warps. MDF and particle board swell and disintegrate with humidity as well. Avoid using wood products of any type outdoors. If you have to use wood outdoors, then use marine plywood, and make sure you paint the undersides and side edges with multiple coats of exterior paint and seal the finished mosaic.
All that being said, plywood can be used for dry indoor mosaics such as small plaques, picture frames and mirrors. If you make an indoor mosaic picture on plywood larger than 2 feet wide, then you should still paint the underside and sides to keep humidity from warping the plywood over time.
Strong
Mosaic materials are heavy, no matter if you are using stone, ceramic or glass mosaic tile. Grout is concrete. The weight of even one square foot of mosaic can be heavy. This means that not only your backer must be strong but also your points of attachment. (Never hang a mosaic from a single nail like a painting.) Mosaics made on thin panes of glass are also not recommended, especially glass table tops.
Glass table tops can sometimes be replaced with a sheet of concrete backer board if the table is strong enough to support the weight. (Never create a safety problem by gluing heavy mosaic materials to a glass table top.) The table should have a wide enough base so that the mosaic doesn’t make it “top heavy” or otherwise unstable. The table should also support the concrete backer in the center and not just on the edges. If your table does not have support in the center, consider bolting or welding a piece of angle-iron across the center.
Inflexible
Grout and mosaic tile are inflexible. If they are mounted to a backer that flexes even slightly over time, the grout and tile will crack and pop off. Mosaic backings for floors should also be incompressible. This is why concrete backer board is used beneath tile floors instead of plywood.
Note that plastic and thin sheet metal fail all three of the above criteria, but especially the requirement to be inflexible. Plastic and sheet metal also pose additional problems with bonding securely to glue and grout.
Clean
Walls and floors made from concrete, stone or masonry are obvious choices for mosaics, but even these ready-made backers should be scoured to remove paint, sealants and dirt, and you may need to plaster them smooth with mortar before starting the mosaic.
It never hurts to take a wire brush and scour a surface before you attach tiles to it. Nothing is worse than putting days or weeks into a project only to have it not hold up very well. It only takes a little dust or a little grease or a little paint to cause tiles to pop off within a few years or even months. How do you know that concrete wall doesn’t have an invisible pore sealer on it? You don’t. Take a wire brush and scour it!
If your surface is large, such as for a mural, then use a power tool called an angle grinder with a rotary wire brush. (Wear gloves and a face shield, especially if you haven’t used one before, because things like angle grinders and belt sanders can take the hide right off of you.) You can rent power tools at places like Home Depot, or you can ask your favorite handyman or handywoman to scour the wall for you. The point is that this type of surface prep can be done with little effort and is worth doing because it might determine whether or not your mosaic lasts more than a year or two.
Contemporary floor mosaics usually take the form of accents such as mosaic medallions and mosaic borders instead of the larger pictoral designs that covered the entire floors of ancient Roman houses. The contemporary mosaic accents are integrated with the existing flooring material, which is usually larger tiles of marble or ceramic. These limited area designs are more practical for the simple reason that most of the floor is covered with furniture, and it only makes sense to mosaic the small part of the floor where it will be consistently visible. That being said, I would absolutely love to have a customer email me pictures of a full floor design.
Mosaic Medallion
The mosaic below is a beautiful example of a compass rose medallion made by our customer Caroline Lahman from the tumbled marble mosaic we sell. I’m particularly impressed with the professional quality of the work Caroline did, and the fact that she actually took the time to photo-document the work in progess with publication-quality images, which is something I usually fail to do once I get rolling.
The first step in making a mosaic medallion is to draw a pattern and tape it to a work table and cover the pattern with construction plastic or plastic kitchen wrap so that you don’t glue everything to your pattern. On top of this, fiberglass mesh is laid and the corners taped or tacked down securely. Although the pattern should be visible through the mesh, I find it useful to take a Sharpie brand marker and trace the design on the mesh directly just to make sure I can see it once things get a little messy.
For most floors, water isn’t that much of an issue, but for shower floor and bathroom floor mosaics, it is something to think about. For these “wet” mosaics, I like to use only a drop of glue at the center of the tile when I attach it to the mesh. This leaves some of the tile uncovered by glue so that it can bond directly to the thinset mortar when the finished mosaic is mounted to the floor. The thinset mortar is much more water resistant than white PVA glues such as Weldbond. (That being said, Weldbond is fairly water resistant when fully cured.)
Thinset mortar and grout are both concrete products that can stain porous materials like unpolished stone. To prevent this, the mosaic should be sealed before you grout it (and probably before you mount it because accidents can happen during mounting). The catch is that you don’t want to seal any surface where grout will need to bond, including the sides of the tiles. You only want to seal the top face of the stones. To do this, I use a small artist’s paint brush and carefully brush the sealer on the top face of the stone taking care to not let excess sealer run into the gaps between the stones. I use TileLab brand “Grout & Tile Sealer” for a normal seal. I use TileLab brand “Stone Enhancer & Sealer” if I want to slightly enhance/darken the stone colors (recommended). Both of these are available at Home Depot. Note that these products are invisible pore sealers and not an actual coating like polyurethane.
The finished compass rose medallion is well integrated with existing floor and the color scheme of the room. Congratulations Caroline on the job well done!
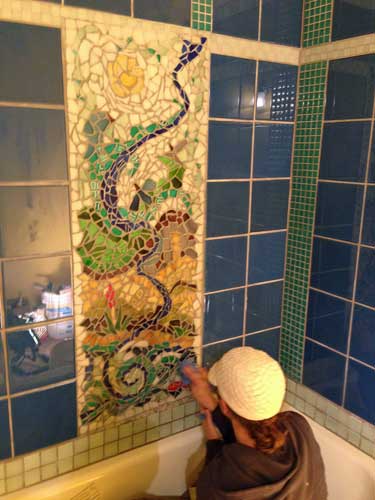
Mosaic backsplashes and shower mosaics make great projects, and with a little thought, it is possible to come up with designs, even figurative designs (pictures), which integrate visually with existing tiling and decor.
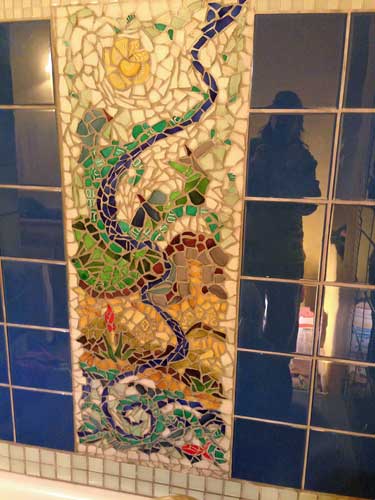
One of our customers puts the finishing touches on her shower mosaic. Rhonda Gotway Clyde and Jessica Oldham made this mosaic from bottles and plates they broke and tumbled in a rock tumbler.
This mosaic has great andamento (arrangement of tile in curves to suggest motion) and uses colors which tie it in visually with existing tiling.
Thinset, Mastic or Weldbond?
Ordinary bathroom and kitchen tiling is mounted using a product called tile mastic, which is a water-based adhesive. Why then do people say to avoid adhesives when creating mosaics in a shower?
The reason is simple: Bathroom tiles are typically 4 inches or larger, while the tiles used in an artistic mosaic are usually smaller than 1/2 inch. This difference in tile size means that the artistic mosaic has more grout lines and thus more places where can potentially penetrate behind the tile and weaken the adhesive over time.
However, mosaic backsplashes in both kitchen and bath CAN be installed using a white PVA adhesive such as Weldbond provided the mosaic is grouted properly and the grout is sealed with a tile and grout sealer, which is absolutely essential on horizontal surfaces where water can pool. In fact, if the mosaic will be wet more often than dry, then you should use thinset mortar instead of adhesive. (Thinset mortar is a sticky concrete that has polymers mixed in for strength and adhesive properties.) For shower floors, for example, you would definitely want to use thinset mortar instead of an adhesive. I should also note that while mosaic walls can be made on drywall or plywood, you should use 1/2″ concrete backer board for any floors to be tiled.
Use Mesh or Work Directly?
For large tiles, thinset is usually spread on with a trowel with 1/4″ notches, and the tile is pressed into the thinset quickly and efficiently. But artistic mosaic work has a different pace from architectural tiling just as painting a portrait takes more time and care than painting a barn door. Many artists overcome this difference in pace by first laying up the mosaic on fiberglass mesh or laying the mosaic upside down on mounting paper or clear mounting tape (in what is called the reverse method). With all the detail work done in advance, the sheets of mosaic are then pressed into spread thinset just as ordinary tile would be.
BUT, an artist often chooses to work in thinset directly and set one tiny tile at a time. Most people can figure out how to do this when using an adhesive, which comes in small convenient bottles, but working with a sticky concrete product like thinset mortar takes a little bit of thought. Fortunately, it isn’t that difficult, and some simple tools like palette knives or popsicle sticks and tweezers can take a lot of the frustration out of the process. I have written a page for how to use thinset for making mosaic art, which probably goes into more detail than you need for most projects.
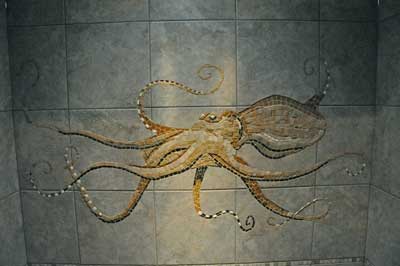
Jason Hiller decided to work in-situ instead of laying up the mosaic on mesh due to the nature of the design, which integrates a mosaic figure (an octopus) with a non-mosaic background.
The finished octopus mosaic is probably a little too real for some people!
I consider this mosaic to be the antithesis of the cutesy mosaics seen at most art and craft shows. Very nice work. Jason Hiller is a tile and stone contractor in the Bellingham, Washington area.
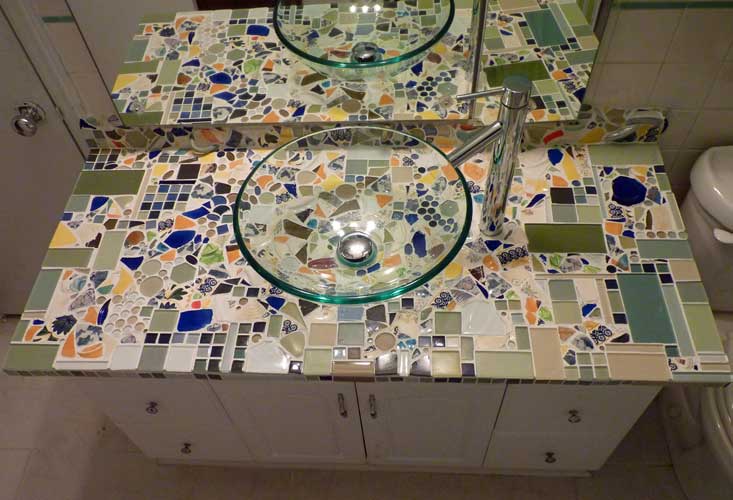
Melanie Berry in Baltimore made this mosaic counter top with very calming colors and cobalt accents that make use of patterned china shards.
Mosaic fireplaces are made by applying mosaic to the surrounding face, but not the inside of the fireplace itself. In fact, if the fireplace is actually used and not merely decorative, you probably shouldn’t mosaic the hearth (floor) in front of the fireplace because heavy chunks of wood and fire irons tend to crack and knock tile loose over time. That being said, porcelain tile and many varieties of stone are very hard and could be used for the hearth. The fireplace surround can be mosaiced with a variety of materials including glass tile.
Brick and stone should be plastered over with thinset mortar to smooth the surface in advance of actually applying the mosaic. Alternatively, 1/2 inch concrete backer board can be mounted over the existing fireplace surround as a backing for your mosaic.
For mounting the tiles, a white PVA adhesive such as Weldbond or thinset mortar should be used. I have written a page for using thinset mortar for detailed mosaic art, but for larger tiles, the thinset could be spread with a 1/4 inch notched trowel, and the tile pressed into it relatively quickly as is typically done with bathroom tiling.
A Whimsical Fireplace Mosaic
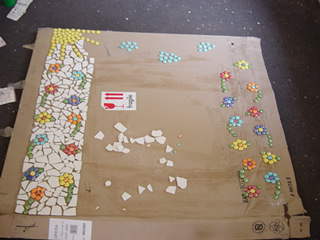
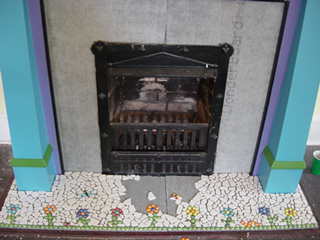
The fireplace mosaic below is a whimsical design made by my friends for their ice cream shop, which was located in a restored Victorian house in Decatur, Georgia. The color choices and motifs are in keeping with the kid-friendly theme of their shop.
Mosaic designs can be developed merely by playing with tile in different arrangements.
Concrete backer board can be mounted over the existing fireplace surround or mortar can be spread in advance of the mosaic work.
Mosaic tile may be mounted individually or on mesh-mounted sheets or face-mounted on paper for pressing into mortar.
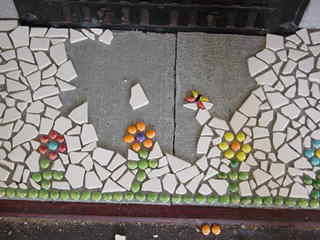
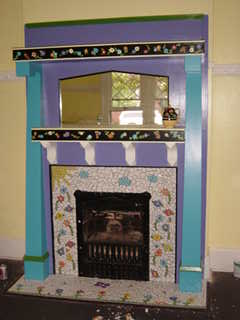
The mosaic fireplace surround and hearth are completed.
An Outdoor Fireplace Mosaic
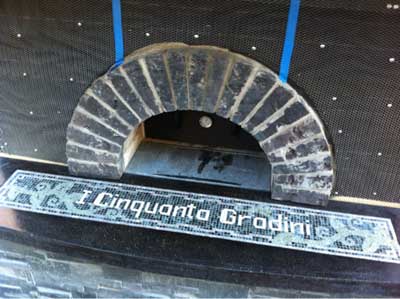
For outdoor mosaics subject to rain, humidity and freezing temperatures, thinset mortar should be used instead of adhesive to mount tiles. Thinset is a sticky concrete product that contains polymers for added strength and adhesive properties. We usually use it for grouting our outdoor mosaics because it is stronger than grout, and it will be the same color as any thinset that squeezes up between the tiles from when they were attached. We have successfully dyed thinset with concrete dye without any noticeable loss of strength or adhesion. Concrete dye and thinset are sold at most building material stores.
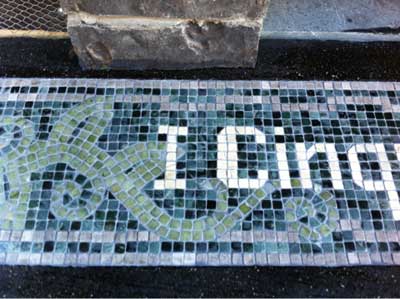
The fireplace below is actually an outdoor pizza oven, based on the wood-fired Italian variety, and the mosaic is on the hearth in front of the oven. The oven and the mosaic were made by one of our customers and her boyfriend in his backyard. “I Cinquanta Gradini” means “The Fifty Steps” in Italian, a reference to the 50 steps leading up to the house and oven.
Mallard Family: mosaic detail by Yetti Frenkel from “Here Comes the Sun”
Mosaic mural for Union Crossing, created by Yetti Frenkel and Joshua Winer, October 2011.
Learn by Looking
The best art is ultimately derived from looking at nature, but nothing seems to inspire an artist more than looking at great artwork by other artists. The reasons are simple: There is the competitive urge to create something even better, but there is also the discovery of new ways of seeing or rendering, a humble realization that the artist has done something in a way that hasn’t occurred to the viewer before.
The amazing thing about art is that this phenomenon occurs all the time, including when experienced professional artists look at naive art or art made by little children.
When artists browse other artists, there is a cross-fertilization of ideas where the synthesis is greater than the sum of the parts. There is the thought, “I can’t wait to do that myself and do it in my own way.”
Mosaic art is particularly suited for casual study by other artists because unlike painting, there are no hidden layers or semi-translucent layers and everything is visible as it was laid down. While a novice might benefit from classes or books for learning the best way to cut tile or transfer patterns or apply grout, he or she can learn more or less everything there is to know about the design merely by looking at it, including that critical element of style that is andamento, which is best expressed as the arrangement of tile in parallel or concentric work lines to suggest motion.
Great Blue Heron: mosaic detail by Yetti Frenkel from “Here Comes the Sun”
Mosaic mural for Union Crossing, created by Yetti Frenkel and Joshua Winer, October 2011.
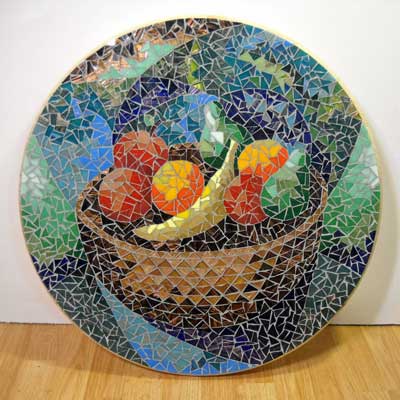
Fruit Bowl mosaic art by David Cruise, 2012.
24 inches diameter, Metallic, Vitreous glass mosaic tile on wood
Normally I dislike mosaics made with triangular tesserae because they seem to be used by artists who aren’t as concerned with using andamento (arrangement of tiles) in rows or concentric rings to create a sense of flow or motion, which is a great source of visual interest in mosaic artwork, but David Cruise’s work really caught my eye.
David creates visual interest in localized areas of his mosaics by using contrasting colors and by contrasting light and dark areas. Notice how light-and-dark contrast naturally catches the eye and makes different elements more distinct. I also like how the andamento of the triangular tesserae creates a woven basket texture in the fruit bowl, however unintentional that might have been.
It is also worth mentioning that you can have the tile close together with minimal grout or no grout (if your mosaic is indoors and not subject to moisture). If there is no groutline, the artist needs to be more conscious of varing his or her colors in order to call attention to individual tiles and break up visual monotony. This can be done by mixing two or three similar colors or shades of a color instead of using all the same color, which is what Yetti has done in the background areas of her magical mosaic. David uses this approach to show depth and shading in his apples and oranges and other fruit and the torso of the female figure.
Mixed-Media Mosaic
There isn’t any need to limit yourself to just one type of material in making a mosaic. Different types of glass, ceramic and stone can
be used together in the same piece in what is known as mixed-media mosaic.
Mosaic Dragonfly by Susanne Sorogon makes use of color-coordinated tesserae of differing materials.
More Great Mosaic Art
One of the largest collections of contemporary mosaic art online can be viewed at our
Mosaic Artists Gallery.
For a discussion of how to create photo-realistic mosaics and mosaic portraits, plus some great examples, see our page of
Mosaic Portraits.
For examples of mosaics that are whimsical and fresh without being tired or cliche, see our page of
Fun Mosaic Art.
For examples of using different types of materials in the same mosaic, check out our page of
Mixed-Media Mosaic Art.


 The first step in making a mosaic medallion is to draw a pattern and tape it to a work table and cover the pattern with construction plastic or plastic kitchen wrap so that you don’t glue everything to your pattern. On top of this, fiberglass mesh is laid and the corners taped or tacked down securely. Although the pattern should be visible through the mesh, I find it useful to take a Sharpie brand marker and trace the design on the mesh directly just to make sure I can see it once things get a little messy.
 For most floors, water isn’t that much of an issue, but for shower floor and bathroom floor mosaics, it is something to think about. For these “wet” mosaics, I like to use only a drop of glue at the center of the tile when I attach it to the mesh. This leaves some of the tile uncovered by glue so that it can bond directly to the thinset mortar when the finished mosaic is mounted to the floor. The thinset mortar is much more water resistant than white PVA glues such as Weldbond. (That being said, Weldbond is fairly water resistant when fully cured.)
 Thinset mortar and grout are both concrete products that can stain porous materials like unpolished stone. To prevent this, the mosaic should be sealed before you grout it (and probably before you mount it because accidents can happen during mounting). The catch is that you don’t want to seal any surface where grout will need to bond, including the sides of the tiles. You only want to seal the top face of the stones. To do this, I use a small artist’s paint brush and carefully brush the sealer on the top face of the stone taking care to not let excess sealer run into the gaps between the stones. I use TileLab brand “Grout & Tile Sealer” for a normal seal. I use TileLab brand “Stone Enhancer & Sealer” if I want to slightly enhance/darken the stone colors (recommended). Both of these are available at Home Depot. Note that these products are invisible pore sealers and not an actual coating like polyurethane.
 The finished compass rose medallion is well integrated with existing floor and the color scheme of the room. Congratulations Caroline on the job well done!