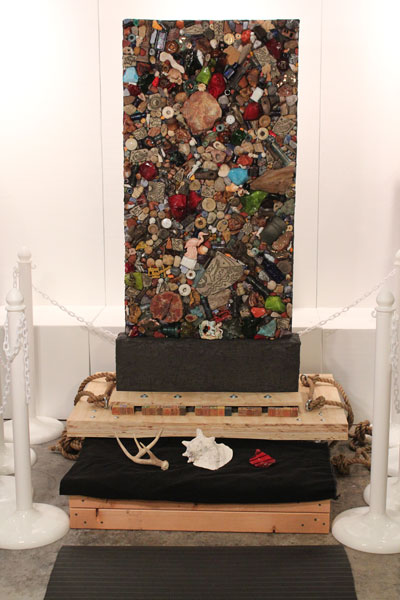
Reinforced concrete sculptures can be made from materials readily available from your local building material store, and these make great long-lasting bases for mosaic sculpture. In fact, if you thoroughly seal the finished mosaic with an outdoor concrete sealer, then the mosaic could last as long as anything made by the ancient Greeks or Romans.
Another great thing about using reinforced concrete as the base for your mosaic sculpture is that there are many techniques and materials that you can use, and you can even make hollow shapes like spheres.
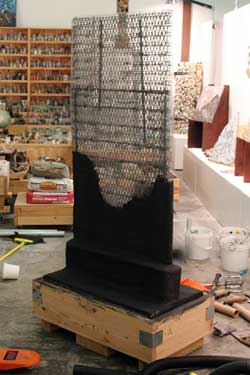
The first step in making a sculpture is to build a load-bearing frame, usually out of welded rebar or angle iron (or whatever scrap steel is available), but people without access to a welder can simply drill holes in the angle iron and bolt their frame together. Expanded metal is also useful for flat shapes.
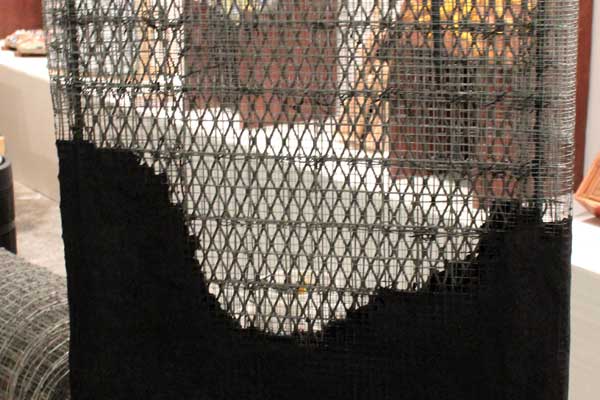
The next step is to cover the frame with wire mesh, usually either chicken wire or hardware cloth, both of which are available at most any building material store. The chicken wire or hardware cloth is “tied” to the frame with bare wire. We usually use fencing wire ties, which are sold for wiring fencing to fence posts, or concrete wire ties, which are sold for holding rebar in place. You can use whatever bare steel wire you have on hand, but I would avoid aluminum or copper because these metals will corrode steel over time. Usually 1 or 2 layers of hardware cloth are sufficient to form a surface upon which concrete can be spread, but 3 or more layers of chicken wire may be needed before your surface is firm enough. It really all depends on whether or not you are making a hollow sculpture or one that will be filled with concrete.
For hollow sculptures, expanding foam (from the building material store) can be squirted in to fill the void inside your wire frame shape. The advantage of using expanding foam is that once the foam hardens, you will have something inside the wire-mesh skin of your sculpture when you start spreading concrete on it so that the wet concrete doesn’t just fall through. Another reason to use the foam is that it will prevent moist air and water from rusting your steel frame from the inside over time. One thing you have to watch out for with expanding foam is the potential to use too much and have it expand into the wire mesh skin. Keep in mind that the wire mesh skin needs to be encased in concrete and not be merely underneath a layer of concrete. If the concrete is just sitting on top of the wire-mesh skin and not integrate with it, then it will probably break off over time like a piece of eggshell. On way to prevent the foam from expanding into the wire-mesh skin is to squirt the foam inside a trash bag inside the frame. The foam will expand inside the bag, and bag will keep it from extruding through the wire-mesh skin.
Concrete is traditionally spread with trowels, and trowels are useful for scooping up concrete and pressing it onto the surface of your mosaic, but you will probably find that working it into the wire by hand works best. The wire tends to puncture even the heaviest of rubber gloves, so we use a cheap pair of work gloves.
Ordinary concrete isn’t the best choice for sculptures because ordinary concrete isn’t sticky enough, and it isn’t strong enough in terms of tensile strength (in spite of having great compressive strength). The authors of most mosaic books explain how to add latex additives to portland cement to make a sticky concrete, but why would you do that when you could just go buy a bag of thinset mortar? I suspect these authors are just trying to posture as artists and demonstrate their technical competence, but I think they forget how many people they discourage by making things harder than they need to be. We use thinset mortar mixed with pea gravel in a 2:1 ratio (thinset:pea gravel). We sieve the pea gravel to remove all the bigger pieces that won’t fit into the wire-mesh skin.
There are a lot of different techniques used by various artists, including coating rags with thinset and layering these rags onto the frame like paper mache. You can find additional instructions and ideas online.