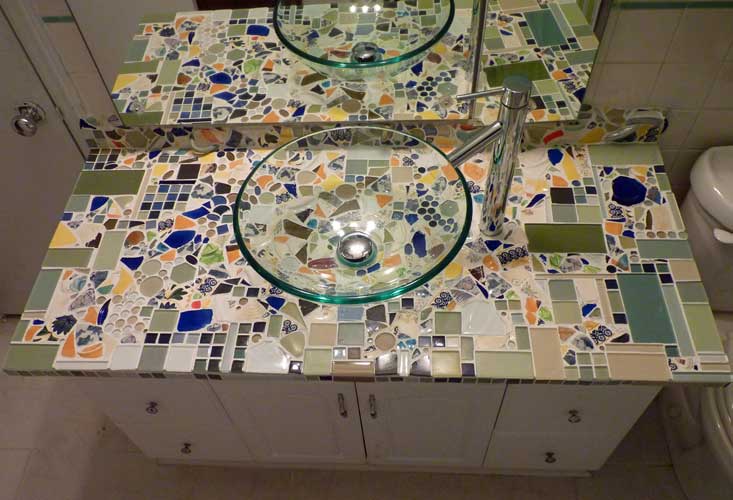
Mosaic backsplashes and shower mosaics make great projects, and with a little thought, it is possible to come up with designs, even figurative designs (pictures), which integrate visually with existing tiling and decor.
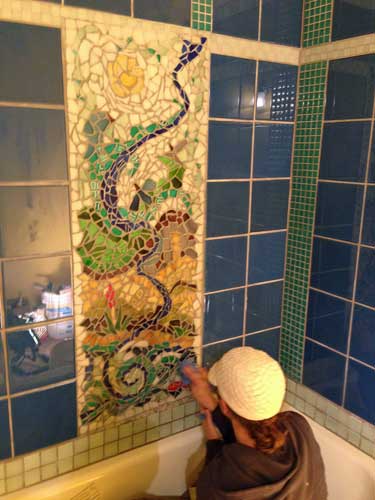
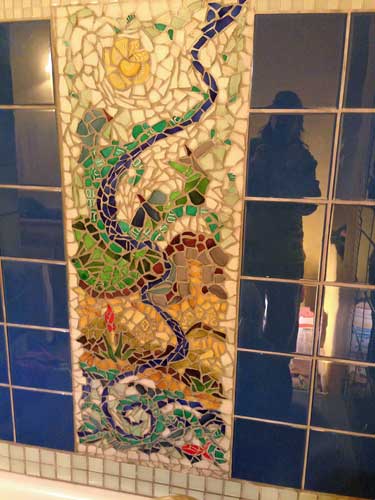
One of our customers puts the finishing touches on her shower mosaic. Rhonda Gotway Clyde and Jessica Oldham made this mosaic from bottles and plates they broke and tumbled in a rock tumbler.
This mosaic has great andamento (arrangement of tile in curves to suggest motion) and uses colors which tie it in visually with existing tiling.
Thinset, Mastic or Weldbond?
Ordinary bathroom and kitchen tiling is mounted using a product called tile mastic, which is a water-based adhesive. Why then do people say to avoid adhesives when creating mosaics in a shower?
The reason is simple: Bathroom tiles are typically 4 inches or larger, while the tiles used in an artistic mosaic are usually smaller than 1/2 inch. This difference in tile size means that the artistic mosaic has more grout lines and thus more places where can potentially penetrate behind the tile and weaken the adhesive over time.
However, mosaic backsplashes in both kitchen and bath CAN be installed using a white PVA adhesive such as Weldbond provided the mosaic is grouted properly and the grout is sealed with a tile and grout sealer, which is absolutely essential on horizontal surfaces where water can pool. In fact, if the mosaic will be wet more often than dry, then you should use thinset mortar instead of adhesive. (Thinset mortar is a sticky concrete that has polymers mixed in for strength and adhesive properties.) For shower floors, for example, you would definitely want to use thinset mortar instead of an adhesive. I should also note that while mosaic walls can be made on drywall or plywood, you should use 1/2″ concrete backer board for any floors to be tiled.
Use Mesh or Work Directly?
For large tiles, thinset is usually spread on with a trowel with 1/4″ notches, and the tile is pressed into the thinset quickly and efficiently. But artistic mosaic work has a different pace from architectural tiling just as painting a portrait takes more time and care than painting a barn door. Many artists overcome this difference in pace by first laying up the mosaic on fiberglass mesh or laying the mosaic upside down on mounting paper or clear mounting tape (in what is called the reverse method). With all the detail work done in advance, the sheets of mosaic are then pressed into spread thinset just as ordinary tile would be.
BUT, an artist often chooses to work in thinset directly and set one tiny tile at a time. Most people can figure out how to do this when using an adhesive, which comes in small convenient bottles, but working with a sticky concrete product like thinset mortar takes a little bit of thought. Fortunately, it isn’t that difficult, and some simple tools like palette knives or popsicle sticks and tweezers can take a lot of the frustration out of the process. I have written a page for how to use thinset for making mosaic art, which probably goes into more detail than you need for most projects.

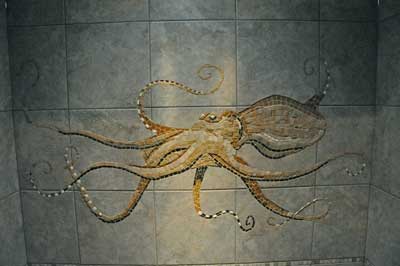
I consider this mosaic to be the antithesis of the cutesy mosaics seen at most art and craft shows. Very nice work. Jason Hiller is a tile and stone contractor in the Bellingham, Washington area.