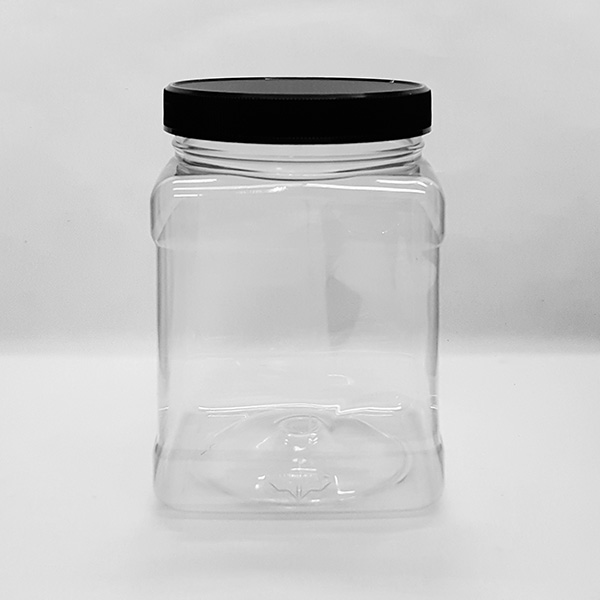
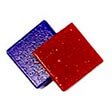
Plastic Storage Jar Square-Grip Clear PET 32oz is perfect for storing and displaying glass mosaic tile. The square shape makes these jars stack efficiently in a small bookshelf. The clear plastic makes the contents visible, which is essential for storing studio materials that are chosen on sight. Holds about 2 to 3 pounds of tile.
Product Specifications
Square-grip plastic storage jar
black ribbed lid with liner
quantity: 1 each
Width: 3.7 in
Height: ~5.5 in with lid
How to Use Plastic Storage Jar Square-Grip Clear PET 32oz
Mosaic tile should be displayed side by side in the studio so that the artist can select just the right color. These clear plastic jars make this possible. We arrange our shelves in “rainbow order” (red-orange-yellow-green-blue-purple-pink) plus browns and black-white-grays. This allows use to find colors quickly, and so we always return the colors to this order, but during a studio session, we are constantly pulling out jars and placing them in different combinations. This is how we quickly evaluate different color schemes for a mosaic before we even start taking tile out of the jar.
How To Make Mosaics
For more advice on designing your mosaic project or mounting, cutting, and grouting tile, please see our page of Mosaic Frequently Asked Questions or our Mosaic Information Guide, which lists instructional pages described by topic. We also post new articles about making mosaics at our How to Mosaic Blog.
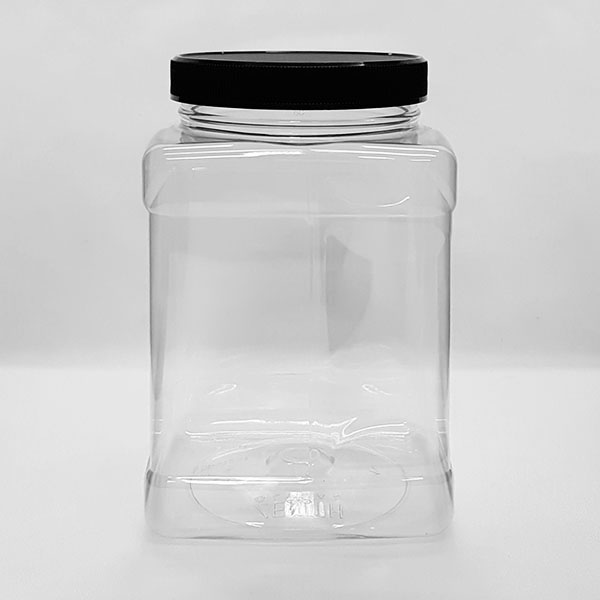
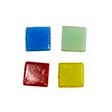
Plastic Storage Jar Square-Grip Clear PET 48oz is perfect for storing and displaying glass mosaic tile. The square shape makes these jars stack efficiently in a small bookshelf. The clear plastic makes the contents visible, which is essential for storing studio materials that are chosen on sight.
Product Specifications
Square-grip plastic storage jar
black ribbed lid with liner
quantity: 1 each
Width: 4.25 in
Height: ~6.5 in with lid
How to Use Plastic Storage Jar Square-Grip Clear PET 48oz
Mosaic tile should be displayed side by side in the studio so that the artist can select just the right color. These clear plastic jars make this possible. We arrange our shelves in “rainbow order” (red-orange-yellow-green-blue-purple-pink) plus browns and black-white-grays. This allows use to find colors quickly, and so we always return the colors to this order, but during a studio session, we are constantly pulling out jars and placing them in different combinations. This is how we quickly evaluate different color schemes for a mosaic before we even start taking tile out of the jar.
How To Make Mosaics
For more advice on designing your mosaic project or mounting, cutting, and grouting tile, please see our page of Mosaic Frequently Asked Questions or our Mosaic Information Guide, which lists instructional pages described by topic. We also post new articles about making mosaics at our How to Mosaic Blog.
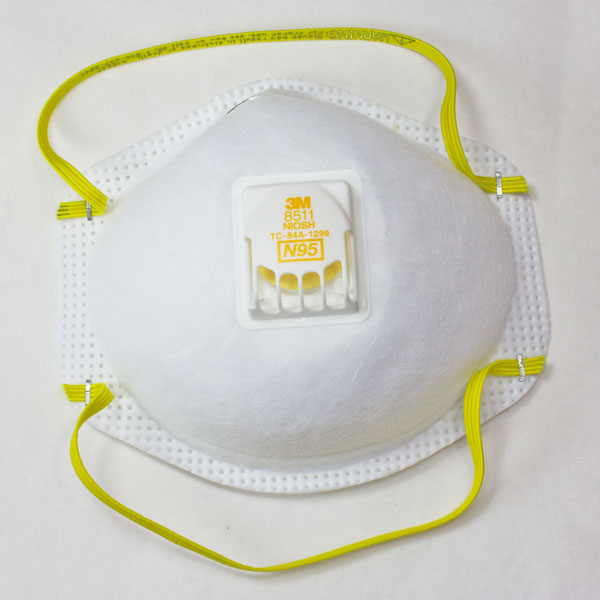
N95 Comfort Dust Mask has braided headbands, an exhalation valve, and an adjustable nose clip to make wearing it more comfortable. This is a a 3M brand 8511 particulate dust mask that meets NIOSH and OSHA standards and is rated at N95.
The N95 rating means they capture 95% of all particles 0.3 microns in diameter or larger. We wear these when mixing grout and thinset mortar.
Product Specifications
3M brand 8511
quantity: 1 each
N95 particulate rated
NIOSH and OSHA approved
adjustable nose clip
braided headbands for comfort
exhalation valve
When and How To Use The N95 Comfort Dusk Mask
Keep in mind that dust masks are only part of a strategy to prevent breathing dust. You should also mimimize the amount of dust you generate by pouring and mixing carefully and using spray bottles to mist the grout as you mix it.
The masks are not individually wrapped, so keep the box closed during storage to prevent incidental contamination.
Vacuum off used masks before storing them in individual Ziplock sandwich bags labeled with the student’s name.
How To Make Mosaics
For more advice on designing your mosaic project or mounting, cutting, and grouting tile, please see our page of Mosaic Frequently Asked Questions or our Mosaic Information Guide, which lists instructional pages described by topic. We also post new articles about making mosaics at our How to Mosaic Blog.
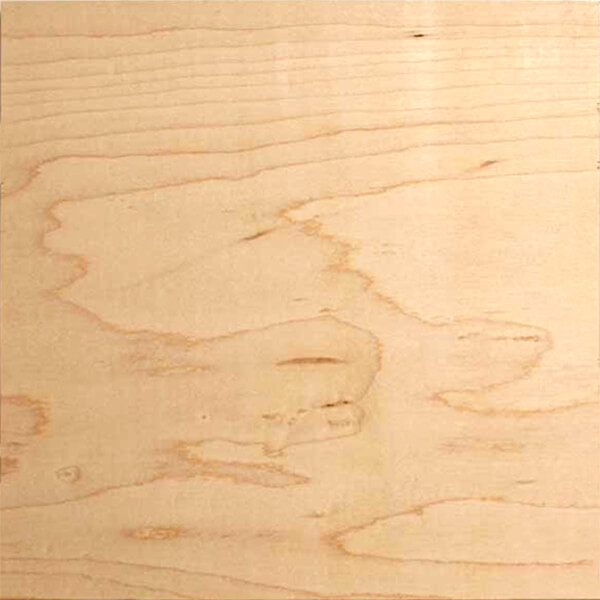
Update in Nov 2024: We now cut the boards ourselves with a table saw. There may be minor imperfections on some edges, but every board is suitable as a backer for indoor mosaic art. The new boards no longer have a shiny smooth side for the back. You can choose which side you think looks nicer, and use that one for the back. Mosaic on the side that you don’t think looks as good. We still have a limited quantity of 8 x 10 size with the old glossy backs, but when they run out that will be it.
Our Plywood Mosaic Backer Boards are cut from 1/2-inch cabinet-grade plywood (either maple or birch based on availability) and are suitable for indoor mosaic projects such as plaques and trivets. The edges are unfinished cuts, which can be left as is or painted with a neutral color of acrylic paint, stained with wood stain, etc.
The faces of some boards may have small splinters missing from the sawing process, but these will be covered by the mosaic.
Plywood Mosaic Backer Boards
Material: cabinet-grade plywood (either maple or birch based on availability).
Dimensions: as stated
Tolerance: within 1/32 inch of nominal dimensions.
Thickness: Nominally 1/2 inch, exact is 15/32 of an inch
Suitable for dry indoor use only.
Backers for Mosaic Art Projects
Using Mosaic Backer Boards
The Mosaic Backer Boards are plywood and are meant for indoor use only.
Should You Pre-Seal The Boards?
Ideally, the bare side of the wood should be painted with dilute Weldbond or another PVA adhesive to make sure that the wood doesn’t suck water out of the grout while it is curing. You can dilute the Weldbond 1:1 with water to help it spread more easily on the wood. However, many mosaic artists get enough glue smeared over the face of the wood while they are mounting the tile, and so this step of sealing the wood with dilute glue is not necessary for them.
The important thing to remember about pre-sealing is that you would never want to use paint or wood sealers on anything else (other than a PVA glue) because these other materials are likely to interfere with the glue or delaminate over the years.
Drawing Your Pattern
The pattern for your mosaic can be drawn directly on the wood with an ordinary pencil. You should do this before coating the wood with Weldbond. If you forget, you can draw the pattern on the wood with a Sharpie marker after the dilute Weldbond dries.
Make sure that your tile doesn’t stick out beyond the edge of the wood, which would make it particularly vulnerable to being knocked loose or chipped by random blows over time.
Indoor Vs Outdoor Mosaics
Outdoors
Wood of any type including plywood should NEVER be used for outdoor mosaics and wet mosaics because wood swells and contracts with changes in humidity, which will cause tile to pop off long before the plywood begins to show signs of warping. For outdoor mosaic projects, you must use stone or concrete if you want the mosaic to last for more than a year or two. For wall murals, mount the mosaic directly on a stone or masonry wall or use concrete backer board such as sold for underlaying bathroom tiling. For garden mosaics, use slabs of field stone or concrete stepping stones. Remember to scuff these with a wire brush to remove contaminants, sealers and loose material before mounting the mosaic with thinset mortar.
Indoors
Indoor mosaics not subject to water can be made on plywood to save weight. There is no need to use stone or concrete backer board as the backer or thinset mortar to attach the tiles. Instead, the tiles can be mounted using a white PVA adhesive such as Weldbond and then grouted.
How To Make Mosaic Art
For more advice on designing your mosaic project or mounting, cutting, and grouting tile, please see our page of Mosaic Frequently Asked Questions or our Mosaic Information Guide, which lists instructional pages described by topic. We also post new articles about making mosaics at our How to Mosaic Blog.
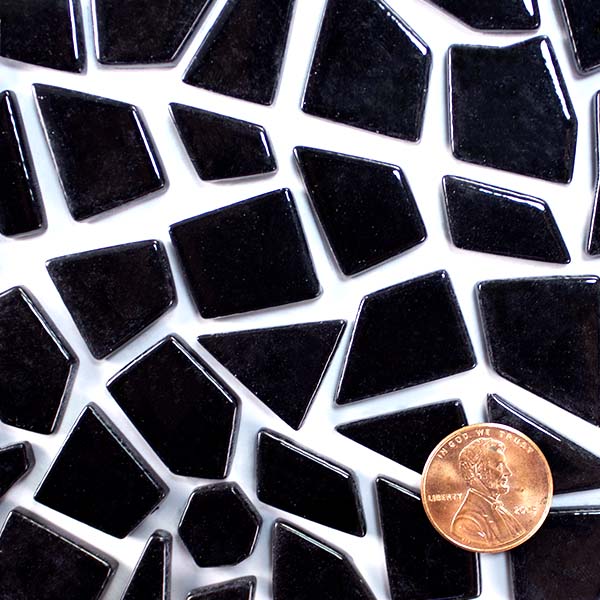
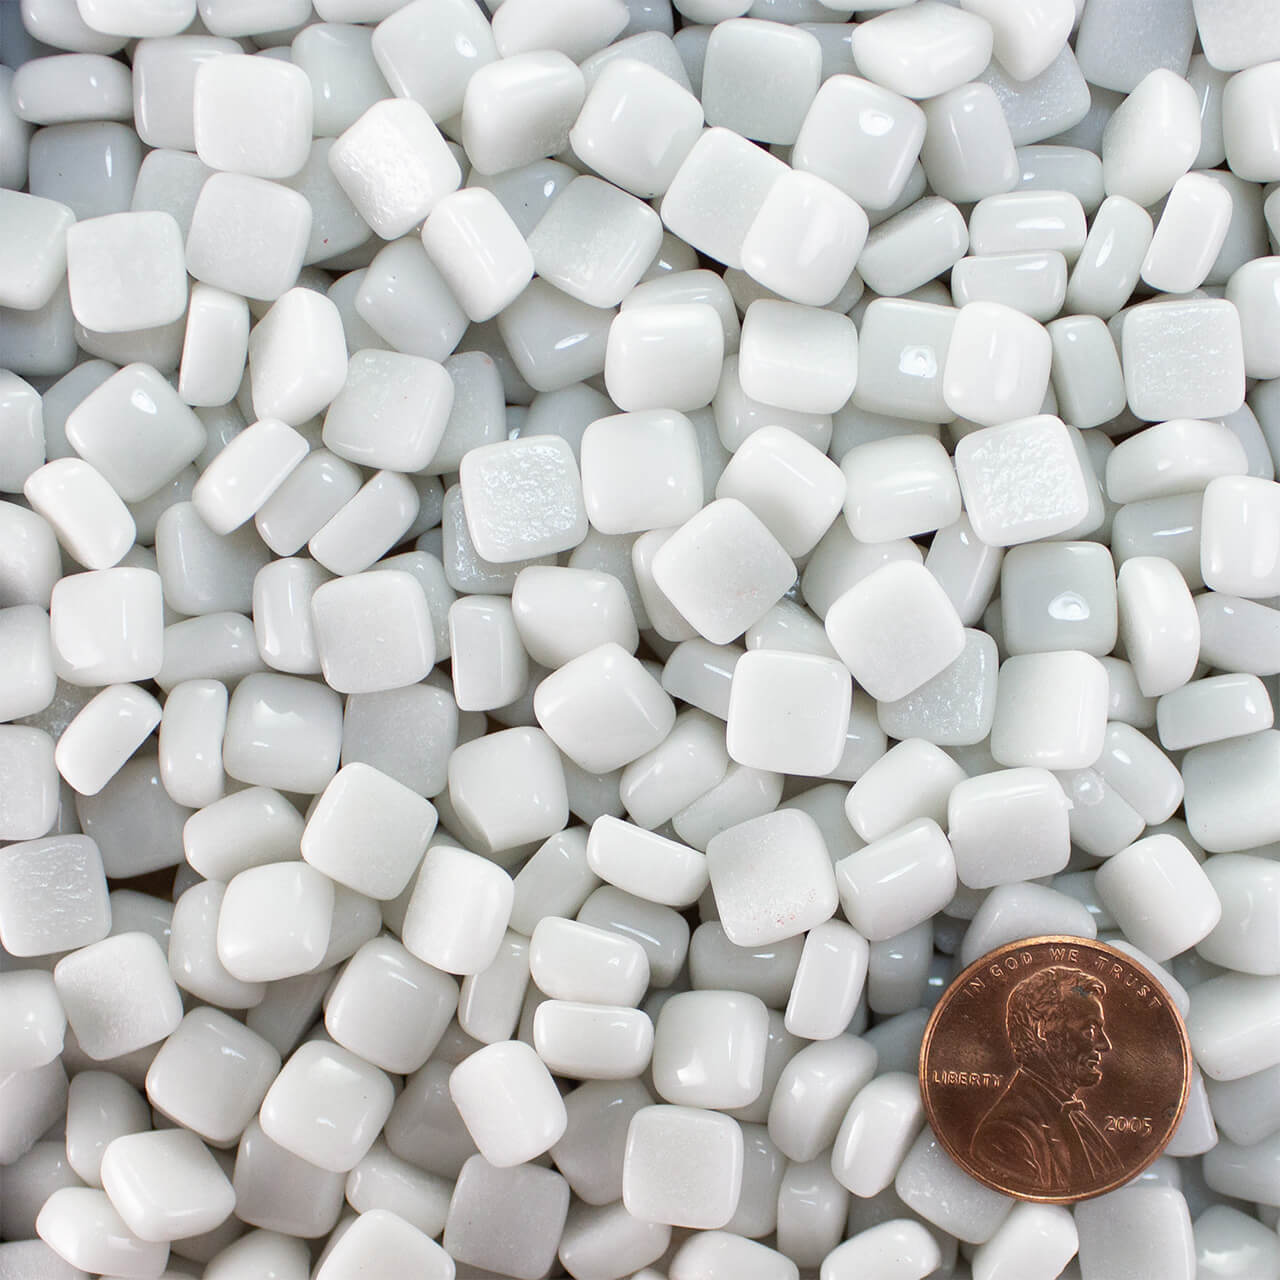
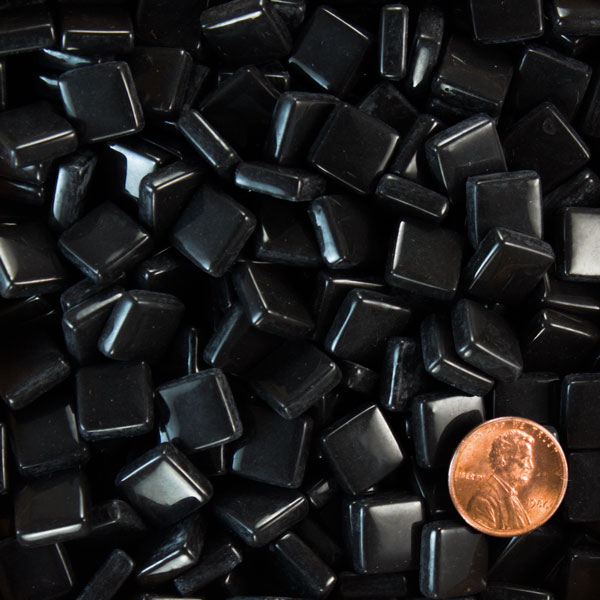
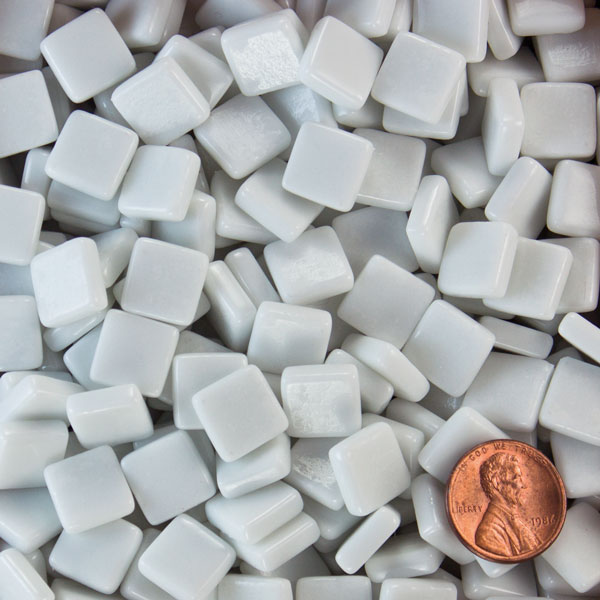
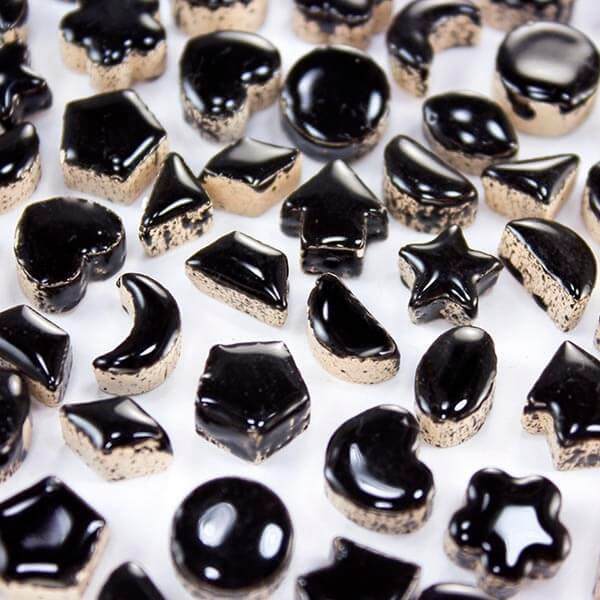
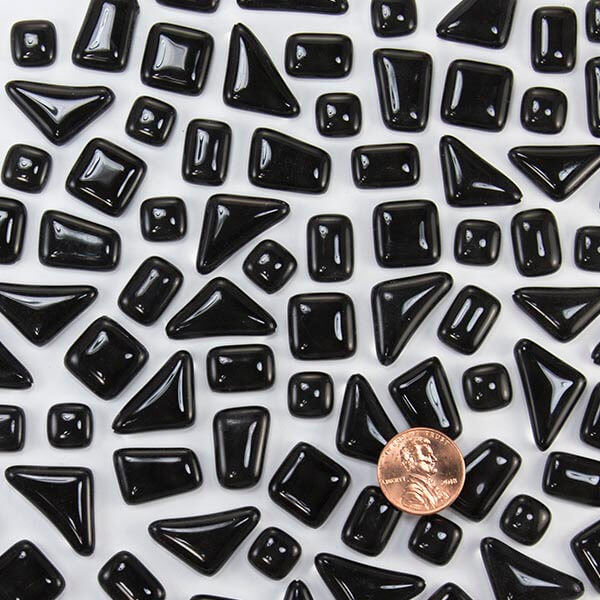
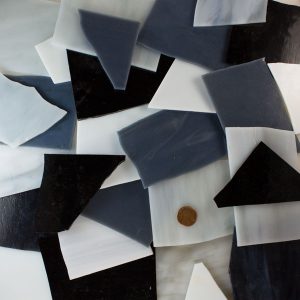
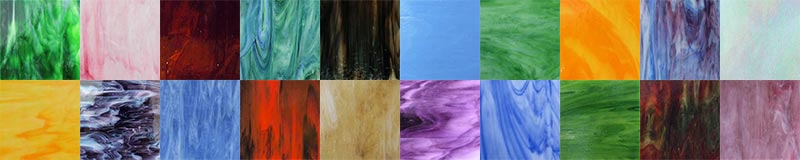
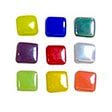
Our Mosaic Art Glass Assortment includes 2-lbs of American-made stained glass pieces for making mosaic artwork. With opaque mosaic work surfaces in mind, we choose pieces for pigment density and opacity. These assortments offer a great way to sample a wide variety of stained glass types and colors. We also sell individual colors of stained glass in 6-inch sheets if you need an individual color. Piece size varies, but we try to cut pieces 2 to 3 inches wide, so there should be fewer pieces measuring 1 inch or less. Cutting Scrap will have smaller pieces.
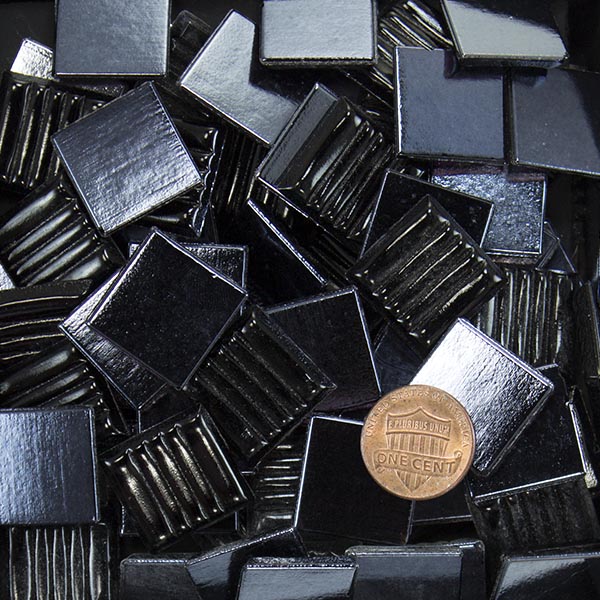
Black White Gray – grayscale stained glass mix
Blue – variety of dark-to-light blue stained glass
Designer Neutrals and Foggy Grays – unusual odds-and-ends, muted and variegated pieces, landscape tones
Glass on Glass Mix Translucents and Transparents – foggy, cloudy, see-through multicolored mix**
Golden Amber Brown – variety of brown-beige stained glass
Green – variety of dark-to-light green stained glass
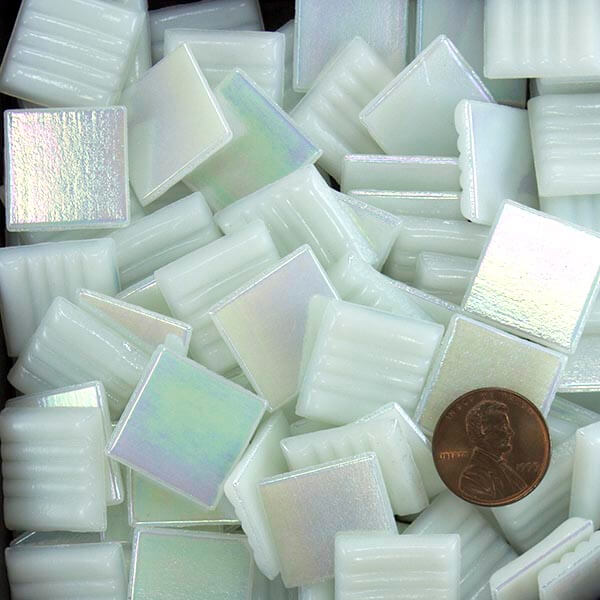
Iridized – all-iridescent multicolored mix**
Premium – rainbow+ assortment with red-orange-yellow, pink-purple, blue-green, brown, black and white
Sunset – warm gradient mix of red-orange-yellow and pink-purple
*All mixes may include one Ripple/textured piece. **All mixes emphasize opacity except Glass on Glass Mix, and Iridized may include clear iridescents.
Product Coverage
Each two-pound bag is approximately 1.25 square feet of stained glass. If you cut these pieces into mosaic tiles of about 3/4 inch or less and use a grout gap of 1/16 inch, then the bag could cover 1.5 square feet.
Compatibility
Stained glass is approximately 1/8 inch thick and therefore nominally the same as most of the glass mosaic tile we sell. We also have 3/4-inch stained glass tiles.
Cutting Art Glass
Mosaic Art Glass cuts quickly with minimal force using our Mosaic Glass Cutters. Caution: Stained glass is usually sharper than regular molded glass mosaic tile. Extra care must be used in cutting, handling, and grouting to ensure that sharp edges are not left exposed. One technique to knock off the razor slivers from freshly-cut stained glass edges (called flash or groze) is to swirl pieces around in a plastic bucket with a little water. The Rubbing Stone and Marble File we sell are useful for smoothing sharp edges and are recommended when the mosaic is for a wall or architectural element.
The traditional stained glass artists’ tool for smoothing edges is the Grozing Pliers, but the Rubbing Stones and Marble Files produce smoother edges and can round off sharp points and corners.
Mosaic Art Glass Assortment 2-lbs
Material: untumbled stained glass with sharp edges.
Piece size: varies, but most should be ABOUT 2 to 3 inches.
Thickness is nominally 1/8 inch but varies considerably, typically around +/- 1/32 inch.
Coverage: a 2-pound bag covers about 1.25 square feet.
American made.
Pigments: colorfast metal oxide.
Suitable for indoor/outdoor use.
Frost-proof and impermeable to liquid.
Not recommended for floors.
Colors vary based on availability, but we keep it colorful with an emphasis on brighter, stronger colors.
Individual Colors Available As 6-Inch Sheets
If you need an individual color or found one you especially liked in an assortment, see our 6-inch stained glass sheet selection.
For environmental, economic and political reasons, it is increasingly important to purchase materials produced here in the United States. In the long run, it doesn’t benefit anyone to ship jobs where people and the environment are exploited for short-term gains, and it makes little sense to throw away our manufacturing base, which is the real source of any nation’s economic strength.
Fortunately, some of the most colorful and beautiful art glass in the world is made in America.
Real Stained Glass
Our stained glass is made by four different American manufacturers.
This is NOT the cheap chips of barely-tinted glass commonly sold in assortments for craft projects.
Our stained glass is proudly made by Kokomo, Spectrum, Armstrong, and Wissmach right here in the US, and it has much greater color density, opacity and consistency than art glass produced in Asia.
There are several reasons to use stained glass in your mosaics. First of all, stained glass isn’t grainy like most varieties of vitreous glass mosaic tile. The colours are much richer and more luminescent than vitreous, and this is true even when comparing muted and less-intense colors like gray or olive. Unlike fully-opaque tile, most stained glass is partially translucent which allows light to penetrate into the glass and produce maximum color.
Another reason to use stained glass is that it comes in larger pieces, and you can hand cut your own individual tiles with slightly irregular shapes. This gives a mosaic a more authentic handmade look, which can be difficult to achieve when using machine-molded square tile.
However, stained glass has more or less the same thickness as vitreous glass mosaic tile, and that means it is possible to use both materials in the same mosaic, provided no sharp edges are left exposed.
The main safety concern with stained glass is the potential for sharp edges, which are sharper than most other types of tile, but this problem can be minimized by taking care to install the tile flat and flush, and then grout thoroughly.
Dual-Grit Rubbing Stones and Marble Files are useful for reducing sharp edges on hand-cut tile.
American-Made Glass Mosaic Tile
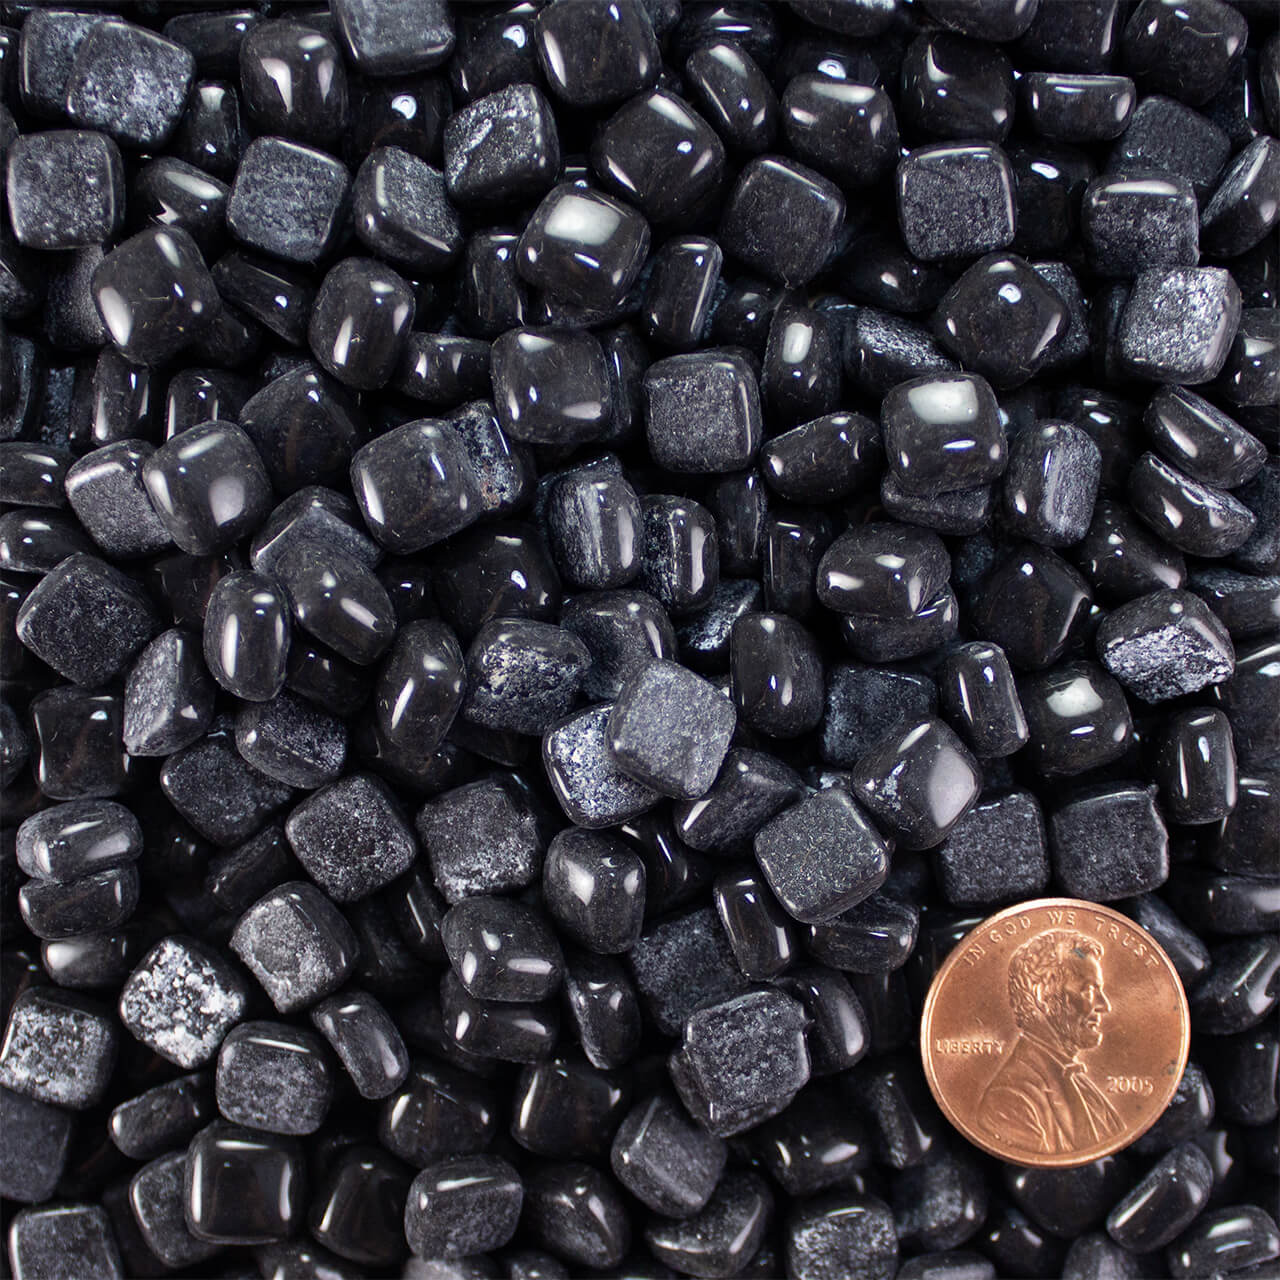
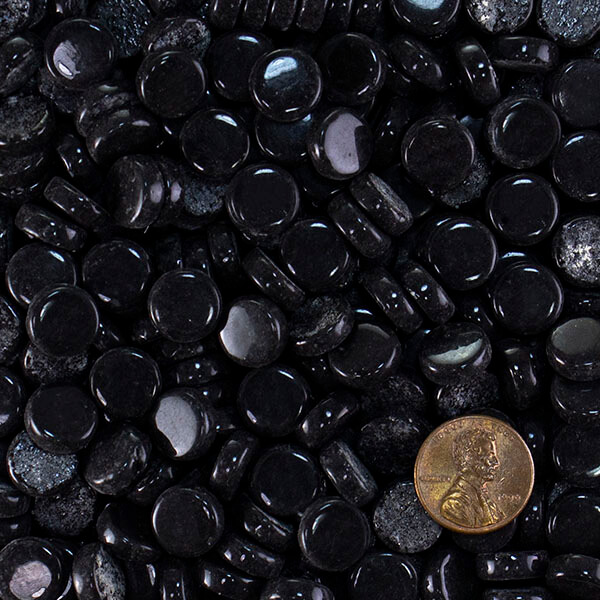
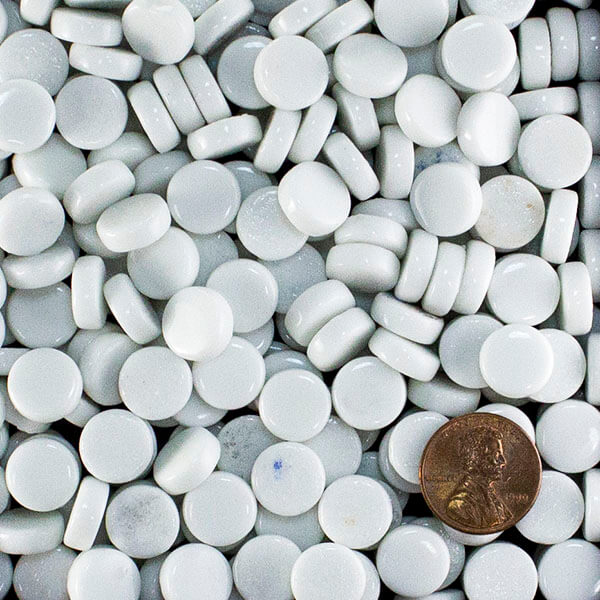
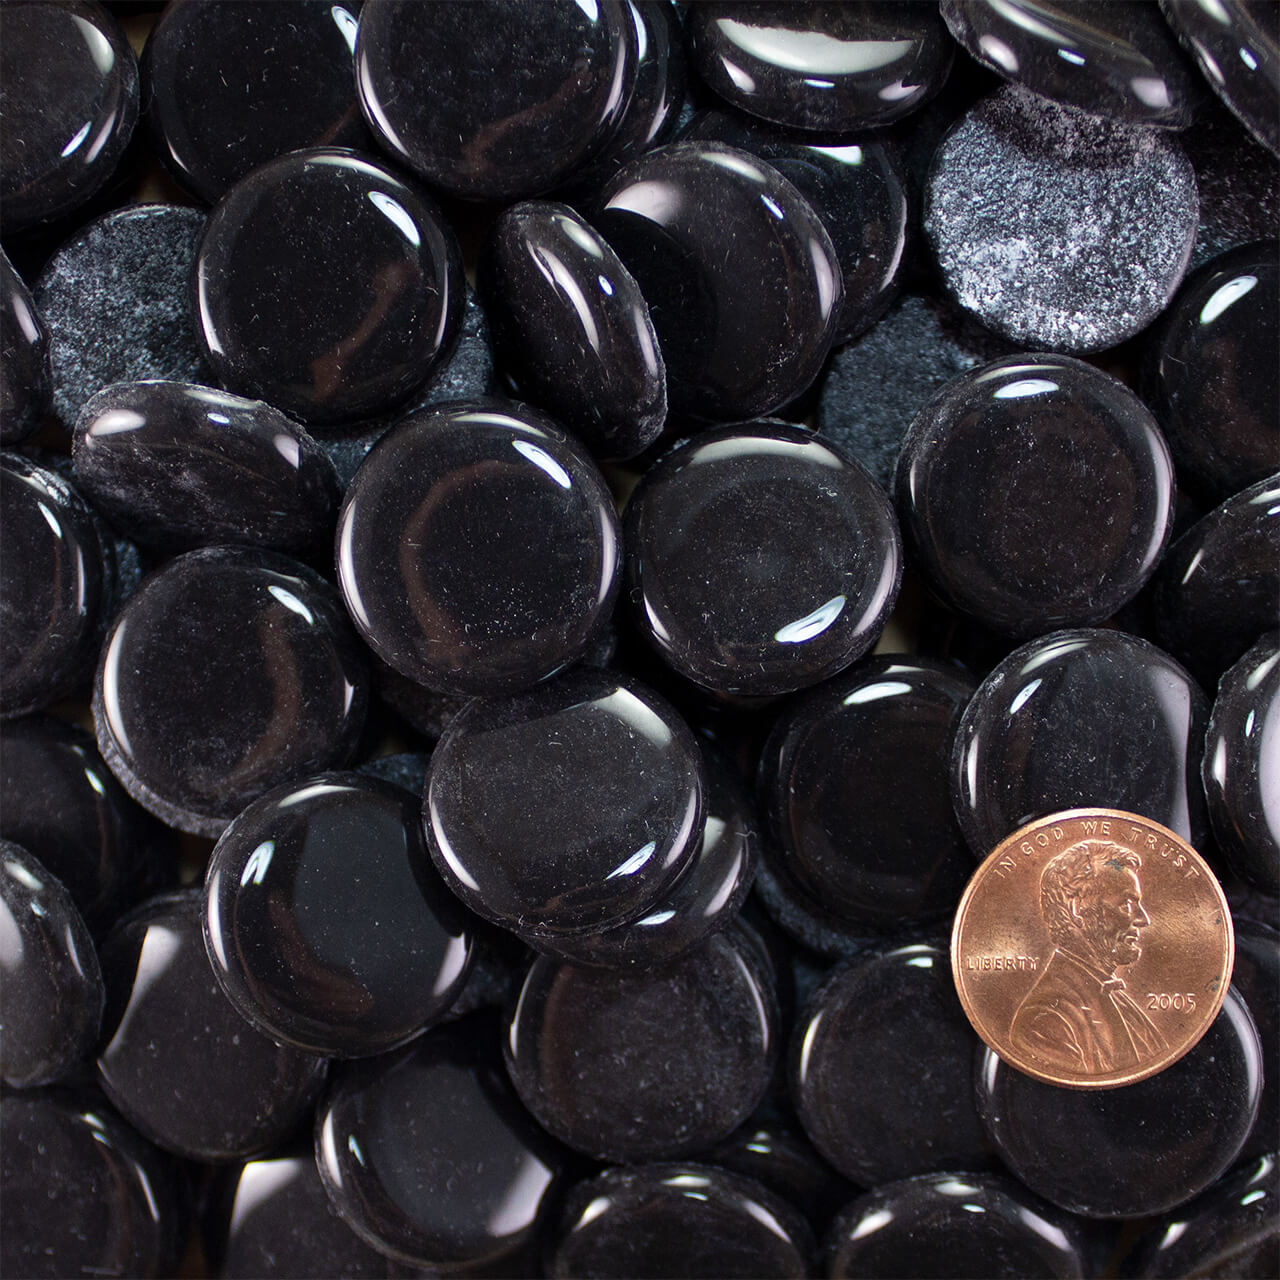
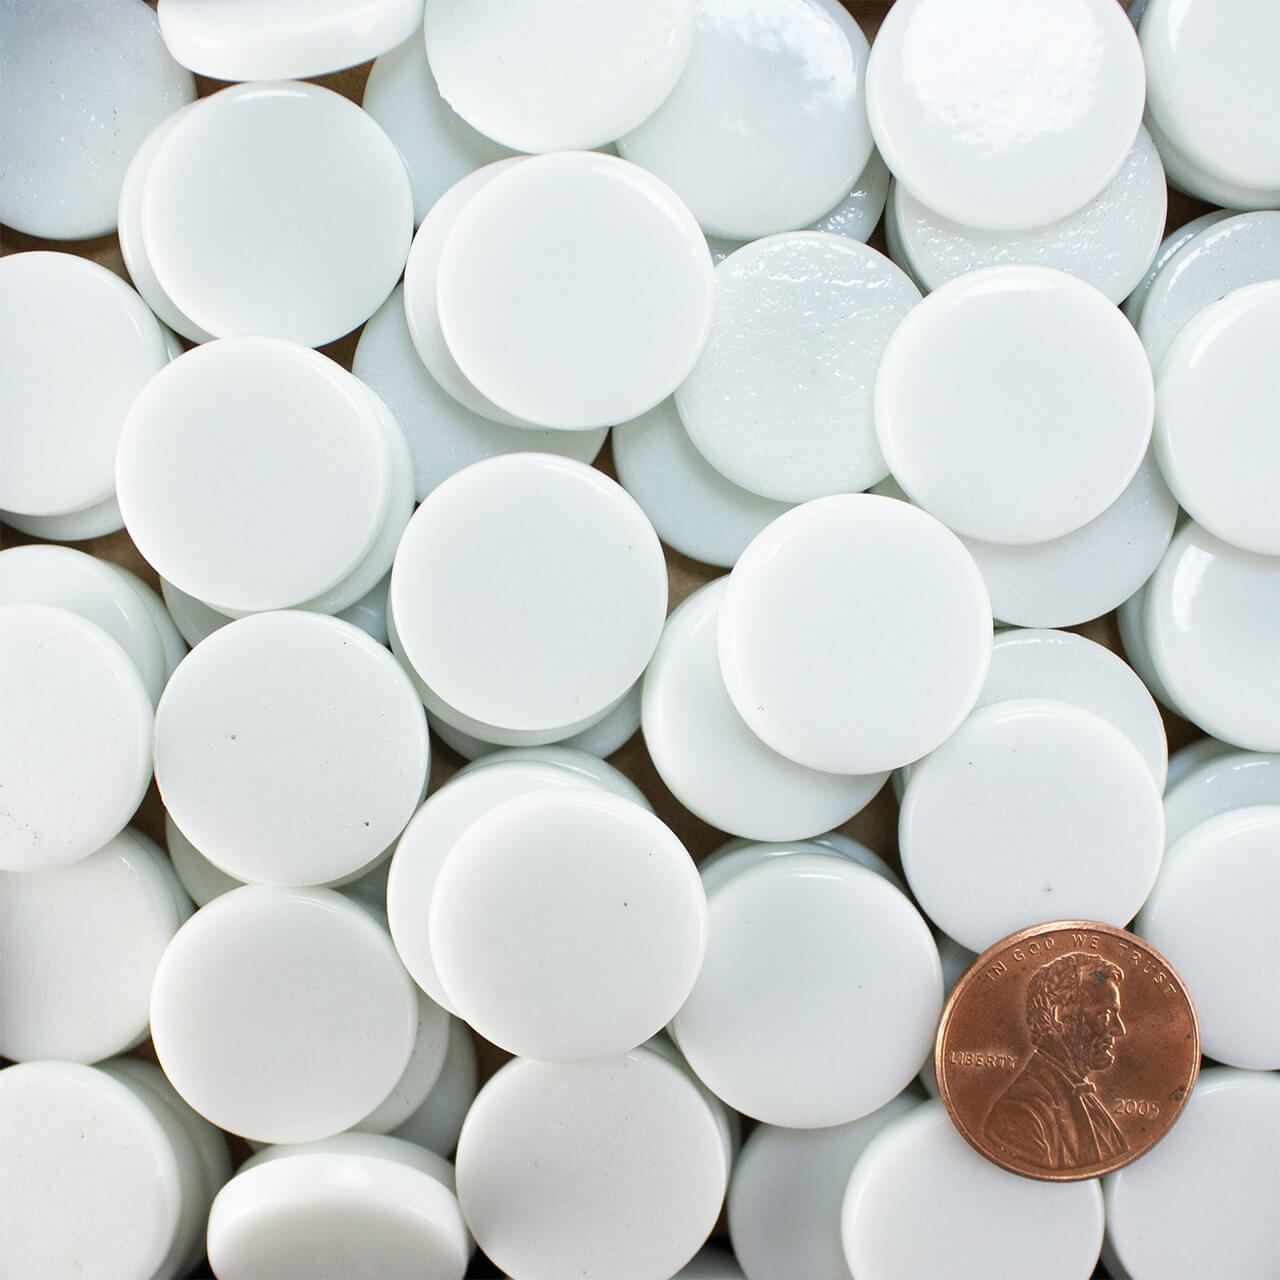
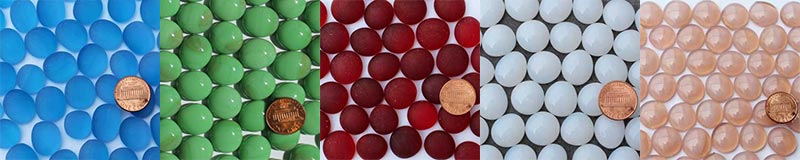
The glass gems we sell are made in the USA.Glass gems are blobs of glass that look like large beads of water: rounded domes that are flat on the bottom. They can be used as an improvised form of glass mosaic tile and work well as accents in stepping stones and mixed-media mosaic.
Most brands of glass gems can only be used in vases and other containers because their colors are too faint to show up well when the gems are laid out flat.
Our glass gems were chosen for their luminous colors and pigment density. They were made by Marble King in the US in their Paden City, West Virginia plant, and they knock the socks off most glass gems made in Asia.
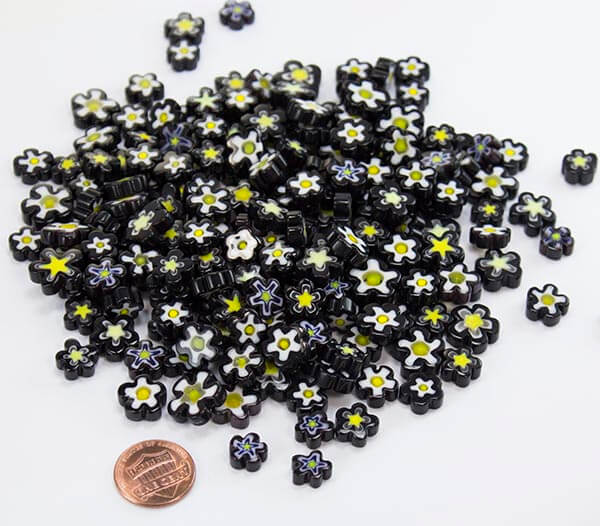
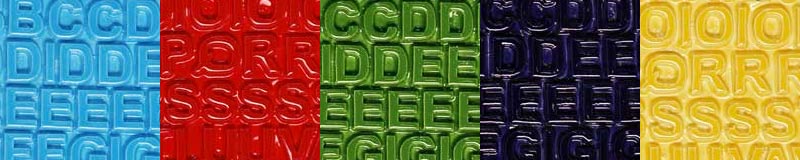
Ceramic Number and Letter Tile
CowTown Ceramics makes these ceramic letters and numbers.Ceramic Letter and Number Tile sets are made in the US by CowTown Ceramics. The letters and numbers come in sheets that are easily snapped apart by hand to produce individual embossed letter and number tiles. These are great for mixed media mosaic projects like stepping stones, mosaic “samplers” with quotes, and address plaques.
We receive school, church and camp project questions every week, so we know how to make things easy and help you save money!
Project Ideas for Kids
The 3/8-inch vitreous tile is recommended when cutting is to be avoided, but keep in mind that the 3/4-inch size is cheaper and can easily be cut into quarters that are the same size as the 3/8-inch tile. For more ideas on how to source inexpensive materials, click here.
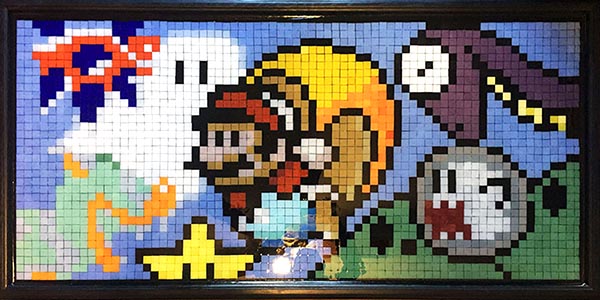
Mario Gamer Mosaic Art second view by Jason Oakley.
Many types of tile can be easily used to create fun and simple to design ‘pixel art’ style mosaics based on your own designs or even video game characters. Students can be instructed how to make their designs on graph paper in colored pencil before laying them out in tile using a grid. We carry grids in most common sizes to make the process painless!
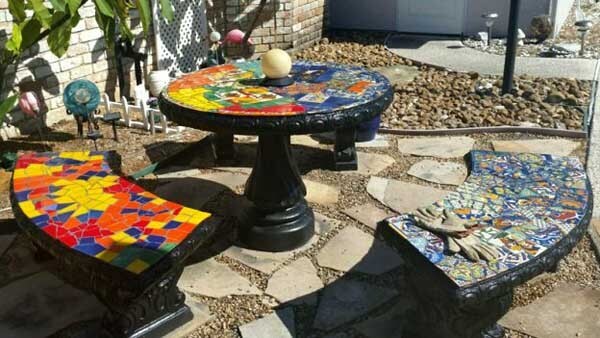
Outdoor Mosaic Patio Table with bench seats by Naomi Haas.
Benches, tables and other outdoor furniture are popular group projects for kids. We have a ton of information on our blog about outdoor mosaic materials an methods. Keep in mind that the materials used for a mosaic which is to survive exposure to the elements aren’t the same as indoor mosaics. Review our guide on outdoor mosaic for details.
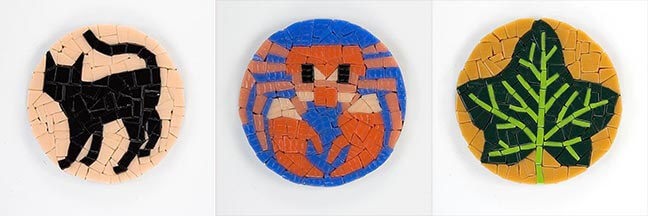
Coaster sized mosaics can be a simple and satisfying mosaic for all ages.
For smaller projects, coaster sized mosaic bases can be used to great effect! The designs can be very simple and freely executed with much satisfaction. In fact, this type of small project can be a fantastic, low stress introduction to mosaic for kids and adults alike.
All children should be given adequate adult supervision. Wear safety glasses with side shields when cutting glass or mixing grout.
While many forms of mosaic involve cutting glass with cutters, nippers or pistol-grip cutters – uncut tiles can be handled safely and used to build a satisfying mosaic without cutting. However, children should be instructed in sound handling practice, as even a molded tile can occasionally have a sharp edge.
Our line of 12mm Morjo tile is easy to handle with safe rounded edges.
It also comes in a full spectrum of colors as well as iridescent varieties.
Note that it is often easiest to grout the children’s mosaics for them outside the class or session for several reasons. First, the glue needs to dry a day or two before you grout. Also grouting is the messy and mildly hazardous part, and the focus of the children’s work should be the creation of their own unique design and gluing the tiles. Many instructors report having some of the older children help with some of the labor of grouting with great success, but all agree that having an entire class play with wet concrete is a bad idea, especially with young children. Always read manufacturer’s safety instructions on grout and glue. Keep in mind that even whole glass tile can be sharp due to occasional chips and breaks that occur with shipping and handling.
How to Save Money on Mosaic Projects
Grout
Grout can be purchased cheaply in large bags at building material stores. Our packages are small convenience packs for individual projects, and they require a shipping charge to get to you.
Mosaic Backers
A popular project for church and camp mosaics is a 6-inch x 6-inch mosaic trivet. The best backer for 6×6 trivets is 1/2-inch cabinet-grade plywood which comes pre-sanded. We sell plywood mosaic backers for small projects, but you can buy a sheet of plywood and skill saw to cut it much more cheaply than you could buy the expensive backers from one of the craft websites! Ask one of the parents or a friend if they could cut up the plywood. Someone probably already has a saw and a truck to pick up the plywood.
Glue
Instead of buying a separate convenience bottle of glue for each child, you should buy a jug of Weldbond glue and pour a little bit for each child in a styrofoam plate. They can use popsicle sticks to apply the glue.
Mosaic project kits may at first seem like an easy solution, but most popular kits we’ve reviewed have poor quality materials (sometimes even plastic tiles!) in quantities that make them much more expensive than ordering individual materials would be. It’s much better to plan the project out and order all the materials at once, avoiding extra shipping charges. Furthermore, kits are usually marketed with eye catching ‘results’ that can leave a young mind disappointed and stifle their self expression. Joe has stated about craft kits in general, “The kits were about producing over-the-top results instead of experiencing a traditional art form in the way it had been experienced for generations. But even that statement does not adequately explain what was wrong. The kits were about PROMISING over-the-top results, but they were pretty weak in the delivery.”
How to Order Supplies as a School, Church, Camp or other Organization
We accept purchase orders! Read our Purchase Order instructions by clicking here.
Questions, Concerns & Project Advice
Still have unanswered questions about your project or how to order? We’re happy to help with any step of the project. Contact us via email by clicking here. We respond to e-mails faster than any other type of inquiry!
There is nothing unique about mosaic grouts. The grouts and sealers used for mosaic artwork are the same ones used for ordinary bathroom tiling, and the techniques of applying the grout are the same. If you are ever uncertain and need information in a pinch, you can ask questions at your local building material store or look at their book on how to tile or bathroom repair, which they usually keep on the same aisle where they sell grout and supplies or in the plumbing department or near the registers. The point is that grouting isn’t rocket science and most handymen and women have done it before.
How much grout you need depends on three things: the area of the mosaic = L x W, the thickness of the tiles and the gaps between the tiles. If the tiles are well-spaced (all gaps under 1/4″), then you should be able to cover the entire mosaic of 18″ x 18″ with 2 lbs of grout. This is assuming your tiles are under 3/8″ thick. I always set my mosaic on an old shower curtain or piece of plastic to catch all the wet grout that falls off the side as I’m spreading it. That way I can scoop it up all the dropped grout and re-use it. Otherwise you need a lot more grout because most of it is wasted when it falls on the dirty floor.
If the gaps between your mosaic tiles are greater than 1/8 inch, then you may need grout with sand in it, such as we sell. The sand reinforces the grout to prevent cracking if the gaps are greater than 1/8 inch. Note that standard grout gaps are usually about 1/16 inch.
How to grout a mosaic
Step 1: Preparation
Grout outdoors if at all possible to minimize dust contamination and clean up of wet grout. Wherever you work, set up a clean area to work in and make sure you have all the tools you will need. Usually you need a bucket of water, some kind of tray to mix the grout in, a mixing stick, a sponge, rubber gloves, a dust mask, and some paper towel or old rags. You can use latex gloves in a pinch if your mosaic is made from smooth tiles, but rubber gloves are recommended when you’re grouting any kind of tile that has sharp edges. Those edges will rip through latex gloves as you spread the grout around.
The mosaic needs to be fully dried before you begin. Wait at least 24 hours after gluing down the last tile before you grout your mosaic if you used Weldbond.
Set up a clean workspace for grouting.
Step 2: Mix the Grout
Wear a dust mask when you do this step. Estimate how much grout you need for the mosaic and pour it into the tray. In this example we used the cut-off bottom of an old plastic jug. If you don’t mix enough grout you can always mix some more. The grout container should indicate how much water to use. The dust generated in this process is very fine and can spread all over the place, that’s why it’s best to do this outside. If you do grout inside, just be sure to vacuum the area once you finish grouting.
Add water and stir the grout with a paint mixing stick.
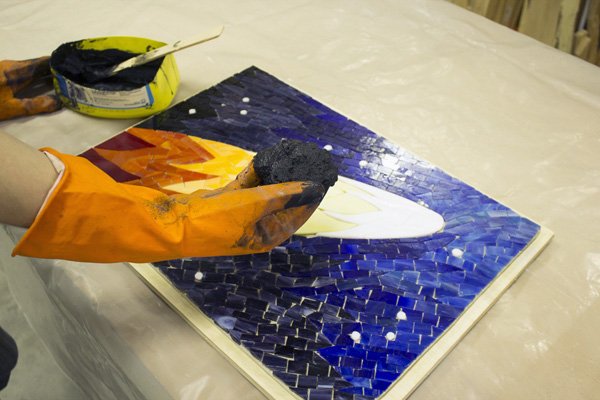
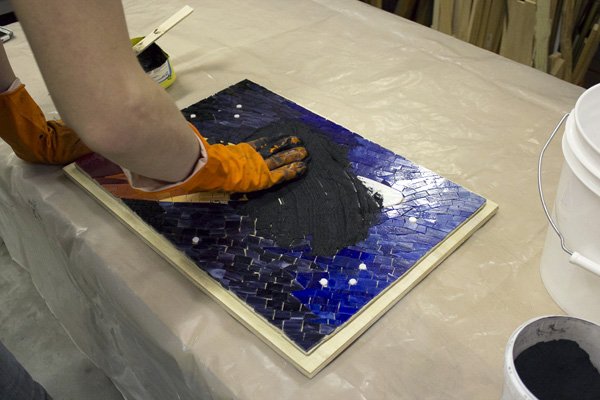
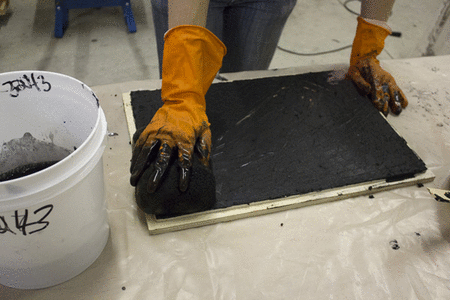
Step 3: Grout the Mosaic
This is the least complicated step. You just need to grab a glob of grout and mush it into the mosaic. Keep doing this until all areas have been covered in grout.
Start with a big glob of grout.
Just smear it into the mosaic.
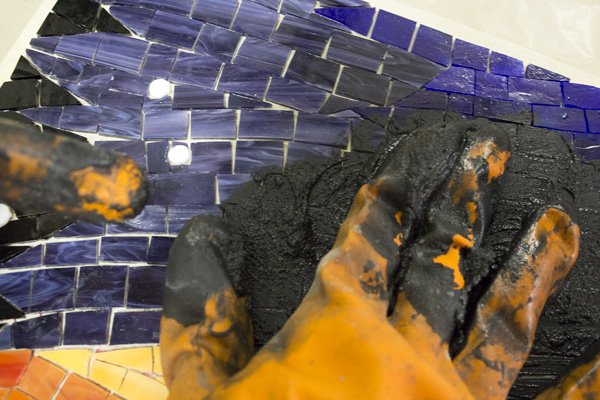
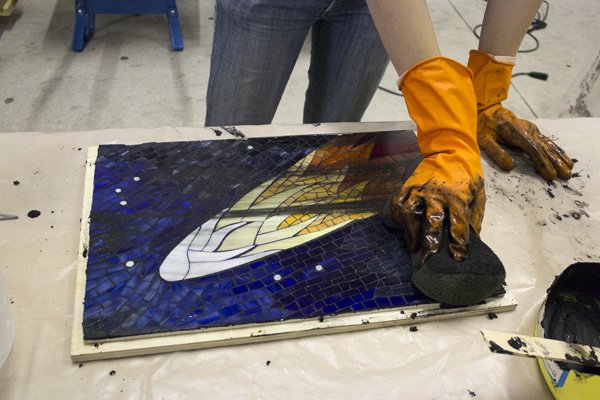
Step 4: Verify Total Grout Coverage
Before you haze the grout, you need to be sure that all of the cracks were completely filled. Look closely and ensure that there are no bubbles between the grout and the wood. Run your fingers along each crack and push the grout down in.
Make sure grout gets in every crack.
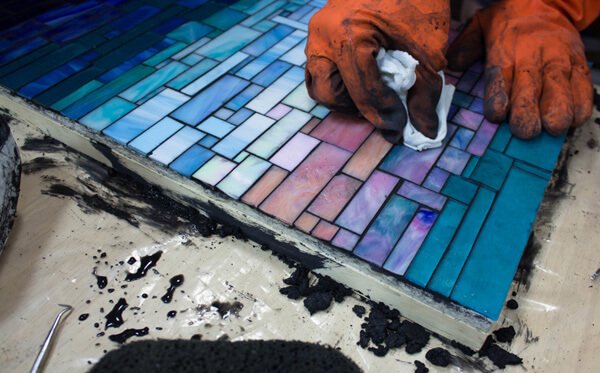
Now you’re ready to wipe off the excess.
Step 5: Clean with Grout Sponge
For smaller projects you can sometimes omit this step and just use rags and paper towel to wipe off the excess grout, but for anything approaching 1 square foot in area or larger you want to do it with a sponge as demonstrated here.
Wipe a straight line in one direction.
Rinse the sponge when it’s covered in grout.
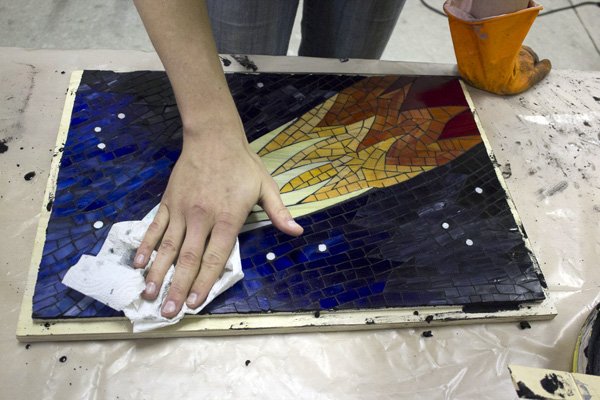
Step 6: Clean the Haze
The sponge will have cleared the bulk of the extra grout off, but there will probably be a thin grout haze left over. It’s okay to let the haze dry for a few minutes to make it more visible and easier to clean before you try to wipe it off. To clean it use a dry rag or paper towel. You should be able to clean an area of 1 square foot with only 1 or 2 paper towels.
A thin haze is still on the mosaic.
Polish the haze off using a paper towel or rag.
Step 7: Final Touchups
Look around for areas where grout is built up on any tiles. This usually happens where tiles are of different thicknesses. This can be done with a rag or paper towel wrapped around your finger. Make sure the grout is roughly flush with, or slightly lower than the tiles around it.
Grout is built up around this tile.
The same spot wiped clean.
All done!
Once it’s cleaned off you’re finished with the grout. Allow a few days to cure fully, but usually it should be pretty solid after a few hours. The time for full curing can depend on the heat and humidity where you did the grouting. Some pieces of dust or sand may slowly fall off the mosaic over the next few days, don’t be alarmed if that happens.
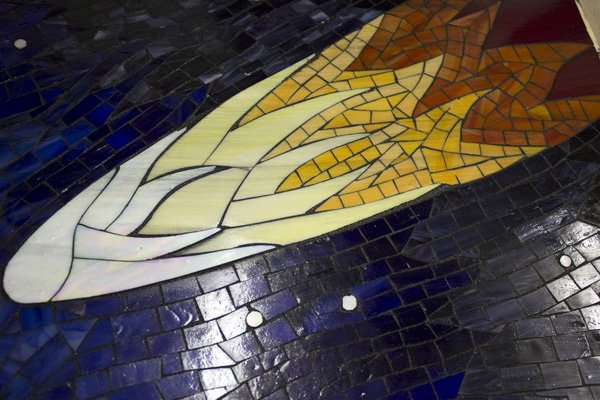
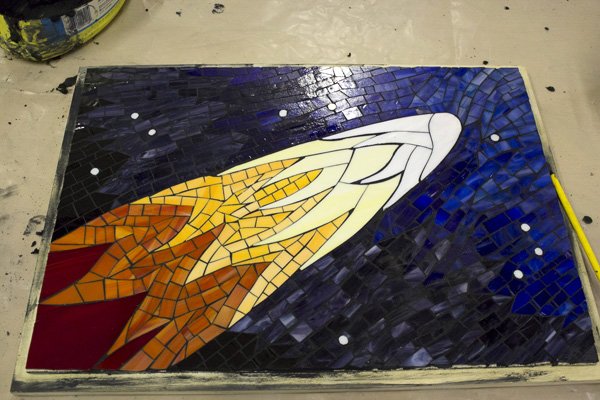
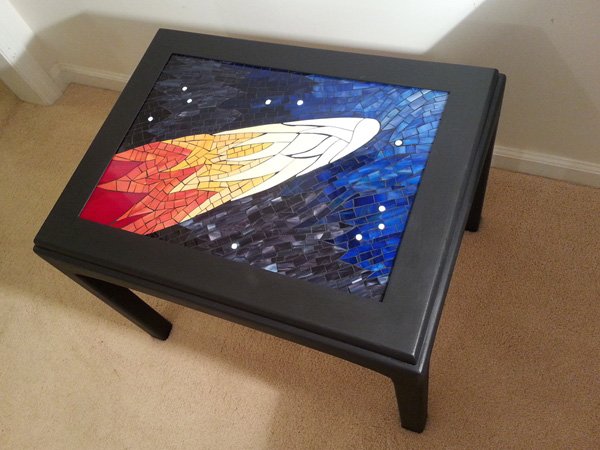
The comet is finished and is ready to be installed in its table.
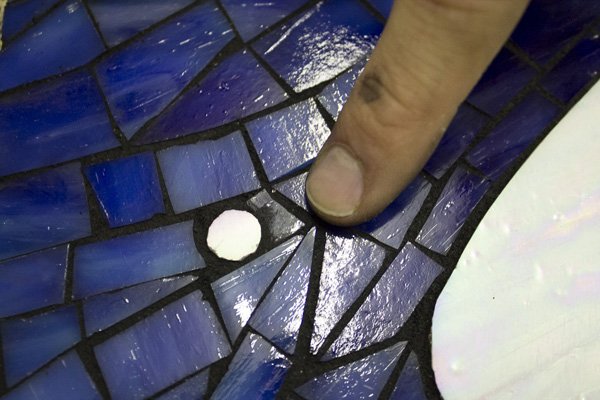
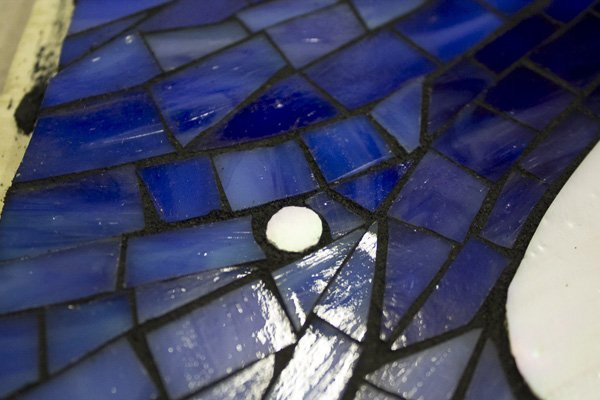
Stars are illuminated by LEDs.
Selecting a Grout Color
I always choose a grout color which contrast the colors of the mosaic tiles so that the design is highlighted. Otherwise the individual tiles run together and are lost to the eye, and the mosaic looks more like an ordinary picture and less like a mosaic made from pieces. I avoid situations like gray grout with gray tile. A nice red-brown terra cotta grout works better in that instance. The key concept is color contrast instead of matching colors.
Color is best provided by the tile, not the grout. In terms of a visual element, the grout is supposed to act like a thin gray pencil line whose only purpose is to make each tile distinct. I don’t think I’ve ever seen a mosaic that used colored grout that wouldn’t have looked better if all tile had been used instead. For example, let’s say you wanted red tile in pink grout. A better way to get the same color effect would be to mix in a few pink tiles randomly throughout the red tiles, or maybe use a few lines of pink tiles. Often this means you have to cut your tile just a little bit smaller. That being said, it is possible to dye grout.
Dyeing Grout
There are mineral concrete dyes sold at building material stores, and these can be used, although the range of colors is limited to black, brown, gray, terracotta, etc. Vegetable dyes such as food colors will not work. You can use artists acrylic paint to color grout by mixing it in the wet grout. I recommend experimenting with tiny batches of grout and letting it harden before grouting a mosaic you have worked many hours on.
The Best Grout Color
Sometimes it is hard to decide which color grout to use because your mosaic already contains so many colors. The best color grout to use for most mosaics is black. Here’s why: The purpose of grout in visual terms is to make each tile distinct in the same way a pencil line in a watercolor is used to provide definition but not color. Black provides just enough contrast to most colors, unless you have black tile, and then you might want to consider something else.
Avoid pure white unless you are trying to make something that looks like a little kid’s summer camp project. Most building material stores such as Lowes and Home Depot cary about 30+ colors of grout. We carry the most commonly needed colors. Bring a few of each color of your tiles with you, and you can pick the color grout that works best with all the tile.
Grouting Stone Tile and Unglazed Ceramic
You should always seal unpolished stone and unglazed ceramic tiles with a tile and grout sealer BEFORE you grout. This is necessary for all porous materials that can be stained by grout. You should seal using a Stone Enhancer instead of tile and grout sealer if you want to darken and enhance the natural color of the stone. Both of these products are available at local building material stores. For a stone mosaic that is already stained, you might want to try some of the muratic acid that contractors use to clean cement from bricks.
Cracking and Crumbling Grout
You shouldn’t let the grout dry out as it cures. Cover with plastic if necessary. Lightly mist with a spray bottle, but don’t let drops accumulate on the surface of the grout. It also helps if you mix the grout according to instructions. It should be like a thick moist dough when you start with no dry material or lumps, and it should stick to your mixing wand, not drip, slide or crumble off.
Sanded Grout vs. Unsanded Grout
Don’t use unsanded grout. Unsanded grout is only used to fill hairline cracks. (Or it is mixed with sand for normal use.) If you use unsanded grout, then you can expect cracks in your grout and grout that isn’t quite as hard and durable.
Note: some tutorials incorrectly advise against using sanded grout because it might scratch the tile during grouting. Very few high quality mosaic materials will be soft enough to be damaged in this way, and you shouldn’t be using such easily scratched materials in any functional setting (bathrooms, counters, table tops et cetera…). Some ‘craft’ materials may have softer glazes which could be scratched by sand, but if you grout carefully the issue is easily avoided. There is no need to use a lot of force when grouting. If you have doubts about the durability of your materials, make a small test piece first.
If you decide to use unsanded grout, be sure to understand exactly why you are using it instead of the the stronger alternative.
Disposal of Grout Waste
Never pour grout down your drains. Grout is concrete, and that isn’t good for your plumbing. It will clog the pipes. I make a point of pouring as much of my grout sludge in an old cardboard box and allowing it to harden for disposal as solid waste. I always just dilute the dirty grout water and pour it in on my compost heap. The grout is a limestone product, so it actually helps balance the pH when there is excess decaying organic matter. Of course, this only applies to traditional grouts. I am not familiar with the synthetic epoxy grouts that some craft sites are selling. For easy cleanup, I always do my grouting in the backyard instead of indoors.