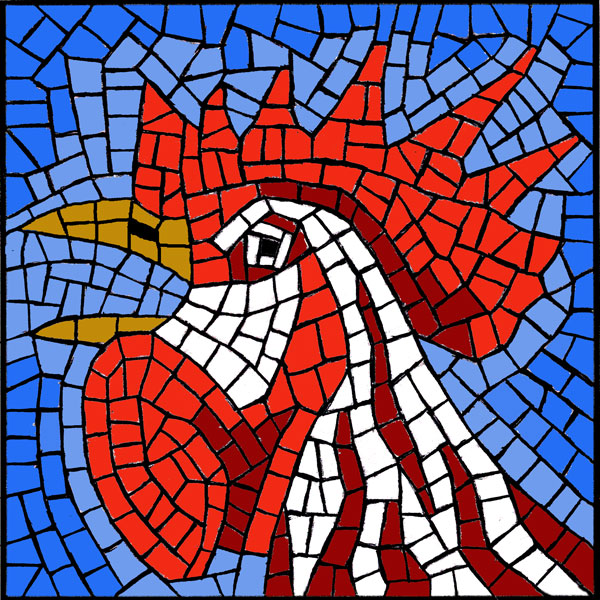
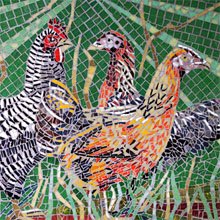
Free Mosaic Pattern Crowing Rooster fits the 6×6-inch mosaic backer board we sell and can be transferred onto the board using these instructions in our blog article. Carbon transfer paper may be easier than coating the entire back of the pattern with charcoal because there are so many lines to be transferred.
The more closely you attempt to fit the tile together, the more tile you will have to scrap because they don’t always cut exactly as desired. It is easier and more efficient to leave a grout gap. You need a grout gap to properly seal out water.
These numbers are inflated to account for cutting scrap. In theory, you can cover the entire pattern in 144 UNCUT tiles with barely a gap. These numbers at their high end add up to 288 tiles, and 216 tiles at their low end. It’s better to have tile left over for other projects, especially if you aren’t sure how steady your cuts will be.
REMEMBER THAT YOU CAN USE DIFFERENT COLORS FROM THESE.
No Partial Bags Sold
We cannot sell partial bags of tile. Of course you will have many tiles left over if the color is only used in 2 or 20 tiles! That is a good thing. You build a library of materials at home that you can be used for other mosaics, hopefully your own designs. We plan to offer kits soon that include the quantities listed above, but until time permits that work, please do not email us asking for partial bags.
–>
Free Mosaic Pattern
Free Mosaic Patterns are available as PDF downloads for customers who checkout using the normal shopping cart checkout process. Other materials do not have to be ordered.
Mosaic Art Edges
This pattern mounted on the 6×6-inch backer board produces a mosaic where the tiles extend all the way to the edge of the board so that edge of the mosaic looks like what it is (an authentic mosaic).
However, the tile needs to stop at the edge of the backer and not stick out. If unframed, the outer edges of the glass tile need to be smoothed by rubbing with a fine-grain stone of moderate hardness, which can be found on the ground or streets most places, or by using the fine-grain sides of a ceramic marble file or a dual-grit rubbing stone. Rub finished mosaics with care and practice first by rubbing sharp tiles before you glue them down. (I have used ordinary found stones for this purpose -JM)
Fits In Standard Frame
A finished 6×6-inch mosaic made with glass tile on our backer boards should have the same dimensions and thickness as a 6×6-inch stretched canvas painting, and so it can fit in a standard 6×6-inch gallery frame meant for paintings.
Displaying Mosaics Unframed
Many books and authorities recommend NOT extending the tiles all the way to the edge of a backer because it makes those tiles vulnerable to damage by impact and by leaning the mosaic on its edge. We have observed that the 6×6-inch size is small and light enough to be handled without these types of damage being as much of an issue provided the mosaic is handled with care. Also, we think the raw mosaic edge is a vital part of the look and feel when displaying the finished artwork. The make great objects d’art when displayed unframed in the easels used for displaying china plates.
If your order has a deadline, place the order and e-mail us immediately at [email protected] so that we can work with you to ensure your order arrives on time.
Weekend orders cannot ship before Monday.
Most orders ship within 1 to 2 business days. Large or special orders may take longer.
UPS Next Day orders placed after 2pm Eastern Time cannot ship before the following weekday.
UPS Next Day and 2nd Day mean business days, not counting weekend days.
UPS 2nd Day orders placed on Thursday or Friday will be sent via USPS Priority Mail (which is cheaper AND faster) unless you e-mail us.
We cannot cancel orders after they ship.
European Union
Information Regarding Directive 2011/83/EU
All products listed on the website have detailed product descriptions provided.
Business information including address is listed at the bottom of each page.
All customer service interactions are handled via e-mail: [email protected]
Delivery to the EU can take multiple weeks and is subject to Customs delays. EU customers are encouraged to e-mail us before ordering for transit time information.
Reimbursement will be made for the original cost of the order, or as applicable, partial cost if only some of the materials are returned.
Pursuant to Article 14(1), the customer is responsible for the price of return shipping.
European Union information concerning the exercise of the right of withdrawal
Right of withdrawal
You have the right to withdraw from a sales contract within 14 days without giving any reason.
The withdrawal period will expire after 14 days from the day on which you acquire, or a third party other than the carrier and indicated by you
acquires, physical possession of the goods.
To exercise the right of withdrawal, you must inform us by e-mail to [email protected] of your decision to withdraw from the sales contract by an
unequivocal statement in the e-mail.
To meet the withdrawal deadline, it is sufficient for you to send your e-mail concerning your exercise of the
right of withdrawal before the withdrawal period has expired.
Effects of withdrawal
If you withdraw from a sales contract, we shall reimburse to you all payments received from you for that particular order, including the costs of
delivery (with the exception of the supplementary costs resulting from your choice of Priority Mail Express International, or any other type of delivery other than the
least expensive type of standard delivery offered by us, which for almost all international orders is Priority Mail International), without undue delay and in any event not later than 14 days from
the day on which we are informed about your decision to withdraw from the sales contract. We will carry out such
reimbursement using the same means of payment as you used for the initial transaction, unless you have expressly
agreed otherwise; in any event, you will not incur any fees as a result of such reimbursement
You shall send back the goods to Mosaic Art Supply, 2964 Alcove Dr, Scottdale, GA 30079 USA without undue delay and in any
event not later than 14 days from the day on which you communicate your withdrawal from this contract to
us. The deadline is met if you send back the goods before the period of 14 days has expired.
You will have to bear the direct cost of returning the goods.
You are only liable for any diminished value of the goods resulting from the handling other than what is
necessary to establish the nature, characteristics and functioning of the goods.
All Customers
When will my order ship?
Mosaic Art Supply, LLC ships all orders from Scottdale, Georgia, which is in the US Eastern Standard Time Zone.
Orders are shipped on weekdays only.
Most orders ship within 1 to 2 business days. Large or special orders may take longer.
We do not ship orders on US postal holidays. For a list of postal holidays please click here.
Orders placed after 4 PM EST cannot be mailed until at least the next business day.
Orders can’t be cancelled after they ship.
When will my order arrive?
For most orders, USPS Priority Mail will be the cheapest option. It is also usually the fastest shipping option.
USPS Priority Mail usually delivers within the lower 48 states within 2 or 3 days.
USPS Priority Mail does NOT guarantee a specific delivery date.
UPS Ground is usually the cheapest option for large and bulky items such as 3 litre Weldbond jugs or full rolls of mosaic mesh.
UPS Ground does NOT guarantee a specific gelivery date.
If your address is incorrect in any way (ZIP, street, apt number, etc.), then UPS’s additional fee of $13 for address corrections will be charged to your credit card.
We reserve the right to use UPS Ground for orders containing multiple sheets of stained glass or other products that we determine may get broken in Priority Mail flat-rate boxes.
Can I get a guaranteed delivery date?
If you absolutely need your order by a certain date please e-mail us right now at [email protected] so we can work with you.
UPS offers 2nd-Day Air and Next-Day Air delivery, which you can select during checkout.
UPS 2nd-Day Air and Next-Day Air services refer to business days only, they do NOT include weekends or US federal holidays.
Orders ship only on weekdays (not including postal holidays) from Scottdale, Georgia, and must be placed before 2 PM EST in order to go out on the same business day.
We strongly encourage you to e-mail us as soon as possible at [email protected] so that we can let you know what your options are.
UPS Saturday Delivery is an extra charge and is very expensive. Our website does not quote Saturday Delivery as a shipping option.
Can I get a guaranteed delivery date outside of the United States?
No, international customs bureaucracies will take time to inspect your package, and can cause delays.
Priority Mail Express International is the fastest international service we offer.
If you order PMEI we need to have the order before 1 PM EST (13h00) and we need you to e-mail us at [email protected] in order for your order to ship the same day.
Simply copy-and paste the following text then change it to include your order number:
I just placed a Priority Mail Express International order, the order is #XXXXX, please ship as soon as possible.
Can you mail a package outside the USA with a service other than USPS?
No, UPS will charge you a hefty customs brokerage fee when you receive your package.
We don’t have relationships with any other international carriers.
You are responsible for paying your country’s taxes and duties, if applicable.
My package is missing items. What should I do?
Please e-mail us immediately at [email protected] so that we can fix the problem. If you wait until your deadline is near to report the problem, we may not be able to help. We cannot ship replacement items by express shipping methods if you wait to report the problem.
My package never showed up, or it was delivered opened or damaged. What should I do?
Please e-mail us immediately at [email protected] so that we can file a missing package inquiry or a claim with USPS or UPS as soon as possible.
Damaged package claims must be reported to us as soon as possible or else USPS or UPS may deny the claim.
US Postal Insurance does not cover theft of packages after they are delivered.
Please follow the tracking information we email you and make sure you retrieve packages from porches and mailboxes quickly and report problems in a timely manner.
We do not assume liability for thefts occurring at your home.
USPS insurance does not cover theft from your porch, and we cannot reimburse orders stolen after delivery to your address. Ship to your work address if needed to be safe.
United States and Other Countries
Sales and Retail Prices
By placing an order from our website, you agree that:
Mosaic Art Supply, LLC is entitled to keep the calculated a retail price displayed with the sale price as long as desired.
Displaying the calculated price is absolutely necessary in this market to avoid artists designing projects over a long time frame (multiple years) being surprised that they may need a quantity that requires a new factory order at the calculated retail price.
You will not seek damages from any perceived or actual violations of any law including but not limited to any limitations on how long sale price can remain in place along with the calculated retail price.
How can I return an item?
Please send us an e-mail at [email protected] to request a return authorization.
Authorization may be granted if you had ordered samples before ordering large quantities and the return is made within 2 weeks.
Please tell us your order number and tell us what product(s) you’d like to return and the reason for the return.
We can’t refund shipping costs for obvious reasons.
We can’t accept returns if you haven’t e-mailed us first and we have not authorized the return.
We can’t accept returns of broken or damaged items or opened containers of Weldbond, Grout, Thinset, or Cutting Oil.
ATTENTION CONTRACTORS: Do not order large quantities if you are not sure about the products you need.
Please e-mail us at [email protected] to ask about Sample Boards or for help selecting the tiles you need.
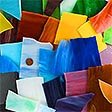
Our Mosaic Art Glass Assortment includes 2-lbs of American-made stained glass pieces for making mosaic artwork. With opaque mosaic work surfaces in mind, we choose pieces for pigment density and opacity. These assortments offer a great way to sample a wide variety of stained glass types and colors. We also sell individual colors of stained glass in 6-inch sheets if you need an individual color. Piece size varies, but we try to cut pieces 2 to 3 inches wide, so there should be fewer pieces measuring 1 inch or less. Cutting Scrap will have smaller pieces.
Black White Gray – grayscale stained glass mix
Blue – variety of dark-to-light blue stained glass
Designer Neutrals and Foggy Grays – unusual odds-and-ends, muted and variegated pieces, landscape tones
Glass on Glass Mix Translucents and Transparents – foggy, cloudy, see-through multicolored mix**
Golden Amber Brown – variety of brown-beige stained glass
Green – variety of dark-to-light green stained glass
Iridized – all-iridescent multicolored mix**
Premium – rainbow+ assortment with red-orange-yellow, pink-purple, blue-green, brown, black and white
Sunset – warm gradient mix of red-orange-yellow and pink-purple
*All mixes may include one Ripple/textured piece. **All mixes emphasize opacity except Glass on Glass Mix, and Iridized may include clear iridescents.
Product Coverage
Each two-pound bag is approximately 1.25 square feet of stained glass. If you cut these pieces into mosaic tiles of about 3/4 inch or less and use a grout gap of 1/16 inch, then the bag could cover 1.5 square feet.
Compatibility
Stained glass is approximately 1/8 inch thick and therefore nominally the same as most of the glass mosaic tile we sell. We also have 3/4-inch stained glass tiles.
Cutting Art Glass
Mosaic Art Glass cuts quickly with minimal force using our Mosaic Glass Cutters. Caution: Stained glass is usually sharper than regular molded glass mosaic tile. Extra care must be used in cutting, handling, and grouting to ensure that sharp edges are not left exposed. One technique to knock off the razor slivers from freshly-cut stained glass edges (called flash or groze) is to swirl pieces around in a plastic bucket with a little water. The Rubbing Stone and Marble File we sell are useful for smoothing sharp edges and are recommended when the mosaic is for a wall or architectural element.
The traditional stained glass artists’ tool for smoothing edges is the Grozing Pliers, but the Rubbing Stones and Marble Files produce smoother edges and can round off sharp points and corners.
Mosaic Art Glass Assortment 2-lbs
Material: untumbled stained glass with sharp edges.
Piece size: varies, but most should be ABOUT 2 to 3 inches.
Thickness is nominally 1/8 inch but varies considerably, typically around +/- 1/32 inch.
Coverage: a 2-pound bag covers about 1.25 square feet.
American made.
Pigments: colorfast metal oxide.
Suitable for indoor/outdoor use.
Frost-proof and impermeable to liquid.
Not recommended for floors.
Colors vary based on availability, but we keep it colorful with an emphasis on brighter, stronger colors.
Individual Colors Available As 6-Inch Sheets
If you need an individual color or found one you especially liked in an assortment, see our 6-inch stained glass sheet selection.
Summaries of some of the most important tools and supplies we offer for working with mosaic tile.
The mosaic supplies you need depend on the type of mosaic tile you are using (glass or ceramic or stone) and how you plan to install them. Five minutes of reading can save you five hours of frustration on your mosaic project.
For a complete listing of tweezers, sponges, gloves, dental picks, spatulas, etc., visit our mosaic tools page.
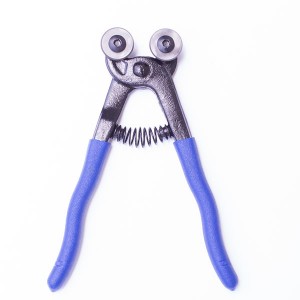
The glass cutter nips off pieces of glass.
Mosaic Glass Cutter
The most important tool for working with glass mosaic tile is the Mosaic Glass Cutter, which is a compression tool like a tile nipper, but the replaceable blades are shaped like wheels.
While a regular tile nipper tends to crush and splinter glass tile, the Mosaic Glass Cutter allows the artist to make cleaner, more precise cuts. (Tile Nippers were made for ceramic materials.) With proper use, the wheel-shaped blades stay sharp and effective for hundreds and hundreds of hours of use.
An amazing product. Weldbond is a water-based adhesive that looks and handles just like plain white glue yet cures stronger than many of the smelly solvent-based glues. The manufacturer’s brochure calls Weldbond “the most versatile, non-toxic, non-flammable adhesive on the North American market.” We don’t think this is an exaggeration. Weldbond is probably the most-used adhesive among mosaic artists with no close second. It bonds to hundreds of different materials and is very water-resistant once it dries.
The new 160ml bottle (pictured) is light weight and easy to handle, but we also sell a 420ml bottle and 3 litre jug. We recommend using the jug to refill one of the smaller bottles. Easy clean-up with soap and water.
Note that Weldbond is very water resistant but not water proof. Artists use Weldbond for back-splashes and vertical surfaces where water can drain off, but you shouldn’t use it for shower floors or pools or fountains. For outdoor and wet mosaics, use thinset mortar instead of adhesives.
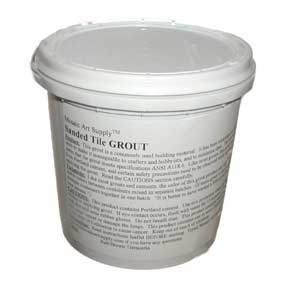
Sanded grout. Just add water.
Grout
Our grout is a traditional portland-cement grout that includes sand. Sand is needed for strength when the gaps between tiles are 1/8″ or greater, but sanded grout can also be used when the gaps are smaller. All of the mosaics at the Riverson gallery were made with sanded grout.
Choosing A Grout Color
Grout can totally change the look of a mosaic, and it is possible to ruin a mosaic with the wrong color grout. To make the individual tiles stand out visually, you have to choose a grout color that CONTRASTS the colors of the tiles. Avoid choices like grey grout with grey tile. In my experience, a grout with some color almost always looks better than white grout.
How Much Grout Do I Need?
The amount needed depends as much on the gaps between the tiles as it does the total area. If your gaps are the standard 1/16 inch, then you will probably use less than 1 lb. of grout per square foot. If you have thick tile with large gaps, you could use over 1.5 lb. Keep in mind that you have to budget extra for all of the wasted grout that falls off the sides of the mosaic.
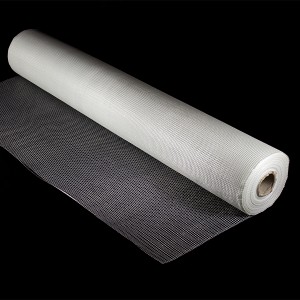
Fiberglass Mesh
Fiberglass mesh can be used for laying down tile in advance for rapid installation.
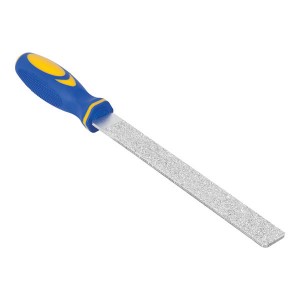
Ceramic and Marble File
Ceramic and marble file for smoothing and shaping sharp edges formed by cutting tile.
Grouting Bags
Grouting Bags are for dispensing grout and thinset neatly for detailed work.
Compound Tile Nipper
Compound Tile Nipper for cutting extremely hard tile, porcelain, and stone.
These instructions are for an indoor mosaic not subjected to excess moisture. The mosaic process is similar for outdoor mosaics (such as pools and fountains) but thinset mortar is used outdoors instead of Weldbond adhesive. For wet mosaics such as shower floors, you also need to use thinset. Thinset is a sticky concrete with polymers added for strength, adhesion and water resistance.
More information on outdoor mosaics, specialized topics and advanced mosaic methods can be found on our Outdoor Mosaic Guide.
Our FAQ page also contains additional mosaic instructions, tips on using thinset and answers to many specific mosaic questions. It is constantly being expanded and has solutions for many common mosaic problems. Also, here are some tips on how to avoid disasters while grouting.
For an indoor project not subjected to moisture, it is very simple:
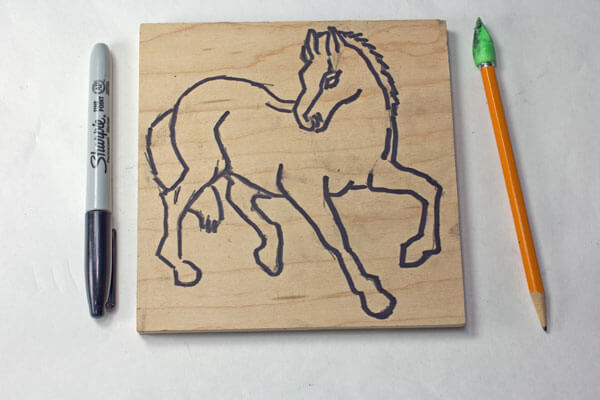
The Mosaic pattern is transferred ready for tiling. This is a dry indoor mosaic, and so the tile can be attached with Weldbond Adhesive. For outdoor and wet mosaics. aconcrete stepping stone or piece of flagstone could be used for a backer and the tiles mounted with thinset mortar.
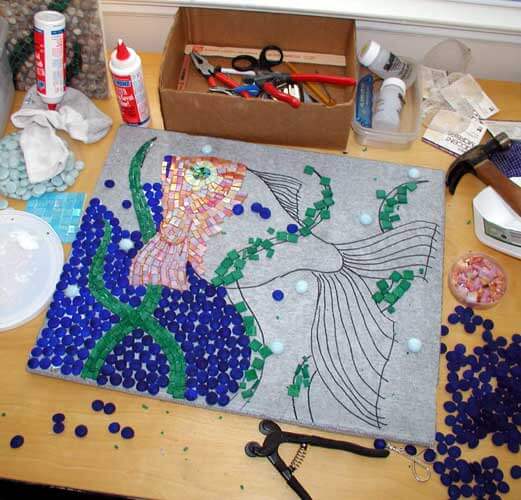
2. Decide what size mosaic tiles are most appropriate for the level of detail in the design (don’t use 1″ tiles to make details that are 1/2″). Lay a few tiles down just to make sure the colors look right together.
It’s better to take a loose, creative approach to picking colors and textures for your mosaic – a variety of surfaces and color often delights the eye more than even fields of color. Have a look at our Mosaic Artists Gallery for inspiration!
3. Glue the tiles to the surface one at a time. We recommend Weldbond Adhesive. Make sure the gaps between the tiles are about 1/8 inch or less.
We’ve extensively tested Weldbond, and consider it the most practical adhesive for indoor mosaic projects.
For more complicated designs, you can lay the project up on fiberglass mesh (by gluing sparingly with Weldbond adhesive), or you can pick up the tiles with clear contact paper. In either case, the next step would be to spread glue or cement on the surface and press the sheet of mosaic onto the glue or cement.
See the Mosaic Tips below for more help with your mosaic.
Mosaic Tips from Our Resident Mosaic Artist
Start simple.
Make a small mosaic plaque before you mosaic a wall or floor. That way you can work out your materials and methods before the big job.
How can you draw a design? Simple drawings like those in a coloring book work best. The color and the details come when you add the tile and glass. I always sketch something on paper and then come home and draw a simple cartoon on my plywood or concrete board using a magic marker. If drawing is a sore spot, you can create mosaic patterns easily without drawing as well.
My first rule of grouts is to choose a contrasting color. If you use white grout with white tile or grey grout with grey tiles, then the tiles don’t stand out from the grout, and most of the detail of your design will be lost. When in doubt, black grout is usually the answer.
My personal second rule of grouts is that DARKER GROUTS ALMOST ALWAYS LOOK BETTER. I have almost always been disappointed when using plain white grout. White grout makes a nice mosaic look like a summer camp project! Try an off-white or light beige if you think you need a light color. Also remember that grouts are much darker while they are wet and get lighter as they cure.
Don’t know anything about glues, grouts or tiling? Your local hardware store or handyman is a mosaic expert even though they’ve never made one. (You might not know anyone who has made a mosaic, but you probably know someone who has tiled a bathroom or kitchen. The technical skills are very similar.)
Always wear safety glasses when cutting tile or glass or mixing grout. (Grout is mildly caustic and has sand and grit in it.) Making a mosaic can be fun but you should always be careful.
Grout mosaics outside. It’s a messy process. Look at books on home improvement for basic techniques of grouting if you’re not sure. Keep grout damp as it cures and do not allow it to dry out rapidly, otherwise it will crumble. Remember, the grout is binding water internally in a chemical process as it cure. It is NOT drying.
Keep mosaic tiles and supplies out of reach of children. Use caution when handling the broken glass and ceramics.
Spend a little more time on your mosaic. Don’t rush and don’t think about what you want to make next. It can make a world of difference in your satisfaction.
Avoid plywood as a backer unless you can seal the edges and bottom. Wood materials absorb water over time and warp, and then grout and tiles pop off. You might not be trying to recreate a timeless Roman mosaic that will endure for centuries, but at least make something that will last 2 or 3 years. Use plywood at least 1/2″ thick inside and concrete or concrete board outside. Always use concrete or concrete board as the base of any mosaic that will be walked on. Concrete board can be purchased from building material stores. A common brand name is Wonderboard. For my indoor mosaics, I laminate 1/4″ Wonderboard to cabinet grade plywood backers.
The best all-around glue for making mosaics is Weldbond. It is a water-based adhesive that looks and handles just like plain white glue, yet it cures stronger than many of the smelly solvent-based glues. The manufacturer’s brochure calls it “the most versatile, non-toxic, non-flammable adhesive on the North American market.” I agree. It bonds to hundreds of different materials and is very water-resistant once it dries. It cleans up easy with soap and water.
If you make a mistake, don’t be afraid to pry some of the tiles off if you don’t like what you see. (Wear goggles or safety glasses with side shields.)
I always wait for a week or two before I grout a piece. That way I have a chance to change things before they are literally set in concrete.
Simple and crude can also be noble. It’s ok if your art has blemishes and mistakes. That’s what makes it interesting and keeps it from looking like it was made on an assembly line. Don’t try to make it a perfect reproduction of anything, and you’ll probably be much happier with the time spent and the results.
Avoid making copies of phony arts-n-crafts stuff. There’s way too much of that around. Make your mosaic YOUR way and it will be genuine art in the highest sense of the word.
Legal Disclaimer and Copyright Information
No warranty is implied by these instructions. Use at your own risk. Please wear goggles when cutting mosaic materials or mixing grout. Mosaic materials are often sharp. Keep out of reach of children. Do not overload patio tables with mosaic materials so that the table becomes unstable (top heavy). You should also make sure that the table frame can support the overall weight. Copyright 2009 J.E. Moorman. Please link to these instructions freely, but email us if you would like to reproduce them for classes, etc.
There is nothing unique about mosaic grouts. The grouts and sealers used for mosaic artwork are the same ones used for ordinary bathroom tiling, and the techniques of applying the grout are the same. If you are ever uncertain and need information in a pinch, you can ask questions at your local building material store or look at their book on how to tile or bathroom repair, which they usually keep on the same aisle where they sell grout and supplies or in the plumbing department or near the registers. The point is that grouting isn’t rocket science and most handymen and women have done it before.
How much grout you need depends on three things: the area of the mosaic = L x W, the thickness of the tiles and the gaps between the tiles. If the tiles are well-spaced (all gaps under 1/4″), then you should be able to cover the entire mosaic of 18″ x 18″ with 2 lbs of grout. This is assuming your tiles are under 3/8″ thick. I always set my mosaic on an old shower curtain or piece of plastic to catch all the wet grout that falls off the side as I’m spreading it. That way I can scoop it up all the dropped grout and re-use it. Otherwise you need a lot more grout because most of it is wasted when it falls on the dirty floor.
If the gaps between your mosaic tiles are greater than 1/8 inch, then you may need grout with sand in it, such as we sell. The sand reinforces the grout to prevent cracking if the gaps are greater than 1/8 inch. Note that standard grout gaps are usually about 1/16 inch.
How to grout a mosaic
Step 1: Preparation
Grout outdoors if at all possible to minimize dust contamination and clean up of wet grout. Wherever you work, set up a clean area to work in and make sure you have all the tools you will need. Usually you need a bucket of water, some kind of tray to mix the grout in, a mixing stick, a sponge, rubber gloves, a dust mask, and some paper towel or old rags. You can use latex gloves in a pinch if your mosaic is made from smooth tiles, but rubber gloves are recommended when you’re grouting any kind of tile that has sharp edges. Those edges will rip through latex gloves as you spread the grout around.
The mosaic needs to be fully dried before you begin. Wait at least 24 hours after gluing down the last tile before you grout your mosaic if you used Weldbond.
Set up a clean workspace for grouting.
Step 2: Mix the Grout
Wear a dust mask when you do this step. Estimate how much grout you need for the mosaic and pour it into the tray. In this example we used the cut-off bottom of an old plastic jug. If you don’t mix enough grout you can always mix some more. The grout container should indicate how much water to use. The dust generated in this process is very fine and can spread all over the place, that’s why it’s best to do this outside. If you do grout inside, just be sure to vacuum the area once you finish grouting.
Add water and stir the grout with a paint mixing stick.
Step 3: Grout the Mosaic
This is the least complicated step. You just need to grab a glob of grout and mush it into the mosaic. Keep doing this until all areas have been covered in grout.
Start with a big glob of grout.
Just smear it into the mosaic.
Step 4: Verify Total Grout Coverage
Before you haze the grout, you need to be sure that all of the cracks were completely filled. Look closely and ensure that there are no bubbles between the grout and the wood. Run your fingers along each crack and push the grout down in.
Make sure grout gets in every crack.
Now you’re ready to wipe off the excess.
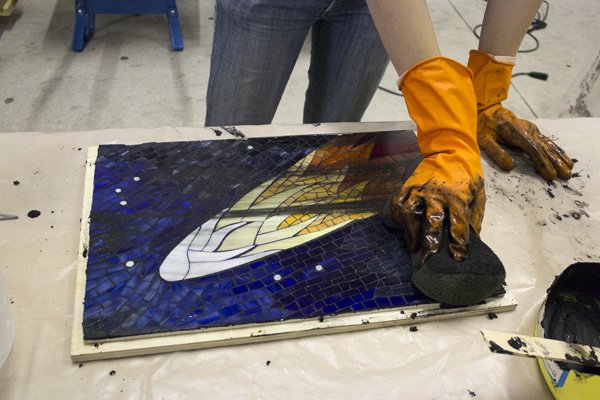
Step 5: Clean with Grout Sponge
For smaller projects you can sometimes omit this step and just use rags and paper towel to wipe off the excess grout, but for anything approaching 1 square foot in area or larger you want to do it with a sponge as demonstrated here.
Wipe a straight line in one direction.
Rinse the sponge when it’s covered in grout.
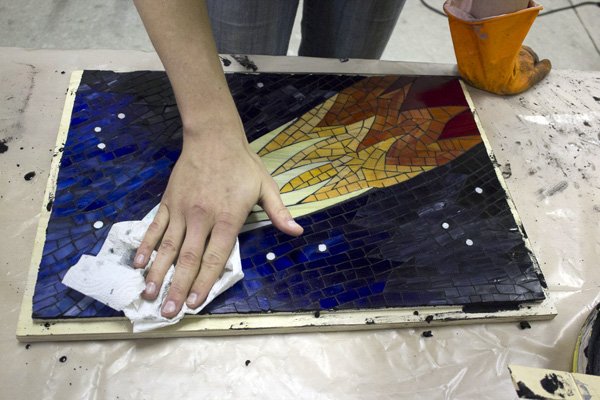
Step 6: Clean the Haze
The sponge will have cleared the bulk of the extra grout off, but there will probably be a thin grout haze left over. It’s okay to let the haze dry for a few minutes to make it more visible and easier to clean before you try to wipe it off. To clean it use a dry rag or paper towel. You should be able to clean an area of 1 square foot with only 1 or 2 paper towels.
A thin haze is still on the mosaic.
Polish the haze off using a paper towel or rag.
Step 7: Final Touchups
Look around for areas where grout is built up on any tiles. This usually happens where tiles are of different thicknesses. This can be done with a rag or paper towel wrapped around your finger. Make sure the grout is roughly flush with, or slightly lower than the tiles around it.
Grout is built up around this tile.
The same spot wiped clean.
All done!
Once it’s cleaned off you’re finished with the grout. Allow a few days to cure fully, but usually it should be pretty solid after a few hours. The time for full curing can depend on the heat and humidity where you did the grouting. Some pieces of dust or sand may slowly fall off the mosaic over the next few days, don’t be alarmed if that happens.
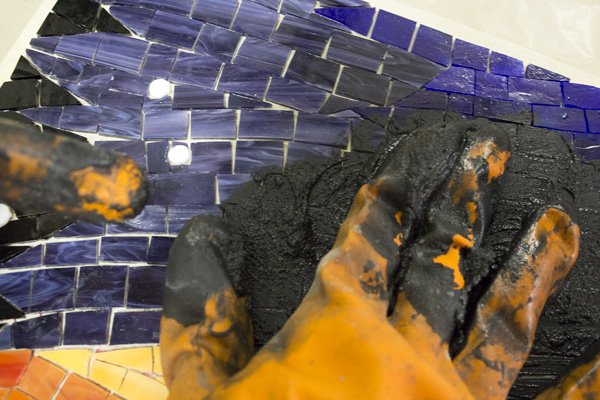
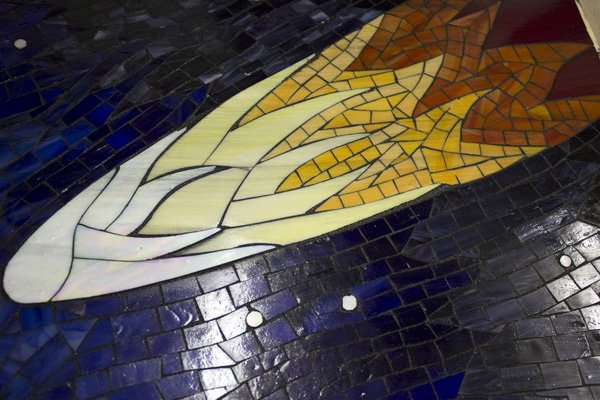
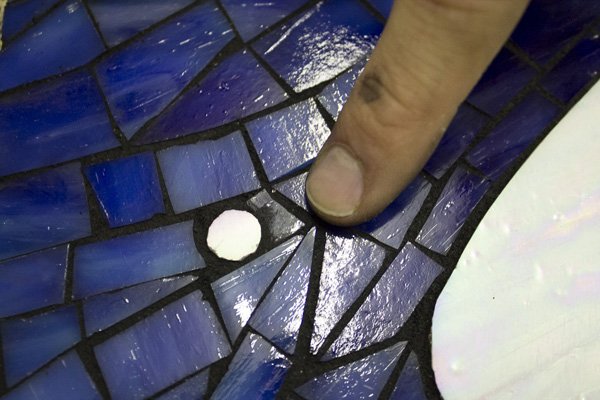
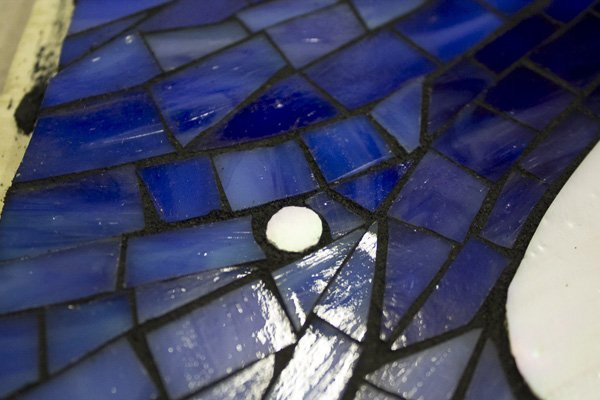
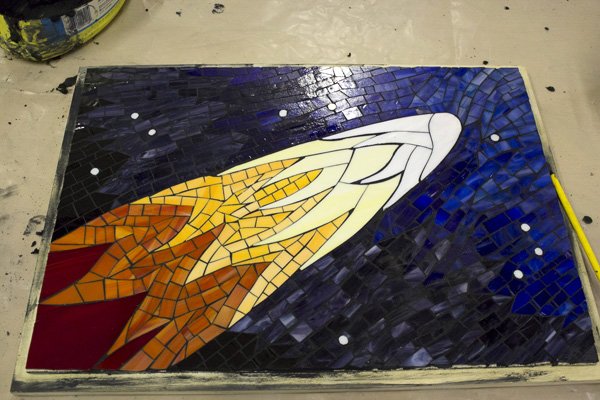
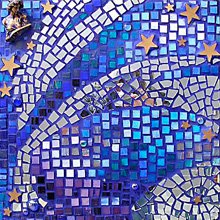
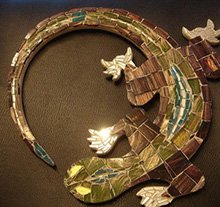
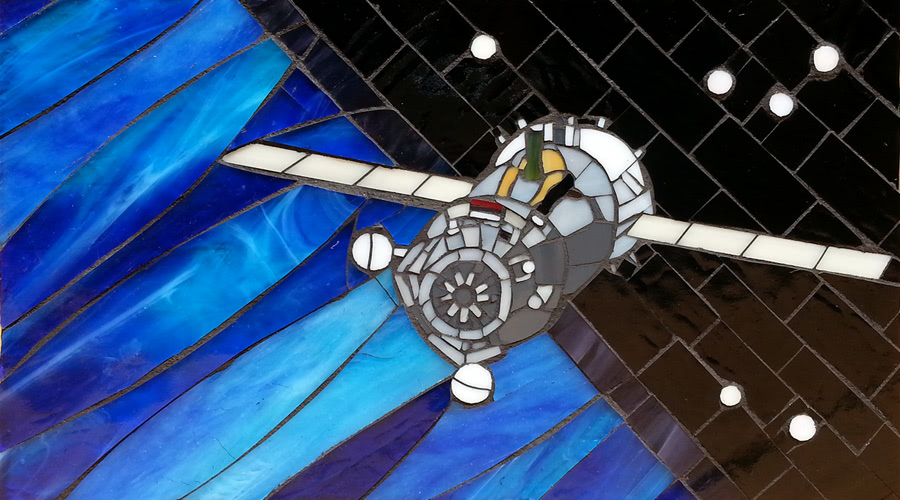
The comet is finished and is ready to be installed in its table.
Stars are illuminated by LEDs.
Selecting a Grout Color
I always choose a grout color which contrast the colors of the mosaic tiles so that the design is highlighted. Otherwise the individual tiles run together and are lost to the eye, and the mosaic looks more like an ordinary picture and less like a mosaic made from pieces. I avoid situations like gray grout with gray tile. A nice red-brown terra cotta grout works better in that instance. The key concept is color contrast instead of matching colors.
Color is best provided by the tile, not the grout. In terms of a visual element, the grout is supposed to act like a thin gray pencil line whose only purpose is to make each tile distinct. I don’t think I’ve ever seen a mosaic that used colored grout that wouldn’t have looked better if all tile had been used instead. For example, let’s say you wanted red tile in pink grout. A better way to get the same color effect would be to mix in a few pink tiles randomly throughout the red tiles, or maybe use a few lines of pink tiles. Often this means you have to cut your tile just a little bit smaller. That being said, it is possible to dye grout.
Dyeing Grout
There are mineral concrete dyes sold at building material stores, and these can be used, although the range of colors is limited to black, brown, gray, terracotta, etc. Vegetable dyes such as food colors will not work. You can use artists acrylic paint to color grout by mixing it in the wet grout. I recommend experimenting with tiny batches of grout and letting it harden before grouting a mosaic you have worked many hours on.
The Best Grout Color
Sometimes it is hard to decide which color grout to use because your mosaic already contains so many colors. The best color grout to use for most mosaics is black. Here’s why: The purpose of grout in visual terms is to make each tile distinct in the same way a pencil line in a watercolor is used to provide definition but not color. Black provides just enough contrast to most colors, unless you have black tile, and then you might want to consider something else.
Avoid pure white unless you are trying to make something that looks like a little kid’s summer camp project. Most building material stores such as Lowes and Home Depot cary about 30+ colors of grout. We carry the most commonly needed colors. Bring a few of each color of your tiles with you, and you can pick the color grout that works best with all the tile.
Grouting Stone Tile and Unglazed Ceramic
You should always seal unpolished stone and unglazed ceramic tiles with a tile and grout sealer BEFORE you grout. This is necessary for all porous materials that can be stained by grout. You should seal using a Stone Enhancer instead of tile and grout sealer if you want to darken and enhance the natural color of the stone. Both of these products are available at local building material stores. For a stone mosaic that is already stained, you might want to try some of the muratic acid that contractors use to clean cement from bricks.
Cracking and Crumbling Grout
You shouldn’t let the grout dry out as it cures. Cover with plastic if necessary. Lightly mist with a spray bottle, but don’t let drops accumulate on the surface of the grout. It also helps if you mix the grout according to instructions. It should be like a thick moist dough when you start with no dry material or lumps, and it should stick to your mixing wand, not drip, slide or crumble off.
Sanded Grout vs. Unsanded Grout
Don’t use unsanded grout. Unsanded grout is only used to fill hairline cracks. (Or it is mixed with sand for normal use.) If you use unsanded grout, then you can expect cracks in your grout and grout that isn’t quite as hard and durable.
Note: some tutorials incorrectly advise against using sanded grout because it might scratch the tile during grouting. Very few high quality mosaic materials will be soft enough to be damaged in this way, and you shouldn’t be using such easily scratched materials in any functional setting (bathrooms, counters, table tops et cetera…). Some ‘craft’ materials may have softer glazes which could be scratched by sand, but if you grout carefully the issue is easily avoided. There is no need to use a lot of force when grouting. If you have doubts about the durability of your materials, make a small test piece first.
If you decide to use unsanded grout, be sure to understand exactly why you are using it instead of the the stronger alternative.
Disposal of Grout Waste
Never pour grout down your drains. Grout is concrete, and that isn’t good for your plumbing. It will clog the pipes. I make a point of pouring as much of my grout sludge in an old cardboard box and allowing it to harden for disposal as solid waste. I always just dilute the dirty grout water and pour it in on my compost heap. The grout is a limestone product, so it actually helps balance the pH when there is excess decaying organic matter. Of course, this only applies to traditional grouts. I am not familiar with the synthetic epoxy grouts that some craft sites are selling. For easy cleanup, I always do my grouting in the backyard instead of indoors.
The Mosaic Artists Gallery at Mosaic Art Supply is a registry of online mosaic artists and mosaic studios. Each entry includes a thumbnail of the artist’s mosaic art plus a link to their website. If you are a mosaic artist interested in joining our registry, please apply by emailing your name and website to us. Mosaic Art Supply, LLC is not responsible for the content of external websites and makes no warranties for suitability for any purpose.
Mauricio Aybar
Gold Coast, Queensland, Australia bluethumb.com.auLorna Ball Lorna Ball Fine Art Mosaic British Columbia, Canada lornaballfineartmosaic.comSolomon Bassoff & Domenica Mottarella Faducci North San Juan, California, USA www.faducci.comHresula Bentsen Mosaico by Hresula Loreto, Baja California Sur, MX www.MosaicobyHresula.comMathieu Bergeron Atelier Phebus Grondines, Quebec, Canada www.atelierphebus.com
Kim Grant Kim Grant Mosaics Canberra, ACT, Australia www.kimgrantmosaics.comClare Green The Art of Glass Brisbane, Queensland, Australia claregreen.artSandra Groeneveld Kalimera Design Company Montverde, Florida, USA www.kalideco.comKristi Halva KHMosaic Design Bay Area, California, USA www.khmosaicdesign.comYulia Hananasen Mosaic Sphere Studio, LLC Baltimore, Maryland, USA www.mosaicsphere.comFloy Height Floy Freestyle Texas, USA floyfreestyleChris Heisinger Heisinger Design Evanston, Illinois, USA www.heisingerdesign.comLinda Hirsh Poetry & Mosaic Paintings Pacific Northwest USA www.lindahirsh.comXuan My Ho Swanmosaic Woodside, California, USA www.swanmosaic.comRobin Indar Robin Indar Mosaics Chico, California USA www.robinindar.comJacqueline Iskander Jacqueline Iskander Mosaics Tulsa, Oklahoma USA www.jiskander.com
Our frequently-asked mosaic questions page contains tons of information concerning mosaic materials and techniques, grouts, glues, mosaic tables, cutting tile, outdoor mosaics and related topics. Choose a topic category from the menu bar above, which will take you to section that includes MOST of the questions that relate to that particular subject. Or you can just scroll down through the list and browse (recommended).
If you have questions about an order or how to use the store please visit our Help page or Contact Us.
See our Legal Disclaimer and Copyright Information for questions regarding reproducing this information and the responsibilities of anyone using this information to make mosaics. Our information is not intended to be a substitute for manufacturer’s instructions or using standard safety practices such as wearing gloves, dust masks or safety glasses. These items are available on our tools category.
BEGINNERS
For an indoor project not subjected to moisture, it is very simple:
Draw a simple “cartoon” (outline) on the surface.
You can copy one from a coloring book or your favorite pattern of china or
fabric if you aren’t an artist
Decide what size tiles are most appropriate for the level of detail
in the design. Lay a few tiles down just to make sure the colors look
right together.
Glue the tiles to the surface one at a time with Weldbond. Make sure the gaps between the tiles are about
1/8 inch or less.
After the glue cures for 24 hours, grout the mosaic with regular bathroom tile grout.
For more complicated designs, you can lay the project up on mesh (by gluing
sparingly with Weldbond), or you can pick up the tiles with clear contact
paper. In either case, the next step would be to spread glue or cement on
the surface and press the sheet of mosaic onto the glue or cement.
For an outdoor project or a project subjected to moisture, you should
probably use thinset (a type of sticky cement with polymers added for
strength and water resistance. We now sell 2 lb containers of thinset. For larger quantities check out the local building store. You should also seal the mosaic with a tile
and grout sealer from your local hardware store. You can find more information about
making a mosaic
by following the link. Return to Top
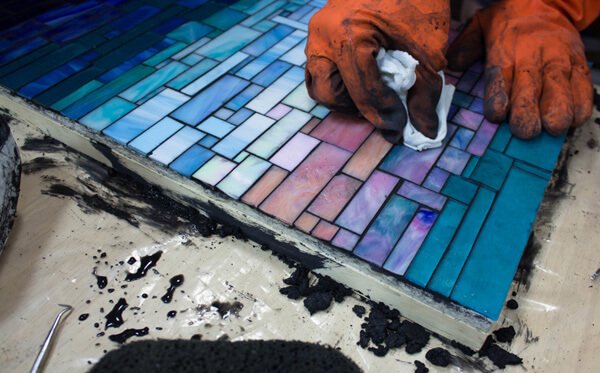
Learn how to grout mosaic art in this tutorial.
Mix the grout according to instructions on package and avoid breathing dust. Spread the grout into the cracks. Wipe off the excess grout. Use a sponge instead of a rag because the rag will catch on any sharp edges. Don’t try to wipe it perfectly clean all at once.
Rinse out the sponge after each pass. Make sure your sponge isn’t dripping water after you rinse it out. Wipe flat across the surface. When cleaning the excess off, take care not to erode the grout from between the tiles. Keep the surface damp as the grout cures or it will crack.
Look at our in-depth grout tutorial for pictures of each step of the process.Return to Top
You can learn how to grout from our How To Grout Tutorial. It’s the same techniques and materials used for bathroom tile. If you were ever have a question that we haven’t covered here at our website, you can always ask at you local building material store or look at a basic book on home improvement if you need pictures.
Return to Top
No. The grouts and sealers you need are the same ones used for ordinary bathroom tiling, and the techniques of applying are the same. For outdoor mosaics, or mosaics which will be exposed to moisture, using thinset as the adhesive and grout is recommended.
Return to Top
If the tiles are spaced with all gaps under 1/4″, then you should be able to cover the entire mosaic of 18″ x 18″ with 2 lbs of grout. This is assuming your tiles are under 3/8″ thick. I always set my mosaic on an old shower curtain or piece of plastic to catch all the wet grout that falls off the side as I’m spreading it. That way, I can scoop it up and use it. Otherwise you need a lot more grout because most is wasted.
Note that a standard grout gap is 1/16″. If you keep your grout gaps small and uniform like this, you will use less grout, and it will be easier to grout. If your grout gaps are wider than 1/8″, then it is difficult to wipe away the excess grout without eroding the grout from between the tiles. Return to Top
Unless you are trying to patch hairline cracks, the answer is emphatically yes. Sand gives the grout strength like gravel gives strength to concrete.
Return to Top
Probably black. Otherwise, choose a grout color which contrast the colors of the mosaic tiles so that the design is highlighted. If there isn’t a strong contrast between the grout and the tiles, then the individual tiles are lost to the eye, and the mosaic looks more like an ordinary picture and less like a mosaic made from pieces. I avoid situations like gray grout with gray tile. A nice red-brown grout works better in that instance. The key concept is color contrast – we receive many emails from people who regret having used white grout on their project.
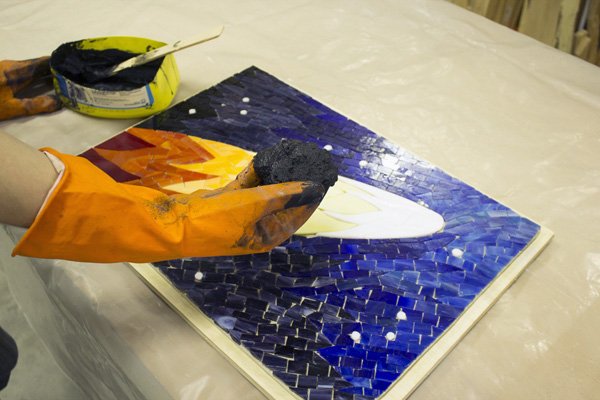
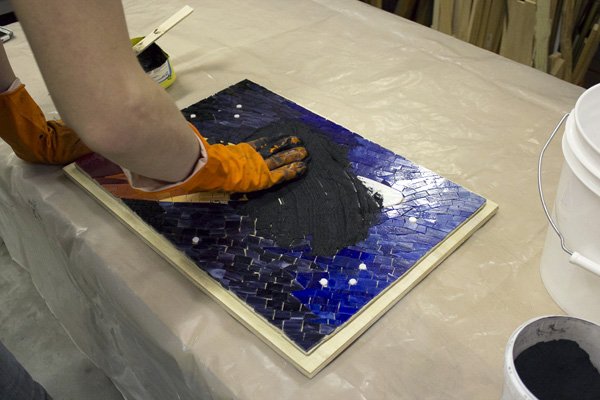
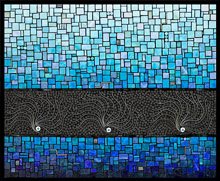
Soyuz Space Capsule Mosaic Art
The mosaic above was grouted using black grout. The black doesn’t pull the eye away from the glass. The lines it creates on the space capsule add to the design, such as by showing the different segments of the solar panels. Sometimes the black grout can even look like line art if you make the mosaic look like an illustration.
Return to Top
Usually black. Here’s why: The purpose of grout in visual terms is to make each tile distinct like a pencil line in a watercolor. Black contrasts well with most colors, causing the tiles to really pop.
Avoid pure white unless you are trying to make something that looks like a little kid’s summer camp project. Some mosaic artists use white grout with white tile to make a clean flat look, but for most projects white is not the way to go because it will outshine all of your tiles.
Most building material stores such as Lowe’s and Home Depot cary about 30+ colors of grout. Bring a few of each color of your tiles with you, and you can pick the color grout that works best with all the tile.
Return to Top
Color is best provided by the tile, not the grout. In terms of a visual element, the grout is supposed to act like a thin gray pencil line that just makes each tile distinct. I don’t think I’ve ever seen a
mosaic that used colored grout that wouldn’t have looked better if all tile had been used instead. For example, let’s say you wanted red tile in pink grout. A better way to get the same color effect would be to mix in a few pink tiles randomly throughout the red tiles, or maybe use a few lines of pink tiles. Often this means you have to cut your tile just a little bit smaller.
There are mineral concrete dyes sold at building material stores, and these can be used, although the range of colors is limited to black, brown, gray, terracotta, etc. Vegetable dyes such as food colors will not be
permanent.
If grout of a specific color is required, the best thing to do is go to a local home improvement center and compare grout swatches against your work. Return to Top
If your mosaic is in a wet location and the grout is used to actually seal out water, then you will need to use a grout remover tool such as we sell to remove the grout and regrout with another color. However, there is an easier fix for indoor mosaics where water isn’t an issue. Artists acrylic paint can be used to paint the surface of the grout. For mosaics made from smooth glass tile, this can be done by taking a rag and wiping the paint onto the face of the mosaic similar to how you grout. The paint sticks to the grout, but the glass tile is wiped clean while the paint is still wet. Note that you can’t do this with rough or porous tile (tumbled stone, unglazed porcelain, etc.) because the paint will absorb into the tile. For these mosaics, you would need to use a small artists paint brush and carefully paint the grout lines. Return to Top
Never pour grout down your drains. Grout is concrete, and that isn’t good for your plumbing. Instead, pour your waste in
an old coffee can or milk jug and allow it to harden. In a day or so, you can pour off the water and throw the container away.
For easy cleanup, I always do my grouting in the backyard instead of indoors.
Return to Top
If the backer is thin enough to flex slightly, even a miniscule amount.
If the grout was allowed to dry out while it was trying to cure.
Grout curing is a hydration reaction, not dehydration, and water is being chemically bound.
Sometimes bare wood can suck the moisture out of the grout,
but usually there is enough glue on the wood to prevent this.
Misting can help, but misting sometimes leaches the color out of the grout.
Wood was used instead of plywood.
Natural wood sometimes splits as it ages.
Plywood is less prone to splitting. (Note: use for indoor/non-wet mosaics only.)
Cabinet grade plywood is best to use in this scenario.
Using unsanded grout.
Unsanded grout should only be used to fill hairline cracks.
Normal grout gaps of 1/8″ require sanded grout for adequate strength.
I always use thinset for attaching and grouting. It never cracks and has polymers added to allow it to flex slightly without cracking.
When I do use glue, it is always Weldbond, which is a white PVA adhesive. Return to Top
It is possible to make a permanent attachment with thinset without filling in the gaps. Depending on how much thinset is used, it would loook rough in the gaps. If more thinset is used, the space between will look better. Too much thinset and it will squeeze to the surface of the objects and make a mess.
The appropriate amount of thinset is based on the size and shape of the pieces you are using. You have to make a functional and aesthetic assessment based on your tile and design. The same applies for determining what size gap to leave between the pieces.
I recommend making a small sample of what you intend to do on a piece of plywood of 1 to 2 sq. ft. This will allow you to work out any issues with your materials and method before you commit to the large project. This “extra work” nearly always saves days of frustration in the end.
Return to Top
Make sure you mix the grout according to instructions on the package with sufficient water and stir it thoroughly. It should be like a moist dough when you start with no dry material or lumps. Also, you shouldn’t let the grout dry out as it cures. Keep it covered with plastic if necessary or lightly mist with a spray
bottle, taking care not to let drops accumulate on the surface of the mosaic. Return to Top
You should always seal stone tiles and unglazed ceramic tiles with a tile and grout sealer BEFORE you grout. This is necessary for all porous materials that can be stained by grout. You should seal using a Stone Enhancer instead of tile and grout sealer if you want to darken and enhance the natural color of the stone. Both of these products are available at local building material stores. Ask there. For a stone mosaic that is already stained, you might want to try some of the muratic acid that contractors use to clean cement from bricks. Also ask at the building material store about this product.
Return to Top
Yes, but it isn’t necessary. If you want extremely hard grout, then you should probably just use thinset, which is cement with polymers added to make it sticky and give it added strength. Return to Top
No, grout isn’t sticky enough and makes a poor adhesive. If you want to set your tiles in concrete instead of glue, then use thinset, which is concrete with
polymers added to make it sticky and give it added strength. You can buy a large bag of thinset from a building material store relatively cheaply. Here are
some instructions I wrote for using thinset for detailed mosaic artwork.
Return to Top
For the most part, our mosaic instructions are written for making indoor mosaics with small details.
This is why we recommend the “glue-then-grout” method using Weldbond glue,
a water-based adhesive with no fumes. With proper grouting and sealing, these indoor mosaics
should last for generations, if not thousands of years. However, mosaics for outdoor walls, patios, fountains,
birdbaths and pools are more vulnerable to moisture penetration, especially over time, and Weldbond should be avoided.
While a solvent-based glue such as Liquid Nails can be used for mosaics on outdoor
walls, it is probably best to avoid glues altogether and use thinset bonding mortar to attach
the tiles, especially if the mosaic is in a pool, patio or
fountain. Thinset bonding mortars are a cement product. Currently, we are using the
Versabond brand of thinset bonding mortar for outdoor mosaics. This thinset or another
brand should be available at most any building material store. Whether or not thinset
mortar is used the attach the tiles, you should grout and seal your mosaic as described
elsewhere in our instructions. We also have more detailed information about thinset here.
Mosaic materials are heavy. Iron patio furniture is a better candidate because aluminum furniture is often thin and flimsy. You would need to make sure
that the legs could hold the weight and the top is sturdy. If the aluminum top flexes even slightly, it will crack the grout. There can also be issues with the grout reacting chemically to aluminum if it directly contacts it.
Return to Top
We get emails about these falling apart all the time. If I had to make one, I would make it from foam-core tile backer board, as can be bought at local building material stores, and I would use thinset mortar to cement the pieces together. You can use concrete backer board to make the house if weight isn’t an issue. Return to Top
Yes, glass tile is non-porous and impervious to moisture penetration and therefore frost-proof. That means glass is actually more durable than
materials like ceramic tile and stone, which can be flaked away by freezing water. The weak points in an outdoor mosaic are the grout and adhesives,
and the best way to protect those is by using a tile and grout sealer from the building material store.
Return to Top
If the mosaic isn’t outdoors or in a wet environment, then you can leave it ungrouted. Outdoor mosaics should be grouted so that water can’t
get between the tiles and freeze. Similarly, mosaics in showers and fountains and other environments should be sealed so that moisture doesn’t
degrade the adhesive over time.
Indoor mosaics can be ungrouted. Note that even outdoor mosaics can be “ungrouted” if the tile is pressed into thinset mortar that is thick enough
to squeeze up between the tile and fill most of the gap. That is how ancient Greek and Roman mosaics were made. Return to Top
Weldbond. It’s water based, has no fumes, dries clear and water resistant, bonds to most any surface, is non-toxic and cleans up
easily. However, we prefer to use thinset bonding mortar for floors.
Return to Top
It is probably best to avoid adhesives altogether and use thinset bonding mortar (a sticky concrete) instead. Liquid Nails Adhesive would probably be best
for outdoors, if you have to use an adhesive. It’s thick and tarry and bonds to anything, but it is solvent based and the fumes are an issue.
We use Weldbond adhesive for mosaics for indoor mosaics where water or rain isn’t an issue because there aren’t any fumes and clean up is much easier.
We have used Weldbond successfully on several outdoor projects, but these pieces were grouted and sealed very well, and they were vertical surfaces that
didn’t have water standing on them. Liquid Nails Adhesive might have been a better choice, but thinset mortar is recommended instead of any adhesive.
Return to Top
Thinset bonding mortar should be used for outdoor mosaics and mosaics where water is an issue, such as shower floors, pools and fountains.
Mastic is used to attach ceramic tile to bathroom walls. For indoor artistic mosaics, we use Weldbond, which is a white PVA adhesive.
Using Mastic on outdoor mosaics can lead to disastrous results.
Return to Top
You should read and follow the instructions on the package for mixing, handling
and disposal. In brief, thinset is like grout and other concrete
products. This means that the best place to mix them up is outside, and
you should wear a dust mask if you have trouble mixing it up without creating a
lot of dust. (Some artists merely stand upwind and mist it with a spray
bottle until they get it mixed up.) Breathing silica (such as dust on a windy day) can have long term health effects on the lungs.
I usually mix up about 1 or 2 pounds at a time and smear it on the wall with a small trowel or putty knife. I spread it out to about
1/8″ to 1/4″ thick and press my mixed materials directly into the concrete. I wear rubber examination
gloves and keep a damp rag so I can wipe away any excess that squeezes up to the face of the tiles.
If you keep the concrete in the bucket covered so that it doesn’t dry out, then it should stay workable
for several hours. I made the mosaic columns at the gallery using thinset mortar in this way.
I always keep a small bucket with a little water and rag to clean my hands from time to time and a
dry rag in my lap.
We have very detailed instructions for using thinset here. Return to Top
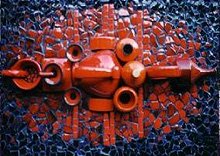
When using found objects, the best method is to adapt how much thinset you spread as you go along, for each piece or a small set of pieces. Be careful about using too much thinset, as it will squeeze to the surface of the objects and make a mess. As you are working, you will probably develop a rhythm in relation to the different pieces and their sizes relative to the amount of thinset you need. Also, when grouting, instead of trying to rub in then wipe off the grout, the typical method for flat tile, fill in the voids selectively with a grouting bag.
Return to Top
I can only find thinset mortar in 50-pound bags. How can I use such a large bag without making a dusty mess?
Buy a 5-gallon bucket with lid at the same store where you buy the thinset. Put the whole bag inside the bucket, bag and all.
(Do not dump it in because that would create a lot of dust.) Slit the top of the bag open and scoop out thinset as you need it.
You can use a plastic cup or scoop or soup ladel or whatever you have. The point is that you don’t try to pour the thinset. Keep
the lid on the bucket so that humidity from the air doesn’t clump the thinset over time, and you can use the same bag for small
projects for years. Return to Top
Glue your mosaic tiles to fiberglass mesh at your work table. (Make sure your
table is covered with construction plastic or parchment paper, such as used in
baking, so that you don’t glue everything to the table. Most people cut the mesh in smaller sections, usually 12 inch x 12
inch, because it is difficult to handle sheets of mosaic larger than 1 sq
foot. Most people use Weldbond (sparingly) to attach tiles to mesh. When
the mesh is dry in about 24 to 48 hours, you are ready to mount this assembly to
the wall. This is done by spreading thinset or mastic or Weldbond on the wall
itself and pressing the mesh onto the wall. After this cures, in about 48
hours, you can grout the mosaic in place.
Return to Top
You need to always clean up excess glue before you grout. I also use the following technique when using Weldbond indoors or outdoors. After the glue has dried for a day or two, I come back and mist the mosaic with water. After about 10 minutes, any traces of glue that are sticking up on the sides of the tile will start to turn white. I then take a razor knife like a box cutter or exacto knife and trim away the excess glue. This
cleaning step ensures that there will be no glue sticking up and not covered by grout.
Return to Top
Weldbond is the adhesive commonly used to attach tiles to the mesh. The problem is that some novice users get adhesive on the sides of the tile. This means that the grout can’t properly cover the adhesive, and water/moisture can wick over time to the back of the tile. However, if the gluing and grouting are done correctly, and the mosaic is sealed with grout or concrete sealer, the mosaic can last for a long time. I use Weldbond sparingly so that there is some surface of the tile that can bond directly to the cement, thus making a more durable bond. I use thinset (sticky concrete) to attach the mosaic to the wall. I also use the same thinset for grouting. Some people avoid the whole issue of water penetrating to the glue by using paper for the reverse method and not using mesh. In the reverse method, the mosaic is laid out face down on sticky paper like clear contact paper, or mosaic mounting film. When finished, the sheet is pressed into thinset, and after the thinset hardens, the contact paper is peeled off. People also use brown mosaic paper instead of contact paper. The mosaic it attached to the paper using dilute glue like Elmers, and after the mosaic is attached to the wall, the paper is misted with water and peeled off. I hope this helps! Return to Top
We mosaic on cement bases, so we use thinset (sticky concrete) for attaching tiles. For fiberglass bases, most artists recommend an epoxy or a construction adhesive like Liquid Nails Outdoor Formula. You should test your adhesive on the fiberglass substrate by gluing the tile in an inconspicuous place on the sculpture. Keep in mind that you are testing not only how well the adhesive bonds but also how easy it is to work with and if it has bad fumes, etc. Note that some artist have reported using Weldbond, but I am not sure about that because Weldbond doesn’t bond to most plastics. As always, you should test adhesives by gluing on a tile and seeing how
difficult it is to pry the tile off. Also, scuffing the surface with a coarse-grit sandpaper helps ensure a stronger bond. Return to Top
If a thin residue of glue sticks up above the grout, water can wick down the glue over time and cause the tile to pop off. Even if water isn’t an issue, it can still interfer with the grouting process and make the grout look messy. Return to Top
Mist the mosaic very well with water. Within a few minutes to ten minutes, any thin residue of PVA glue will start to turn white. You can use a box cutter or knife to scrape off the residue. Return to Top
We use 0.25 pounds of water per 1 pound of thinset. It’s a good idea to check the instructions and labeling on whatever material you buy before using it. Return to Top
Indoors, these materials can be used with no problems. Outdoor use
requires some thought and preparation, and I would definitely avoid wood
outdoors if possible. I would seal the back and edges with water
seal or an oil-based paint. Fine mosaic work takes an investment in time
and materials. It only makes sense to mosaic on a backing that is
resistant to moisture and decay. Thus the best material to use for an outdoor mosaic is foam-core tile backer board from a local building material store. It is cheap, easy to cut, and resists the elements. Wood and even plywood make great backings for DRY INDOOR mosaics such as
mirror frames and wall plaques. For these indoor projects, we recommend using cabinet grade plywood. Return to Top
Only if you don’t care whether or not it lasts. Outdoor mosaics should be on concrete or concrete backer board. Concrete backer board can be purchased cheaply at local building material stores and can be used as the mosaic surface in metal patio tables. This is the best way to make an outdoor mosaic table.
This article, Materials and Methods for Outdoor Mosaic Tables, can give you an overview.
Return to Top
People have done so, but if the mosaic is an interesting design, you’ll probably want to take the formica off and use a base that is sure to last.
The engineer in me hates the idea of wasting time and material on something that might not last. Also, I’m not sure what adhesive you would use to
bond to formica because the top of formica is made to resist things sticking to it. Return to Top
The brick is fine, unless it is old and slightly crumbling, and then you might need to buff off the loose material. I always scrub exterior walls
with a rotary wire brush and plaster the surface smooth and level with thinset a few days before tiling. Return to Top
Foam-core tile backer boards are best because they are relatively lightweight compared to concrete backer board. Brands include Schluter Kerdi-board, USG Durock, Laticrete Hydroban, Johns Manville GoBoard, and Wedi board. I suspect USG Durock will be the most affordable in most places. You can use concrete backer board, but make sure that you don’t overload the table or make it too heavy or unstable. Whatever you use, it is best if the rim of the table covers the edge of the mosaic or at least the backer.
This article, Materials and Methods for Outdoor Mosaic Tables, can give you an overview.Return to Top
I’ve mosaiced on raw wood and wood with stain, but not on top of wood sealer. I think raw wood is best because that probably allows the best bonding of glue and grout. If you’re concerned about the possibility of the furniture warping over the years due to humidity, you can coat it with Weldbond. This seals the wood from moisture, but still provides a surface that is good for bonding. Some people mix in a little water with the Weldbond so that they can paint it on with a paintbrush. A few coats should ensure that the wood is sealed. Once that is dry, you can begin the mosaic. Another thing that you can due to help your piece last for generations is to seal the grout when you are done with a non-gloss grout sealer. I always use non-gloss because that doesn’t change the color or appearance of the mosaic the way that gloss sealers can. Return to Top
We don’t recommend plastic for backers. Even a sloppy half-hearted
mosaic takes some work. Once you are done, you will be glad you spent a
little bit of time to find a backer that will last.
Return to Top
Concrete backer board from your local building material store. It’s cheap and can be cut and broken by scoring with a box cutter.
Either glue the material on the backer board and mount the board to the studs in the wall or mount the board and glue mosaic material
to the board. In the latter case, you might want to glue the tiles to fiberglass mesh and then glue the whole piece of mesh to the backer.
In either case, you grout the tiles in place on the wall. Return to Top
Mosaic tile and grout are heavy. Don’t create a safety problem by using glass as a base. Simply replace the glass with a piece of wood.
People report that translucent Lexan can be used if you need a translucent base. Return to Top
Consider using foam-core tile backer board as an alternative to concrete backer board if weight is an issue.
Regardless of the backer used, you need to frame and protect the edges. One solution is to have a local welder fabricate some frames from 3/4″ angle iron to fit around the edges of the mosaic. The frames can have mounting holes made from washers welded to the outside of the frame. The frame should be spray painted with multiple coat of outdoor paint in a matte color, preferably umber or something neutral depending on the color of the wall where they will be mounted. The mosaic is attached to the wall inside the frame with thinset or an outdoor construction adhesive such as Liquid Nails Outdoor formula. Return to Top
As long as the colors look right, you can mix any materials, except that you need to make sure they are close to being the same thickness.
You don’t have to wory about thickness if you are pressing them into wet concrete of course. On the other hand, a difference in thickness might add interest to a fine art mosaic not used as a surface.Return to Top
The two materials usually have different thickness. If you are pushing the tiles into concrete or mortar, then it doesn’t matter. If you are gluing to a surface, the difference in heights will be visible. This makes grouting a little more difficult, but it hasn’t stopped me from doing it on many of my pieces at the gallery.
Return to Top
If you’re pushing them into wet concrete as you would for a stepping stone, then no problem. If you are gluing them to a surface and then grouting, make sure you use something thick and tarry like Liquid Nails brand adhesive. Also make sure that you use thicker tile around the marbles so they don’t stick out so far. Otherwise there is a danger that the marbles may pop off when you grout. I always wear grouting gloves and grout with my fingers. This allows me to remove all excess grout without bumping the marbles too much.
Return to Top
Actually, there is a good way to use the millefiori, china and other objects of different thickness.
To use these materials, the best way is to use thinset bonding mortar (a type of sticky concrete)
instead of glue. It’s available at building material stores. I usually mix up about 1 or 2 pounds
at a time and smear it on the wall with a small trowel or putty knife. I spread it out to about
1/8″ to 1/4″ thick and press my mixed materials directly into the concrete. I wear rubber gloves and keep a damp rag so I can wipe away any excess that squeezes up to the face of the tiles.
If you keep the concrete in the bucket covered so that it doesn’t dry out, then it should stay workable
for several hours. I made the mosaic columns at the gallery using thinset mortar in this way.
I always keep a small bucket with a little water and rag to clean my hands from time to time and a
dry rag in my lap.
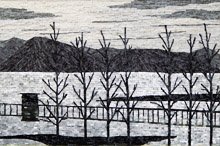
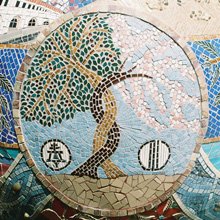
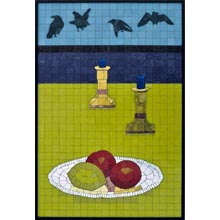
That way the thin pieces can have more concrete underneath, like in the “Plum
Tree Mosaic.”Return to Top
Yes and No. You want the surface to be even for safety and durability reasons, and the easiest way to do that is to do that is to use tile of the same
thickness. You can use tile of different thickness if you build up the rest of the area with concrete or mortar. Keep in mind that thinset mortar contracts
slightly as it cures, and so you would need to build up the area in advance of tiling. Return to Top
The vitreous glass is highly recommended for cost, ease of cutting and the range of colors available. The 3/4″ is much more cost effective than the 3/8″ minis. The 3/4″ tile can be cut into quarters and yield four 3/8″ pieces. The method of attaching and even the choice of tile depends on how large the mosaic is going to be. That is determined in large part by the design or picture you want to create. Specifically, it depends on what is the smallest detail you want to depict in the mosaic. You shouldn’t try to depict any detail smaller than what you can render with a few tiles. This is the starting point.
Select preliminary design.
Look at smallest details in the design and decide if you can render that in a few tiles. Note: Vitreous tile is embossed with ridges on the back
that make it difficult to use if you if you try to cut it up too small. I recommend experimenting with real tile to figure this out. It saves a lot
of frustration.
Determine how large the design would have to be based on the results of #2.
See if the room can accommodate a mosaic that large or that small. Does it look right aesthetically at that size and work with the
other design elements?
Determine method of installation. If the mosaic is large, then create it on mesh. If the mosaic is resonably small or medium size, create
on a backer and mount the finished mosaic on the wall by drilling into the studs.
The correct way to order tile is to make a small exploratory order to see what different colors look like
NEXT TO EACH OTHER before you order full quantities for the project itself. (Never start the project with
partial quantities due to the potential for batch variations.)
It is nearly impossible to order five or six colors for a particular project and have all of the colors be
correct, although some novices assume that they can. There are several reasons for this, and it is NOT just
a question of computer graphics cards or the limitations of digital photography. Any fine-art painter will
tell you that it is impossible to tell what a color will look like until it is applied to the canvas next to
the other colors. Biopsychologists and human-factor engineers will tell you much the same thing.
It really helps to have a small library of different colors and materials before you start. We carry sample boards, and can put together sample sets for you.
This means it actually helps to have a few “wrong” colors lying aroung your studio. What is “wrong” for one
mosaic, will be perfect for a later project. I’ve noticed time and again that I wouldn’t have been aware of this perfect
color if I didn’t have it already lying around. Thank heaven for “wrong” tile.
Return to Top
We don’t offer sample boards because tile colors vary by manufacturer batch.
For a variety of economic and technical reasons, tile colors aren’t tightly controlled
like the colors of paint and other products.
Architectural suppliers pretend this problem doesn’t exist because they
can afford to send a sample if needed before each order because the orders are
typically for 50 sq ft or more.
We do offer 10-item samples for the cost of
postage. This way, we can provide samples from our current manufacturer batches
on an as-needed basis without giving the false impression that colors
are fixed consistently the way paint is. Return to Top
When starting any new mosaic project, try out different colors to see which work best. It helps to have odds and ends of different colors in small amounts as a “library” for exploring different colors. This is why it helps to have samples of extra colors lying around. If you don’t already have extra tile colors around, then ordering samples is a good idea, especially if your mosaic will be large. If you continue to do mosaics, it won’t be long before you have your own color library. I rarely complete a mosaic using all the tiles I originally ordered for it. I usually end up realizing that one of the sample colors I have lying around works better than what I had intended to use, and then I have to place a second or third order.
I recommend making a small pilot order of small amounts of many different colors before making firm decisions about a larger order for the actual project. If some goes unused, it’s not a problem because these scraps serve as “seeds” for future ideas.
If you are just beginning, you can order a starter kit and request that we ship specific colors you choose. To do so, paste the names of 12 colors of Kaleidoscope in the Special Instructions during checkout.
Return to Top
When choosing colors for a mosaic design, instead of trying to match the colors of a painting or picture, I take the colors I have available and lay them in various combinations on a sketch of the design. A color can look completely different based on what colors are around it. Even if computer images were completely accurate, you would still need to play with the tiles before you knew for sure which colors were right. The bottom line is that you should have a small amount of many different colors laying around to experiment with before you commit to any design. That’s why we sell sheets of 25 tiles. In general, I recommend that customers make a small “exploratory order” before ordering the full quantities for the project. If a person has never made a mosaic before, I also recommend that they make a small mosaic plaque on a piece of plywood before they do the larger project to work out materials and methods first. People regularly report that the “delay” of doing the small project often saves them days of labor or disastrous mistakes on the large project. Return to Top
As you’ve noticed, the color palette is limited. The only product that is good for matching colors exactly is smalti, such as we carry, and is also offered at www.dimosaico.com
and www.smalti.com.
On the other hand, I always think of mosaic as an exercise in working in a limited color pallet,
and that is what makes the old mosaics so fascinating. I see more and more modern mosaics
that are more or less reproductions of paintings or made to look like paintings in terms of color
pallet. To me this art seems a little hollow in the sense that it has more technical resource than
imagination. (I’m sure other people would disagree.) Return to Top
Labeled sheets can actually be problematic. The sheet can completely be completely consumed while in the heat of an art project or lost while soaking the tile to remove paper. Here’s what we recommend: take the invoice and tape one tile on each color on the side of the invoice. The tiles only have to be in order. You don’t have to squeeze them beside each name.
This has several advantages:
Your record isn’t nearly as like to be destroyed in the studio.
You not only have the name of the tile, you also have the date it was ordered. (This is important because colors vary over time, so
you might need to know how long ago you ordered before assuming the color is the same.)
You have the price you paid for the color, which is important for cost comparisons or bidding on commissions.
Brightly colored ceramic tiles could be bought at any building material store in the 1970s and even into the 1980s, but I think they are as
rare as dodo birds now. People just don’t tile bathrooms in bright colors any more, so the factories stopped making them.
Return to Top
The wheeled glass cutter is better. It works like a tile nipper only it has wheel-shaped blades that allow it to cut glass cleaner instead
of crushing it. Return to Top
I can cut vitreous in equal halves and quarters fairly consistently with the mosaic glass cutter,
although the glassier reds, oranges and yellows can be slightly more difficult. I notice that
I am more likely to get a crecent-shaped cut if I allow the tile to rotate, and I expect some
people might have less finger strength or flinch at the moment of cutting, so they might
not get the same results for that reason alone. However, the most important piece of advice
I can give is to cut with the tile upside down so that you can see the scoring on the bottom
as you cut and make sure you aren’t positioning one blade on top of a ridge, which will almost
always cause the tile to rotate in the blades at the moment of cutting.
Return to Top
Look at any book on classical or Renaissance mosaics. They don’t use curved pieces. The artists make curved shapes by putting small pieces
together. Return to Top
Glass tile can be difficult to cut in a predictable shape due to the scoring on the backsides of the tiles. That is why you should cut the
tiles upside down so that you can see how the embossed ridges might be affecting your cut.
(Wear safety glasses as always.)
Here’s the more important information:
The pieces shouldn’t be perfect squares or triangle. The irregularity ensures a grout gap even when the tiles are pressed close together. More importantly,
non-uniform squares will make the mosaic much more interesting visually than uniform squares. (Look at traditional mosaics
if you doubt this.) Perfect squares make a mosaic look like it was made from a kit. A little
irregularity makes a mosaic look more like hand-made art.
Tiles should never be “shaped” or custom cut. Instead, cut up about 4 or 5 tiles, and then select
the piece that is closest in shape to what you need. You will find that you work faster that way with
much less stress. Return to Top
Choosing the best piece out of 5 to 10 random pieces is much easier than trimming a single piece down to size, especially if the material being used is brittle or breaks unpredictably. Also, some tile such as vitreous glass has embossed patterns or ridges on the bottom of the tile to help the tile bond more securely to the cement, and these ridges can interfer with the blade of the cutter. When cutting these tiles, then hold them upside down as you cut so that you can see how the cutting blade is resting between or across the ridges. It also helps if you hold the tile firmly during cutting to prevent it from rotating.
Return to Top
Cutting up all the pieces takes too long. How can I work faster?
One common mistake is to cut or trim each piece as you use it. This is slow and tedious in itself, and it also requires that you constantly pick up and put down the cutting tool. While some trimming is unavoidable, it is much easier to select what you need from handful of pieces that were already cut up “randomly” than it is to custom trim each piece. The only potential problem with cutting up tile randomly before you start arranging them is that you could end up with a lot of shapes and sizes that aren’t useable. Here is the procedure we use to minize unusable pieces:
Estimate the size and shape of the piece you need.
Cut up 3 or 4 (or 10) pieces in that size and shape range.
Use the piece that fits best or cut up 3 or 4 new candidates.
Keep the rejects in a tray and try to use these pieces in other places in the mosaic later.
Pay attention to the sizes and shapes of the rejects in your tray that you don’t seem to use as often.
Traditionally, mosaic stone is cut with a hammer and hardie (small anvil), but many people use a tile nipper. Here’s the method I use: Since the stone doesn’t break that cleanly, and the cuts often mar the finish of the stone, I design my mosaic so that as few pieces as possible have to be cut. Most pieces in the design are full squares, and the few pieces I have to cut are cut with a tile nipper or small hammer and small chisel. This means you should probably buy small pieces (such as 3/8″ as opposed to 9/16″) to make your design. Return to Top
Some porcelain dinnerware can be extremely hard. The Compound Nippers for Hard
Tile take less force than the regular tile nippers, and so they may give you more control in your cuts. However, no compression tool can make
continuous long cuts like a pair of scissors cutting paper. Even with the compound nippers, you will still be snipping off chunks one at a time and
be at risk of breaking any pattern that might be on the dinnerware. Most pique assiette work features a pattern such as a flower or face that was
carefully cut out, but notice that these select pieces are almost always surrounded by pieces of the same pattern that are broken more randomly.
That should give you a clue about how the dinnerware was cut up: The artist cut up several identical plates before she got the pattern she needed for
the centerpiece, and she used all her “scrap” for the surrounding tiles. The point is that you shouldn’t count on getting the piece you need from just
one plate. Every time you snip, there is a chance that the plate will break in the wrong place and go right through the pattern.
However, if you see a pique-assiette mosaic where the dinnerware patterns are more uniformly cut, you can assume one or more of the following:
The person used a wet saw (powersaw used by installers of ceramic tile).
The person discarded a large amount of scrap.
The dinnerware used just happened to break more predictably than most. (Ceramic materials vary considerably.
Some types will be more friendly than others.)
Here are some general principles I have observed:
Plates of normal thickness of about 1/8″ or more are much more easy to cut and use than thin eggshell china.
Thin eggshell china is difficult to grout. The curvature of the pieces often means sharp edges will be sticking up.
Cutting out distinct parts of a pattern such as a flower is difficult and takes practice and usually generates scrap.
Allow yourself several practice plates, so when you approach those with the pattern that is most important to you, you’ll be ready.
You can if you don’t mind wasting a lot of your material and producing lots of dust and useless tiny sharp pieces. Sometimes a hammer is
useful for breaking up large ceramic tile or unpatterned dinnerware, but never glass tile or stained glass. You just waste too much material
that way. If you do use a hammer on dinnerware, wrap it in an old towel to minimize and contain small shards.
Return to Top
The 3/4″ vitreous usually can be trimmed to halves, thirds and quarters with no problem. If you attempt to cut it smaller than that, then
the embossed ridges on the back sides can interfer with the cuts you are trying to make or the ability of your pieces to lay flat once cut.
Return to Top
I use the regular clear contact paper from the grocery store. It can be problematic as well. Most people use the mosaic mounting paper we sell with diluted Weldbond. Here’s how I work indirect: I draw my pattern on piece of butcher paper. I lay a piece of clear contact paper on the pattern with the sticky side up. I lay my tiles face down on the sticky contact paper. Keep in mind that this method reverses the image from left to right. The easiest way to compensate for this is to draw the pattern on the butcher paper as you would like it to look, then turn the butcher paper over and trace the pattern from the other side, then use this side as your pattern for laying up the tile. Whatever mounting paper you use, I highly recommend making a small
“experiment” mosaic first to make sure you know how to handle and apply the mosaic. A square foot of mosaic attached to
clear contact paper can be heavy and unwieldy. Sometimes tile will fall off while you are about to press the mosaic into the
cement. Make sure you have done a quick and dirty mosaic on a scrap piece of board before you invest a lot
of time in laying up the real mosaic because it’s awful to suddenly realize you don’t have the confidence to mount what you’ve
spent so much time laying up. Return to Top
To make a simple mosaic, you sketch an outline or “cartoon” on the
surface. Then you lay tile on the drawing until you are comfortable with
the colors, the size of the tile, how it will look, etc. Then you start gluing
the tiles on one by one. The problem is that this takes forever and is
tedious because your fingers become sticky with glue and you disturb other tiles
as you work.
The solution is simple: Lay the tile out without gluing them
down. Keep going until the design is complete. Then carefully press
a piece of clear contact paper down on the tiles. (It might be useful to
have an extra pair of hands help you do this, and make sure you start in the
middle and work outward to avoid wrinkles, which can be disastrous.) Spend
as much time as needed pressing the contact paper down, rubbing carefully to
ensure that each tile is Then CAREFULLY slide the mosaic onto a temporary board
or table top just to store it for the time being. Now you can apply
thinset or adhesive to your surface and press the mosaic into the thinset or
adhesive. After the cement is fully cured in 24 to 48 hours, you can peel
off the contact paper and grout the mosaic.
An alternative method that may be easier for some people: You can lay
clear contact paper upside down on your outline and stick the tiles face-down
onto the contact paper. Note that this requires that the tiles be attached
to the paper upside down. This means that you are creating your design in
left-right reverse because the paper/tiles will be flipped over when installed.
Return to Top
Small tile isn’t mounted on mesh. Instead, use mounting paper or clear contact paper instead to temporarily mount the tile FACE down. Paper mounted sheets
are pressed into thinset mortar or adhesive, and the adhesive is allowed to harden. Then the paper is removed by misting with water and peeled off.
Return to Top
The normal procedure is to place clear plastic kitchen wrap or construction plastic over your pattern (usually an outline drawn on paper) and then lay
the fiberglass mesh on top of that. Remember to tack or tape the corners down to keep the mesh from moving as you work. Tile is glued to the mesh with a
white PVA adhesive such as Weldbond. Take care not to get glue on the sides of the tile, which could allow moisture to wick underneath the grout over time.
Leave some of the back of the tile uncovered by glue so that thinset mortar can bond directly to the glass.
Tip: Sometimes it helps to trace the outline of the pattern onto the mesh with a black Sharpie marker before you begin gluing tile down and things
get messy. Return to Top
Only porous materials such as unpolished stone and unglazed porcelain need to be sealed to prevent staining. Things like smooth glass shouldn’t stain. I use TileLab brand “Grout & Tile Sealer” for a normal seal. I use TileLab brand “Stone Enhancer & Sealer” if I want to slightly enhance/darken the stone colors (recommended). Both of these are available at hardware stores. I apply grout sealer with a small artists paint brush. I am careful to minimize the amount of sealer that drips to the sides where the grout should go. Make sure you don’t put on so much that you get it down in the cracks. You only want to seal the face. I do this before I grout. I also seal the grout after it cures for two or three days. Return to Top
I only seal stone and unglazed ceramics before I grout. I don’t worry about glass because it isn’t porous the way stone is, and it can’t be stained by the grout. Stone and Grout Sealer is available at local building material stores. I use non-gloss sealer because it doesn’t change the color or shine of the mosaic.
Return to Top
The 48″ patio tables are very common. You should have a welder put some supports of angle iron underneath, and the concrete board is glued to that. The table probably needs to be reinforced anyway, and you should make sure that you aren’t making the table too heavy for the legs or top-heavy or unstable.
Return to Top
Grout and glue are not needed. Most mosaic stepping stones are made by pouring concrete into a mold and pressing in mosaic tiles while the concrete is still wet. We have an in-depth stepping stone tutorial that shows how to make one using concrete. You can get ordinary concrete mix from a local building material store. Make sure you pick out most of the larger rocks before you mix it.
You can use a plastic dishpan as a mold or cut off a plastic 5-gallon bucket. Make sure you rub vaseline into it so the stone will come out later. Pour the concrete about 2 1/2 to 3 inches thick. Don’t buy the stepping stone kits that come with ready-made designs. They are boring and unoriginal. You can make beautiful stones just by collecting your own marbles, beach glass, shells, etc.
An alternative way of making a stepping stone is to buy a stepping stone from a lawn and garden store and attach tiles to it using
thinset. Keep in mind that you might need to scuff the stepping stone with a wire brush to remove any
invisible sealers that might keep the thinset from bonding securely. Return to Top
There are two different approaches for handling the edges of mosaics:
1. “Roman Fragment” In museums, small fragments of Roman mosaics are often displayed on small stands
with the edges left unfinished. When I make small mosaic plaques, I will often
use a flat piece of fieldstone from a lawn and garden center because I like the
non-square shapes. For square shapes, I laminate 1/4″ concrete board to 1/4″ plywood. I mosaic to the edge but make sure that no tile extends beyond the edge.
Once I have grouted the mosaic and let it cure, I will go back with medium grit sandpaper and clean
up the edge. Then I seal the back and edges with acrylic paint. This technique should only be used
on small mosaics because tiles can easily be knocked loose from the unprotected edges.
2. “Picture Frame” For larger mosaics, I build a frame from 1.5″ wide oak, but you can use a cheaper
and softer variety of wood. Usually I make the frame before I create the mosaic by glueing the frame to
the plywood wood backer and then cutting a smaller piece of concrete board to fit inside the frame.
You should find a friend with a miter saw to cut the frame for you because a miter saw can quickly and
accurately cut the ends of the wood strips at a 45 degree angle so that they fit together like the corners
of a picture frame. It is possible to build a frame around a mosaic you have already made, but again it
helps to have a miter saw or a friend with one. This method is recommended because you can drill through
the frame to mount your mosaic into the studs of the wall. Return to Top
Hardwood trims and moldings work very well for making a “picture
frame” type of border on the surfaces of wooden coffee tables. The
molding can be attached with carpenter’s glue. Tip: Stain a sample
piece of the molding to make sure that it can be stained close enough in color
to the color of the coffee table.
Return to Top
African-American memory jars were home-made funeral urns that were covered with personal items
that belonged to the deceased loved one. The objects included buttons, cigarette lighters, keys, pieces
of favorite ceramics, etc. I’ve not done any research to find out what was used
originally to attach the pieces, but I always use thinset in multi-media
mosaics made of these type objects. Tip: You can turn the urn on its side and do a side each night.
Return to Top
Creating a mosaic in one session isn’t that realistic, but it can be done, especially if the class
can finish up what they start on their own.
The class should be all about glueing the tiles down, because that is where the art happens. The mosaics
should then be grouted later outside of class, either by the instructor or by the students who are given
a handout of instructions and mistakes to avoid. You should review those instructions at the end of
the class. The concept is sort of like the you-paint-it ceramic stores where customers come in and
paint there designs on the pot, but the pot is fired later by the store. Trying to glue and grout in
the same class does nothing but produce disasters.
Return to Top
Our vitreous tile is recommended due to price, range of colors and ease of cutting. There is also a way to do this cheaply using local materials. Large bags of concrete can be bought for a few dollars at a local building material store. Stepping stone molds can be improvised: use plastic dish pans, litter boxes and the bottoms of 5-gallon buckets. Grease the molds with Vaseline to ensure easy removal of stepping stones. Sources of tile: broken ceramic tile from local tile show rooms. They will often donate discontinued and damaged tile; broken pieces of old plates from thrift stores and parents garages. Our vitreous tile is the cheapest tile we have. Use this as an opportunity to show the kids how to improvise as true artists: have them bring in marbles, old ceramic figurines, rocks, old souvenirs and other things and make a few stones. It will be a great learning experience for them. If you decide to do indoor mosaics with them, I recommend backers/substrates cut from 1/2″ sanded plywood. You can build a frame around the backer with wooden molding. Alternatively, I have seen people take wooden picture frames and cut a backer to fit the frame. It all comes down to what you have on hand or what you can get cheaply. Return to Top
For wooden tables, there are several edge options, which might or might not be appropriate depending on the size, thickness and finish of the table top:
Use a plunge router to cut out the area where the mosaic should go.
Make a border/frame from wood molding from the building material store.
Make a border from a different type of tile with a rounded edge, such as ceramic tile with a bullnose edge.
Outdoor mosaic table tops are usually supported by metal bases, such as a metal patio table where
the table top is a separate piece which fits into the base, which usually has a metal rim around the
edge to protect the edge. The best option is to find a base which has an appropriate rim. Junk
shops and garage sales are good sources for metal tables. A local welder can also fabricate what you
need. In either case, it is much easier to find or make something appropriate than it is to try to use a metal
table that isn’t quite right simply because you happen to already own it. Wonderful art can often be made from
junk, but sometimes junk is junk. Don’t waste your creative energy trying to make a metal patio table
work when it isn’t quite right. The same applies to wooden coffee tables. Mosaic art takes too much work
to warrant using a base that will quickly fall apart or never quite look right. Return to Top
Legal Disclaimer and Copyright Information
No warranty is implied by these instructions. Use at your own risk.
Please wear goggles when cutting mosaic materials or mixing grout. Mosaic
materials are often sharp. Keep out of reach of children. Do not
overload patio tables with mosaic materials so that the table becomes unstable
(top heavy). You should also make sure that the table frame can support
the overall weight. Copyright 2003-2017 J.E. Moorman. Please link to these
instructions freely, but email us if you would like to reproduce them for
classes, etc.
Return to Top