Glass Penny Rounds 3/4 inch (20mm) are circular glass tiles that are opaque with solid color throughout. They are superior to glass gems because they are more consistent in size, easier to grout, and richer in color. Each 1/2-pound bag contains about 50 whole pieces plus 2 or 3 broken pieces. The thickness is 6mm, compared to 4mm for most glass mosaic.
Glass Penny Rounds 3/4 Inch (20mm)
- Price is per 1/2 pound.
- There are approximately 50+ loose pieces per 1/2 pound plus an occasional broken piece.
- Tile diameter: 3/4 inch (20mm).
- Tile thickness: 6mm.
- Material: glass with UV resistant mineral pigments.
- Coverage: 1/2 pound covers 29+ square inches
- Coverage: 1 square foot can be covered with 2.5 pounds.
- Frost-proof, impervious to liquid.
- Suitable for indoor/outdoor use.
Product Coverage
Each 1/2-pound bag (approximately 50+ pieces) covers 29+ square inches with all pieces touching. With a standard grout spacing of 1/16 inch, you could get 30 to 31 square inches or more of coverage. To cover 1 square foot, you would need 2.5 pounds.
Compatibility
The Glass Penny Rounds are 6mm thick, which is 50% thicker than the 1/8 inch nominal thickness of most glass tile and stained glass. This means the Penny Rounds will stick out slightly from surrounding tile giving your mosaic some texture and dimension. Note that the tops of the Penny Rounds are flat, so they are easier to grout than glass gems which have a dome-shaped surface that tends to get covered by grout at the edges. In other words, Penny Rounds give the surface of your mosaic dimension yet aren’t a pain to grout.
Cutting Tile
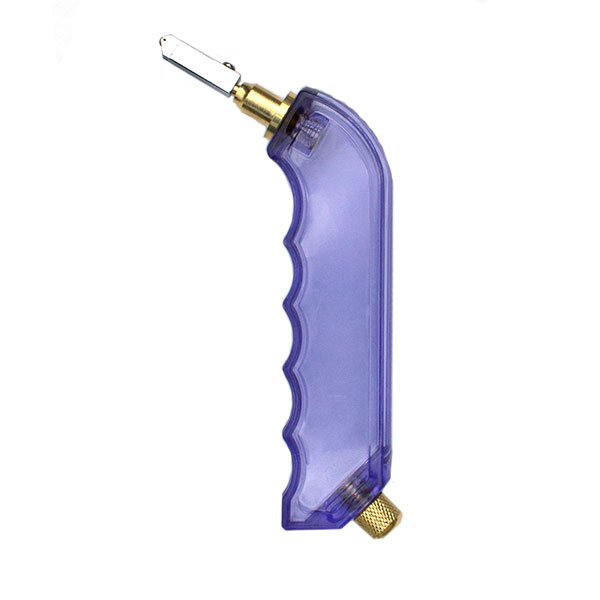
The Glass Penny Rounds are easily cut just like other types of glass mosaic tile. You use a pair of mosaic glass cutters, which is a pliers hand tool with wheel shaped blades, and the piece being cut is compressed between the blades and snapped apart with minimal force.
Use in Mosaic Art
The circular pieces can be nested for area coverage, but Penny Rounds are best used as accents in mosaic art made from various materials and shapes. Note that these are slightly thicker than most varieties of glass tile, but this is a positive feature because it adds texture to the surface of the mosaic.
How To Make Mosaics
For more advice on designing your mosaic project or mounting, cutting, and grouting tile, please see our page of Mosaic Frequently Asked Questions or our Mosaic Information Guide, which lists instructional pages described by topic. We also post new articles about making mosaics at our How to Mosaic Blog.
; [product_table category=”glass-penny-rounds-20mm-large” widths=”auto,auto,12,12,20″] ;