Cutting Oil

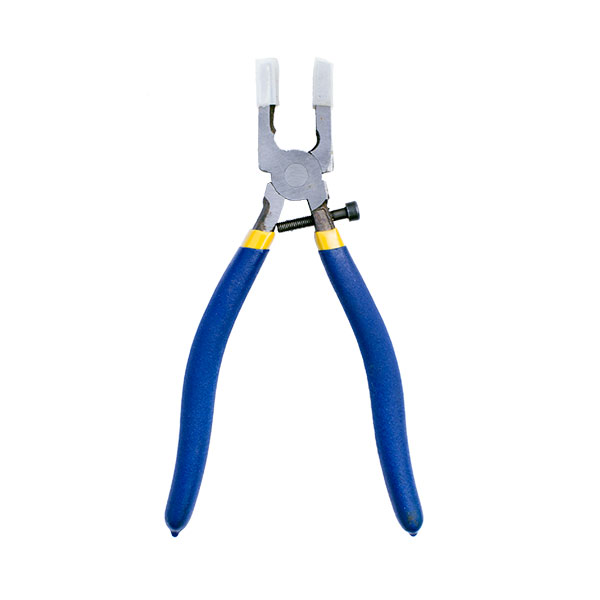
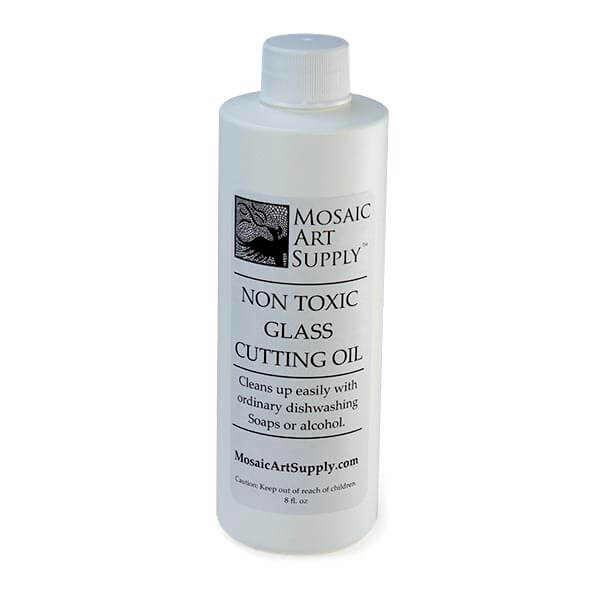
Cutting Oil is a light oil used in Pistol-Grip Cutters to prolong the life of the scoring wheel when cutting stained glass for mosaic art. Keep in mind that any stained glass exposed to cutting oil needs to be washed with detergent to ensure that the glues and mortars used in mosaic work can bond securely. This residue is NOT an issue if you are soldering the glass in lead channel and making traditional stained glass artwork, but it can be fatal for a mosaic.

Cutting Oil Required?

It is possible to use a Pistol Grip Cutter without cutting oil if you use the right amount of pressure. Most people prefer not to do that. The oil allows you to press harder than you need to without generating as many tiny flakes of glass and supposedly helping the cutting wheel last longer. Whether or not YOU use cutting oil when you cut stained glass, you must assume that the glass was cut with oil at some point, and so you should rinse it with detergent so that the glue or mortar can bond to the glass when you use it in a mosaic.

How To Make Mosaics

For more advice on designing your mosaic project or mounting, cutting, and grouting tile, please see our page of Mosaic Frequently Asked Questions or our Mosaic Information Guide, which lists instructional pages described by topic. We also post new articles about making mosaics at our How to Mosaic Blog.
Mosaic Tile Mesh FULL ROLL 150 ft x 38.5 in

mosaic tile mesh 38.5 inch wide x 150 feet

Mosaic Tile Mesh is 38.5 inches wide and 150 feet long in one continuous UNCUT piece. The mesh is made from woven fiberglass and is the same material that factories use for pre-mounting ceramic tile for rapid installation in walls, floors, and backsplashes. Artists use it in much the same way when laying up large designs, but the mesh is not needed for small mosaic art projects or surfaces such as tables where the tile can be glued directly to the surface.

Fiberglass mounting mesh is most useful for backsplashes and murals and floor medallions and other projects that are large or involve surfaces that can’t be monopolized for long periods of time. In these situations, the mosaic design is laid up on a worktable overs an extended period perhaps involving many different studio sessions, and then the finished design is installed in one session for attaching to the surface and a second session for grouting.

Tip: Even if your design is large, you will probably find it easier to cut the mesh up into 1 ft x 1 ft pieces and lay up your mosaic in these smaller sections. Anything larger than 3 ft x 3 ft is just too heavy and unwieldy to mount on a vertical surface.

Product Specifications

  • material: woven fiberglass mesh
  • unit weight: 4.3 oz/square meter (standard weight used for tile mounting)
  • width: 38.5 inches
  • length: 150 ft.

How to Use Mosaic Tile Mesh

Glue

Use a white PVA adhesive such as Weldbond to attach tiles to the mesh.

To avoid gluing your mesh to your work table, you should use a plastic table or cover the tray in plastic. Construction plastic or coroplast from the building store should work. If you have an old politician or real estate agent plastic advertisement sign from the side of the road you can probably use one of those.

Outdoor and Wet Installation

For outdoor and wet mosaics, it is best to avoid mesh and use mounting paper or mounting tape to temporarily face-mount the mosaic so that it can be pressed into thinset mortar without a layer of mesh and glue on the bottom. This is particularly important when your tiles are small. Mesh can be used in wet locations if glue is used sparingly and your tiles are large enough to safely cover the glue.

If you will be installing the mosaic outdoors or in a wet location, avoid completely covering the bottom of the tile with glue and keep the glue toward the center of the tiles. Leave the outer edges bare to bond directly to the thinset mortar used in final installation. Be careful not to get glue up the sides of the tile. If adhesive isn’t covered with grout, then water can wick underneath the grout over time and cause tiles to pop off. You should inspect the sheet of excess glue by misting it before it is installed. Any traces of glue on the sides and faces of the tile will start to turn white after a few minutes of being misted with water. Use a knife to scrape away any glue residues you see coming up the sides of the tile to face of the tile.

Working Size and Sections

Mesh covered with tile can be heavy and unwieldy, especially when mounted to a wall. Don’t try to vertically mount a one-piece mosaic larger than 3 foot x 3 foot. The standard practice is to lay up the mosaic on 1 foot x 1 foot pieces of mesh and match up the different sections when the mosaic is installed. Floor medallions 3 foot x 3 foot are sometimes made on one piece of mesh, but even though these are mounted horizontally, it still requires that the mosaic be carried on a piece of plywood and slid into place.

Tip: One technique for dividing up a large mesh-mounted mosaic is to lay it up on one large piece of mesh and then cut it up using a pair of sharp scissors. This is most useful for mosaic designs made from cut pieces of tile not arranged in a grid. You can cut along the rows of tile instead of cutting it up into exact 1 ft x 1 ft squares, which is usually impractical if your design isn’t a grid.

Final Mounting

To mount mesh sheets of mosaic to your surface, thinset mortar or adhesive should be spread on the surface with 1/4-inch notched trowel. We “butter” the bottom of the sheet with a little bit of the same adhesive in a thin coat before pressing the sheet into place. Make sure you allow the thinset or adhesive to cure for at least 24 hours before attempting to grout because grouting is a physical process that can easily knock tiles loose from uncured mounting.

Compatibility

The mesh is not used with tiles 3/8-inch or smaller because the holes in the mesh and the ridges on the bottoms of most glass tile make it difficult for small tile to sit level. For small tiles, you should use mounting paper to temporarily FACE-mount the tiles upside down. The product description for our mounting paper explains how that is done.

Use in Concrete Sculpture

The fiberglass mesh can also be used with other materials to make concrete sculptures for covering in mosaic.

How To Make Mosaics

For more advice on designing your mosaic project or cutting and grouting tile, please see our Mosaic Frequently Asked Questions page or our How To Mosaic blog or our Mosaic Information Guide.

Mosaic Tile Nipper

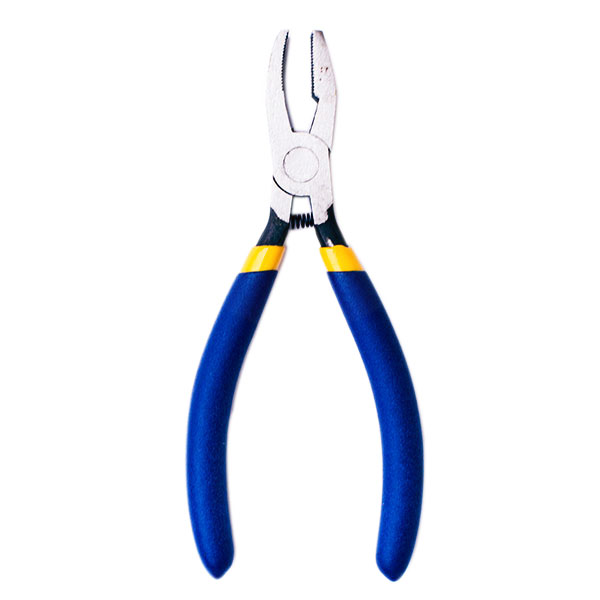
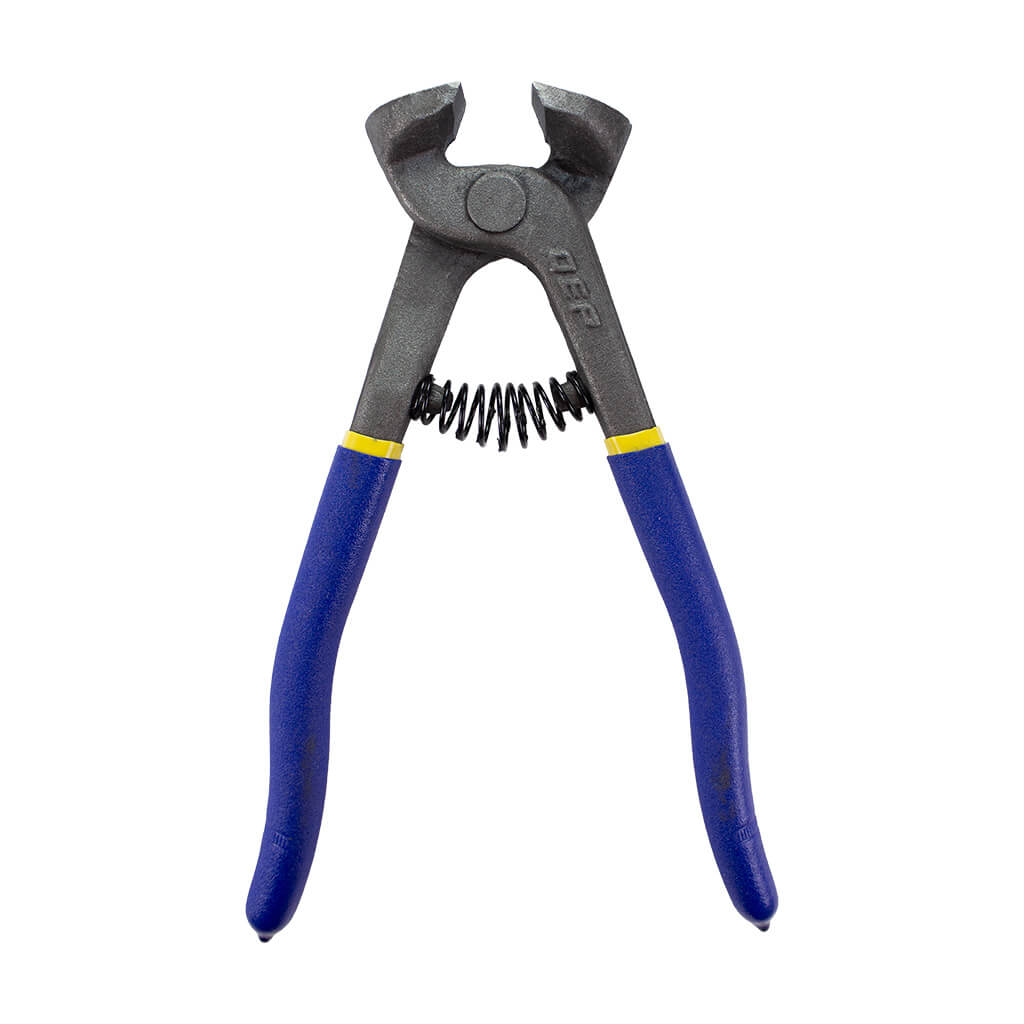
The Mosaic Tile Nipper is our recommended hand tool for cutting glazed ceramic tile up to 3/8-inch thick and can also be used for cutting most varieties of stone, porcelain, and dinnerware. However, the tile nipper should not be used for glass tile because it crushes and splinters more glass than it cuts. For cutting glass mosaic tile, you should use a Mosaic Glass Cutter, which has wheel-shaped blades and cuts more cleanly.

Cutting Unbreakable Dinnerware and Hard Stone?

This tile nipper is fine for cutting most types of stone and dinnerware. However, some varieties of modern dinnerware are extremely hard. In fact, some of the “unbreakable” plates found at thrift stores are made from some of the hardest engineered materials known to science. We generally avoid a plate if it is particularly difficult and move on to the next piece unless it has a pattern we like. Keep in mind that a plate that is extremely hard tends to break into pieces with extremely sharp edges. If you do need to cut extremely hard materials, then use the Compound Tile Nipper, which has a force multiplier built into its mechanism.

Safety and Cutting Tile

  • Always wear safety glasses with side shields when using tile nippers.
  • Make sure that you don’t cut glass around people not wearing safety glasses. Flying chips could potentially hit their eyes as easily as yours.
  • Be aware that cutting tile of any type can produce sharp edges.
  • Crumbs from cutting can be extremely sharp. Never sweep off a work surface with your bare hand. Use a vacuum or counter brush.

Efficient Cutting

It is much easier to cut up four or five pieces of tile and choose the one that fits best than it is to try to trim one piece to a certain shape or size. It is quicker too. Keep your rejects in a small pile and pay attention to the shapes that are in it. If you don’t use a certain size or shape as often, try to cut fewer pieces like that. This is much more effective than trimming a piece down to what you need, and it is a lot less tedious.

Replacement Springs

We now carry replacement springs, but no, your nippers are NOT defective or useless if the spring falls off. The springs tend to fall off all hand tools eventually, even the most expensive brands. They can still be used efficiently without the spring: Keep your pinky fingers inside the handle instead of outside with the rest of your fingers and use your pinky to open the tool. This is basic shop/studio practice for using any type of plier tool, most of which do not come with springs in the first place, at least not back in the day.

How To Make Mosaic Art

For more advice on designing your mosaic project or mounting, cutting, and grouting tile, please see our page of Mosaic Frequently Asked Questions or our Mosaic Information Guide, which lists instructional pages described by topic. We also post new articles about making mosaics at our How to Mosaic Blog.
Mosaic Ornament Base

Mosaic Ornament Base

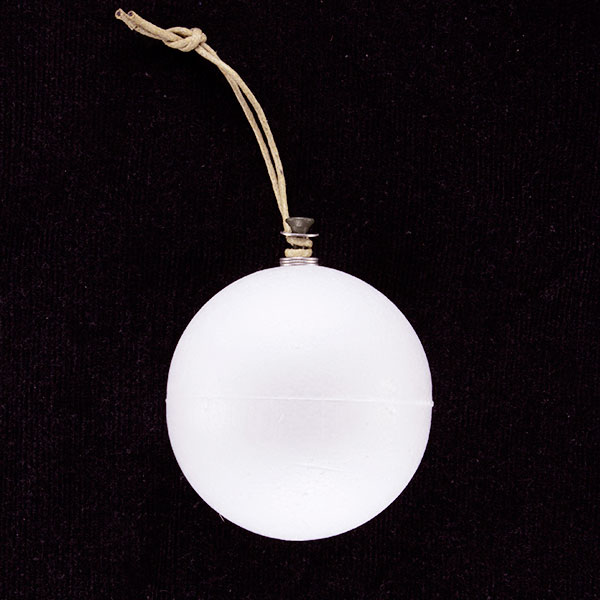
Mosaic base for a holiday ornament is made of the hard variety of expanded polystyrene that is used for fishing floats. The ornament base is spherical 3 inches in diameter, which makes it the size and shape of traditional Christmas tree ornament. The base comes with generic mounting hardware installed (designed to be repairable) and a 2mm beading cord loop which can be replaced with ribbon if desired. Note that the ornament hangs at an angle so that it resembles the earth tilted on its axis (hint). The ornament base hangs at a slight angle because the loop wraps the shaft of a 3-inch decking screw instead of a shallow eye screw like so many ornaments doomed to fail in a way difficult to repair. Our 3-inch screw’s corrosion-resistant coating also allows glue to bond to it better than bare steel, so the same white PVA adhesive Weldbond used to attach the tiles could be used to reinsert the mounting screw if it ever pulled out.

Product Specifications

  • 1x hard expanded polystyrene sphere 3-inch
  • 1x 3-inch deck screw #9 with corrosion resistant-coating
  • 4x stainless steel washers #8
  • approximately 4 inch loop of 2mm beading cord

Instructions For Using the Mosaic Ornament Base

There are three important tips for making a mosaic on the polystyrene sphere:

  • Make sure you paint the sphere with adhesive and allow it to dry a few hours before you attempt to glue tile to it. The sphere by itself is so smooth, than any tile stuck to it tends to slide downhill. A layer of dried glue is much more tacky and will help prevent tiles from sliding. You can use your fingertip to paint on the glue.
  • Lay your ornament on an old folded up towel as you work on it to keep it from rolling over. A coffee mug can also be used. Work on the part of the sphere facing up, allow the area to partially dry and then rotate the sphere slightly to work on adjacent areas.
  • Put the mosaic ornament near a central heat vent or AC vent to speed drying, but not too close to fireplaces and wood stoves and places that get too hot.

Here is a step-by-step procedure for putting a mosaic on the ornament:

  1. Hang the mosaic over some old newspapers or place where glue can drip.
  2. Use your fingertips or a small brush to paint the sphere with a white PVA such as Weldbond adhesive.
  3. Allow the glue to dry for at least several hours. Hang the ornament near AC vents and central heat vents to speed the drying.
  4. Place the sphere on its side on an old folded up towel or on top of a coffee mug to work on it.
  5. Glue mosaic tile to the part of the sphere facing up, taking care not to work to far down the sloping sides because the tile will slide.
  6. Allow the glue to partially dry and then rotate the sphere slightly to one side so that an adjacent bare patch is now facing up.
  7. Continue tiling and rotating the sphere as needed until it is covered. Take care not to rotate the sphere prematurely and cause tile to shift while the glue is still soft. Take advantage of vents and warm locations to speed the process.
  8. Allow the fully tiled mosaic ornament to dry overnight or longer if needed before grouting. If the glue isn’t fully dry, then wet grout could cause tiles to pop off.
  9. Grout the mosaic with gloved hands over a plastic basin such as an old dish pan.
  10. Haze the grout the next day by burnishing with a cloth until all tile is free of grout residue.
  11. Do not over tighten the mounting screw. Hand tighten only.
  12. If the screw becomes loose or pulls out, squirt a white PVA adhesive such as Weldbond into the hole and reinsert.

Which Tile Works Best For The Ornament?

Our stone is too thick and heavy. Glass tile works best, preferably stained glass, Elementile, and the 3/8-inch mini tiles. The 3/4 inch tile can be used as well, but it would need to be cut to fit to the curvature of the 3-inch sphere. Keep in mind that if you use cut tile, especially stained glass, then take the time to smooth any sharp edges before gluing on the tile. You can use a marble file or a rubbing stone such as we sell, or you can use a piece of stone as I did for years and just rub the edge on that.

How Much Tile Do I Need For A Mosaic Ornament?

The surface area of the sphere is about 0.2 square feet. That means you should be able to tile an ornament with one of our 6×6 sheets of stained glass, which are approximately 0.25 square feet. However, you will have to be careful and not generate too much waste as cutting scrap (slivers). We recommend keeping the grout gap small (1/16 inch or less). The following numbers are based on a grout gap of 1/16 inch, but you might need slightly more of the 3/4-inch tile because that will need to be cut up:

  • 8mm tiles: 255
  • 12mm tiles: 106
  • 3/8 inch tiles: 155
  • 3/4 inch tiles: 46

How To Make Mosaic Art

For more advice on designing your mosaic project or mounting, cutting, and grouting tile, please see our page of Mosaic Frequently Asked Questions or our Mosaic Information Guide, which lists instructional pages described by topic. We also post new articles about making mosaics at our How to Mosaic Blog.
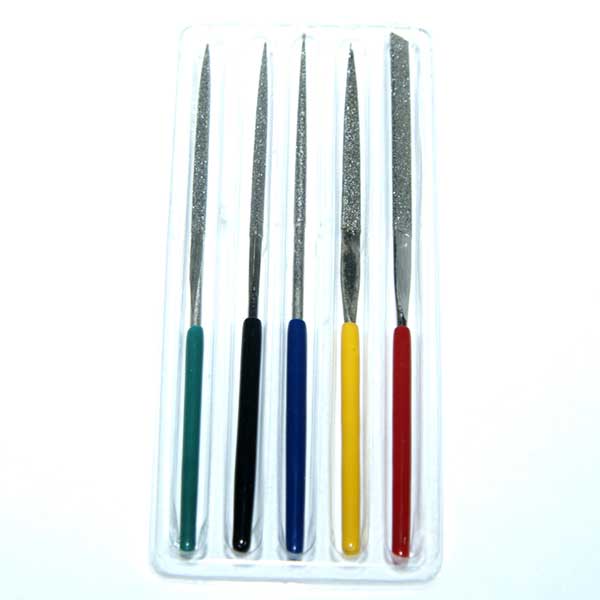
Mini Diamond Files 5-Piece Set

Mini Diamond Files 5-Piece Set

The Mini Diamond Files 5-Piece Set contains different blade styles for shaping hard materials and creating detail notches in mosaic tile. The files are approximately 4 inches in length with vinyl handles. The material is diamond-impregnated steel. These are useful for shaping small tesserae for fine detail work in ordinary mosaic and micromosaic.

Mini Diamond Files 5-Piece Set

  • steel files impregnated with diamond dust
  • 5 different shapes
  • vinyl handles
  • approximately 4 inches in length

Do You Need This Tool?

These are not needed for most mosaic work, but they are recommended for micromosaic artwork for tiny pieces of glass needing precise shaping. For most mosaic artwork, you can cut and shape what you need with the standard tools such as the Mosaic Glass Cutter and the fine side of a Marble File.

Safety

An ordinary Dust Mask rated N95 is recommended for studio processes that create dust (filing, sanding, drilling, machining, mixing concrete products, etc.). Dust masks are important, but they don’t protect your clothing or your studio from dust, which is still a problem once you remove the mask. You can minimize exposure to dust in two ways: Use a HEPA-rated shop vacuum to clean your clothing and work surfaces before you remove your dust mask. You can also control dust at the source by misting with water from a spray bottle. Misting with water causes steel tools to rust more rapidly than normal, but that can be justified in terms of health but also the labor savings of not having to vacuum studios packed full of materials. Note that misting can’t be done around electric power tools for obvious reasons (Think jiggowatts.)

How To Make Mosaics

For more advice on designing your mosaic project or mounting, cutting, and grouting tile, please see our page of Mosaic Frequently Asked Questions or our Mosaic Information Guide, which lists instructional pages described by topic. We also post new articles about making mosaics at our How to Mosaic Blog.
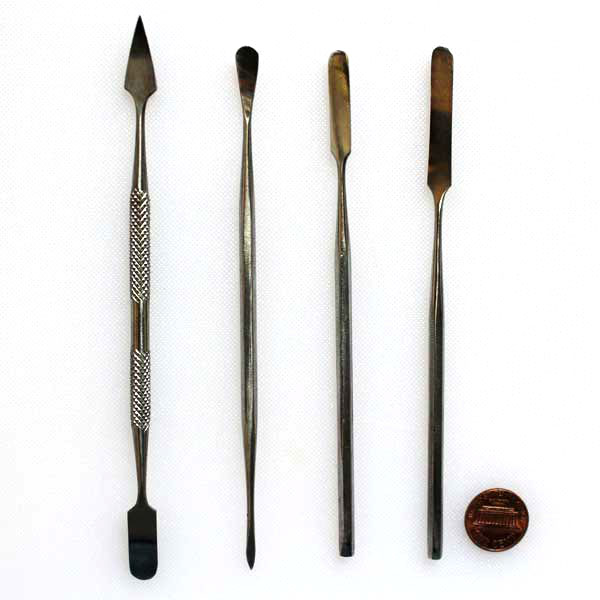
Mini SPATULA Set

mosaic-tile-tools-spatkt-bi

The Mini Spatula Set is 4 steel tools used for positioning mosaic tile and for detailed work with glue, thinset mortar, and grout. The set includes 4 different shaped heads. We use them in a similar manner to how palette knives are used in painting: scooping, transferring and manipulating viscous materials on a flat surface, only the medium is glue or mortar instead of paint. Also, small metal tools like the spatulas are more useful than fingertips when it comes to making slight adjustments to tile positions. Fingers tend to get contaminated with drying glue and stick to tiles or bump other tiles unexpectedly, but a thin metal spatula is more precise and less frustrating and more easily cleaned by wiping.

When To Use This Tool

The spatulas are not a required tool for most people because you can use your tweezers in a similar way, but it is always better to have more than one small metal positioning tool available by your side. Glues and thinset are sticky, and your hand tools are continually getting contaminated as you work. Sometimes you can’t stop to wipe them off. Sometimes you have to just grab the one that is clean and fix whatever is going wrong like a surgeon tying off a bleeding artery. This is especially true when you are working with porous stone or unglazed ceramics or artifacts that can be stained. You have to grab something immediately and scoop up the spill or straighten out the mess before the glue or thinset soaks in. Note that small metal tools such as the spatulas are better than rags for this purpose because the rag is much more likely to smear the mortar into the porous surface. Instead of doing that, we recommend scraping or scooping the spill off with a metal tool such as a spatula and follow up with a wipe with the corner of a wet rag.

How to Reduce Frustration

Small metal tools such as spatulas, dental picks and tweezers reduce the frustration of positioning small tiles and enable you to attempt more detailed designs than you would consider if using only your fingertips.

How To Make Mosaics

For more advice on designing your mosaic project or mounting, cutting, and grouting tile, please see our page of Mosaic Frequently Asked Questions or our Mosaic Information Guide, which lists instructional pages described by topic. We also post new articles about making mosaics at our How to Mosaic Blog.
Mosaic Coaster Base Circular Round

circular coaster base hardwood

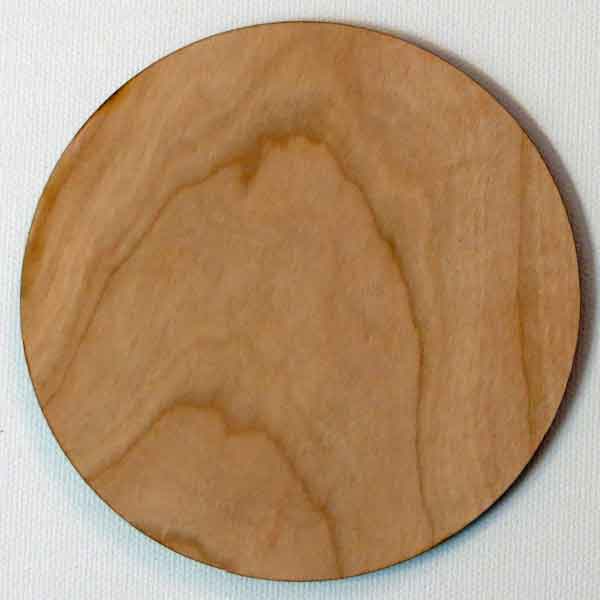
Circular Mosaic Coaster Base is made from cherry hardwood right here in the USA. The circular base is 4 inches in diameter and 3/16 inches thick. They are cut out with a laser, so the sides have a natural burnt wood color that could be lacquered. Note that the wood is not recessed to form a border for your mosaic. Instead, your mosaic should extend to the edge of the coaster so that the finished coaster looks like a fragment of an ancient mosaic. This is easiest to do when you use tile without a heavy embossed pattern on the underside, and for this reason, we recommend the 12mm Elementile Recycled Glass Mosaic Tile for use with the coasters.

Weldbond adhesive or another high quality PVA glue is recommended for attaching tiles to the coaster base, and there are several options for grouting your mosaic coaster. You can press the tiles closely together instead of leaving a gap, but that requires much more time and effort than leaving an irregular gap and then grouting the mosaic. With an irregular grout gap of 1/16 inch or less, you can use almost every piece of tile you cut because it does not have to be exact. You can also use regular sanded grout to grout it.

Mosaic Art Projects Using Coaster Bases

Product Specifications

  • 1 piece hardwood cherry circular coaster base.
  • wood pattern is natural and varies by piece.
  • diameter: 4 inches.
  • thickness: 3/16 inches.
  • laser cut edges (natural burnt wood finish).
  • unvarnished, unlacquered.
  • made in America
  • Removable paper tape protects the best face of the coaster.
  • The reverse side of the coaster may have occasional singes from the cutting laser, but these are superficial and can be covered by mosaic.

Compatibility

Any type of glass mosaic tile could be used with these, but there is no border on the coaster, so your mosaic will go all the way to the edge. If you use a type of glass tile that has coarse embossing or bevels on the underside, then these might look odd at the edge of the mosaic. It is also more difficult to cut a tile into small pieces if the bottom has an embossed pattern. For these reasons, the coasters are best covered with stained glass or the 8mm and 12mm sizes of recycled glass mosaic tile by Elementile. We prefer Elementile to stained glass because stained glass tends to form sharper edges when cut. Whatever tile you decide to use, make sure you file off any sharp edges at the sides of the mosaic using a rough stone or marble file.

Instructions For Using The Coaster Bases For Detailed Mosaic Art

The coaster bases can be used any way you want, including simple projects for children with tiles glued randomly with variable grout spacing, and these make great first-time projects because they are small and do not require as much time and material. However, it is possible to create a more sophisticated mosaic design on the coaster using these instructions. Due to the limited space provided by the coaster, one of the most important steps is making sure you can cut tile small enough to render the smallest detail of your design and modifying your design if necessary:

  1. Find a design or picture. Google Images is a great source of photos, images, patterns, models to draw from.
  2. Draw a simple cartoon outline of your design.
  3. Try cutting up some tile and arranging it on the cartoon to see how it looks.
  4. Pay special attention to the smallest detail in your design.
  5. If it is not possible to cut tile that small, or the pieces seem too tedious to work with, then simplify your design.
  6. Note that when you start using glue, it will be easier to arrange small pieces because they will not move around as unexpectedly. Tweezers also help.
  7. Once you have you have verified that your design is not too detailed to be rendered in tile, then sketch the cartoon on the coaster in pencil.
  8. You can darken your pencil sketch with a Sharpie brand marker so that glue does not rub it off once you start working.
  9. Wipe Weldbond glue over the face of the coaster and allow to dry to seal the wood. Use a very thin coat to avoid warping the coaster from the moisture in the glue! Remember, the reason you are sealing the coaster in the first place is to avoid warping it later when you use lots of glue for the tiles. Use two light coasts and allow to dry thoroughly between coats.
  10. Start tiling your design from the center and working to the edges.
  11. Leaving an irregular grout gap of 1/16 inch or less is much easier than fitting the tile tightly together.
  12. At the edge of the coaster, cut the tile so that it fits flush with the edge. You can place a tile on the coaster, mark where it should be cut with a Sharpie marker before gluing and then make the cut.
  13. Use the fine side of a marble file or a piece of rough stone to rub the edge of the cut tile so that the edge is not as sharp.
  14. After the glue has dried (preferably for 48+ hours) grout your mosaic with sanded grout.
  15. We recommend sealing the edges and bottoms of the coasters to protect from spills and condensation that could split or warp the wood.
  16. Deft Clear Wood finish in a spray can is sold by Home Depot and can be used for this.

How Much Tile Do I Need For The Coaster Base?

The top surface of a 4-inch circular coaster base has only 12.6 square inches (0.09 square feet) in area. This means you could cover it with 45 to 60 of the 12mm Elementile or 90 to 130 of the 8mm Elementile depending on how you cut and space the tile. In either case, one bag of tile would be more than enough to cover the coaster. However, you will want to order more than that to account for the cutting waste, possibly twice as much if you are fitting the tile exactly with no grout gap.

How To Make Mosaic Art

For more advice on designing your mosaic project or mounting, cutting, and grouting tile, please see our page of Mosaic Frequently Asked Questions or our Mosaic Information Guide, which lists instructional pages described by topic. We also post new articles about making mosaics at our How to Mosaic Blog.
Mosaic Coaster Base Square

square mosaic coaster base

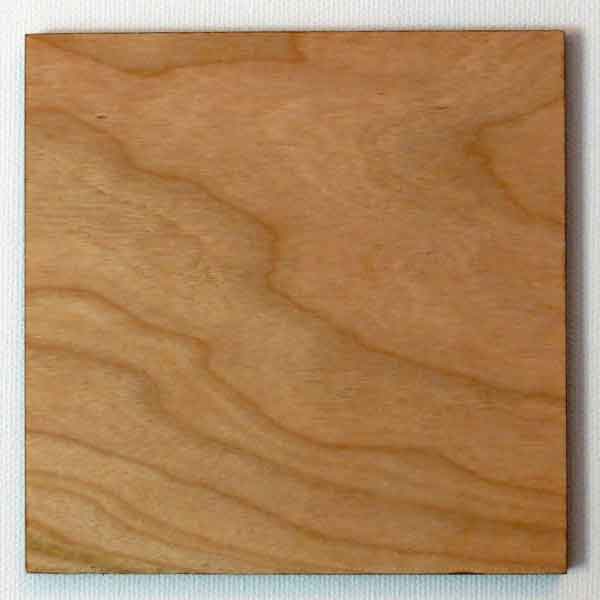
Square Mosaic Coaster Base is made from cherry hardwood right here in the USA. The square base is 4 inches wide and 3/16 inches thick. They are cut out with a laser, so the sides have a natural burnt wood color that could be lacquered. Note that the wood is not recessed to form a border for your mosaic. Instead, your mosaic should extend to the edge of the coaster so that the finished coaster looks like a fragment of an ancient mosaic. This is easiest to do when you use tile without a heavy embossed pattern on the underside, and for this reason, we recommend the 12mm Elementile Recycled Glass Mosaic Tile for use with the coasters.

Weldbond adhesive or another high quality PVA glue is recommended for attaching tiles to the coaster base, and there are several options for grouting your mosaic coaster. You can press the tiles closely together instead of leaving a gap, but that requires much more time and effort than leaving an irregular gap and then grouting the mosaic. With an irregular grout gap of 1/16 inch or less, you can use almost every piece of tile you cut because it does not have to be exact. You can also use regular sanded grout to grout it.

Mosaic Art Projects Using Coaster Bases

Product Specifications

  • 1 piece hardwood cherry square coaster base.
  • wood pattern is natural and varies by piece.
  • width: 4 inches.
  • thickness: 3/16 inches.
  • laser cut edges (natural burnt wood finish).
  • unvarnished, unlacquered.
  • made in America
  • Removable paper tape protects the best face of the coaster.
  • The reverse side of the coaster may have occasional singes from the cutting laser, but these are superficial and can be covered by mosaic.

Compatibility

Any type of glass mosaic tile could be used with these, but there is no border on the coaster, so your mosaic will go all the way to the edge. If you use a type of glass tile that has coarse embossing or bevels on the underside, then these might look odd at the edge of the mosaic. It is also more difficult to cut a tile into small pieces if the bottom has an embossed pattern. For these reasons, the coasters are best covered with stained glass or the 8mm and 12mm sizes of recycled glass mosaic tile by Elementile. We prefer Elementile to stained glass because stained glass tends to form sharper edges when cut. Whatever tile you decide to use, make sure you file off any sharp edges at the sides of the mosaic using a rough stone or marble file.

Instructions For Using The Coaster Bases For Detailed Mosaic Art

The coaster bases can be used any way you want, including simple projects for children with tiles glued randomly with variable grout spacing, and these make great first-time projects because they are small and do not require as much time and material. However, it is possible to create a more sophisticated mosaic design on the coaster using these instructions. Due to the limited space provided by the coaster, one of the most important steps is making sure you can cut tile small enough to render the smallest detail of your design and modifying your design if necessary:

  1. Find a design or picture. Google Images is a great source of photos, images, patterns, models to draw from.
  2. Draw a simple cartoon outline of your design.
  3. Try cutting up some tile and arranging it on the cartoon to see how it looks.
  4. Pay special attention to the smallest detail in your design.
  5. If it is not possible to cut tile that small, or the pieces seem too tedious to work with, then simplify your design.
  6. Note that when you start using glue, it will be easier to arrange small pieces because they will not move around as unexpectedly. Tweezers also help.
  7. Once you have you have verified that your design is not too detailed to be rendered in tile, then sketch the cartoon on the coaster in pencil.
  8. You can darken your pencil sketch with a Sharpie brand marker so that glue does not rub it off once you start working.
  9. Wipe Weldbond glue over the face of the coaster and allow to dry to seal the wood. Use a very thin coat to avoid warping the coaster from the moisture in the glue! Remember, the reason you are sealing the coaster in the first place is to avoid warping it later when you use lots of glue for the tiles. Use two light coasts and allow to dry thoroughly between coats.
  10. Start tiling your design from the center and working to the edges.
  11. Leaving an irregular grout gap of 1/16 inch or less is much easier than fitting the tile tightly together.
  12. At the edge of the coaster, cut the tile so that it fits flush with the edge. You can place a tile on the coaster, mark where it should be cut with a Sharpie marker before gluing and then make the cut.
  13. Use the fine side of a marble file or a piece of rough stone to rub the edge of the cut tile so that the edge is not as sharp.
  14. After the glue has dried (preferably for 48+ hours) grout your mosaic with sanded grout.
  15. We recommend sealing the edges and bottoms of the coasters to protect from spills and condensation that could split or warp the wood.
  16. Deft Clear Wood finish in a spray can is sold by Home Depot and can be used for this.

How Much Tile Do I Need For The Coaster Base?

The top surface of a 4-inch square coaster base has only 16 square inches (0.1 square feet) in area. This means you could cover it with 56 to 72 of the 12mm Elementile or 113 to 162 of the 8mm Elementile depending on how you cut and space the tile. In either case, one bag of tile would be more than enough to cover the coaster. However, you will want to order more than that to account for the cutting waste, possibly twice as much if you are fitting the tile exactly with no grout gap.

How To Make Mosaic Art

For more advice on designing your mosaic project or mounting, cutting, and grouting tile, please see our page of Mosaic Frequently Asked Questions or our Mosaic Information Guide, which lists instructional pages described by topic. We also post new articles about making mosaics at our How to Mosaic Blog.

Mosaic Mounting Tape 6 inches x 108 feet

Mosaic Mounting Tape 6 inches

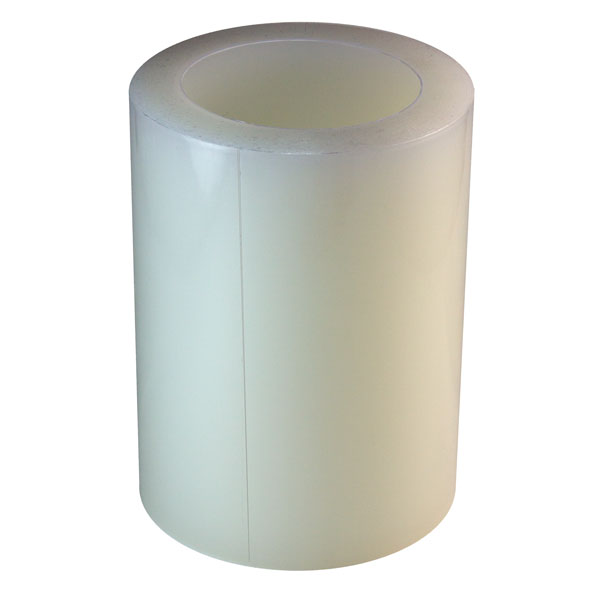
Mosaic Mounting Tape 6 inches x 108 feet is a transparent adhesive film used for face-mounting mosaic tile designs for rapid installation. The adhesive film bonds strongly enough to mosaic tile for the sheets to be handled and transported (including shipping), but it releases cleanly without residue. It is also water resistant. Note that the roll is 6 inches wide, but it can be used for 12-inch sheets merely by using two strips slightly overlapped. The tape is fully transparent so that patterns divided between multiple sheets can be aligned and grout joints matched. The tape comes in a continuous roll 108 feet long.

Mosaic Mounting Tape 6 inches

  • transparent adhesive film in a roll
  • 6 inches x 108 feet
  • water resistant adhesive
  • adhesive releases cleanly from all tile materials tested with no sticky residue.

Product Usage

Unlike fiberglass mesh, Mounting Tape sticks to the front FACES of the tile, which leaves the backs fully exposed for bonding with mortar or adhesives, thus increasing the strength and longevity of outdoor and wet mosaics. Mosaic designs can be laid out in a mosaic mounting grid, and then tape is pressed to the faces of the tiles, and the mosaic is lifted out of the grid for mounting.

If you aren’t using a tile mounting grid and are laying out tiles or pieces of tiles on top of a paper pattern, we recommend tacking clear contact paper sticky-side-up over the pattern. This moderate stickiness keeps the tiles from moving around as you lay them out. When you are finished placing the tiles, you press the tape on top of the mosaic and rub it gently to ensure adequate adhesion. Then you can cut the mosaic into sections (typically 1 ft x 1 ft), but the sections can be irregular in shape if needed, and the cuts can zig zag around tiles.

Another method of using the tape is to not use contact paper and place the tape itself over the pattern with the sticky side up, and then stick the tiles face down onto the tape. This “reverse method” reverses the pattern from left to right when the taped mosaic is taken off the pattern and flipped over, and so most people avoid it and use contact paper as a temporary surface over the pattern as recommended above. A roll of clear contact paper from the grocery store is inexpensive and worth it.

When the sections of the mosaic on tape are pressed into mortar or glue, make sure that the gaps between sheets is the same width as the grout gaps used in the sheets and that the sheets are properly aligned. After the glue or mortar has hardened, the tape is removed by peeling it back and rolling it back.

How To Make Mosaics

For more advice on designing your mosaic project or cutting and grouting tile, please see our Mosaic Frequently Asked Questions page or our How To Mosaic blog or our Mosaic Information Guide.

Mosaic Mounting Tape WIDE 12 inches x 108 feet

Mosaic Mounting Tape WIDE 12 inches
Update as-of August 2024:

If you order the 12″ tape roll you cannot check out with USPS Ground Advantage as your shipping method. USPS has been unreliable, so high-value items cannot be shipped with their cheapest shipping service, Ground Advantage.

Mosaic Mounting Tape 12 inches x 108 feet is a transparent adhesive film used for face-mounting mosaic tile designs for rapid installation. The adhesive film bonds strongly enough to mosaic tile for the sheets to be handled and transported (including shipping), but it releases cleanly without residue. It is also water resistant. The tape is fully transparent so that patterns divided between multiple sheets can be aligned and grout joints matched. The tape comes in a continuous roll 108 feet long.

Mosaic Mounting Tape 12 inches

  • transparent adhesive film in a roll
  • 12 inches x 108 feet
  • water resistant adhesive
  • adhesive releases cleanly from all tile materials tested with no sticky residue.

Product Usage

Unlike fiberglass mesh, Mounting Tape sticks to the front FACES of the tile, which leaves the backs fully exposed for bonding with mortar or adhesives, thus increasing the strength and longevity of outdoor and wet mosaics. Mosaic designs can be laid out in a mosaic mounting grid, and then tape is pressed to the faces of the tiles, and the mosaic is lifted out of the grid for mounting.

If you aren't using a tile mounting grid and are laying out tiles or pieces of tiles on top of a paper pattern, we recommend tacking clear contact paper sticky-side-up over the pattern. This moderate stickiness keeps the tiles from moving around as you lay them out. When you are finished placing the tiles, you press the tape on top of the mosaic and rub it gently to ensure adequate adhesion. Then you can cut the mosaic into sections (typically 1 ft x 1 ft), but the sections can be irregular in shape if needed, and the cuts can zig zag around tiles.

Another method of using the tape is to not use contact paper and place the tape itself over the pattern with the sticky side up, and then stick the tiles face down onto the tape. This "reverse method" reverses the pattern from left to right when the taped mosaic is taken off the pattern and flipped over, and so most people avoid it and use contact paper as a temporary surface over the pattern as recommended above. A roll of clear contact paper from the grocery store is inexpensive and worth it.

When the sections of the mosaic on tape are pressed into mortar or glue, make sure that the gaps between sheets is the same width as the grout gaps used in the sheets and that the sheets are properly aligned. After the glue or mortar has hardened, the tape is removed by peeling it back and rolling it back.

More Information

For more advice on designing your mosaic project or cutting and grouting tile, please see our Mosaic Frequently Asked Questions or our List of How-to-Mosaic Pages, which are described by topic.