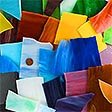
Summaries of some of the most important tools and supplies we offer for working with mosaic tile.
The mosaic supplies you need depend on the type of mosaic tile you are using (glass or ceramic or stone) and how you plan to install them. Five minutes of reading can save you five hours of frustration on your mosaic project.
For a complete listing of tweezers, sponges, gloves, dental picks, spatulas, etc., visit our mosaic tools page.
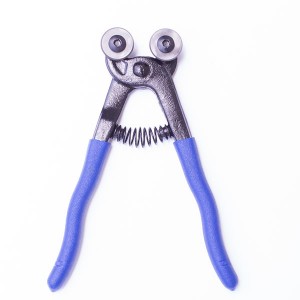
The glass cutter nips off pieces of glass.
Mosaic Glass Cutter
The most important tool for working with glass mosaic tile is the Mosaic Glass Cutter, which is a compression tool like a tile nipper, but the replaceable blades are shaped like wheels.
While a regular tile nipper tends to crush and splinter glass tile, the Mosaic Glass Cutter allows the artist to make cleaner, more precise cuts. (Tile Nippers were made for ceramic materials.) With proper use, the wheel-shaped blades stay sharp and effective for hundreds and hundreds of hours of use.
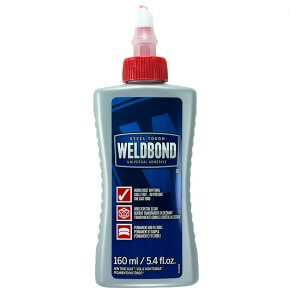
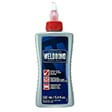
An amazing product. Weldbond is a water-based adhesive that looks and handles just like plain white glue yet cures stronger than many of the smelly solvent-based glues. The manufacturer’s brochure calls Weldbond “the most versatile, non-toxic, non-flammable adhesive on the North American market.” We don’t think this is an exaggeration. Weldbond is probably the most-used adhesive among mosaic artists with no close second. It bonds to hundreds of different materials and is very water-resistant once it dries.
The new 160ml bottle (pictured) is light weight and easy to handle, but we also sell a 420ml bottle and 3 litre jug. We recommend using the jug to refill one of the smaller bottles. Easy clean-up with soap and water.
Note that Weldbond is very water resistant but not water proof. Artists use Weldbond for back-splashes and vertical surfaces where water can drain off, but you shouldn’t use it for shower floors or pools or fountains. For outdoor and wet mosaics, use thinset mortar instead of adhesives.
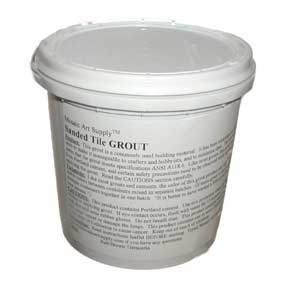
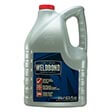
Sanded grout. Just add water.
Grout
Our grout is a traditional portland-cement grout that includes sand. Sand is needed for strength when the gaps between tiles are 1/8″ or greater, but sanded grout can also be used when the gaps are smaller. All of the mosaics at the Riverson gallery were made with sanded grout.
Choosing A Grout Color
Grout can totally change the look of a mosaic, and it is possible to ruin a mosaic with the wrong color grout. To make the individual tiles stand out visually, you have to choose a grout color that CONTRASTS the colors of the tiles. Avoid choices like grey grout with grey tile. In my experience, a grout with some color almost always looks better than white grout.
How Much Grout Do I Need?
The amount needed depends as much on the gaps between the tiles as it does the total area. If your gaps are the standard 1/16 inch, then you will probably use less than 1 lb. of grout per square foot. If you have thick tile with large gaps, you could use over 1.5 lb. Keep in mind that you have to budget extra for all of the wasted grout that falls off the sides of the mosaic.
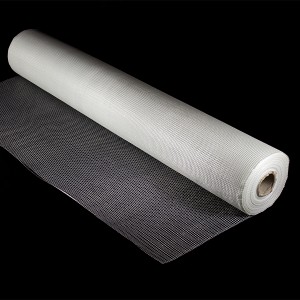
Fiberglass Mesh
Fiberglass mesh can be used for laying down tile in advance for rapid installation.
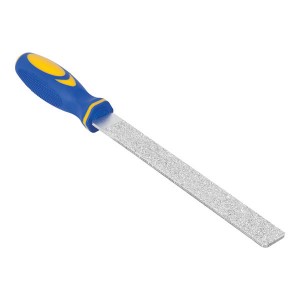
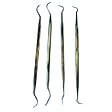
Ceramic and Marble File
Ceramic and marble file for smoothing and shaping sharp edges formed by cutting tile.
Grouting Bags
Grouting Bags are for dispensing grout and thinset neatly for detailed work.
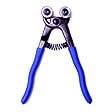
Compound Tile Nipper
Compound Tile Nipper for cutting extremely hard tile, porcelain, and stone.
Mosaics are sometimes laid up on a thin and flexible fiberglass mesh for rapid installation. Tiles are glued to the mesh using a white PVA adhesive such as the Weldbond brand adhesive we sell. Once the mosaic is assembled on the mesh, the mosaic artwork can be pressed into thinset mortar or adhesive and mounted to the surface to be covered.
Our mesh is sold in uncut lengths like fabric in linear feet. The roll is 38 inches wide, so each linear foot actually gives you 3 square feet of mesh.
When Not To Use Mesh
If your mosaic will be in a pool or shower floor, you may want to avoid mesh because it involves glue to attach the tile to the mesh. For these “wet” mosaics, you lay them up face down on mounting paper using a temporary glue such as Elmer’s School Glue in what is called the “reverse method” because you glue the tiles upside down on paper. These finished sheets are pressed into thinset mortar, which is allowed to harden overnight, and the next day the paper is misted and removed. Note that this is different from how fiberglass mesh is used, which goes underneath the tile and is permanent. Most people prefer mesh to paper because the “reverse method” of using paper means that you have to lay out your mosaic upside down.
When You Can Use Mesh
Note that mesh and glue CAN be used on kitchen and bathroom back-splashes and other vertical surfaces where water does not pool. You CAN use mesh for dry indoor floors, walls, etc. You CAN use mesh for mosaic tables and plaques, but why would you? Sometimes it makes sense to draw your pattern on the surface to be mosaiced and simply start gluing tile to it.
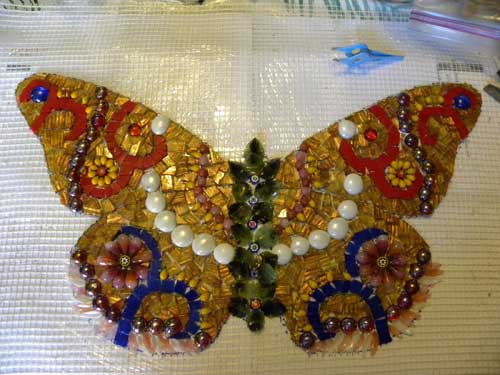
Mosaic Butterfly by Caroline Lahman
Caroline laid this butterfly mosaic up on fiberglass mesh. It is ready to be installed. In this instance, the artist glued the background tile around the butterfly on the same mesh. However, if she wasn’t doing that sort of background she could have trimmed away the surrounding mesh and used the mosaic butterfly as an insert into a space in existing tiling.
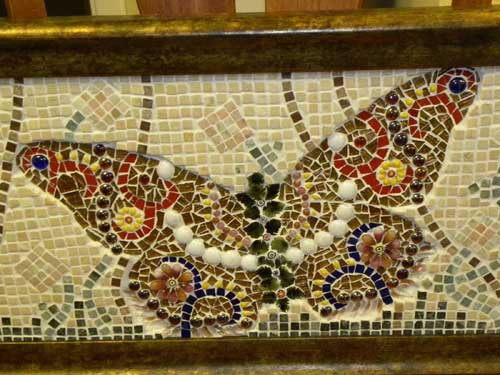
Caroline’s completed butterfly after installation.
Tips for using mosaic tile mesh:
Tape a piece of clear plastic or kitchen wrap over the top of your pattern so that you don’t accidentally glue the mosaic tile mesh to the pattern or work table.
It may be easier to work in small sections, such as 1 ft x 1 ft, than to lay the entire mosaic on one piece of mesh
Some people lay the mosaic on one large sheet of mesh, and then cut this sheet with a box cutter to make it easier to mount to the wall.
Picking the correct adhesive or glue is a very important decision when starting a mosaic, possibly the most important. If you choose the wrong one, your mosaic will not last as long as it should.
The best way to make a decision is to understand the different choices of adhesives and which ones works better with certain surfaces and tesserae. The primary deciding factor will be where the mosaic will live once it is complete: indoors or outdoors.
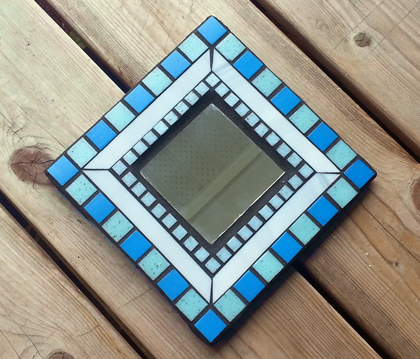
Indoor mosaic glue
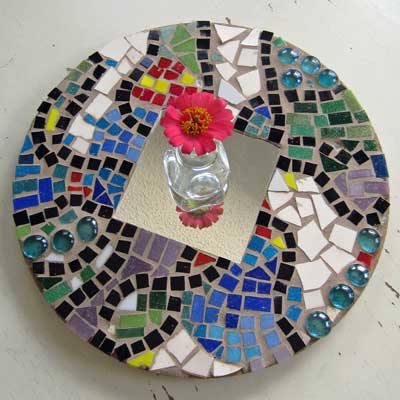
Most mosaics intended for indoor use such as this mirror can be made using Weldbond and sanded grout.
Weldbond Adhesive 160ml (5.4oz) the best mosaic glue made.
Weldbond is the best. It’s a water based PVA glue, has no fumes, dries clear and water resistant, bonds to most any surface, is non-toxic and cleans up easily. We’ve extensively tested it, which you can read about here. However, I prefer to use thinset bonding mortar for floors. It gives a more stable and durable walking surface and better resists water seepage when cleaning the floors.
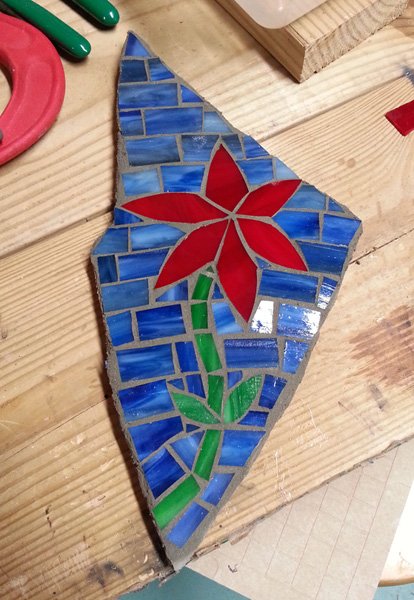
Outdoor mosaic glue
Thinset is the best adhesive for outdoor mosaics such as this garden stone.
In choosing adhesive for outdoor mosaics, it’s probably best to avoid adhesives altogether and use thinset mortar (a sticky concrete with added polymers) instead. To use thinset, you should read and follow the instructions on the package for mixing, handling and disposal. We also have a guide to using thinset. In brief, thinset is like grout and other concrete products. This means that the best place to mix them up is outside, and you should wear a dust mask if have trouble mixing it up without creating a lot of dust. (Our artists merely stand upwind and mist it with a spray bottle until they get it mixed up.)
I usually mix up about 1 or 2 pounds at a time and smear it on the wall with a small trowel or putty knife. I spread it out to about 1/8″ to 1/4″ thick and press my mixed materials directly into the concrete. I wear rubber examination gloves and keep a damp rag so I can wipe away any excess that squeezes up to the face of the tiles. If you keep the concrete in the bucket covered so that it doesn’t dry out, then it should stay workable for several hours. I made the mosaic columns at the gallery using thinset mortar in this way. I always keep a small bucket with a little water and rag to clean my hands from time to time and a dry rag in my lap.
Marbles and round stones can be a challenge. Unless they are being pressed into cement face-up on a horizontal surface like stepping stones, the right adhesive choice is important. You may be able to use a thick cosntruction adhesive for this purpose, though it isn’t recommended to do this for outdoor mosaics. It is probably best to use thinset in these cases.
Understanding Different Types of Mosaic Adhesives
PVA Glues
PVA glues like Welbond are water soluble adhesives that will clean up with water. PVA glues should not be used on any outdoor project. Even if it isn’t exposed to rain, humidity can also loosen the bond. When working in the indirect method, PVA glue can be used to adhere tiles to fiberglass mesh. It also bonds well with any type of tile and wooden or acrylic surfaces. Again, Weldbond is the best and it dries clear.
Thinset Mortar
Thinset is a sticky cement which can be messy to work with, but it is necessary for outdoor projects if you want them to hold up. It can be found at any hardware store, and is often only sold in large quantities. The best surfaces for thinset are porous, such as cement, cement backerboard, and wood and terracotta. To use with non-porous surfaces like glass, the thinset has to be mixed with admixes instead of water, which are either latex or acrylic liquids that make the thinset sticky. Premixed thinset is not as good as dry mix.
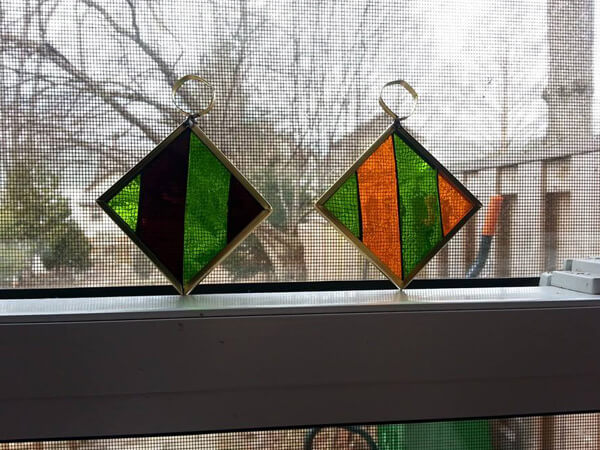
Stained glass was glued with clear silicone to square pieces of clear glass to make these sun catchers.Silicone
Silicone is used most often on glass surfaces because it comes in transparent varieties. It usually comes in a caulking tube and can take some time to get used to. It is difficult to remove and if you apply too much, it will come up between the tiles and make grouting more difficult and incomplete. When used under larger sheets, the areas towards the inside may never cure completely.
Epoxy
Epoxy is used on metal surfaces, but works on wood and glass also. It can hold up outdoors in ideal conditions, but it is very difficult to use and has a noxious odor. Once it is mixed, it must be used quickly. But when it is used successfully and correctly, it is a very strong adhesive and it dries clear.
Other Glues
In speaking with other mosaic artists, you will likely find that everyone has their own preferences for adhesives and that they are used in different ways from artist to artist. Understanding the characteristics of each type of adhesive will help you in finding the best solution for you in your various projects. When working with a new glue, be sure it is what you need for your project. Is it for interior or exterior, is it toxic, and will it work with your surface? Other than Welbond, the most popular brands for mosaics are Liquid Nails, MacGlue, and Gorilla Glue. Once you’ve experimented with several types of adhesives, you will get a feel for what you prefer and what works best.
NOTE
Always clean up excess glue before you grout. After water soluble glue has dried for a day or two, I come back and mist the mosaic with water. After about 10 minutes, any traces of glue that are sticking up on the sides of the tile will start to turn white. I then take a razor knife like a box cutter or exacto knife and trim away the excess glue. This cleaning step ensures that there will be no glue sticking up and not covered by grout.
We receive school, church and camp project questions every week, so we know how to make things easy and help you save money!
Project Ideas for Kids
The 3/8-inch vitreous tile is recommended when cutting is to be avoided, but keep in mind that the 3/4-inch size is cheaper and can easily be cut into quarters that are the same size as the 3/8-inch tile. For more ideas on how to source inexpensive materials, click here.
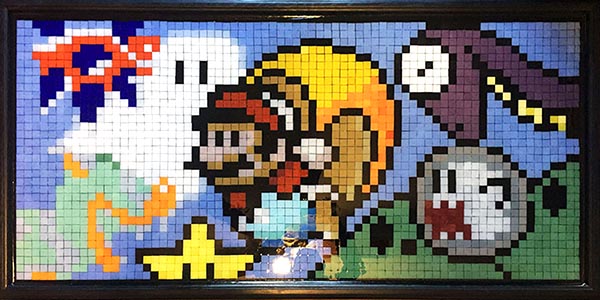
Mario Gamer Mosaic Art second view by Jason Oakley.
Many types of tile can be easily used to create fun and simple to design ‘pixel art’ style mosaics based on your own designs or even video game characters. Students can be instructed how to make their designs on graph paper in colored pencil before laying them out in tile using a grid. We carry grids in most common sizes to make the process painless!
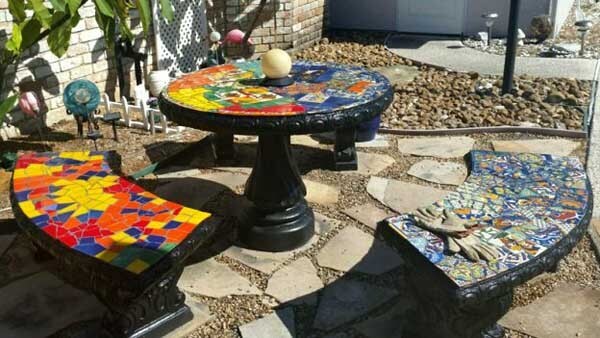
Outdoor Mosaic Patio Table with bench seats by Naomi Haas.
Benches, tables and other outdoor furniture are popular group projects for kids. We have a ton of information on our blog about outdoor mosaic materials an methods. Keep in mind that the materials used for a mosaic which is to survive exposure to the elements aren’t the same as indoor mosaics. Review our guide on outdoor mosaic for details.
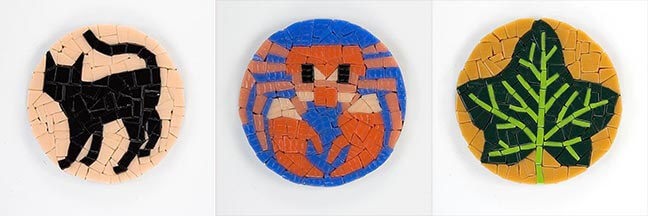
Coaster sized mosaics can be a simple and satisfying mosaic for all ages.
For smaller projects, coaster sized mosaic bases can be used to great effect! The designs can be very simple and freely executed with much satisfaction. In fact, this type of small project can be a fantastic, low stress introduction to mosaic for kids and adults alike.
All children should be given adequate adult supervision. Wear safety glasses with side shields when cutting glass or mixing grout.
While many forms of mosaic involve cutting glass with cutters, nippers or pistol-grip cutters – uncut tiles can be handled safely and used to build a satisfying mosaic without cutting. However, children should be instructed in sound handling practice, as even a molded tile can occasionally have a sharp edge.
Our line of 12mm Morjo tile is easy to handle with safe rounded edges.
It also comes in a full spectrum of colors as well as iridescent varieties.
Note that it is often easiest to grout the children’s mosaics for them outside the class or session for several reasons. First, the glue needs to dry a day or two before you grout. Also grouting is the messy and mildly hazardous part, and the focus of the children’s work should be the creation of their own unique design and gluing the tiles. Many instructors report having some of the older children help with some of the labor of grouting with great success, but all agree that having an entire class play with wet concrete is a bad idea, especially with young children. Always read manufacturer’s safety instructions on grout and glue. Keep in mind that even whole glass tile can be sharp due to occasional chips and breaks that occur with shipping and handling.
How to Save Money on Mosaic Projects
Grout
Grout can be purchased cheaply in large bags at building material stores. Our packages are small convenience packs for individual projects, and they require a shipping charge to get to you.
Mosaic Backers
A popular project for church and camp mosaics is a 6-inch x 6-inch mosaic trivet. The best backer for 6×6 trivets is 1/2-inch cabinet-grade plywood which comes pre-sanded. We sell plywood mosaic backers for small projects, but you can buy a sheet of plywood and skill saw to cut it much more cheaply than you could buy the expensive backers from one of the craft websites! Ask one of the parents or a friend if they could cut up the plywood. Someone probably already has a saw and a truck to pick up the plywood.
Glue
Instead of buying a separate convenience bottle of glue for each child, you should buy a jug of Weldbond glue and pour a little bit for each child in a styrofoam plate. They can use popsicle sticks to apply the glue.
Mosaic project kits may at first seem like an easy solution, but most popular kits we’ve reviewed have poor quality materials (sometimes even plastic tiles!) in quantities that make them much more expensive than ordering individual materials would be. It’s much better to plan the project out and order all the materials at once, avoiding extra shipping charges. Furthermore, kits are usually marketed with eye catching ‘results’ that can leave a young mind disappointed and stifle their self expression. Joe has stated about craft kits in general, “The kits were about producing over-the-top results instead of experiencing a traditional art form in the way it had been experienced for generations. But even that statement does not adequately explain what was wrong. The kits were about PROMISING over-the-top results, but they were pretty weak in the delivery.”
How to Order Supplies as a School, Church, Camp or other Organization
We accept purchase orders! Read our Purchase Order instructions by clicking here.
Questions, Concerns & Project Advice
Still have unanswered questions about your project or how to order? We’re happy to help with any step of the project. Contact us via email by clicking here. We respond to e-mails faster than any other type of inquiry!
Mosaic techniques for outdoor table tops, patio floors, fountains or birdbaths
Outdoor Mosaic Patio Table with bench seats by Naomi Haas.
Indoor vs. Outdoor
Our regular mosaic instructions page is written for indoor mosaics not subject to standing water such as a shower floor. For these indoor mosaics, wood can be used as a backer, and we recommend the “glue-then-grout” method using Weldbond glue, a water-based PVA adhesive with no fumes.
However, outdoor mosaics and wet mosaics like pools and fountains require different backers and cements. First, wood should never be used as a backer for outdoor mosaics, even those kept relatively dry. The reason is that wood swells and contracts due to humidity changes in the air, and tiles will start to fall off eventually, and usually sooner than expected. Instead of wood, use 1/4″ concrete backer board for your outdoor mosaic projects. For attaching the tiles, use thinset mortar instead of adhesive. Thinset and concrete backer board is available at building material stores.
All that being said, if you do want to mosaic something wooden for outdoors, such as a mosaic birdhouse, use thinset mortar to attach the tiles and make sure that every surface of the birdhouse not covered in mosaic is covered in multiple coats of exterior paint. You should seal the mosaic with multiple applications of a tile and grout sealer a few days after the grout cures. Even then, the life expectancy of such a project will be relatively short if exposed to the elements.
Outdoor Backers
Do not use wood as a backer for outdoor mosaics. Use 1/4″ concrete backer board, which is available at building material stores and is cut by scoring with box cutter and snapped along a straight edge. Masonry, concrete and stone are also good outdoor mosaic backers. Masonry can be smoother by plastering with thinset a few days (preferably 2 weeks) before the mosaic is applied. Fieldstone and pre-made concrete stepping stones from the lawn and garden center are good for smaller projects such as mosaic plaques and mosaic stepping stones. All stone, masonry and concrete should be scoured with a wire brush prior to applying thinset in order to remove contaminant and invisible concrete sealers which could interfere with bonding.
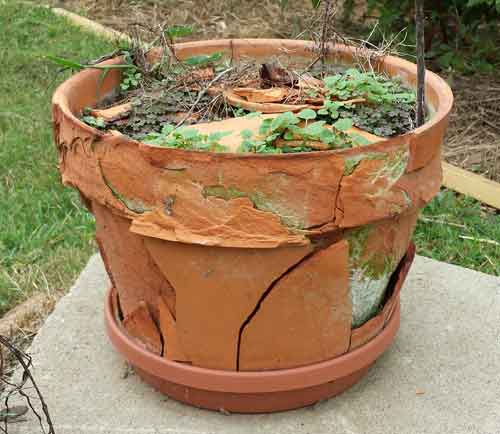
Avoid the use of terracotta bases for outdoor mosaics, as they can be extremely susceptible to freezing damage.
Terracotta flower pots are highly vulnerable to freeze damage because they are soft and porous. The damage could have been minimized by sealing the pot inside and out with a tile and grout sealer.
Use thinset mortar instead of adhesives for outdoor mosaics. Most people find it is easier to mix up small batches of thinset than it is to use a solvent-based adhesive.
We use Versabond brand thinset which comes in a 50-pound bag. Buy a 5-gallon plastic bucket with lid at the same store you buy the thinset and put the bag directly into the bucket without emptying it (which would create an enormous amount of dust). The bucket helps contain dust and keeps humidity from ruining the mortar over time. Slit the top of the bag and use a long-handle spoon or garden shovel or ice scoop to take out what you need. The mixing ratio is 1/4 cup water per pound. Wear a dust mask and scoop and mix the thinset outdoors.
For outdoor projects, we will often use thinset mortar for grouting. We do this for two reasons: the thinset will match any thinset that squeezed up between the tiles, and thinset is harder than grout.
Outdoor Tiles
Glass tile is impervious to moisture penetration and therefore resistant to freeze damage. On the other hand, unglazed ceramic and tumble-finished stone are porous and highly susceptible to freeze damage. We avoid soft ceramics for use outdoors and always seal our finished mosaic with multiple applications of sealer to prevent damage. Even if glass tile is used, the porous grout is still vulnerable, so we always seal with multiple applications.
Outdoor Sealers
Outdoor mosaics should be sealed to protect against staining and freeze damage. There are two types of tile and grout sealers: penetrating pore sealer and coatings that form a membrane on the surface. Penetrating sealers soak into the pores of the grout, stone and ceramic. These pore sealers are usually made of latex or silicone, and they’re invisible. The membrane-forming sealers are coatings that create a hard, glossy finish and may change the color of the grout (usually by making it look darker). Concrete sealers tend to be of this second type.
TileLab SurfaceGard Penetrating Sealer made by Custom Building Products is a high-quality penetrating sealer. It’s water based, easy to apply, cleans up easily, and repels dirt, water, oil and stains. When applying a sealer, let it dry for two hours and then apply a drop of water to a grout line. If the water beads instead of soaking in, the grout is adequately sealed, which can usually be accomplished in two coats. I always put one additional coat to help ensure I plug any random pinholes.
Outdoor mosaic tables are often made by covering metal patio tables with concrete backer board insets which are then covered in mosaic. For any project using concrete backer board that is left exposed, it is important to seal the bottom and edges of the backer board to prevent water from penetrating the porous concrete. NOTE: You never want to seal any surface before mosaic is applied to it because the sealer will interfere with bonding.
Further Reading
We have tons more info on outdoor mosaic on our blog.
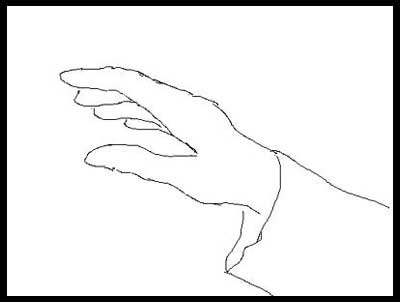
This hand has enough detail to be used as the pattern for a mosaic.
Inexpensive and free mosaic patterns¹ can be found online, in ornamental design books or graphic design books such as the Dover Pictorial Archive Series, and even in children’s coloring books.
Some images in design books can be somewhat complex, depending on the type of book, but it’s also very easy to find images with minimum detail, which will work best for interpreting into a mosaic. Children’s coloring books can make great patterns for mosaics for the following reasons:
The images have just enough detail, but not too much. The drawing needs to be simple because it’s only a map. The details, shading and texture come when you add the tile. Most importantly, it doesn’t make sense to sketch out details that are smaller than your smallest mosaic tile. Refer to the sketch on the right. If you were to make a mosaic of a hand, you probably wouldn’t need or want a sketch any more detailed than that.
Coloring books come in most every theme imaginable: human figures, historical events, animals, vehicles, ships, mythological creatures, famous architecture, etc. Why buy a generic pattern from a stained glass store when you can find more specific images in a coloring book?
Coloring books are cheap and available most anywhere.
You can change the pictures or combine several into one scene.
Customizing a Mosaic Pattern
Visual noise is good! Since you will probably be converting a simple image wtih little detail into a more complex work of art, it’s necessary to add your own elements of depth, dimension and style as you choose tiles for color, texture and shading. It’s all in the details. As you work, remember to “color outside the lines” and don’t worry about fixing every “mistake.” A little “visual noise” can make a work of art much more interesting.
Consider using 2 different colors or shades of the same color instead of only 1 color to create highlights and shading, giving flat shapes some depth.
Use bold outlining. Outlines should be clear and dark but not thick. Big thick outlines make images hard to see.
Incorporate multiple design elements into one work, such as ornamental bordering, or use multiple designs together to create a central theme.
Experiment with tiles or stones with varying texture and unexpected color.
Improvise by modifying the pattern to make it work for you.
¹ Make sure you write and ask for permission if you are using copyright material, especially if the mosaic is for a commission or public space. The suggestions on this page are intended primarily for mosaics for personal use.
Transferring and Enlarging Patterns
Need a larger pattern for your mosaic but can’t draw? No problem. There is a simple technique that is used all the time, even by people who haven’t learned to draw freehand. The solution is to trace a light grid over the original drawing using a pencil and ruler and then quickly and easily copy the contents of the grid onto a similar yet larger grid.
Ex: Let’s say we have a small drawing that is 10″ x10″ and we want to use that drawing as the pattern for a table that is 24″x 24″:
Take a ruler and pencil and trace a grid on your original pattern. For example, draw a line every 1 inch both horizontally and vertically so that the pattern is covered by a grid of 1 inch squares. In this example, that would mean 10 columns by 10 rows.
Take the ruler and pencil and trace a grid with the same number of lines on the table. But the table is larger. How far apart should you make the lines? We divide the width of the table by the number of rows: 24 inches divided by 10 rows = 2.4 inches per row. That means we trace a line every 2.4 inches on the table.
Now we have a pattern covered in 100 squares and a table covered in 100 larger squares. Look at the grid on the pattern and notice that the pattern doesn’t look that complicated when divided up into 100 pieces. In fact, each of the 100 squares probably only contain one simple line.
Simply copy one square at a time. Notice that it is easy and fast to copy each of the squares without “drawing” in a mental sense because you are only making a line or maybe two in each of the squares.
These instructions are for an indoor mosaic not subjected to excess moisture. The mosaic process is similar for outdoor mosaics (such as pools and fountains) but thinset mortar is used outdoors instead of Weldbond adhesive. For wet mosaics such as shower floors, you also need to use thinset. Thinset is a sticky concrete with polymers added for strength, adhesion and water resistance.
More information on outdoor mosaics, specialized topics and advanced mosaic methods can be found on our Outdoor Mosaic Guide.
Our FAQ page also contains additional mosaic instructions, tips on using thinset and answers to many specific mosaic questions. It is constantly being expanded and has solutions for many common mosaic problems. Also, here are some tips on how to avoid disasters while grouting.
For an indoor project not subjected to moisture, it is very simple:
The Mosaic pattern is transferred ready for tiling. This is a dry indoor mosaic, and so the tile can be attached with Weldbond Adhesive. For outdoor and wet mosaics. aconcrete stepping stone or piece of flagstone could be used for a backer and the tiles mounted with thinset mortar.
2. Decide what size mosaic tiles are most appropriate for the level of detail in the design (don’t use 1″ tiles to make details that are 1/2″). Lay a few tiles down just to make sure the colors look right together.
It’s better to take a loose, creative approach to picking colors and textures for your mosaic – a variety of surfaces and color often delights the eye more than even fields of color. Have a look at our Mosaic Artists Gallery for inspiration!
3. Glue the tiles to the surface one at a time. We recommend Weldbond Adhesive. Make sure the gaps between the tiles are about 1/8 inch or less.
We’ve extensively tested Weldbond, and consider it the most practical adhesive for indoor mosaic projects.
For more complicated designs, you can lay the project up on fiberglass mesh (by gluing sparingly with Weldbond adhesive), or you can pick up the tiles with clear contact paper. In either case, the next step would be to spread glue or cement on the surface and press the sheet of mosaic onto the glue or cement.
See the Mosaic Tips below for more help with your mosaic.
Mosaic Tips from Our Resident Mosaic Artist
Start simple.
Make a small mosaic plaque before you mosaic a wall or floor. That way you can work out your materials and methods before the big job.
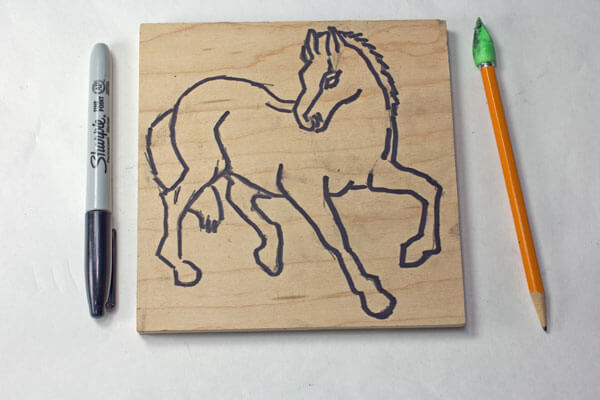
How can you draw a design? Simple drawings like those in a coloring book work best. The color and the details come when you add the tile and glass. I always sketch something on paper and then come home and draw a simple cartoon on my plywood or concrete board using a magic marker. If drawing is a sore spot, you can create mosaic patterns easily without drawing as well.
My first rule of grouts is to choose a contrasting color. If you use white grout with white tile or grey grout with grey tiles, then the tiles don’t stand out from the grout, and most of the detail of your design will be lost. When in doubt, black grout is usually the answer.
My personal second rule of grouts is that DARKER GROUTS ALMOST ALWAYS LOOK BETTER. I have almost always been disappointed when using plain white grout. White grout makes a nice mosaic look like a summer camp project! Try an off-white or light beige if you think you need a light color. Also remember that grouts are much darker while they are wet and get lighter as they cure.
Don’t know anything about glues, grouts or tiling? Your local hardware store or handyman is a mosaic expert even though they’ve never made one. (You might not know anyone who has made a mosaic, but you probably know someone who has tiled a bathroom or kitchen. The technical skills are very similar.)
Always wear safety glasses when cutting tile or glass or mixing grout. (Grout is mildly caustic and has sand and grit in it.) Making a mosaic can be fun but you should always be careful.
Grout mosaics outside. It’s a messy process. Look at books on home improvement for basic techniques of grouting if you’re not sure. Keep grout damp as it cures and do not allow it to dry out rapidly, otherwise it will crumble. Remember, the grout is binding water internally in a chemical process as it cure. It is NOT drying.
Keep mosaic tiles and supplies out of reach of children. Use caution when handling the broken glass and ceramics.
Spend a little more time on your mosaic. Don’t rush and don’t think about what you want to make next. It can make a world of difference in your satisfaction.
Avoid plywood as a backer unless you can seal the edges and bottom. Wood materials absorb water over time and warp, and then grout and tiles pop off. You might not be trying to recreate a timeless Roman mosaic that will endure for centuries, but at least make something that will last 2 or 3 years. Use plywood at least 1/2″ thick inside and concrete or concrete board outside. Always use concrete or concrete board as the base of any mosaic that will be walked on. Concrete board can be purchased from building material stores. A common brand name is Wonderboard. For my indoor mosaics, I laminate 1/4″ Wonderboard to cabinet grade plywood backers.
The best all-around glue for making mosaics is Weldbond. It is a water-based adhesive that looks and handles just like plain white glue, yet it cures stronger than many of the smelly solvent-based glues. The manufacturer’s brochure calls it “the most versatile, non-toxic, non-flammable adhesive on the North American market.” I agree. It bonds to hundreds of different materials and is very water-resistant once it dries. It cleans up easy with soap and water.
If you make a mistake, don’t be afraid to pry some of the tiles off if you don’t like what you see. (Wear goggles or safety glasses with side shields.)
I always wait for a week or two before I grout a piece. That way I have a chance to change things before they are literally set in concrete.
Simple and crude can also be noble. It’s ok if your art has blemishes and mistakes. That’s what makes it interesting and keeps it from looking like it was made on an assembly line. Don’t try to make it a perfect reproduction of anything, and you’ll probably be much happier with the time spent and the results.
Avoid making copies of phony arts-n-crafts stuff. There’s way too much of that around. Make your mosaic YOUR way and it will be genuine art in the highest sense of the word.
Legal Disclaimer and Copyright Information
No warranty is implied by these instructions. Use at your own risk. Please wear goggles when cutting mosaic materials or mixing grout. Mosaic materials are often sharp. Keep out of reach of children. Do not overload patio tables with mosaic materials so that the table becomes unstable (top heavy). You should also make sure that the table frame can support the overall weight. Copyright 2009 J.E. Moorman. Please link to these instructions freely, but email us if you would like to reproduce them for classes, etc.
Smalti is traditional hand-cut mosaic glass that has a different look and feel from molded tile. It is the glass to use for reproducing religious icons, antique mosaic art, or making modern interpretations of classical designs. Is is sold by the 1/4 pound, which is 40+ pieces on average.
Mud Turtle Mosaic™ brand smalti is a next-generation smalti. It looks like ordinary smalti (non-molded hand-cut rectangles), but it can be cut more predictably and cleanly with less waste and fewer shards, which often an issue with smalti. Avoid having to discard a significant percentage of your expensive materials as cutting scrap. This brand cuts more efficiently because of how it is poured and cooled. With Mud Turtle Mosaic™ smalti, extra care is taken to ensure that the mixture is more homogeneous and that little or no cold seams are formed during the pouring of the molten material out on the slab. The result is that are fewer blobs and swirls and fault plains inside the glass. These artificial internal structures are what causes regular smalti to break in such odd ways and form such vicious finger-poking shards. With this brand, there are also fewer surface pits and crevices for grouts and mortars to contaminate.
Product Coverage
One sales unit (1/4-pound) covers a little over 9 square inches uncut with no grout spacing. Depending on how you cut the smalti, you could get about 12 to 14 square inches of coverage per 1/4 pound. A good rule of thumb is 2.5 to 3 pounds per square foot.
Traditionally mosaics made from smalti were not grouted. However, if your mosaic will be outdoors or in a wet location, then you need to leave a gap between the tiles so that if can be filled with grout to seal out moisture. Having a grout gap means that you will need about 10 to 15% less smalti than otherwise.
Piece Count
One sales unit (1/4-pound) USUALLY contains 40+ pieces, with 42 being the average for the material we sampled. However, the smalti is sold by weight, and if the factory cuts a batch with slightly larger pieces, then that batch will have fewer pieces per 1/4 pound.
Compatibility
Smalti is hand cut when it is made at the factory, and so it had a different look and feel from regular molded glass mosaic tile that is pressed into a uniform shape. Smalti is also significantly thicker than most of the glass tile we sell. For these reasons, mosaics look best when they are made from one type material or the other but not both.
Cutting Smalti
Mud Turtle Mosaic™ Smalti cuts extremely well with the mosaic glass cutters that we sell.
Smalti Mosaic Glass
Price is per 1/4 pound, which is USUALLY 40+ pieces.
The factory could potentially cut the pieces slightly larger, which would reduce the piece count per 1/4 pound.
hand-cut non-molded rectangular pieces.
variable dimensions: ~1/4 inch x ~5/8 inch x ~1/4 inch thick.
coverage: about 2.5 to 3 pounds per square foot with coverage being affected by how the smalti is cut by the artist.
Pigments: colorfast metal oxide.
Solid color throughout.
Opaque.
Cut surface is glossy.
Cuts relatively easily with mosaic glass cutters.
Heat, frost and chemical resistant.
Suitable for both commercial and residential installation, indoors and out.
Use in Mosaic Art
This smalti is probably the best you can find is you need to render small details in smalti because it can be cut smaller with less waste than other brands. It also has little or no surface pitting, so you can grout a mosaic made from this material without having specks of grout remaining all over the face of the mosaic in pits. The product is highly recommended.
How To Make Mosaic Art
For more advice on designing your mosaic project or mounting, cutting, and grouting tile, please see our page of Mosaic Frequently Asked Questions or our Mosaic Information Guide, which lists instructional pages described by topic. We also post new articles about making mosaics at our How to Mosaic Blog.
There is nothing unique about mosaic grouts. The grouts and sealers used for mosaic artwork are the same ones used for ordinary bathroom tiling, and the techniques of applying the grout are the same. If you are ever uncertain and need information in a pinch, you can ask questions at your local building material store or look at their book on how to tile or bathroom repair, which they usually keep on the same aisle where they sell grout and supplies or in the plumbing department or near the registers. The point is that grouting isn’t rocket science and most handymen and women have done it before.
How much grout you need depends on three things: the area of the mosaic = L x W, the thickness of the tiles and the gaps between the tiles. If the tiles are well-spaced (all gaps under 1/4″), then you should be able to cover the entire mosaic of 18″ x 18″ with 2 lbs of grout. This is assuming your tiles are under 3/8″ thick. I always set my mosaic on an old shower curtain or piece of plastic to catch all the wet grout that falls off the side as I’m spreading it. That way I can scoop it up all the dropped grout and re-use it. Otherwise you need a lot more grout because most of it is wasted when it falls on the dirty floor.
If the gaps between your mosaic tiles are greater than 1/8 inch, then you may need grout with sand in it, such as we sell. The sand reinforces the grout to prevent cracking if the gaps are greater than 1/8 inch. Note that standard grout gaps are usually about 1/16 inch.
How to grout a mosaic
Step 1: Preparation
Grout outdoors if at all possible to minimize dust contamination and clean up of wet grout. Wherever you work, set up a clean area to work in and make sure you have all the tools you will need. Usually you need a bucket of water, some kind of tray to mix the grout in, a mixing stick, a sponge, rubber gloves, a dust mask, and some paper towel or old rags. You can use latex gloves in a pinch if your mosaic is made from smooth tiles, but rubber gloves are recommended when you’re grouting any kind of tile that has sharp edges. Those edges will rip through latex gloves as you spread the grout around.
The mosaic needs to be fully dried before you begin. Wait at least 24 hours after gluing down the last tile before you grout your mosaic if you used Weldbond.
Set up a clean workspace for grouting.
Step 2: Mix the Grout
Wear a dust mask when you do this step. Estimate how much grout you need for the mosaic and pour it into the tray. In this example we used the cut-off bottom of an old plastic jug. If you don’t mix enough grout you can always mix some more. The grout container should indicate how much water to use. The dust generated in this process is very fine and can spread all over the place, that’s why it’s best to do this outside. If you do grout inside, just be sure to vacuum the area once you finish grouting.
Add water and stir the grout with a paint mixing stick.
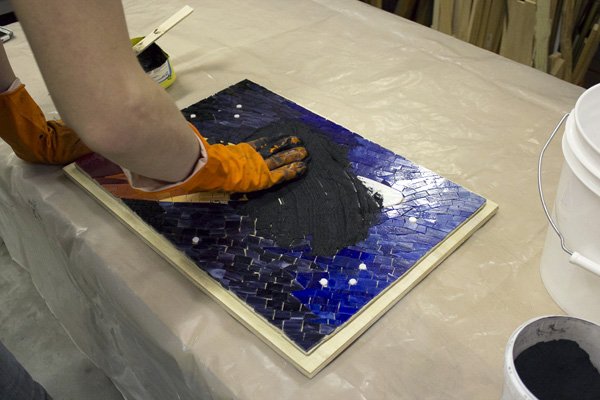
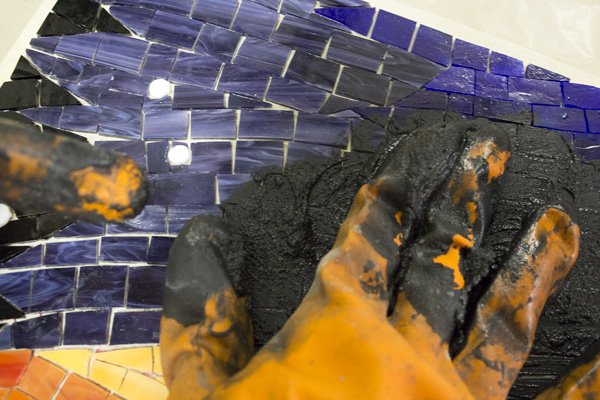
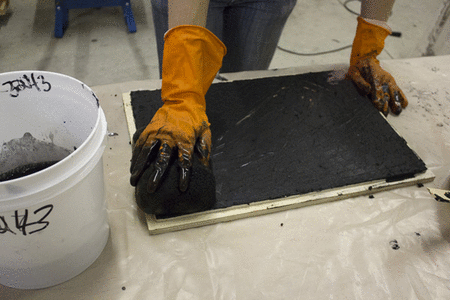
Step 3: Grout the Mosaic
This is the least complicated step. You just need to grab a glob of grout and mush it into the mosaic. Keep doing this until all areas have been covered in grout.
Start with a big glob of grout.
Just smear it into the mosaic.
Step 4: Verify Total Grout Coverage
Before you haze the grout, you need to be sure that all of the cracks were completely filled. Look closely and ensure that there are no bubbles between the grout and the wood. Run your fingers along each crack and push the grout down in.
Make sure grout gets in every crack.
Now you’re ready to wipe off the excess.
Step 5: Clean with Grout Sponge
For smaller projects you can sometimes omit this step and just use rags and paper towel to wipe off the excess grout, but for anything approaching 1 square foot in area or larger you want to do it with a sponge as demonstrated here.
Wipe a straight line in one direction.
Rinse the sponge when it’s covered in grout.
Step 6: Clean the Haze
The sponge will have cleared the bulk of the extra grout off, but there will probably be a thin grout haze left over. It’s okay to let the haze dry for a few minutes to make it more visible and easier to clean before you try to wipe it off. To clean it use a dry rag or paper towel. You should be able to clean an area of 1 square foot with only 1 or 2 paper towels.
A thin haze is still on the mosaic.
Polish the haze off using a paper towel or rag.
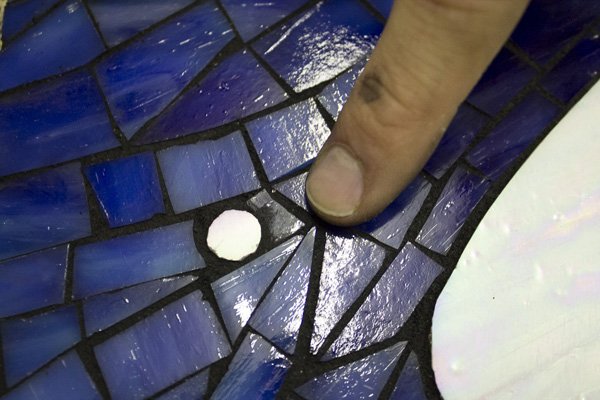
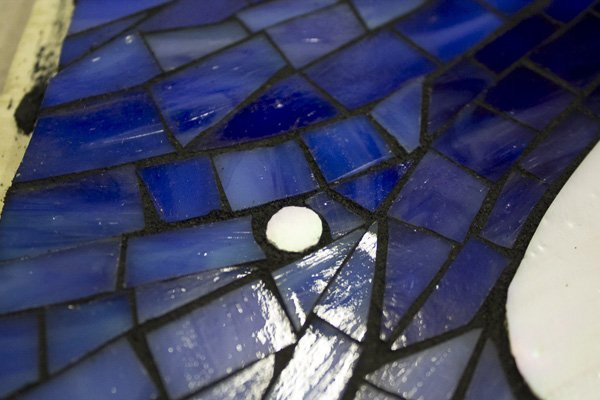
Step 7: Final Touchups
Look around for areas where grout is built up on any tiles. This usually happens where tiles are of different thicknesses. This can be done with a rag or paper towel wrapped around your finger. Make sure the grout is roughly flush with, or slightly lower than the tiles around it.
Grout is built up around this tile.
The same spot wiped clean.
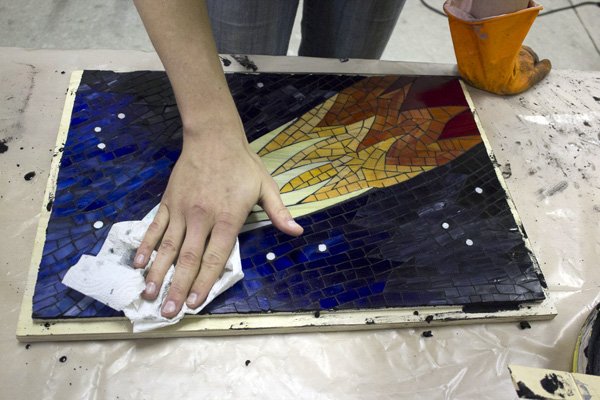
All done!
Once it’s cleaned off you’re finished with the grout. Allow a few days to cure fully, but usually it should be pretty solid after a few hours. The time for full curing can depend on the heat and humidity where you did the grouting. Some pieces of dust or sand may slowly fall off the mosaic over the next few days, don’t be alarmed if that happens.
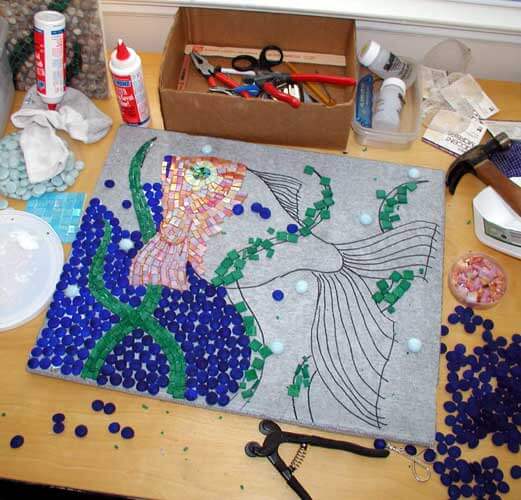
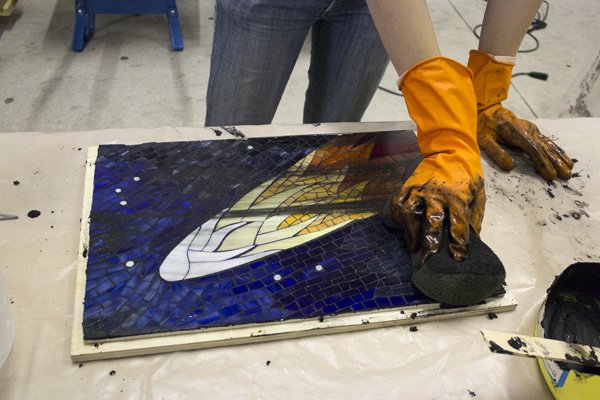
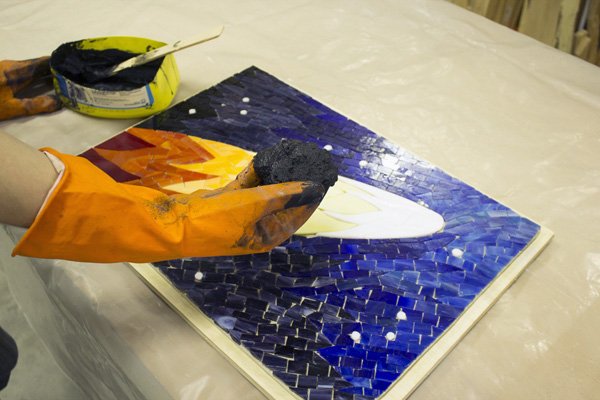
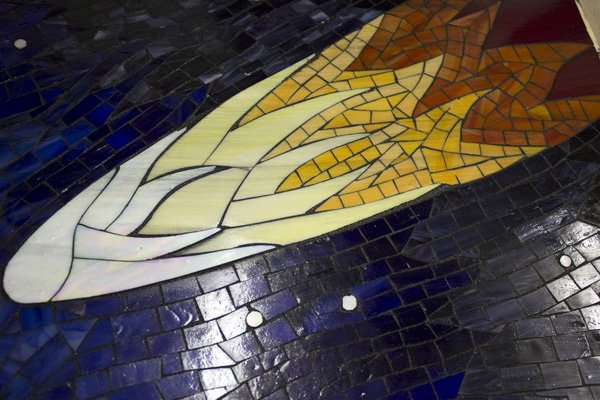
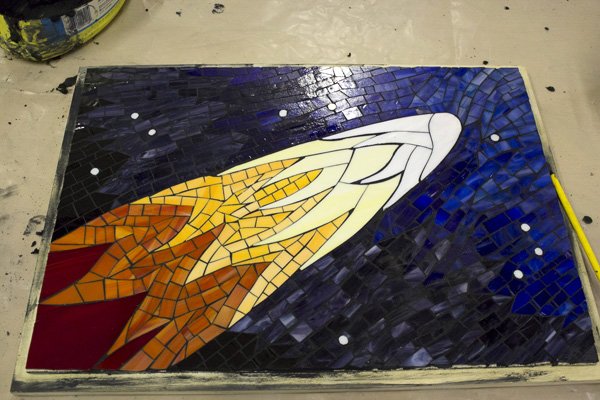
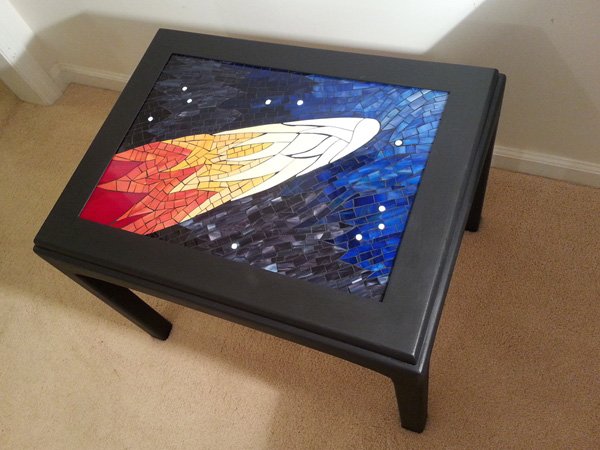
The comet is finished and is ready to be installed in its table.
Stars are illuminated by LEDs.
Selecting a Grout Color
I always choose a grout color which contrast the colors of the mosaic tiles so that the design is highlighted. Otherwise the individual tiles run together and are lost to the eye, and the mosaic looks more like an ordinary picture and less like a mosaic made from pieces. I avoid situations like gray grout with gray tile. A nice red-brown terra cotta grout works better in that instance. The key concept is color contrast instead of matching colors.
Color is best provided by the tile, not the grout. In terms of a visual element, the grout is supposed to act like a thin gray pencil line whose only purpose is to make each tile distinct. I don’t think I’ve ever seen a mosaic that used colored grout that wouldn’t have looked better if all tile had been used instead. For example, let’s say you wanted red tile in pink grout. A better way to get the same color effect would be to mix in a few pink tiles randomly throughout the red tiles, or maybe use a few lines of pink tiles. Often this means you have to cut your tile just a little bit smaller. That being said, it is possible to dye grout.
Dyeing Grout
There are mineral concrete dyes sold at building material stores, and these can be used, although the range of colors is limited to black, brown, gray, terracotta, etc. Vegetable dyes such as food colors will not work. You can use artists acrylic paint to color grout by mixing it in the wet grout. I recommend experimenting with tiny batches of grout and letting it harden before grouting a mosaic you have worked many hours on.
The Best Grout Color
Sometimes it is hard to decide which color grout to use because your mosaic already contains so many colors. The best color grout to use for most mosaics is black. Here’s why: The purpose of grout in visual terms is to make each tile distinct in the same way a pencil line in a watercolor is used to provide definition but not color. Black provides just enough contrast to most colors, unless you have black tile, and then you might want to consider something else.
Avoid pure white unless you are trying to make something that looks like a little kid’s summer camp project. Most building material stores such as Lowes and Home Depot cary about 30+ colors of grout. We carry the most commonly needed colors. Bring a few of each color of your tiles with you, and you can pick the color grout that works best with all the tile.
Grouting Stone Tile and Unglazed Ceramic
You should always seal unpolished stone and unglazed ceramic tiles with a tile and grout sealer BEFORE you grout. This is necessary for all porous materials that can be stained by grout. You should seal using a Stone Enhancer instead of tile and grout sealer if you want to darken and enhance the natural color of the stone. Both of these products are available at local building material stores. For a stone mosaic that is already stained, you might want to try some of the muratic acid that contractors use to clean cement from bricks.
Cracking and Crumbling Grout
You shouldn’t let the grout dry out as it cures. Cover with plastic if necessary. Lightly mist with a spray bottle, but don’t let drops accumulate on the surface of the grout. It also helps if you mix the grout according to instructions. It should be like a thick moist dough when you start with no dry material or lumps, and it should stick to your mixing wand, not drip, slide or crumble off.
Sanded Grout vs. Unsanded Grout
Don’t use unsanded grout. Unsanded grout is only used to fill hairline cracks. (Or it is mixed with sand for normal use.) If you use unsanded grout, then you can expect cracks in your grout and grout that isn’t quite as hard and durable.
Note: some tutorials incorrectly advise against using sanded grout because it might scratch the tile during grouting. Very few high quality mosaic materials will be soft enough to be damaged in this way, and you shouldn’t be using such easily scratched materials in any functional setting (bathrooms, counters, table tops et cetera…). Some ‘craft’ materials may have softer glazes which could be scratched by sand, but if you grout carefully the issue is easily avoided. There is no need to use a lot of force when grouting. If you have doubts about the durability of your materials, make a small test piece first.
If you decide to use unsanded grout, be sure to understand exactly why you are using it instead of the the stronger alternative.
Disposal of Grout Waste
Never pour grout down your drains. Grout is concrete, and that isn’t good for your plumbing. It will clog the pipes. I make a point of pouring as much of my grout sludge in an old cardboard box and allowing it to harden for disposal as solid waste. I always just dilute the dirty grout water and pour it in on my compost heap. The grout is a limestone product, so it actually helps balance the pH when there is excess decaying organic matter. Of course, this only applies to traditional grouts. I am not familiar with the synthetic epoxy grouts that some craft sites are selling. For easy cleanup, I always do my grouting in the backyard instead of indoors.
Ideas for small mosaic projects for beginners with examples
Mosaic Trivets and Mosaic Plaques
The best beginner’s project is a small trivet or plaque made on 1/2 inch plywood. I recommend cabinet-grade plywood which comes with a sanded finish. Many times you can get plenty of plywood in the scrap bin from a home remodeling job. Note that your backer doesn’t need to be perfectly square. Irregular triangles and rectangles and trapezoids work as well as squares. Remember to be “artistic” and “color outside the lines.”
If you desire to make a mosaic shape like a star or a cat or a sun, then 1/2 inch sanded plywood is still the best way to go. You can buy an entire sheet of plywood and a jigsaw to cut it with for not much more than what most craft websites charge for mosaic backers. Another advantage of cutting your own shape is that your project is more likely to look like YOUR art instead of some factory-made craft kit, which is all I can think of when I see the mosaic shapes or mosaic backers sold elsewhere.
The exposed edges of your plywood backer can be painted with a neutral color of acrylic paint or even latex house paint. You don’t always have to buy something special to make art, and you can often use what you happen to have on hand. In fact, using re-purposed materials usually adds an extra dimension of creativity to your project.
Displaying small mosaic plaques is simple: they can rest on a table as a coaster or trivet to hold hot plates, or they can be displayed on a small plate easel, such as people use to display fine china plates.
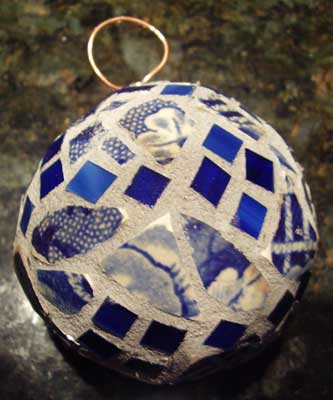
Mosaic Christmas Ornament
Mosaic Christmas ornament by Jim Hopton constructed on a 2.5″ Styrofoam ball using glass mosaic tile and antique china shards found along the shores of the Allegheny River in Pittsburgh, PA. I recommend threading a wire loop all the way through the Styrofoam ball before mosaicing to make sure that the heavy mosaic ornament has something secure to tie the string to. Craft stores sell little hoops with spikes that stick into the Styrofoam less than an inch, but that would not hold a heavier ornament. Our mosaic ornament kit comes built ready to hold the weight of tile and grout.
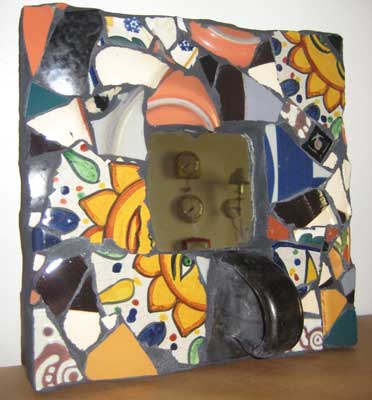
Mosaic Mirror
Mosaic Mirror by Melanie Berry makes use of broken dinnerware and broken talavera tile from Mexico, which is a soft terracotta tile with a colorful glaze of primary colors in traditional patterns. Keep in mind that you can make your own mosaic mirrors from plywood and mirror stock. One sheet of 1/2-inch plywood is used as a backer, and a second of 1/4 inch has a whole cut out for the mirror and forms a frame around the mirror. If this seems like extra work compared to buying something ready made, then remember that making your own allows you to make it exactly the size and shape you want. Tip: you don’t have to own a jigsaw or cut it out yourself. You probably have a friend or a friend’s partner that can do that for you.
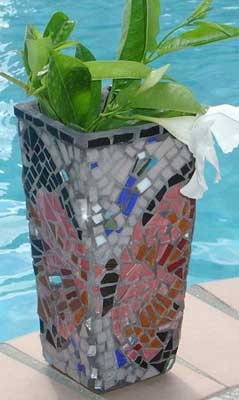
Butterfly Mosaic Vase
Butterfly Mosaic Vase by Sandra Schwartz was made on a thick glass vase. Sandra reports that she coated the vase with Weldbond and allowed that to dry before gluing on tile. This makes the work of gluing on tile much easier because a surface of dried glue is less likely to allow tile to slide compared to a slick glass surface. I would recommend scuffing the glass with coarse-grit sandpaper before applying the first coat of glue.
Mosaic Mirror
Mosaic Mirror by Sandra Schwartz is a mixed-media mosaic that uses glass gems, glass mosaic tile and broken dinnerware.