
Thinset is used for outdoor mosaics, or mosaics which may come into contact with water, such as in a shower enclosure.
This page explains how to mix and use thinset mortar for detailed work with glass mosaic tile and other tesserae for outdoor and wet mosaics where PVA adhesives such as Weldbond should be avoided.
These instructions are written for doing detailed work one-tile-at-a-time by hand, and so this page might make using thinset sound more difficult than it really is. For mounting sheets of tile on mesh or paper, it’s a lot simpler: Spread the mortar on the wall with a notched trowel, butter the back of the sheet of tile, and then press the sheet to the wall.
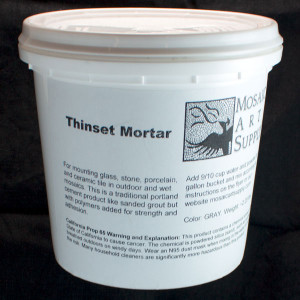
What Is Thinset Mortar?
For outdoor and wet mosaics, thinset is recommended instead of adhesives. Thinset is a bonding mortar, which means it is a portland cement (the same as used in concrete) with polymers added to make it sticky and extra strong. This is particularly important when working with glass mosaic tile, which is non-porous and difficult to bond securely.
What Brand?
We now sell thinset mortar in 2.25-pound convenience packs for small projects.
We use Versabond brand, which we buy at Home Depot, and I suspect your local contractors are using the same or something more or less the same. HOWEVER, if you live some place with extreme cold or extreme wet, it never hurts to go to your local building material store and ask what contractors are using in your area before choosing a paint or a roofing material or a sealant or anything like that.
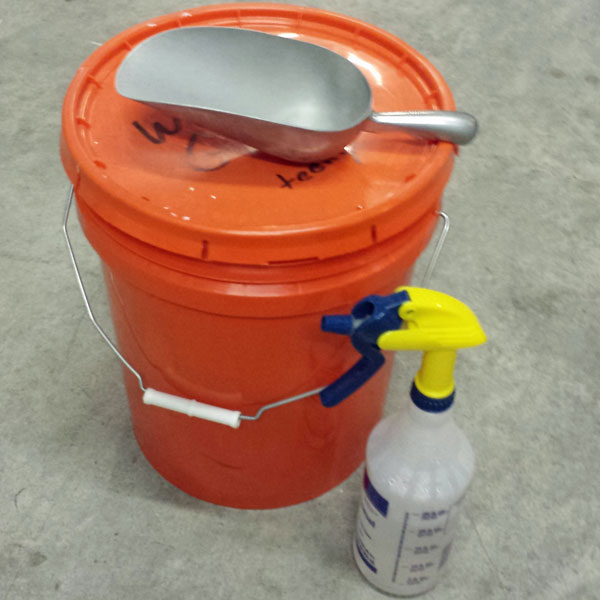
How To Handle Large Bags?
Thinset Mortar comes in 25-pound bags. Go ahead and buy a 5-gallon bucket with a snap on lid and keep your material in there. Bags leak. Buckets with lids don’t. Slide the bag into the bucket and shake it until the bag fits into the bucket. Avoid pouring the bag into the bucket, which would make a large dust cloud. Keep a recycled plastic yogurt tub in the bucket and use that to scoop out material. Wear a dust mask and do this outside. Mist with a spray bottle to control dust.
Mixing Thinset Mortar
The thinset bag has mixing instructions on the label, but those were written for mixing the entire bag. For detailed mosaic artwork where you are placing each tile by hand, you will probably want to mix 1 to 3 pounds at most. You can find what amount of water to add per pound by dividing the amount of water recommended for the entire package by the weight of the package.
Mixing Ratio: 4 oz Water to 1 lb Thinset
For Versabond thinset, we add 1/2 cup or 4 oz of water per 1 pound of dry thinset powder. You can use that same ratio of 1 part water to 4 parts thinset to mix up tiny batches of thinset, such as 1 ounce of water plus 4 ounces of thinset.
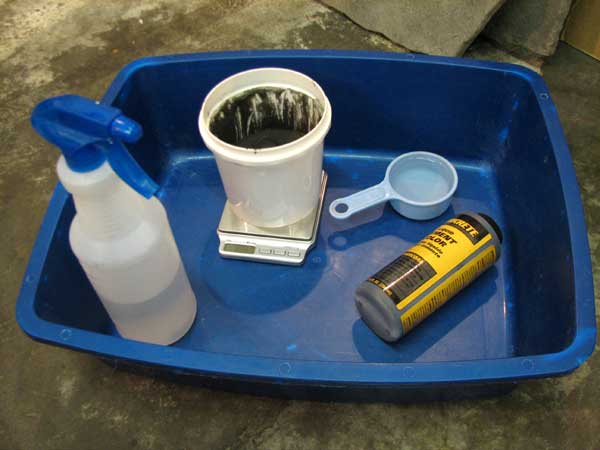
Mix Outdoors and Control Dust
We use a small kitchen scale or postal scale for weighing out the thinset and the water. Alternatively, a measuring cup can be used for the water, with 1/2 cup being the equivalent of 4 ounces weight. Although you should wear a dust mask when scooping and mixing the thinset powder, it is best to control dust at the source by slow careful scoops and stirs and never pouring or dumping the powder.
Use a spray bottle at its finest setting to mist your work area with water as you stir and scoop. There is only a tiny amount of water in a fine mist, and so you don’t have to worry about it messing up your unused thinset or throwing off your measurements, but it is highly effective at getting the dust out of the air. Keep in mind that you can create a lot of dust after the water is added to the powder by stirring to rapidly. Stir slowly until the powder is wetted, and make use of your spray bottle as needed.
An aluminum ice scoop or a large steel kitchen spoon can be used to scoop out the thinset powder, but you can also use a recycled plastic container (such as used for cottage cheese or yogurt) and just store this improvised scoop in your bucket of thinset.
Here is a list of items recommended for mixing thinset:
- plastic bucket or plastic container for mixing.
- smaller plastic containers for scooping and weighing
- dust mask
- small kitchen scale or postal scale
- measuring cup (optional)
- paint paddle or sturdy rod for stirring
- trowel for scraping buckets and stirring tools
- spray bottle for misting
Mixing Buckets: Size Matters
For small batches of 1 pound or less, we mix it up in a 32-ounce plastic yogurt container and use a putty knife or old butter knife to stir. For larger batches, we mix in a 5-gallon bucket so that we can mix vigorously without slinging out any material. A smaller bucket (2 gallon) can also be used, but keep in mind that you don’t want to fill any container more than half way full, ideally a quarter full or less. It helps to control dust if all the mixing happens near the bottom of the bucket.
Stirring
You have to pour the water in gently and stir slowly at first to avoid creating dust before the powder is wetted. Use a clean paint paddle or sturdy rod to stir, and make sure that your stirrer is stout enough for the job. This is concrete not cookie dough! You can break the plastic handle off your wife’s favorite spoon or bend a thin piece of pipe in a hurry if the batch is large enough. In all seriousness, you will notice that it takes some strength to mix up larger batches. We have a concrete mixing attachment that fits into our electric drill, and we use it for batches of 5 pounds or more.
Mix the mortar until it has the consistency of dough with no lumps. Take care to mix all the way to the bottom of the bucket and scrape the edges to make sure that no powder, lumps or clumps remain. Then the mortar is allowed to sit for 5 to 10 minutes, and then it is mixed again for a minute or two.
A margin trowel is very useful for scraping the sides of the bucket and making sure there aren’t pockets of unmixed powder down in the edges of the bottom of the bucket. The scraping power of the trowel comes in handy during clean up too. Thinset is very sticky, and if it has set for more than a few minutes, it will likely take more than a squirt nozzle to remove it. Scraping with a trowel is the best way to remove the crust of thinset that forms on buckets and stirrers.
Dyeing Thinset?
After the thinset is mixed, concrete dye can be blended into it if the thinset will be used for grouting and a custom color is desired. (Versabond thinset is sold in white and gray.) Most thinset is used only for attaching tiles, and so there is no need to dye the thinset if it will not be visible. Also, you need to test your dye with your thinset to make sure that it doesn’t affect the bond strength or hardness. (A good test is to cement a few rocks together, wait about 6 days, and then bust them apart with a hammer and look for crumbly material or a lack of adhesion.) Recently we added a liquid concrete dye to Versabond thinset, and we used many, many times the recommended dosage for concrete without any noticeable loss in bond strength or hardness as far as we could tell, although we make no guarantees. Keep in mind that we used a concrete dye and not acylic paint or some other source of pigment that might interfere with the adhesive additive.
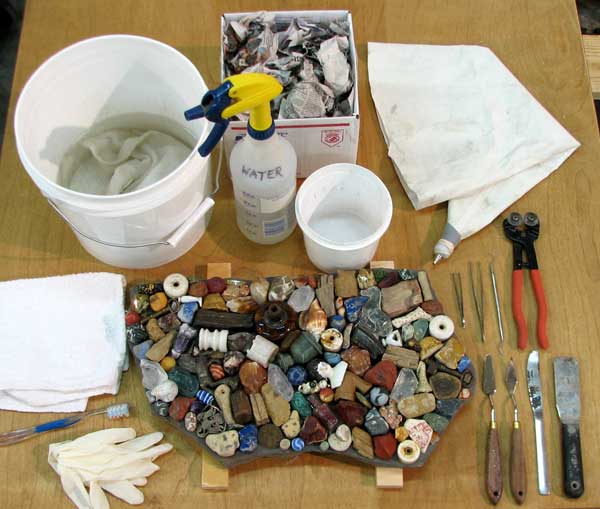
Detailed Mosaic Artwork
Thinset is extremely sticky and meant to be spread with a trowel to mount large tiles or sheets of tile, but with a little care and planning, you can use it mount tile one piece at a time for detailed mosaic artwork similar to how glue is normally used in that mode of working.
As with glue, thinset can be used in either of two ways: It can be spread on a small area on which tiles are then placed, or it can be applied to the back of each tile individually. For either technique, a painter’s palette knife is the ideal tool for handling the thinset. (Although improvised tools such as an old butter knife can be used for this work, the benefits of the palette knife become obvious in just a few minutes. The pallet knife was ergonomically designed to manipulate pastes on flat surfaces WITH MINIMAL BENDING OF THE WRIST and makes a butter knife just seem clumsy.)
Whether your spread the thinset or apply it to each individual tile, you will need a way of keeping your hands clean and a way of cleaning up random drops and smears. We use the following materials to keep the work clean and efficient:
- painter’s pallet knives
- putty knife or margin trowel
- small plastic lid or tray
- tweezers
- spray bottle
- dirty rag
- wet rag floating in a bucket 1/4 full of water
- clean rag
- medical examination gloves (recommended)
- old work surface or shop table.
- wadded newspapers in garbage can
The plastic tray or recycled container lid holds a small amount of thinset for use. Scoop a small amount of thinset into the tray and keep the rest of the thinset in the mixing bucket. Keep the bucket covered and use the putty knife or margin trowel to scrap the sides of the bucket so that all the thinset is in a blob and doesn’t dry out. Mist the thinset sparingly if you see it drying. We can use thinset for up to 4 or 5 hours this way.
Whether you spread the thinset in small patches or put a smear of thinset on the backside of each tile will depend on your style and pace of work. If you are improvising your design as you go along, you may find that you use both techniques.
Keeping Fingers Clean
No matter how you handle the thinset, you will occasionally get some on your fingers. If you are sloppy in how you clean your fingers (gloved or ungloved), you will use up tons of rags. Use this procedure to use only 3 rags:
- Scrape fingers off on the wadded newspaper in the garbage can.
- Use the DIRTY rag if needed, but try to use as little as possible.
- Dip fingers in bucket of water with WET rag.
- Use the CLEAN rag to dry fingers.
If the above instructions aren’t detailed enough, I have also written an expanded version of this technique in a blog article called How To Keep Your Hands Clean When Using Thinset Mortar.
Examination Gloves Recommended
Thinset, grout, concrete, and other products that contain portland cement are mildly caustic and can dry out the skin very rapidly and cause irritation. For this reason, we wear medical examination gloves while we work with thinset. The nitril gloves we sell are ideal for this purpose because they are latex-free and powder free and are more durable than the latex medical examination gloves we used to sell. Note that these gloves are much thinner and offer much more dexterity than the thick grouting gloves.
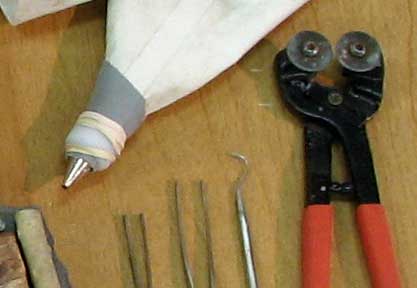
Grouting Bag Fitted With Icing Nipple
For found-object mosaic, we sometimes use a grouting bag fitted with a Wilton brand cake icing nipple. The grouting bag with nipple allows us to dispense the thinset in a very controlled way as if from a bottle of glue. This technique can also be used for flat tile.
Clean Up
Make sure you clean up outside and do not pour unused thinset down drains. Even the sand in grout and thinset is enough to stop up some plumbing systems. Try to dispose of most of your unused thinset as solid waste. Rinse away any residue with enough water so that you don’t leave a white limestone scum on the grass, which could kill it if conditions are dry.