Mosaic Coaster Base Square

square mosaic coaster base

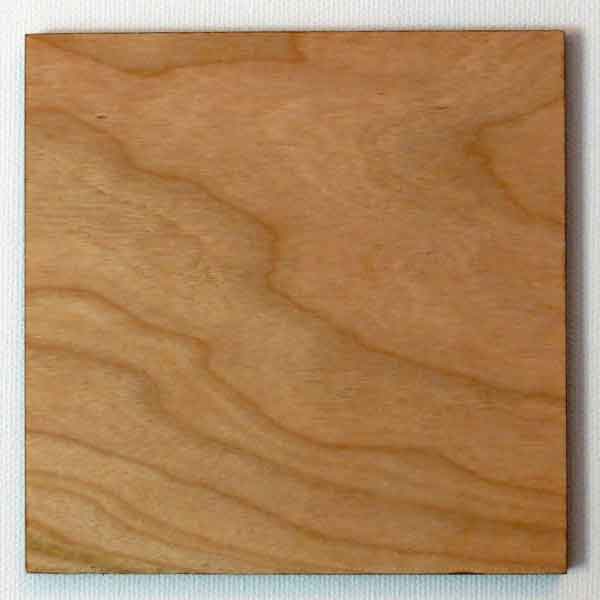
Square Mosaic Coaster Base is made from cherry hardwood right here in the USA. The square base is 4 inches wide and 3/16 inches thick. They are cut out with a laser, so the sides have a natural burnt wood color that could be lacquered. Note that the wood is not recessed to form a border for your mosaic. Instead, your mosaic should extend to the edge of the coaster so that the finished coaster looks like a fragment of an ancient mosaic. This is easiest to do when you use tile without a heavy embossed pattern on the underside, and for this reason, we recommend the 12mm Elementile Recycled Glass Mosaic Tile for use with the coasters.

Weldbond adhesive or another high quality PVA glue is recommended for attaching tiles to the coaster base, and there are several options for grouting your mosaic coaster. You can press the tiles closely together instead of leaving a gap, but that requires much more time and effort than leaving an irregular gap and then grouting the mosaic. With an irregular grout gap of 1/16 inch or less, you can use almost every piece of tile you cut because it does not have to be exact. You can also use regular sanded grout to grout it.

Mosaic Art Projects Using Coaster Bases

Product Specifications

  • 1 piece hardwood cherry square coaster base.
  • wood pattern is natural and varies by piece.
  • width: 4 inches.
  • thickness: 3/16 inches.
  • laser cut edges (natural burnt wood finish).
  • unvarnished, unlacquered.
  • made in America
  • Removable paper tape protects the best face of the coaster.
  • The reverse side of the coaster may have occasional singes from the cutting laser, but these are superficial and can be covered by mosaic.

Compatibility

Any type of glass mosaic tile could be used with these, but there is no border on the coaster, so your mosaic will go all the way to the edge. If you use a type of glass tile that has coarse embossing or bevels on the underside, then these might look odd at the edge of the mosaic. It is also more difficult to cut a tile into small pieces if the bottom has an embossed pattern. For these reasons, the coasters are best covered with stained glass or the 8mm and 12mm sizes of recycled glass mosaic tile by Elementile. We prefer Elementile to stained glass because stained glass tends to form sharper edges when cut. Whatever tile you decide to use, make sure you file off any sharp edges at the sides of the mosaic using a rough stone or marble file.

Instructions For Using The Coaster Bases For Detailed Mosaic Art

The coaster bases can be used any way you want, including simple projects for children with tiles glued randomly with variable grout spacing, and these make great first-time projects because they are small and do not require as much time and material. However, it is possible to create a more sophisticated mosaic design on the coaster using these instructions. Due to the limited space provided by the coaster, one of the most important steps is making sure you can cut tile small enough to render the smallest detail of your design and modifying your design if necessary:

  1. Find a design or picture. Google Images is a great source of photos, images, patterns, models to draw from.
  2. Draw a simple cartoon outline of your design.
  3. Try cutting up some tile and arranging it on the cartoon to see how it looks.
  4. Pay special attention to the smallest detail in your design.
  5. If it is not possible to cut tile that small, or the pieces seem too tedious to work with, then simplify your design.
  6. Note that when you start using glue, it will be easier to arrange small pieces because they will not move around as unexpectedly. Tweezers also help.
  7. Once you have you have verified that your design is not too detailed to be rendered in tile, then sketch the cartoon on the coaster in pencil.
  8. You can darken your pencil sketch with a Sharpie brand marker so that glue does not rub it off once you start working.
  9. Wipe Weldbond glue over the face of the coaster and allow to dry to seal the wood. Use a very thin coat to avoid warping the coaster from the moisture in the glue! Remember, the reason you are sealing the coaster in the first place is to avoid warping it later when you use lots of glue for the tiles. Use two light coasts and allow to dry thoroughly between coats.
  10. Start tiling your design from the center and working to the edges.
  11. Leaving an irregular grout gap of 1/16 inch or less is much easier than fitting the tile tightly together.
  12. At the edge of the coaster, cut the tile so that it fits flush with the edge. You can place a tile on the coaster, mark where it should be cut with a Sharpie marker before gluing and then make the cut.
  13. Use the fine side of a marble file or a piece of rough stone to rub the edge of the cut tile so that the edge is not as sharp.
  14. After the glue has dried (preferably for 48+ hours) grout your mosaic with sanded grout.
  15. We recommend sealing the edges and bottoms of the coasters to protect from spills and condensation that could split or warp the wood.
  16. Deft Clear Wood finish in a spray can is sold by Home Depot and can be used for this.

How Much Tile Do I Need For The Coaster Base?

The top surface of a 4-inch square coaster base has only 16 square inches (0.1 square feet) in area. This means you could cover it with 56 to 72 of the 12mm Elementile or 113 to 162 of the 8mm Elementile depending on how you cut and space the tile. In either case, one bag of tile would be more than enough to cover the coaster. However, you will want to order more than that to account for the cutting waste, possibly twice as much if you are fitting the tile exactly with no grout gap.

How To Make Mosaic Art

For more advice on designing your mosaic project or mounting, cutting, and grouting tile, please see our page of Mosaic Frequently Asked Questions or our Mosaic Information Guide, which lists instructional pages described by topic. We also post new articles about making mosaics at our How to Mosaic Blog.
Mosaic Mounting Tape WIDE 12 inches x 108 feet

Mosaic Mounting Tape WIDE 12 inches
Update as-of August 2024:

If you order the 12″ tape roll you cannot check out with USPS Ground Advantage as your shipping method. USPS has been unreliable, so high-value items cannot be shipped with their cheapest shipping service, Ground Advantage.

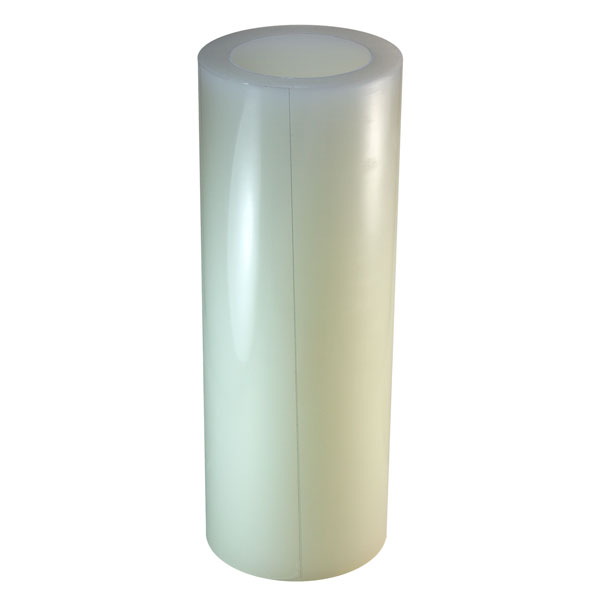
Mosaic Mounting Tape 12 inches x 108 feet is a transparent adhesive film used for face-mounting mosaic tile designs for rapid installation. The adhesive film bonds strongly enough to mosaic tile for the sheets to be handled and transported (including shipping), but it releases cleanly without residue. It is also water resistant. The tape is fully transparent so that patterns divided between multiple sheets can be aligned and grout joints matched. The tape comes in a continuous roll 108 feet long.

Mosaic Mounting Tape 12 inches

  • transparent adhesive film in a roll
  • 12 inches x 108 feet
  • water resistant adhesive
  • adhesive releases cleanly from all tile materials tested with no sticky residue.

Product Usage

Unlike fiberglass mesh, Mounting Tape sticks to the front FACES of the tile, which leaves the backs fully exposed for bonding with mortar or adhesives, thus increasing the strength and longevity of outdoor and wet mosaics. Mosaic designs can be laid out in a mosaic mounting grid, and then tape is pressed to the faces of the tiles, and the mosaic is lifted out of the grid for mounting.

If you aren't using a tile mounting grid and are laying out tiles or pieces of tiles on top of a paper pattern, we recommend tacking clear contact paper sticky-side-up over the pattern. This moderate stickiness keeps the tiles from moving around as you lay them out. When you are finished placing the tiles, you press the tape on top of the mosaic and rub it gently to ensure adequate adhesion. Then you can cut the mosaic into sections (typically 1 ft x 1 ft), but the sections can be irregular in shape if needed, and the cuts can zig zag around tiles.

Another method of using the tape is to not use contact paper and place the tape itself over the pattern with the sticky side up, and then stick the tiles face down onto the tape. This "reverse method" reverses the pattern from left to right when the taped mosaic is taken off the pattern and flipped over, and so most people avoid it and use contact paper as a temporary surface over the pattern as recommended above. A roll of clear contact paper from the grocery store is inexpensive and worth it.

When the sections of the mosaic on tape are pressed into mortar or glue, make sure that the gaps between sheets is the same width as the grout gaps used in the sheets and that the sheets are properly aligned. After the glue or mortar has hardened, the tape is removed by peeling it back and rolling it back.

More Information

For more advice on designing your mosaic project or cutting and grouting tile, please see our Mosaic Frequently Asked Questions or our List of How-to-Mosaic Pages, which are described by topic.

Grouting Bag

Grouting Bag

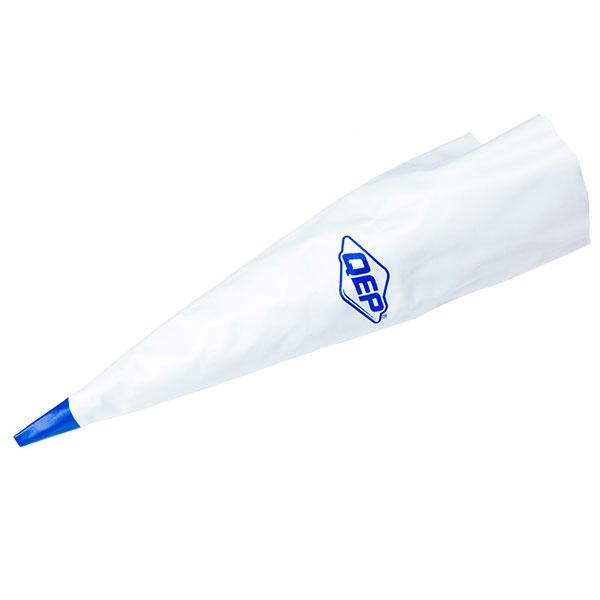
The Grouting Bag is made from latex-rubber-coated reinforced canvas and is puncture and tear resistant for durable use with concrete products such as grouts and mortars. The bag is large, about 22 inches long, so it can hold 5 to 8 pounds of grout easily, depending on your preference. (We prefer to use less and keep the top of the bag cleaner where you twist it closed.) The purpose of the bag is for applying grout in areas where you have to work a little neater or in places that are harder to reach, such as the tops of walls near the ceiling. Ask any installer, and they will tell you: squeezing a controlled amount from a bag is neater than lifting wet grout on a trowel, especially when working over head, unless you don’t mind clumps of concrete falling in your hair!

Grouting Bag

  • material: reinforced canvas coated with latex rubber
  • length: approximately 22 inches
  • capacity: approximately 8 pounds
  • closure: twisted by hand, using clips or clamps recommended
  • nozzle: simple opening in the end of the bag

How to Use the Grouting Bag

A grouting bag works just like an icing bag that is used for icing cakes. The only difference is that it is larger and doesn’t come with different nipple attachments. The end of the bag is twisted to close it up and squeeze it, and we have found that a plastic carpenters clamp is useful for keeping the bag twisted closed when you sit it down. (If it twists open, it can get a little messy when you twist it closed again.)

Use for Detailed Mosaic Art

The normal use of the Grouting Bag is for getting grout neatly into architectural crevices and corners that are too confined for trowel work. We use the Grouting Bag for much more detailed work than that. Specifically, we use the bag for cementing irregularly-shaped artifacts in found-object mosaic using thinset mortar. To use the bag for this purpose, we attach a small diameter nozzle from a Wilton brand cake icing kit, which allows us to apply smaller amounts of mortar in a more controlled way.

To get the nozzle tip of a cake icing kit to stay on the grouting bag, we have to improvise a little bit: We trim some of the tip of the bag off so that the nozzle can fit through the opening. Then we put rubber bands around the plastic collar holding the nozzle to help it stay on. The finished assembly looks home made, but we have found it to be highly effective for dispensing controlled amounts of thinset mortar on tiny objects without contaminating them. Note that rags are still required for cleaning up occasional mistakes, and a set of palette knives is also useful for manipulating and spreading material.

Tip: the icing nozzle has a small diameter and tends to get clogged occasionally, so keep a nail or piece of wire to clean it out. We have also written some instructions for how to use thinset mortar for detailed mosaic artwork.

Loading Without Contaminating

The most important tip we can give in using the bag is to keep the top of the inside clean where you will need to twist it closed. How do you do that and still get the sticky grout or thinset inside? Pull the top of the bag down so that it is inside out, but don’t pull the bag all the way inside out. Then sit the bag tip down in something that can hold it upright as you scoop grout or thinset into it. We sit our bags in plastic quart-sized yogurt tubs and coffee cans and other recycled containers, and then we fill them and then fold up the top of the bag so that it is no longer inside out. Then we twist the top of the bag closed and clamp it and get to work.

Safety

Always wear safety glasses with side shields when mixing and applying grout. Grout is mildly caustic and contains little pieces of sand. Grouting is a physical process with lots of mixing and rubbing and wiping, and these motions cause pieces of sand and grit to fly unexpectedly.

How To Make Mosaics

For more advice on designing your mosaic project or mounting, cutting, and grouting tile, please see our page of Mosaic Frequently Asked Questions or our Mosaic Information Guide, which lists instructional pages described by topic. We also post new articles about making mosaics at our How to Mosaic Blog.
Large Economy Tweezers

Large Economy Tweezers

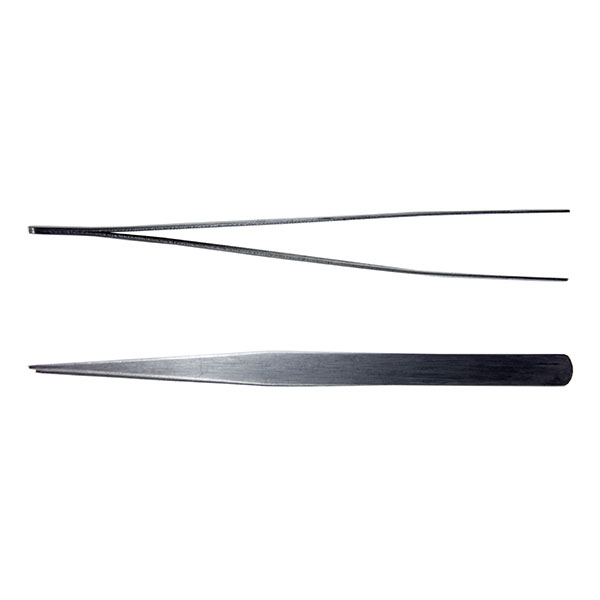
Large Economy Tweezers are over 6 inches long needle-point steel tweezers that are competitively priced for creating mosaic art, which can be harsh on steel tools. These are a larger option for those who find our regular thumb tweezers too small or need something with extra length. The function is essentially the same: reducing tedium and frustration in positioning tiny tiles. We would not recommend doing mosaic work without some sort of tweezers, especially if using tile or pieces cut 3/8 inch or smaller. Sticks are fine for pushing materials around, but they can’t pick up tiles. Tweezers stay a lot cleaner than fingertips, which seem to get gummed up almost immediately. The needle-point tips of these tweezers are easily cleaned of drying glues by wiping on a shop rag.

Large Economy Tweezers

  • steel tweezers
  • needle point
  • over 6 inches in length
  • subject to rusting by thinset and grout

Mortars and Grouts Rust Steel Tools

Portland cement products like mortar and grout are mildly caustic and cause steel tools to rust faster than normal. The Large Economy Tweezers are steel and thus subject to this problem. You can delay and slow rusting by washing and drying your tools on a CLEAN rag after use. Never let your tools soak overnight. They can and will rust literally overnight. Use a brush to scrub invisible grout residue from the tools. After our tools are dry, we wipe them with shop rag from our garage toolbox. These garage rags have traces of oil on them, which is just what is needed to prevent rusting, but not so excessive that glues get contaminated next use.

How to Reduce Frustration

Tweezers make it infinitely easier to dip your tile in adhesive or thinset without contaminating your fingertips. They also makes it much easier to position the tile on the surface without messing up what you have already done. Most of the frustration of making a mosaic comes from accidentally bumping tiles that you have already positioned, and tweezers keep this from happening quite so often. The trivial cost of a basic pair of tweezers is the best money you can spend as far as reducing frustration. You will also be able to attempt more detailed designs than you would consider if using only your fingertips.

How To Make Mosaics

For more advice on designing your mosaic project or cutting and grouting tile, please see our Mosaic Frequently Asked Questions page or our How To Mosaic blog or our Mosaic Information Guide.

Margin Trowel

margin trowel

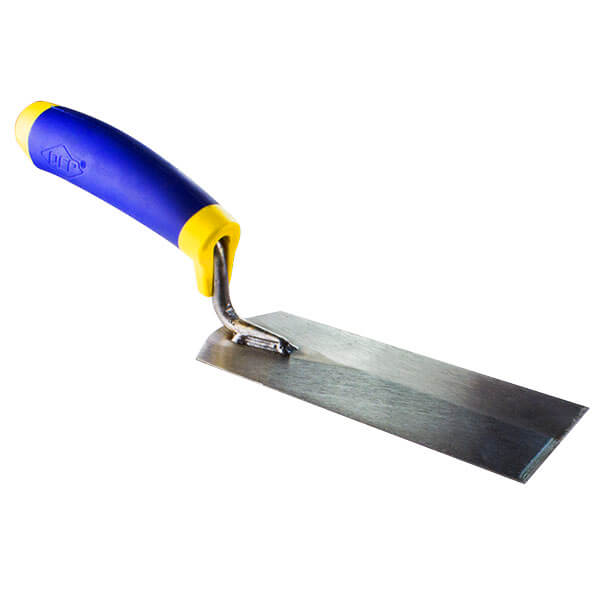
The margin trowel has a 5 1/2 inch x 2 inch blade for mixing and spreading grout and thinset. Note that this isn’t a notched trowel of the type typically used for spreading adhesive over large areas for architectural projects. Instead, this trowel was selected for its small size and its shape, which makes it suitable for mixing grout in small tubs and buckets.

Margin Trowel

  • wooden handle
  • steel blade 5 1/2 inch x 2 inch

Using The Trowel

The most important tip we can give you concerning grout tools like the mounting trowel is to remember to wash them thoroughly after grouting your project. This is actually a common problem because people are so focused on their mosaic that they often don’t think about their tools until after the concrete has hardened, usually not until the next day.

Never Soak Your Tools

Note that hardened concrete can be scraped off and is not nearly as bad a soaking your tools, which can rust them literally overnight. Never soak your tools. Grout and thinset are mildly caustic and cause them to rust rapidly. Wash and dry them with a clean rag or let the concrete harden on them for removal later.

Grouting Tips

Grouting outdoors is best, especially some place you can run a water hose and don’t mind a little sand and residue being rinsed. Excess grout could kill grass or plants, so scoop up what you can for disposal as solid waste in the trash and wash away what little is left with ample water.

Grout and concrete harden by BINDING water not by drying out. If you let grout or concrete dry out while it is curing, then it will be soft and crumbly. This also happens if you did not add enough water to the grout when you mixed it up. Cover your mosaic with plastic if you are grouting in strong heat, sunlight, air conditioning, wind or any other condition that accelerates drying.

Make sure you rinse all the water out of sponge so that it is moist but not leaving drips of water when you rub it on the mosaic. You do not want to get drips of water in the grout in the gaps when you are rubbing the residue off the faces of the tile.

Do not pour left over grout or grout sludge down plumbing or drains. Grout is concrete and can harden under water. Even sand can clog drains. Instead, pour your grout and grout water into an old plastic container. After it hardens, you can pour off the water and dispose what is left as solid waste.

We use traditional grouts and NOT the new epoxy-grouts, and all our advice is written for traditional grout. If you use the new epoxy-base products, then make sure you read manufacturer recommendations for safety and disposal.

Safety

Always wear safety glasses with side shields when mixing and applying grout. Grouting is a physical process with lots of mixing and rubbing and wiping, and these motions cause pieces of sand and grit to fly unexpectedly.

Grout contains powdered silica (sand) and is mildly caustic. Avoid breathing the dust. Use an ordinary dust mask rated N95 when mixing or use a misting water bottle to avoid creating dust. To protect your skin from grout, wear heavy-duty grouting gloves.

How To Make Mosaics

For more advice on designing your mosaic project or mounting, cutting, and grouting tile, please see our page of Mosaic Frequently Asked Questions or our Mosaic Information Guide, which lists instructional pages described by topic. We also post new articles about making mosaics at our How to Mosaic Blog.
Dual-Grit Rubbing Stone

Dual-Grit Rubbing Stone

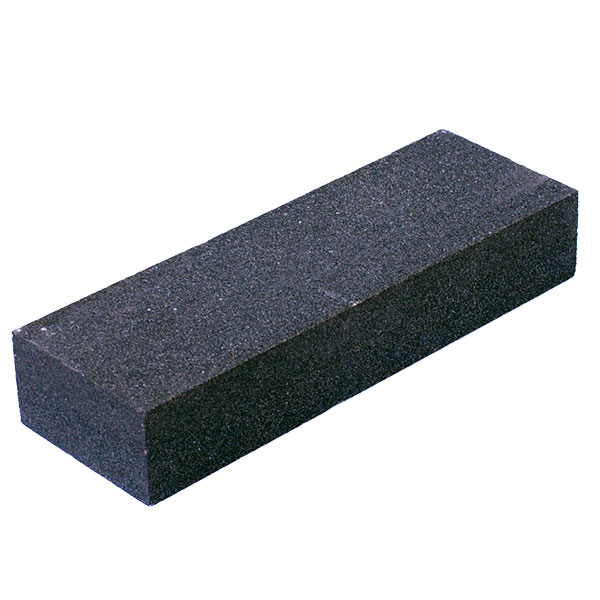
The Dual-Grit Rubbing Stone is a double sided sanding block for smoothing rough edges on ceramic, stone, and marble mosaic tile after cutting. One side is made of size 80 grit, and the other is size 60 grit for more aggressive removal of material. Note that the stone erodes as it is used. You can minimize the problem of creating a rut in the stone by dragging the tile sideways instead of straight along the edge, and you can vary the place on the stone where you rub.

When to Use This Tool

Smoothing Cuts

The Dual-Grit Rubbing Stone can be more useful than a marble file for quickly processing tile because it can sit on a flat surface and not move around when a tile is rapidly brushed on it. This allows the artist to rub the tile with one hand immediately after cutting without ever setting down the tile. This might seem trivial, but think about all the tiles you would need to cut in order to install a a large mosaic mural of 100 square feet or more, or even 10 square feet. Reducing hand motions and combining smoothing with cutting can save a significant amount of time when tens of thousands of tiles are to be processed, or even hundreds.

Safety

Dust

Avoid breathing construction dusts of any type, especially glass, cement, ceramics, stone, etc. An ordinary dust mask rated N95 is recommended as a precaution when using the rubbing stone, but we prefer to contain the dust with mist at the source. Keeping the dust wet is an easy was to make sure it stays out of the air. Dispose of the wet dust as solid waste in a trash bag and not down your drains.

We set the rubbing stone inside a plastic dishpan and mist with water from a spray bottle. The bucket collects the waste and acts as a moisture reservoir for keeping the air around the rubbing stone humid, which causes dust to fall out of the air faster.

Safety Glasses

Always wear safety glasses with side shields when cutting, filing and sanding materials.

Slivers and Surfaces

Be aware that cutting and sanding mosaic tile can produce tiny slivers that are surprisingly sharp. Never sweep off a work surface with your bare hand. This is how most cuts happen in the studio (seriously). Use a vacuum or counter brush instead.

How To Make Mosaics

For more advice on designing your mosaic project or mounting, cutting, and grouting tile, please see our page of Mosaic Frequently Asked Questions or our Mosaic Information Guide, which lists instructional pages described by topic. We also post new articles about making mosaics at our How to Mosaic Blog.
Economy Artist Palette Knife 1 Piece

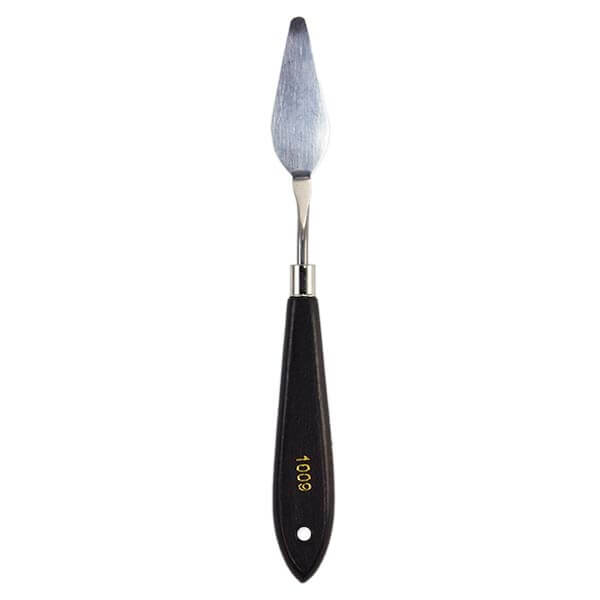
The Economy Artist Palette Knife is a steel blade in a wooden handle and was made for spreading and mixing paint. We use them for spreading and manipulating thinset mortar and mosaic adhesives. Note that thinset, grout, and other concrete products are mildly caustic and therefore corrosive to steel and other metals. What this means is that you should take extra care to clean and dry your knives after use and not let them soak overnight even though you are worn out from a full day in the studio. You should also be prepared for the tools to rust and wear out over time, much sooner than ordinary trowels and putty knives, which are made of thicker steel. All that being said, many tools in the studio and workshop have a limited working life and yet are indispensable. The palette knife is extremely useful for detailed mosaic work, especially when pressing non-flat found objects such as seashells and artifacts into thinset mortar.

Economy Artist Palette Knife

  • Steel blade mounted in a wooden handle
  • approximately 8 inches in length
  • subject to rusting by mortars and grouts

Safety

The blade is not sharpened in the manner of ordinary knives, but it is a thin pieces of steel that is sharp enough to cut if handled carelessly.

How To Make Mosaics

For more advice on designing your mosaic project or mounting, cutting, and grouting tile, please see our page of Mosaic Frequently Asked Questions or our Mosaic Information Guide, which lists instructional pages described by topic. We also post new articles about making mosaics at our How to Mosaic Blog.
Economy Artist Palette Knife 5-Piece Set

Economy Artist Palette Knife Set

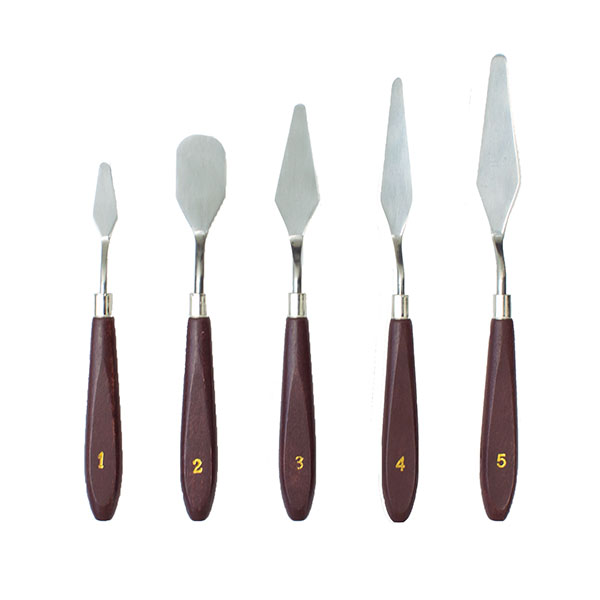
The Economy Artist Palette Knife Set is five different sizes of steel knives with wooden handles that were made for spreading and mixing paint. We use them for spreading and manipulating thinset mortar and mosaic adhesives. Note that thinset, grout, and other concrete products are mildly caustic and therefore corrosive to steel and other metals. What this means is that you should take extra care to clean and dry your knives after use and not let them soak overnight even though you are tired from a full day in the studio. You should also be prepared for the tools to rust and wear out over time, much sooner than ordinary trowels and putty knives, which are made of thicker steel. All that being said, many tools in the studio and workshop have a limited working life, and yet they are indispensable. The palette knives are extremely useful for detailed mosaic work, especially when setting non-flat found objects such as seashells and artifacts into thinset mortar.

Economy Artist Palette Knife Set

  • Steel blades mounted in wooden handles
  • 5 pieces, each with a different style of blade
  • longest knife ~8.5 inches
  • shortest knife ~6.875 inches
  • subject to rusting by mortars and grouts

Safety

The blades are not sharpened in the manner of ordinary knives, but they are thin pieces of steel that are sharp enough to cut if handled carelessly.

How To Make Mosaics

For more advice on designing your mosaic project or mounting, cutting, and grouting tile, please see our page of Mosaic Frequently Asked Questions or our Mosaic Information Guide, which lists instructional pages described by topic. We also post new articles about making mosaics at our How to Mosaic Blog.
Denim Shop Apron

Denim Shop Apron

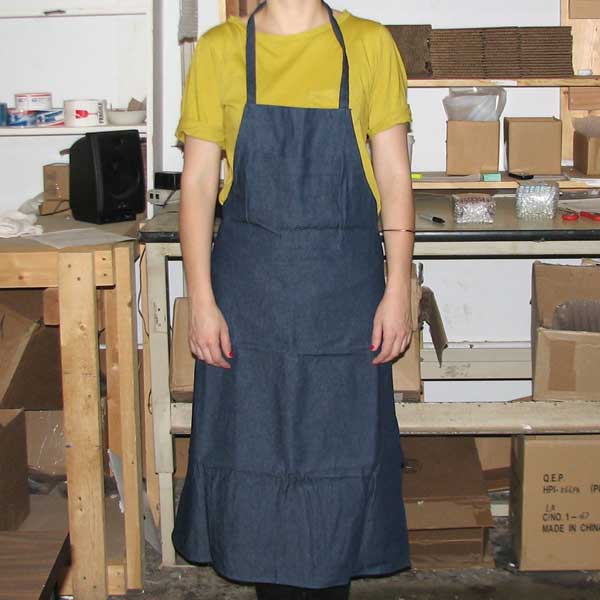
The Heavy-Duty Denim Shop Apron is worn to protect clothing while cutting mosaic tile, grouting, and cleaning up. At our studio, we use aprons with long-sleeve shirts while cutting large amounts of tile (if the temperature and humidity aren’t too high). We leave the long-sleeve shirts unbuttoned like a lab coat. When we take breaks, we remove the long-sleeve shirt and aprons off. That way our clothing stays free from cutting slivers and dust that occasionally pop onto your cloths when you cut tile for a long period.

Denim Shop Apron

  • one heavy-duty denim apron with neck loop and tie straps

When To Use This Tool

The denim apron is worn when cutting large amounts of tile or mixing and applying grout. Wearing the apron with an unbuttoned long-sleeve shirt provides extra protection, but both are optional when it is hot. We use a shop vac and brush to dust off our clothing during summer months instead of wearing aprons and over-clothing.

Cleaning

After we are done grouting, we rinse out any concrete smears in the fabric outside in our back yard with the water hose. The back yard is also where we clean the mosaic tools, grouting sponge and bucket. (Excess grout could kill grass or plants, so scoop up what you can and dispose in the trash and wash away what is left with plenty of water.) We are careful not to rinse concrete down drains for obvious reasons, including the drains of washing machines.

Do not pour left over grout or grout sludge down plumbing or drains. Grout is concrete and can harden under water. Even sand can clog drains. Instead, pour your grout and grout water into an old plastic container. After it hardens, you can pour off the water and dispose what is left as solid waste.

Safety

The denim apron can be considered a piece of safety equipment because it helps keep your clothing free from cutting slivers and grout dust.

How To Make Mosaics

For more advice on designing your mosaic project or mounting, cutting, and grouting tile, please see our page of Mosaic Frequently Asked Questions or our Mosaic Information Guide, which lists instructional pages described by topic. We also post new articles about making mosaics at our How to Mosaic Blog.
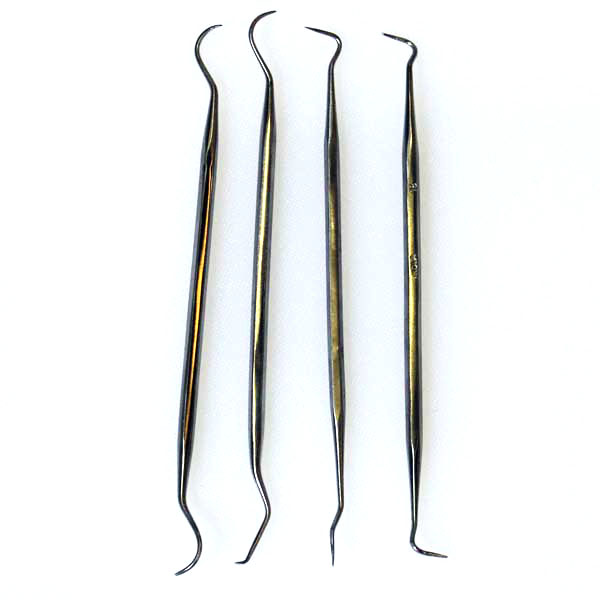
Dental Pick Set 4 Pieces

Dental Pick 4-Piece Set

The Dental Pick 4-Piece Set is used for cleaning grout from cracks and pits and for removing glue residue from gaps between mosaic tile. WARNING: THESE ARE SHARP. The shape of the points can vary from the photo shown, but the tips can be bent and reshaped, and each unit has a pick at either end of the tool. The 4-piece set is better than buying an individual pick because the styles of the ends vary, and multiple picks help ensure that you have what you need.

Dental Pick 4-Piece Set

  • double-ended steel dental picks
  • 4 pieces
  • shapes of pick ends vary from photos

The Importance of Cleaning Glue Residue

It is important that no glue residue extends up the sides of your tile. If adhesive isn’t covered with grout, then water can wick underneath the grout over time and cause tiles to pop off. You should inspect your mosaic by misting it before grouting. Any traces of glue on the sides and faces of the tile will start to turn white after a few minutes of being misted with water. You can use the point of a knife or box cutter to scrape away any glue residues you see coming up the sides of the tile to the top. However, tile in artistic mosaics made from hand-cut tile sometimes has points where tile actually touch each other at points, or the tile has extremely small grout gaps, similar to the spacing of human teeth. This makes a dental pick ideal for cleaning glue residue in these tight gaps.

How to Reduce Frustration

Tools like tweezers and dental picks can save hours of tedium and reduce frustration by allowing you to position tile without disturbing tile that you have already positioned. With these simple tools, you will be able to attempt more detailed designs than you would consider if using only your fingertips.

How To Make Mosaics

For more advice on designing your mosaic project or mounting, cutting, and grouting tile, please see our page of Mosaic Frequently Asked Questions or our Mosaic Information Guide, which lists instructional pages described by topic. We also post new articles about making mosaics at our How to Mosaic Blog.