Thumb Tweezers

thumb tweezers

Thumb Tweezers are approximately 3.5 inches in length and have slanted chisel tips for gripping small pieces of mosaic tile. This is a standard pair of thumb tweezers such as commonly used for grooming and pulling hairs. We use these for positioning small pieces of tile in mosaic art designs, especially working directly in mortar.

Thumb Tweezers

  • steel tweezers
  • slanted chisel top
  • approximately 3.5 inches in length
  • subject to rusting by thinset and grout

Mortars and Grouts Rust Steel Tools

Portland cement products like mortar and grout are mildly caustic and cause steel tools to rust faster than normal. The Thumb Tweezers are steel and thus subject to this problem. You can delay and slow rusting by washing and drying your tools on a CLEAN rag after use. Never let your tools soak until morning. They can rust literally overnight. Use a brush to scrub invisible grout residue from the tools. After our tools are dry, we wipe them with shop rag from our garage toolbox. These garage rags have traces of oil on them, which is just what is needed to prevent rusting, but not so excessive that glues get contaminated next use.

How to Reduce Frustration

Tweezers make it infinitely easier to dip your tile in adhesive or thinset without contaminating your fingertips. They also make it much easier to position the tile on the surface without messing up what you have already done. Most of the frustration of making a mosaic comes from accidentally bumping tiles that you have already positioned, and tweezers keep this from happening quite so often. The trivial cost of a basic pair of tweezers is the best money you can spend as far as reducing frustration. You will also be able to attempt more detailed designs than you would consider if using only your fingertips.

How To Make Mosaics

For more advice on designing your mosaic project or mounting, cutting, and grouting tile, please see our page of Mosaic Frequently Asked Questions or our Mosaic Information Guide, which lists instructional pages described by topic. We also post new articles about making mosaics at our How to Mosaic Blog.

Mosaic Tile Pick-Up Tool

Mosaic Tile Pick-Up Tool

The Mosaic Tile Pick-Up Tool is a 5-inch long spring-loaded gripping tool for positioning small pieces of tile in mosaic art designs. The Pick-Up Tool is superior to tweezers for many tasks because its spring-loaded arms hold the tile securely in until the end of the handle is pressed. This can be particularly helpful for people with hand tremors or motor control issues or for people working long hours. Also, the arms which grasp the tile are thin wires with minimal surface area that can be contaminated by glue, unlike tweezers which are more prone to accumulation.

Pick-Up Tool or Tweezers?

Basically, the Pick-Up Tool has the same purpose as as a pair tweezers: taking the frustration out of detailed mosaic work. Don’t use your fingertips to manipulate small mosaic tiles. Use simple tools instead, such as tweezers and this tool. Keep in mind that you might use both tools in the same mosaic depending on the different sizes of tile used in the design.

Compatibility

The Pick-Up Tool can pick up whole mosaic tile and pieces smaller than approximately 1/2-inch. It would not be of much if any use with whole 3/4-inch tile, but it is very useful with pieces cut from 3/4-inch tile. Like all metal tools, the Mosaic Tile Pick-Up Tool is easily corroded and oxidized by caustic grouts and mortars, so keep them clean and expect them to age with use.

How to Reduce Frustration

Tools like tweezers and the pick-up tool can save hours of tedium and reduce frustration by allowing you to position tile without disturbing tile that you have already positioned. They are also useful for dipping the tile in mosaic adhesive or thinset mortar without contaminating your fingertips. With these simple tools, you will be able to attempt more detailed designs than you would consider if using only your fingertips.

How To Make Mosaics

For more advice on designing your mosaic project or mounting, cutting, and grouting tile, please see our page of Mosaic Frequently Asked Questions or our Mosaic Information Guide, which lists instructional pages described by topic. We also post new articles about making mosaics at our How to Mosaic Blog.

Tweezers 4-Piece Set

Tweezers 4-Piece Set

Tweezers 4-Piece Set includes four different styles of steel tweezers for positioning mosaic tile: self-closing, flat, slanted, and needle-tip. This gives you some options if the type or shape of mosaic tile you are using happens to slip in a particular style of tip. We would not recommend doing mosaic work without some form of tweezers, especially if using tile or pieces cut 3/8 inch or smaller. The self-closing tweezers are particularly useful for people with shaking hands, or anyone working in long stretches. Reduce the tedium and frustration involved in positioning tiny tiles!

Tweezers 4-Piece Set

  • steel tweezers
  • 4 pieces
  • 4 different styles: self-closing, flat, slanted, and needle-tip.
  • subject to rusting by thinset and grout

Mortars and Grouts Rust Steel Tools

Portland cement products like mortar and grout are mildly caustic and cause steel tools to rust faster than normal. The Thumb Tweezers are steel and thus subject to this problem. You can delay and slow rusting by washing and drying your tools on a CLEAN rag after use. Never let your tools soak until morning. They can rust literally overnight. Use a brush to scrub invisible grout residue from the tools. After our tools are dry, we wipe them with shop rag from our garage toolbox. These garage rags have traces of oil on them, which is just what is needed to prevent rusting, but not so excessive that glues get contaminated next use.

How to Reduce Frustration

Tweezers make it infinitely easier to dip your tile in adhesive or thinset without contaminating your fingertips. They also make it much easier to position the tile on the surface without messing up what you have already done. Most of the frustration of making mosaic comes from accidentally bumping tiles that you have already positioned, and tweezers keep this from happening quite so often. The trivial cost of a basic pair of tweezers is the best money you can spend as far as reducing frustration. You will also be able to attempt more detailed designs than you would consider if using only your fingertips.

How To Make Mosaics

For more advice on designing your mosaic project or mounting, cutting, and grouting tile, please see our page of Mosaic Frequently Asked Questions or our Mosaic Information Guide, which lists instructional pages described by topic. We also post new articles about making mosaics at our How to Mosaic Blog.

Grozing Pliers

Grozing Pliers

Grozing Pliers are used to break off flares of glass (sharp flakes or slivers) at the edge of newly cut stained glass. These slivers are known as groze, and the process is known as grozing.

Grozing Flares

Cutting stained glass often leaves flakes or slivers of glass at the edge of the new cut. When cut, the glass behaves as if it is many thin planes of glass, and some of these planes don’t all break right at the line of the cut, and usually the top or bottom will be left sticking out as a razor-sharp flare. The jaws of the Grozing Pliers have small serrations for catching and breaking off these tiny slivers. As an alternative to Grozing Pliers, you may prefer using the fine-grit side of a rubbing stone or a marble file because these tools can also be used on ceramic and stone, and they can be used to shape and notch tile.

Scoring and Snapping Stained Glass

Scoring stained glass is done with a Pistol-Grip Cutter, which can be used to make complex curves or long straight lines. Once the glass is scored, it can be snapped apart by placing the glass on a flat surface with a pencil or spaghetti stick under the line of the cut and pressing down on both sides of the glass. For snapping apart complex curves, Running Pliers with padded jaws can be used. Stained glass artists report that Grozing Pliers can be used for this task, but our experience has been that they are of limited utility in snapping score pieces apart. What they are are particularly useful for is cleaning the groze from relatively large cuts as quickly as possible.

Grozing Pliers

  • tool type: hand tool/compression tool
  • steel pliers with one straight jaw and one curved jaw, both serrated to catch and break off sharp glass flares
  • vinyl grip

How To Make Mosaic Art

For more advice on designing your mosaic project or mounting, cutting, and grouting tile, please see our page of Mosaic Frequently Asked Questions or our Mosaic Information Guide, which lists instructional pages described by topic. We also post new articles about making mosaics at our How to Mosaic Blog.

Running Pliers

Running Pliers

Running Pliers are used to snap apart pieces of stained glass after it has been scored with the Pistol Grip Cutters. The jaws are padded with clear rubber cushions that prevent the steel from crushing the glass.

Running Pliers

  • steel pliers tool
  • plastic grips
  • cushioned jaws

Repairable for Long Life

The clear rubber cushions tend to split and fall off of the jaws over years of use, but we have repaired the jaws of our tools merely by wrapping in several layers of electrical tape, which we have also used to replace plastic grips on hand tools. Artist Joe Moorman proudly owns and uses several of his grandfather’s hand tools that have had their broken center bolts replaced with ordinary bolts and a locking nut. These sort of common-sense repairs save you money and keep perfectly usable tools out the landfill. There is no reason a single-pair of these pliers could not last a lifetime and beyond with simple repairs.

Do You Need This Tool?

If you are snapping apart long straight scores in a piece of stained glass, then no, you don’t. You can easily snap apart a straight score by placing a straight object under the score and pressing down on the glass on both sides of the score with your gloved hands. The straight object can be a pencil or an uncooked stick of spaghetti. Snapping these straight lines is simple and easy. What is difficult is snapping a curved score. For snapping curved pieces of stained glass apart, Running Pliers are needed.

How To Make Mosaics

For more advice on designing your mosaic project or mounting, cutting, and grouting tile, please see our page of Mosaic Frequently Asked Questions or our Mosaic Information Guide, which lists instructional pages described by topic. We also post new articles about making mosaics at our How to Mosaic Blog.

Cutting Oil

Cutting Oil is a light oil used in Pistol-Grip Cutters to prolong the life of the scoring wheel when cutting stained glass for mosaic art. Keep in mind that any stained glass exposed to cutting oil needs to be washed with detergent to ensure that the glues and mortars used in mosaic work can bond securely. This residue is NOT an issue if you are soldering the glass in lead channel and making traditional stained glass artwork, but it can be fatal for a mosaic.

Cutting Oil Required?

It is possible to use a Pistol Grip Cutter without cutting oil if you use the right amount of pressure. Most people prefer not to do that. The oil allows you to press harder than you need to without generating as many tiny flakes of glass and supposedly helping the cutting wheel last longer. Whether or not YOU use cutting oil when you cut stained glass, you must assume that the glass was cut with oil at some point, and so you should rinse it with detergent so that the glue or mortar can bond to the glass when you use it in a mosaic.

How To Make Mosaics

For more advice on designing your mosaic project or mounting, cutting, and grouting tile, please see our page of Mosaic Frequently Asked Questions or our Mosaic Information Guide, which lists instructional pages described by topic. We also post new articles about making mosaics at our How to Mosaic Blog.

Mosaic Tile Nipper

The Mosaic Tile Nipper is our recommended hand tool for cutting glazed ceramic tile up to 3/8-inch thick and can also be used for cutting most varieties of stone, porcelain, and dinnerware. However, the tile nipper should not be used for glass tile because it crushes and splinters more glass than it cuts. For cutting glass mosaic tile, you should use a Mosaic Glass Cutter, which has wheel-shaped blades and cuts more cleanly.

Cutting Unbreakable Dinnerware and Hard Stone?

This tile nipper is fine for cutting most types of stone and dinnerware. However, some varieties of modern dinnerware are extremely hard. In fact, some of the “unbreakable” plates found at thrift stores are made from some of the hardest engineered materials known to science. We generally avoid a plate if it is particularly difficult and move on to the next piece unless it has a pattern we like. Keep in mind that a plate that is extremely hard tends to break into pieces with extremely sharp edges. If you do need to cut extremely hard materials, then use the Compound Tile Nipper, which has a force multiplier built into its mechanism.

Safety and Cutting Tile

  • Always wear safety glasses with side shields when using tile nippers.
  • Make sure that you don’t cut glass around people not wearing safety glasses. Flying chips could potentially hit their eyes as easily as yours.
  • Be aware that cutting tile of any type can produce sharp edges.
  • Crumbs from cutting can be extremely sharp. Never sweep off a work surface with your bare hand. Use a vacuum or counter brush.

Efficient Cutting

It is much easier to cut up four or five pieces of tile and choose the one that fits best than it is to try to trim one piece to a certain shape or size. It is quicker too. Keep your rejects in a small pile and pay attention to the shapes that are in it. If you don’t use a certain size or shape as often, try to cut fewer pieces like that. This is much more effective than trimming a piece down to what you need, and it is a lot less tedious.

Replacement Springs

We now carry replacement springs, but no, your nippers are NOT defective or useless if the spring falls off. The springs tend to fall off all hand tools eventually, even the most expensive brands. They can still be used efficiently without the spring: Keep your pinky fingers inside the handle instead of outside with the rest of your fingers and use your pinky to open the tool. This is basic shop/studio practice for using any type of plier tool, most of which do not come with springs in the first place, at least not back in the day.

How To Make Mosaic Art

For more advice on designing your mosaic project or mounting, cutting, and grouting tile, please see our page of Mosaic Frequently Asked Questions or our Mosaic Information Guide, which lists instructional pages described by topic. We also post new articles about making mosaics at our How to Mosaic Blog.

Mosaic Ornament Base

Mosaic Ornament Base

Mosaic base for a holiday ornament is made of the hard variety of expanded polystyrene that is used for fishing floats. The ornament base is spherical 3 inches in diameter, which makes it the size and shape of traditional Christmas tree ornament. The base comes with generic mounting hardware installed (designed to be repairable) and a 2mm beading cord loop which can be replaced with ribbon if desired. Note that the ornament hangs at an angle so that it resembles the earth tilted on its axis (hint). The ornament base hangs at a slight angle because the loop wraps the shaft of a 3-inch decking screw instead of a shallow eye screw like so many ornaments doomed to fail in a way difficult to repair. Our 3-inch screw’s corrosion-resistant coating also allows glue to bond to it better than bare steel, so the same white PVA adhesive Weldbond used to attach the tiles could be used to reinsert the mounting screw if it ever pulled out.

Product Specifications

  • 1x hard expanded polystyrene sphere 3-inch
  • 1x 3-inch deck screw #9 with corrosion resistant-coating
  • 4x stainless steel washers #8
  • approximately 4 inch loop of 2mm beading cord

Instructions For Using the Mosaic Ornament Base

There are three important tips for making a mosaic on the polystyrene sphere:

  • Make sure you paint the sphere with adhesive and allow it to dry a few hours before you attempt to glue tile to it. The sphere by itself is so smooth, than any tile stuck to it tends to slide downhill. A layer of dried glue is much more tacky and will help prevent tiles from sliding. You can use your fingertip to paint on the glue.
  • Lay your ornament on an old folded up towel as you work on it to keep it from rolling over. A coffee mug can also be used. Work on the part of the sphere facing up, allow the area to partially dry and then rotate the sphere slightly to work on adjacent areas.
  • Put the mosaic ornament near a central heat vent or AC vent to speed drying, but not too close to fireplaces and wood stoves and places that get too hot.

Here is a step-by-step procedure for putting a mosaic on the ornament:

  1. Hang the mosaic over some old newspapers or place where glue can drip.
  2. Use your fingertips or a small brush to paint the sphere with a white PVA such as Weldbond adhesive.
  3. Allow the glue to dry for at least several hours. Hang the ornament near AC vents and central heat vents to speed the drying.
  4. Place the sphere on its side on an old folded up towel or on top of a coffee mug to work on it.
  5. Glue mosaic tile to the part of the sphere facing up, taking care not to work to far down the sloping sides because the tile will slide.
  6. Allow the glue to partially dry and then rotate the sphere slightly to one side so that an adjacent bare patch is now facing up.
  7. Continue tiling and rotating the sphere as needed until it is covered. Take care not to rotate the sphere prematurely and cause tile to shift while the glue is still soft. Take advantage of vents and warm locations to speed the process.
  8. Allow the fully tiled mosaic ornament to dry overnight or longer if needed before grouting. If the glue isn’t fully dry, then wet grout could cause tiles to pop off.
  9. Grout the mosaic with gloved hands over a plastic basin such as an old dish pan.
  10. Haze the grout the next day by burnishing with a cloth until all tile is free of grout residue.
  11. Do not over tighten the mounting screw. Hand tighten only.
  12. If the screw becomes loose or pulls out, squirt a white PVA adhesive such as Weldbond into the hole and reinsert.

Which Tile Works Best For The Ornament?

Our stone is too thick and heavy. Glass tile works best, preferably stained glass, Elementile, and the 3/8-inch mini tiles. The 3/4 inch tile can be used as well, but it would need to be cut to fit to the curvature of the 3-inch sphere. Keep in mind that if you use cut tile, especially stained glass, then take the time to smooth any sharp edges before gluing on the tile. You can use a marble file or a rubbing stone such as we sell, or you can use a piece of stone as I did for years and just rub the edge on that.

How Much Tile Do I Need For A Mosaic Ornament?

The surface area of the sphere is about 0.2 square feet. That means you should be able to tile an ornament with one of our 6×6 sheets of stained glass, which are approximately 0.25 square feet. However, you will have to be careful and not generate too much waste as cutting scrap (slivers). We recommend keeping the grout gap small (1/16 inch or less). The following numbers are based on a grout gap of 1/16 inch, but you might need slightly more of the 3/4-inch tile because that will need to be cut up:

  • 8mm tiles: 255
  • 12mm tiles: 106
  • 3/8 inch tiles: 155
  • 3/4 inch tiles: 46

How To Make Mosaic Art

For more advice on designing your mosaic project or mounting, cutting, and grouting tile, please see our page of Mosaic Frequently Asked Questions or our Mosaic Information Guide, which lists instructional pages described by topic. We also post new articles about making mosaics at our How to Mosaic Blog.

Mini SPATULA Set

mosaic-tile-tools-spatkt-bi

The Mini Spatula Set is 4 steel tools used for positioning mosaic tile and for detailed work with glue, thinset mortar, and grout. The set includes 4 different shaped heads. We use them in a similar manner to how palette knives are used in painting: scooping, transferring and manipulating viscous materials on a flat surface, only the medium is glue or mortar instead of paint. Also, small metal tools like the spatulas are more useful than fingertips when it comes to making slight adjustments to tile positions. Fingers tend to get contaminated with drying glue and stick to tiles or bump other tiles unexpectedly, but a thin metal spatula is more precise and less frustrating and more easily cleaned by wiping.

When To Use This Tool

The spatulas are not a required tool for most people because you can use your tweezers in a similar way, but it is always better to have more than one small metal positioning tool available by your side. Glues and thinset are sticky, and your hand tools are continually getting contaminated as you work. Sometimes you can’t stop to wipe them off. Sometimes you have to just grab the one that is clean and fix whatever is going wrong like a surgeon tying off a bleeding artery. This is especially true when you are working with porous stone or unglazed ceramics or artifacts that can be stained. You have to grab something immediately and scoop up the spill or straighten out the mess before the glue or thinset soaks in. Note that small metal tools such as the spatulas are better than rags for this purpose because the rag is much more likely to smear the mortar into the porous surface. Instead of doing that, we recommend scraping or scooping the spill off with a metal tool such as a spatula and follow up with a wipe with the corner of a wet rag.

How to Reduce Frustration

Small metal tools such as spatulas, dental picks and tweezers reduce the frustration of positioning small tiles and enable you to attempt more detailed designs than you would consider if using only your fingertips.

How To Make Mosaics

For more advice on designing your mosaic project or mounting, cutting, and grouting tile, please see our page of Mosaic Frequently Asked Questions or our Mosaic Information Guide, which lists instructional pages described by topic. We also post new articles about making mosaics at our How to Mosaic Blog.

Mosaic Coaster Base Circular Round

circular coaster base hardwood

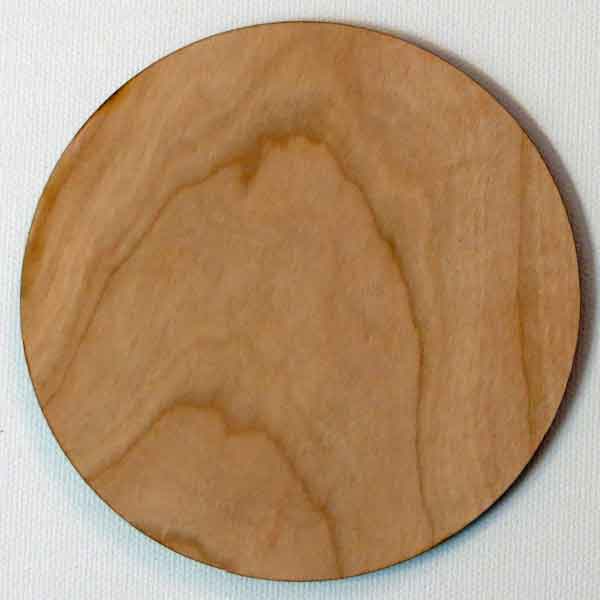
Circular Mosaic Coaster Base is made from cherry hardwood right here in the USA. The circular base is 4 inches in diameter and 3/16 inches thick. They are cut out with a laser, so the sides have a natural burnt wood color that could be lacquered. Note that the wood is not recessed to form a border for your mosaic. Instead, your mosaic should extend to the edge of the coaster so that the finished coaster looks like a fragment of an ancient mosaic. This is easiest to do when you use tile without a heavy embossed pattern on the underside, and for this reason, we recommend the 12mm Elementile Recycled Glass Mosaic Tile for use with the coasters.

Weldbond adhesive or another high quality PVA glue is recommended for attaching tiles to the coaster base, and there are several options for grouting your mosaic coaster. You can press the tiles closely together instead of leaving a gap, but that requires much more time and effort than leaving an irregular gap and then grouting the mosaic. With an irregular grout gap of 1/16 inch or less, you can use almost every piece of tile you cut because it does not have to be exact. You can also use regular sanded grout to grout it.

Mosaic Art Projects Using Coaster Bases

Product Specifications

  • 1 piece hardwood cherry circular coaster base.
  • wood pattern is natural and varies by piece.
  • diameter: 4 inches.
  • thickness: 3/16 inches.
  • laser cut edges (natural burnt wood finish).
  • unvarnished, unlacquered.
  • made in America
  • Removable paper tape protects the best face of the coaster.
  • The reverse side of the coaster may have occasional singes from the cutting laser, but these are superficial and can be covered by mosaic.

Compatibility

Any type of glass mosaic tile could be used with these, but there is no border on the coaster, so your mosaic will go all the way to the edge. If you use a type of glass tile that has coarse embossing or bevels on the underside, then these might look odd at the edge of the mosaic. It is also more difficult to cut a tile into small pieces if the bottom has an embossed pattern. For these reasons, the coasters are best covered with stained glass or the 8mm and 12mm sizes of recycled glass mosaic tile by Elementile. We prefer Elementile to stained glass because stained glass tends to form sharper edges when cut. Whatever tile you decide to use, make sure you file off any sharp edges at the sides of the mosaic using a rough stone or marble file.

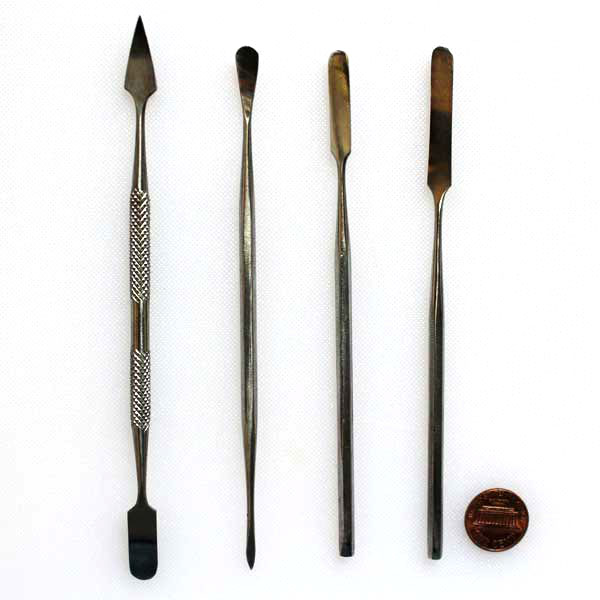
Instructions For Using The Coaster Bases For Detailed Mosaic Art

The coaster bases can be used any way you want, including simple projects for children with tiles glued randomly with variable grout spacing, and these make great first-time projects because they are small and do not require as much time and material. However, it is possible to create a more sophisticated mosaic design on the coaster using these instructions. Due to the limited space provided by the coaster, one of the most important steps is making sure you can cut tile small enough to render the smallest detail of your design and modifying your design if necessary:

  1. Find a design or picture. Google Images is a great source of photos, images, patterns, models to draw from.
  2. Draw a simple cartoon outline of your design.
  3. Try cutting up some tile and arranging it on the cartoon to see how it looks.
  4. Pay special attention to the smallest detail in your design.
  5. If it is not possible to cut tile that small, or the pieces seem too tedious to work with, then simplify your design.
  6. Note that when you start using glue, it will be easier to arrange small pieces because they will not move around as unexpectedly.
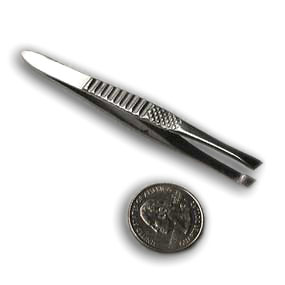
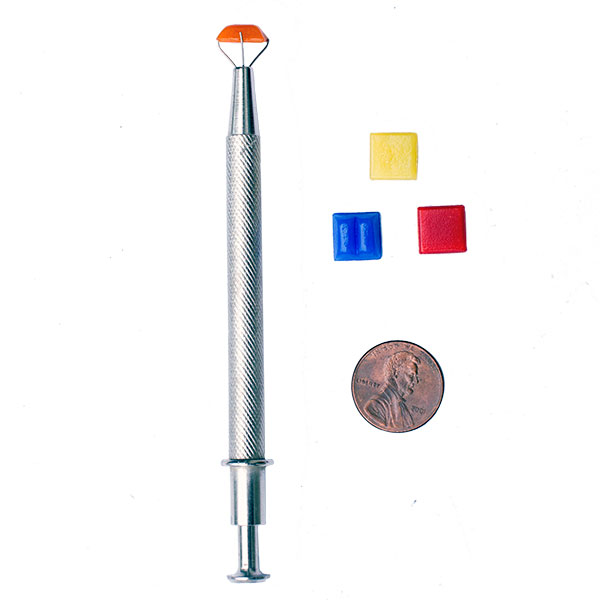
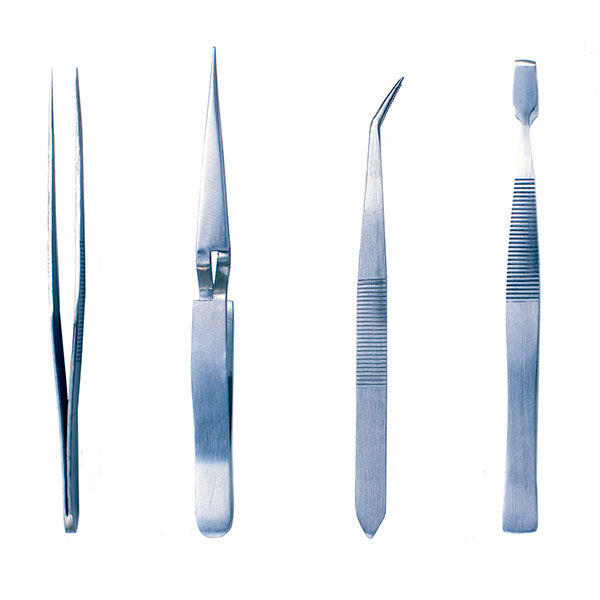
 Tweezers also help.
  7. Once you have you have verified that your design is not too detailed to be rendered in tile, then sketch the cartoon on the coaster in pencil.
  8. You can darken your pencil sketch with a Sharpie brand marker so that glue does not rub it off once you start working.
  9. Wipe Weldbond glue over the face of the coaster and allow to dry to seal the wood. Use a very thin coat to avoid warping the coaster from the moisture in the glue! Remember, the reason you are sealing the coaster in the first place is to avoid warping it later when you use lots of glue for the tiles. Use two light coasts and allow to dry thoroughly between coats.
  10. Start tiling your design from the center and working to the edges.
  11. Leaving an irregular grout gap of 1/16 inch or less is much easier than fitting the tile tightly together.
  12. At the edge of the coaster, cut the tile so that it fits flush with the edge. You can place a tile on the coaster, mark where it should be cut with a Sharpie marker before gluing and then make the cut.
  13. Use the fine side of a marble file or a piece of rough stone to rub the edge of the cut tile so that the edge is not as sharp.
  14. After the glue has dried (preferably for 48+ hours) grout your mosaic with sanded grout.
  15. We recommend sealing the edges and bottoms of the coasters to protect from spills and condensation that could split or warp the wood.
  16. Deft Clear Wood finish in a spray can is sold by Home Depot and can be used for this.

How Much Tile Do I Need For The Coaster Base?

The top surface of a 4-inch circular coaster base has only 12.6 square inches (0.09 square feet) in area. This means you could cover it with 45 to 60 of the 12mm Elementile or 90 to 130 of the 8mm Elementile depending on how you cut and space the tile. In either case, one bag of tile would be more than enough to cover the coaster. However, you will want to order more than that to account for the cutting waste, possibly twice as much if you are fitting the tile exactly with no grout gap.

How To Make Mosaic Art

For more advice on designing your mosaic project or mounting, cutting, and grouting tile, please see our page of Mosaic Frequently Asked Questions or our Mosaic Information Guide, which lists instructional pages described by topic. We also post new articles about making mosaics at our How to Mosaic Blog.