Elementile 8mm IRIDESCENT Tiles

Elementile 8mm Iridescent

5/16 inch (8mm) Iridescent Glass Mosaic Tiles by Elementile are iridized versions of the standard gloss-finish product, which we also sell. The iridescence is a surface finish created by firing metal oxides onto the surface of the glass, so it could be abraded over time by foot traffic. Note that the iridescence is deliberately mild instead of heavily applied so that the underlying colors are still visible. Like the regular 8mm, these are sold loose by the 1/4 pound (approximately 175+ pieces), which covers 0.14 square feet with a standard grout gap of 1/32 inch. Mounting grids are available. Made from recycled glass.

Elementile 8mm Iridescent Glass Mosaic Tiles

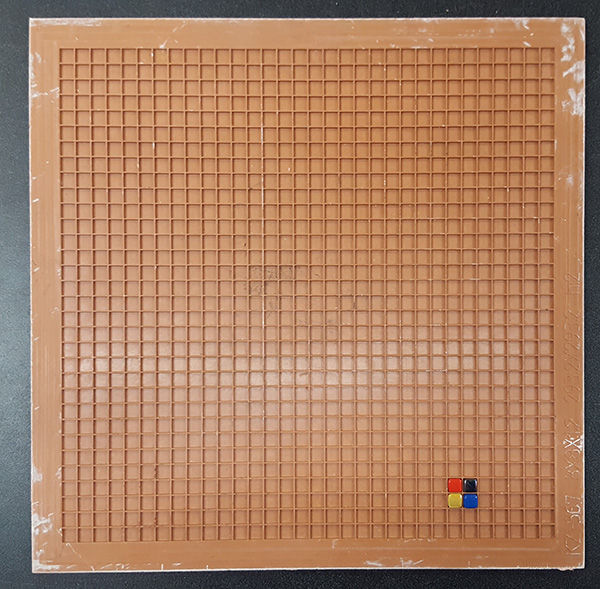
  • tile size: 5/16 inch (8mm)
  • thickness: 1/8 nominal (4mm)
  • sales unit: 1/4 pound (approximately 175+ pieces)
  • material: glass
  • variety: recycled
  • finish: iridescent
  • pigments: colorfast, UV resistant
  • durability: frost-proof, impervious to liquid
  • usage: suitable for indoor and outdoor use

Coverage

A 1/4 bag of 175 loose tiles will cover 0.14 sq ft. with a grout spacing of about 1/32 inch. To cover 1 square foot with a standard grout spacing of about 1/32 inch, you would need 1225 tiles or seven bags, but for large area coverage, order a little extra in case the tile is running incrementally thicker/heavier than normal, which could cause the piece count to run under 175. Use our tile estimator to calculate how much you need for your project.

Note that dry indoor mosaics do not have to be grouted (and thus you can simply mount the tiles tightly together), but outdoor and wet mosaics must have grout to prevent water from penetrating behind the tiles. The best way to ensure that the gaps between the tiles is to leave a 1/32-inch gap instead of pressing them tightly together, and this point seems counter intuitive to some people. Consider this: you can never mount tile so closely together that water couldn’t penetrate between, but you can put them so close that grout can’t get pressed into the gap sufficiently during the grouting process.

Compatibility

For rendering images, it is best to stick to standard gloss-finish or iridescent finish instead of mixing the two. For mixed media mosaics, a variety of finishes could be considered, but your mosaic might look better if you stuck to one or the other.

Cutting Elementile 8mm

This product cuts extremely well with the mosaic glass cutter that we sell. In fact, the homogeneous nature of pate de verre glass means that it cuts better than most types of glass tile and produces more useful pieces with fewer splinters and dust and waste.

Use in Mosaic Art

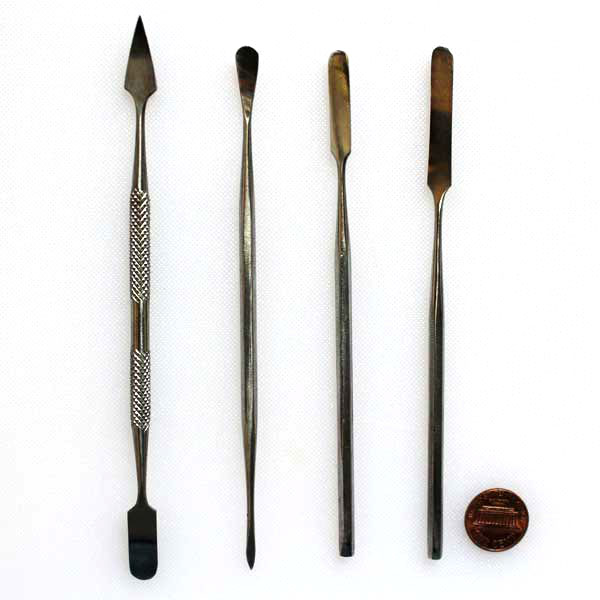
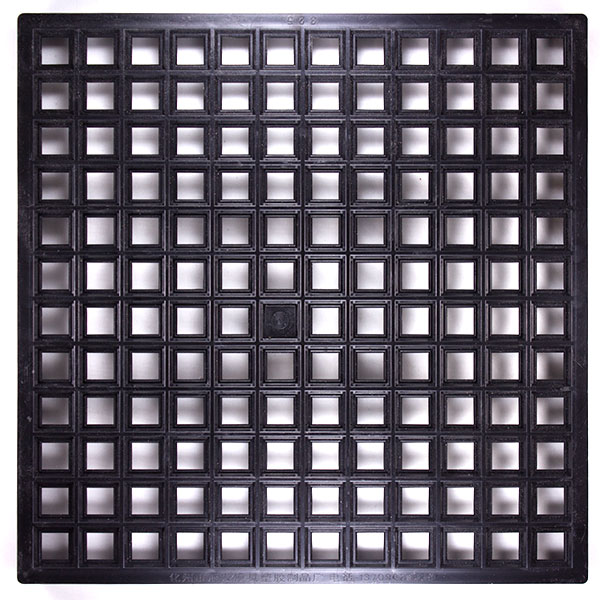
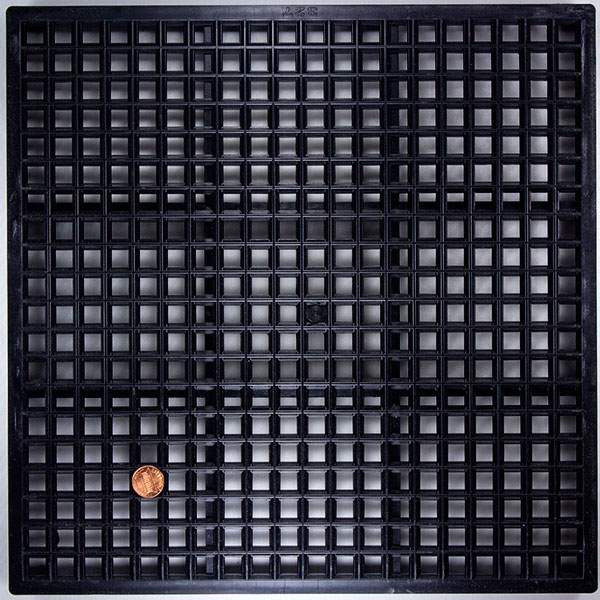
A set of tweezers can make working with these tiny tiles a lot less tedious. An 8mm Tile Mounting Grid is available for mounting designs one Mounting Paper or Tile Mounting Tape. For dry indoor mosaics, these tiles can be mounted with Weldbond Adhesive.

Elementile’s rich color palette make it a professional rendering tool that can be used for photo-realist portraiture and fine art mosaic. The colors available are more like the canonical hues of artist oil paint and less like the arbitrary mixed hues of most lines of architectural tile. The material cuts very cleanly into small pieces that can be used for micro-mosaic artwork.

How To Make Mosaics

For more advice on designing your mosaic project or cutting and grouting tile, please see our Mosaic Frequently Asked Questions page or our How To Mosaic blog or our Mosaic Information Guide.

; [product_table category=”elementile-iridescent-recycled-8mm” widths=”auto,auto,12,12,20″] ;

Mini SPATULA Set

mosaic-tile-tools-spatkt-bi

The Mini Spatula Set is 4 steel tools used for positioning mosaic tile and for detailed work with glue, thinset mortar, and grout. The set includes 4 different shaped heads. We use them in a similar manner to how palette knives are used in painting: scooping, transferring and manipulating viscous materials on a flat surface, only the medium is glue or mortar instead of paint. Also, small metal tools like the spatulas are more useful than fingertips when it comes to making slight adjustments to tile positions. Fingers tend to get contaminated with drying glue and stick to tiles or bump other tiles unexpectedly, but a thin metal spatula is more precise and less frustrating and more easily cleaned by wiping.

When To Use This Tool

The spatulas are not a required tool for most people because you can use your tweezers in a similar way, but it is always better to have more than one small metal positioning tool available by your side. Glues and thinset are sticky, and your hand tools are continually getting contaminated as you work. Sometimes you can’t stop to wipe them off. Sometimes you have to just grab the one that is clean and fix whatever is going wrong like a surgeon tying off a bleeding artery. This is especially true when you are working with porous stone or unglazed ceramics or artifacts that can be stained. You have to grab something immediately and scoop up the spill or straighten out the mess before the glue or thinset soaks in. Note that small metal tools such as the spatulas are better than rags for this purpose because the rag is much more likely to smear the mortar into the porous surface. Instead of doing that, we recommend scraping or scooping the spill off with a metal tool such as a spatula and follow up with a wipe with the corner of a wet rag.

How to Reduce Frustration

Small metal tools such as spatulas, dental picks and tweezers reduce the frustration of positioning small tiles and enable you to attempt more detailed designs than you would consider if using only your fingertips.

How To Make Mosaics

For more advice on designing your mosaic project or mounting, cutting, and grouting tile, please see our page of Mosaic Frequently Asked Questions or our Mosaic Information Guide, which lists instructional pages described by topic. We also post new articles about making mosaics at our How to Mosaic Blog.

Mosaic Coaster Base Circular Round

circular coaster base hardwood

Circular Mosaic Coaster Base is made from cherry hardwood right here in the USA. The circular base is 4 inches in diameter and 3/16 inches thick. They are cut out with a laser, so the sides have a natural burnt wood color that could be lacquered. Note that the wood is not recessed to form a border for your mosaic. Instead, your mosaic should extend to the edge of the coaster so that the finished coaster looks like a fragment of an ancient mosaic. This is easiest to do when you use tile without a heavy embossed pattern on the underside, and for this reason, we recommend the 12mm Elementile Recycled Glass Mosaic Tile for use with the coasters.

Weldbond adhesive or another high quality PVA glue is recommended for attaching tiles to the coaster base, and there are several options for grouting your mosaic coaster. You can press the tiles closely together instead of leaving a gap, but that requires much more time and effort than leaving an irregular gap and then grouting the mosaic. With an irregular grout gap of 1/16 inch or less, you can use almost every piece of tile you cut because it does not have to be exact. You can also use regular sanded grout to grout it.

Mosaic Art Projects Using Coaster Bases

Product Specifications

  • 1 piece hardwood cherry circular coaster base.
  • wood pattern is natural and varies by piece.
  • diameter: 4 inches.
  • thickness: 3/16 inches.
  • laser cut edges (natural burnt wood finish).
  • unvarnished, unlacquered.
  • made in America
  • Removable paper tape protects the best face of the coaster.
  • The reverse side of the coaster may have occasional singes from the cutting laser, but these are superficial and can be covered by mosaic.

Compatibility

Any type of glass mosaic tile could be used with these, but there is no border on the coaster, so your mosaic will go all the way to the edge. If you use a type of glass tile that has coarse embossing or bevels on the underside, then these might look odd at the edge of the mosaic. It is also more difficult to cut a tile into small pieces if the bottom has an embossed pattern. For these reasons, the coasters are best covered with stained glass or the 8mm and 12mm sizes of recycled glass mosaic tile by Elementile. We prefer Elementile to stained glass because stained glass tends to form sharper edges when cut. Whatever tile you decide to use, make sure you file off any sharp edges at the sides of the mosaic using a rough stone or marble file.

Instructions For Using The Coaster Bases For Detailed Mosaic Art

The coaster bases can be used any way you want, including simple projects for children with tiles glued randomly with variable grout spacing, and these make great first-time projects because they are small and do not require as much time and material. However, it is possible to create a more sophisticated mosaic design on the coaster using these instructions. Due to the limited space provided by the coaster, one of the most important steps is making sure you can cut tile small enough to render the smallest detail of your design and modifying your design if necessary:

  1. Find a design or picture. Google Images is a great source of photos, images, patterns, models to draw from.
  2. Draw a simple cartoon outline of your design.
  3. Try cutting up some tile and arranging it on the cartoon to see how it looks.
  4. Pay special attention to the smallest detail in your design.
  5. If it is not possible to cut tile that small, or the pieces seem too tedious to work with, then simplify your design.
  6. Note that when you start using glue, it will be easier to arrange small pieces because they will not move around as unexpectedly. Tweezers also help.
  7. Once you have you have verified that your design is not too detailed to be rendered in tile, then sketch the cartoon on the coaster in pencil.
  8. You can darken your pencil sketch with a Sharpie brand marker so that glue does not rub it off once you start working.
  9. Wipe Weldbond glue over the face of the coaster and allow to dry to seal the wood. Use a very thin coat to avoid warping the coaster from the moisture in the glue! Remember, the reason you are sealing the coaster in the first place is to avoid warping it later when you use lots of glue for the tiles. Use two light coasts and allow to dry thoroughly between coats.
  10. Start tiling your design from the center and working to the edges.
  11. Leaving an irregular grout gap of 1/16 inch or less is much easier than fitting the tile tightly together.
  12. At the edge of the coaster, cut the tile so that it fits flush with the edge. You can place a tile on the coaster, mark where it should be cut with a Sharpie marker before gluing and then make the cut.
  13. Use the fine side of a marble file or a piece of rough stone to rub the edge of the cut tile so that the edge is not as sharp.
  14. After the glue has dried (preferably for 48+ hours) grout your mosaic with sanded grout.
  15. We recommend sealing the edges and bottoms of the coasters to protect from spills and condensation that could split or warp the wood.
  16. Deft Clear Wood finish in a spray can is sold by Home Depot and can be used for this.

How Much Tile Do I Need For The Coaster Base?

The top surface of a 4-inch circular coaster base has only 12.6 square inches (0.09 square feet) in area. This means you could cover it with 45 to 60 of the 12mm Elementile or 90 to 130 of the 8mm Elementile depending on how you cut and space the tile. In either case, one bag of tile would be more than enough to cover the coaster. However, you will want to order more than that to account for the cutting waste, possibly twice as much if you are fitting the tile exactly with no grout gap.

How To Make Mosaic Art

For more advice on designing your mosaic project or mounting, cutting, and grouting tile, please see our page of Mosaic Frequently Asked Questions or our Mosaic Information Guide, which lists instructional pages described by topic. We also post new articles about making mosaics at our How to Mosaic Blog.

Mosaic Coaster Base Square

square mosaic coaster base

Square Mosaic Coaster Base is made from cherry hardwood right here in the USA. The square base is 4 inches wide and 3/16 inches thick. They are cut out with a laser, so the sides have a natural burnt wood color that could be lacquered. Note that the wood is not recessed to form a border for your mosaic. Instead, your mosaic should extend to the edge of the coaster so that the finished coaster looks like a fragment of an ancient mosaic. This is easiest to do when you use tile without a heavy embossed pattern on the underside, and for this reason, we recommend the 12mm Elementile Recycled Glass Mosaic Tile for use with the coasters.

Weldbond adhesive or another high quality PVA glue is recommended for attaching tiles to the coaster base, and there are several options for grouting your mosaic coaster. You can press the tiles closely together instead of leaving a gap, but that requires much more time and effort than leaving an irregular gap and then grouting the mosaic. With an irregular grout gap of 1/16 inch or less, you can use almost every piece of tile you cut because it does not have to be exact. You can also use regular sanded grout to grout it.

Mosaic Art Projects Using Coaster Bases

Product Specifications

  • 1 piece hardwood cherry square coaster base.
  • wood pattern is natural and varies by piece.
  • width: 4 inches.
  • thickness: 3/16 inches.
  • laser cut edges (natural burnt wood finish).
  • unvarnished, unlacquered.
  • made in America
  • Removable paper tape protects the best face of the coaster.
  • The reverse side of the coaster may have occasional singes from the cutting laser, but these are superficial and can be covered by mosaic.

Compatibility

Any type of glass mosaic tile could be used with these, but there is no border on the coaster, so your mosaic will go all the way to the edge. If you use a type of glass tile that has coarse embossing or bevels on the underside, then these might look odd at the edge of the mosaic. It is also more difficult to cut a tile into small pieces if the bottom has an embossed pattern. For these reasons, the coasters are best covered with stained glass or the 8mm and 12mm sizes of recycled glass mosaic tile by Elementile. We prefer Elementile to stained glass because stained glass tends to form sharper edges when cut. Whatever tile you decide to use, make sure you file off any sharp edges at the sides of the mosaic using a rough stone or marble file.

Instructions For Using The Coaster Bases For Detailed Mosaic Art

The coaster bases can be used any way you want, including simple projects for children with tiles glued randomly with variable grout spacing, and these make great first-time projects because they are small and do not require as much time and material. However, it is possible to create a more sophisticated mosaic design on the coaster using these instructions. Due to the limited space provided by the coaster, one of the most important steps is making sure you can cut tile small enough to render the smallest detail of your design and modifying your design if necessary:

  1. Find a design or picture. Google Images is a great source of photos, images, patterns, models to draw from.
  2. Draw a simple cartoon outline of your design.
  3. Try cutting up some tile and arranging it on the cartoon to see how it looks.
  4. Pay special attention to the smallest detail in your design.
  5. If it is not possible to cut tile that small, or the pieces seem too tedious to work with, then simplify your design.
  6. Note that when you start using glue, it will be easier to arrange small pieces because they will not move around as unexpectedly. Tweezers also help.
  7. Once you have you have verified that your design is not too detailed to be rendered in tile, then sketch the cartoon on the coaster in pencil.
  8. You can darken your pencil sketch with a Sharpie brand marker so that glue does not rub it off once you start working.
  9. Wipe Weldbond glue over the face of the coaster and allow to dry to seal the wood. Use a very thin coat to avoid warping the coaster from the moisture in the glue! Remember, the reason you are sealing the coaster in the first place is to avoid warping it later when you use lots of glue for the tiles. Use two light coasts and allow to dry thoroughly between coats.
  10. Start tiling your design from the center and working to the edges.
  11. Leaving an irregular grout gap of 1/16 inch or less is much easier than fitting the tile tightly together.
  12. At the edge of the coaster, cut the tile so that it fits flush with the edge. You can place a tile on the coaster, mark where it should be cut with a Sharpie marker before gluing and then make the cut.
  13. Use the fine side of a marble file or a piece of rough stone to rub the edge of the cut tile so that the edge is not as sharp.
  14. After the glue has dried (preferably for 48+ hours) grout your mosaic with sanded grout.
  15. We recommend sealing the edges and bottoms of the coasters to protect from spills and condensation that could split or warp the wood.
  16. Deft Clear Wood finish in a spray can is sold by Home Depot and can be used for this.

How Much Tile Do I Need For The Coaster Base?

The top surface of a 4-inch square coaster base has only 16 square inches (0.1 square feet) in area. This means you could cover it with 56 to 72 of the 12mm Elementile or 113 to 162 of the 8mm Elementile depending on how you cut and space the tile. In either case, one bag of tile would be more than enough to cover the coaster. However, you will want to order more than that to account for the cutting waste, possibly twice as much if you are fitting the tile exactly with no grout gap.

How To Make Mosaic Art

For more advice on designing your mosaic project or mounting, cutting, and grouting tile, please see our page of Mosaic Frequently Asked Questions or our Mosaic Information Guide, which lists instructional pages described by topic. We also post new articles about making mosaics at our How to Mosaic Blog.

Margin Trowel

margin trowel

The margin trowel has a 5 1/2 inch x 2 inch blade for mixing and spreading grout and thinset. Note that this isn’t a notched trowel of the type typically used for spreading adhesive over large areas for architectural projects. Instead, this trowel was selected for its small size and its shape, which makes it suitable for mixing grout in small tubs and buckets.

Margin Trowel

  • wooden handle
  • steel blade 5 1/2 inch x 2 inch

Using The Trowel

The most important tip we can give you concerning grout tools like the mounting trowel is to remember to wash them thoroughly after grouting your project. This is actually a common problem because people are so focused on their mosaic that they often don’t think about their tools until after the concrete has hardened, usually not until the next day.

Never Soak Your Tools

Note that hardened concrete can be scraped off and is not nearly as bad a soaking your tools, which can rust them literally overnight. Never soak your tools. Grout and thinset are mildly caustic and cause them to rust rapidly. Wash and dry them with a clean rag or let the concrete harden on them for removal later.

Grouting Tips

Grouting outdoors is best, especially some place you can run a water hose and don’t mind a little sand and residue being rinsed. Excess grout could kill grass or plants, so scoop up what you can for disposal as solid waste in the trash and wash away what little is left with ample water.

Grout and concrete harden by BINDING water not by drying out. If you let grout or concrete dry out while it is curing, then it will be soft and crumbly. This also happens if you did not add enough water to the grout when you mixed it up. Cover your mosaic with plastic if you are grouting in strong heat, sunlight, air conditioning, wind or any other condition that accelerates drying.

Make sure you rinse all the water out of sponge so that it is moist but not leaving drips of water when you rub it on the mosaic. You do not want to get drips of water in the grout in the gaps when you are rubbing the residue off the faces of the tile.

Do not pour left over grout or grout sludge down plumbing or drains. Grout is concrete and can harden under water. Even sand can clog drains. Instead, pour your grout and grout water into an old plastic container. After it hardens, you can pour off the water and dispose what is left as solid waste.

We use traditional grouts and NOT the new epoxy-grouts, and all our advice is written for traditional grout. If you use the new epoxy-base products, then make sure you read manufacturer recommendations for safety and disposal.

Safety

Always wear safety glasses with side shields when mixing and applying grout. Grouting is a physical process with lots of mixing and rubbing and wiping, and these motions cause pieces of sand and grit to fly unexpectedly.

Grout contains powdered silica (sand) and is mildly caustic. Avoid breathing the dust. Use an ordinary dust mask rated N95 when mixing or use a misting water bottle to avoid creating dust. To protect your skin from grout, wear heavy-duty grouting gloves.

How To Make Mosaics

For more advice on designing your mosaic project or mounting, cutting, and grouting tile, please see our page of Mosaic Frequently Asked Questions or our Mosaic Information Guide, which lists instructional pages described by topic. We also post new articles about making mosaics at our How to Mosaic Blog.

Grout Removal Tool

Grout Removal Tool_02_600 x 600_2024

Grout Removal Tool has durable carbide tips for scraping grout and thinset from between mosaic tile. It is great for removing the wrong color grout or old grout that is stained by age.

When to Use This Tool

Fine Art Mosaic

One of the worst experiences you can have is a mosaic artist is to spend days or weeks mounting tile by hand to produce a mosaic that looks great only to ruin it by applying the wrong color grout. THIS HAPPENS OFTEN, at least with artists new to mosaic, and most are surprised and horrified at how quickly they ruined something beautiful that took them an significant amount of time to make. The good news is the mosaic is not ruined. The grout removal tool can efficiently scrape out the grout so that a new color can be applied.

Bathroom Tiling and Kitchen Backsplashes

While it is true that there are people who genuinely dislike the color of their bathroom tile and want to replace it with something else, a significant percentage of people who say this would actually find the current color acceptable if only the old stained grout were replaced with new clean grout. Unless tile is chipped or broken or scratched, some very old tile can look remarkably new if regrouted. The Grout Removal Tool provides a very affordable way of making bathroom tub and shower stalls look new without the work and expense of tearing down old tile.

Crumbly Grout

Many people do not realize the grout and concrete harden by BINDING water not by drying out. If you let grout or concrete dry out while it is curing, then it will be soft and crumbly. This also happens if you did not add enough water to the grout when you mixed it up. The Grout Removal Tool can be used to quickly scrape the old grout out and start over.

How To Make Mosaics

For more advice on designing your mosaic project or mounting, cutting, and grouting tile, please see our page of Mosaic Frequently Asked Questions or our Mosaic Information Guide, which lists instructional pages described by topic. We also post new articles about making mosaics at our How to Mosaic Blog.

Mosaic Tile Mounting Grid 1-Inch IRREGULAR

Mosaic Tile Mounting Grid 1-Inch

Mosaic Tile Mounting Grid 1-Inch is for temporarily mounting 1-inch tiles on paper or clear tape for rapid installation using the indirect method. NOT NEEDED FOR BEGINNERS. Most artists glue each tile directly on the surface they are covering and do not need grids. In fact, original mosaic art looks best when tile is cut into pieces and mounted in a pattern that is not a grid.

The grid mounts 144 glass mosaic tiles (25mm size) on 1.15 square foot of mosaic mounting paper in a uniform grid of 12 x 12 tiles with a standard grout gap of approximately 1/16 inch. The sockets in the grid are tapered to accommodate the bevelled undersides of most glass mosaic tiles. Tile without bevels (such as most stone and porcelain tile) could be used in the grid, but they might not stay positioned as securely, and so more care might be required while glueing mounting paper to those materials.

WARNING IRREGULAR

These grids are made for mounting beveled tiles placed face up in the grid and cannot hold 1-inch tiles placed face down in them because the beveled sockets are actually smaller than 1 inch. That means you can use these with mounting tape (to pick tiles up by their faces) but not mounting mesh (to be glued to the backs of tiles placed upside down in the grid).

If you place tile upside down in the grid, the tile would need to be 22mm (7/8 inch), and the resulting gap would be approximately 5/32 inch, which is wide. Fortunately when you place 1-inch beveled tile in the sockets face up, the resulting gap is approximately 1/16 inch.

Mosaic Tile Mounting Grid 1-Inch

  • For beveled tiles placed face up. Cannot hold 1-inch tiles placed face down.)
  • grid size: 12 tiles x 12 tiles.
  • grid area: approximately 1.15 square foot.
  • grout gap: approximately 1/16 inch. (When beveled tiles are placed face up.)
  • tile size: 1 inch. (When beveled tiles are placed face up.)

The Indirect Method

Mosaic tile can be glued one at a time DIRECTLY to a surface, or you can lay your mosaic out on a temporary surface in what is called the “Indirect Method.” Temporary surfaces can include things like fiberglass mesh, paper, adhesive contact paper, or trays filled with lime putty. Our grids were made to work with self-adhesive mounting tape and mounting paper that is temporarily glued to the faces of the tiles.

Why Use The Indirect Method

Why would you want to use the Indirect Method? It is easier to lay up your mosaic design at your work table than it is to lay it out on a floor or a wall or some other vertical surface. Also, you can work for days or weeks at your work table laying up the mosaic without tying up the location where the mosaic will actually be installed. Again, none of this is necessary for a beginner laying up a small craft project like a trivet or a mosaic mirror.

Use In Mosaic Art

The following is how to do the indirect method using our grids and mounting paper:

  1. Place glass mosaic tile into the grid face up, filling up the grid with your design.
  2. Dilute water-soluble glue such as Elmer’s Glue with 3 parts water to 1 part glue.
  3. Paint the water soluble glue onto the mounting paper using a small artists paint brush. Use a light coat to avoid wrinkling the paper.
  4. Lay mounting paper onto the face of the tile, careful to avoid wrinkles.
  5. Allow sheet to dry completely and remove from the grid.
  6. Spread thinset mortar or mosaic adhesive on the surface to be mosaiced.
  7. “Butter” the bottom of the sheet of tile with the same mortar or adhesive. Of coarse, you butter the bare glass bottoms of the tile, not the paper.
  8. Press the sheet of tiles into the adhesive-covered surface with the PAPER ON THE OUTSIDE.
  9. Allow the thinset or adhesive to cure for 24 hours.
  10. Mist the paper until it is soaked and peel it off the tiles.
  11. Grout the mosaic.

How To Make Mosaics

For more advice on designing your mosaic project or cutting and grouting tile, please see our Mosaic Frequently Asked Questions page or our How To Mosaic blog or our Mosaic Information Guide.

Mosaic Tile Mounting Grid 15mm

Mosaic Tile Mounting Grid 15mm

Mosaic Tile Mounting Grid 15mm is for temporarily mounting 15mm tiles on paper or clear tape for rapid installation using the indirect method. NOT NEEDED FOR BEGINNERS. Most artists glue each tile directly on the surface they are covering and do not need grids. In fact, original mosaic art looks best when tile is cut into pieces and mounted in a pattern that is not a grid.

The grid mounts 400 glass mosaic tiles (15mm size) on a 1.15 square foot piece of mosaic mounting paper in a uniform grid of 20 x 20 tiles with a standard grout gap of approximately 1/16 inch.

Note that the sockets of the grid are contoured to match the bevels on the bottoms of the 15mm glass mosaic tile we sell. The grid might not work as well for tile which is completely flat on the bottom, such as most stone and porcelain tile. With the flat-bottomed tile, you might have to be a little more careful to keep the tiles from popping out as you apply the mounting paper because the flat-bottomed tile doesn’t sit as deeply in the sockets.

This grid is NOT suitable for the 15mm Colored Mirror Tile we sell because those tiles have mold flashing on the sides.

Mosaic Tile Mounting Grid 15mm

  • grid size: 20 tiles x 20 tiles.
  • grid area: approximately 1.15 square foot.
  • grout gap: approximately 1/16 inch.
  • tile size: 15mm.

The Indirect Method

Mosaic tile can be glued one at a time DIRECTLY to a surface, or you can lay your mosaic out on a temporary surface in what is called the “Indirect Method.” Temporary surfaces can include things like fiberglass mesh, paper, adhesive contact paper, or trays filled with lime putty. Our grids were made to work with self-adhesive mounting tape or mounting paper that is temporarily glued to the faces of the tiles.

Why Use The Indirect Method

Why would you want to use the Indirect Method? It is easier to lay up your mosaic design at your work table than it is to lay it out on a floor or a wall or some other vertical surface. Also, you can work for days or weeks at your work table laying up the mosaic without tying up the location where the mosaic will actually be installed. Again, none of this is necessary for a beginner laying up a small craft project like a trivet or a mosaic mirror.

Use In Mosaic Art

The following is how to do the indirect method using our grids and mounting paper:

  1. Place glass mosaic tile into the grid face up, filling up the grid with your design.
  2. Dilute water-soluble glue such as Elmer’s Glue with 3 parts water to 1 part glue.
  3. Paint the water soluble glue onto the mounting paper using a small artists paint brush. Use a light coat to avoid wrinkling the paper.
  4. Lay mounting paper onto the face of the tile, careful to avoid wrinkles.
  5. Allow sheet to dry completely and remove from the grid.
  6. Spread thinset mortar or mosaic adhesive on the surface to be mosaiced.
  7. “Butter” the bottom of the sheet of tile with the same mortar or adhesive. Of coarse, you butter the bare glass bottoms of the tile, not the paper.
  8. Press the sheet of tiles into the adhesive-covered surface with the PAPER ON THE OUTSIDE.
  9. Allow the thinset or adhesive to cure for 24 hours.
  10. Mist the paper until it is soaked and peel it off the tiles.
  11. Grout the mosaic.

How To Make Mosaics

For more advice on designing your mosaic project or cutting and grouting tile, please see our Mosaic Frequently Asked Questions page or our How To Mosaic blog or our Mosaic Information Guide.

Mosaic Tile Mounting Grid 8mm (Fits ~90% pieces)

Mosaic Tile Mounting Grid 8mm

Mosaic Tile Mounting Grid 8mm is for temporarily mounting patterns of uncut tile Elemetile brand on paper for rapid installation using the indirect method. They are not needed for most projects. Most artists use cut tiles or glue each tile directly on the surface they are covering and do not need grids.

The grid mounts 1024 of the 8mm Tiny Elementile on ~1 square foot of mosaic mounting paper in a uniform grid of 32 x 32 tiles with a grout gap of approximately 1/32 inch. HOWEVER, THE 8MM TILE IS A NOMINAL SIZE, AND THE ACTUAL SIZE VARIES, AND SO ABOUT 5 TO 10% OF THE PIECES MIGHT NOT FIT IN THE GRID OR FIT VERY TIGHTLY. DO NOT BUY THIS GRID IF THAT IS A PROBLEM.

Note that the paper we sell is 1.15 square foot, which is slightly larger than these grids but should not pose any problems. (You can always trim away the excess paper after you mount the tiles.)

This grid is suitable for use with either the standard glossy finish 8mm Elementile or the iridescent finish 8mm Elementile.

Mosaic Tile Mounting Grid 8mm

  • grid size: 32 tiles x 32 tiles.
  • grid area: 11.5 inches x 11.5 inches (under 1 square foot).
  • grout gap: approximately 1/32 inch.
  • tile size: 8mm (~5/16 inch).

Indirect Method

Mosaic tile can be glued one at a time DIRECTLY to a surface, or you can lay your mosaic out on a temporary surface in what is called the “Indirect Method.” Temporary surfaces can include things like fiberglass mesh, paper, adhesive contact paper or trays filled with lime putty. Our grids were made to work with self-adhesive mounting tape and mounting paper that is glued to the faces of the tiles.

Why Use The Indirect Method

Why would you want to use the Indirect Method? It is easier to lay up your mosaic design at your work table than it is to lay it out on a floor or vertical wall. Also, you can work for days or weeks at your work table laying up the mosaic without tying up the location where the mosaic will actually be installed. Again, none of this is necessary for a beginner laying up a small craft project like a trivet or a mosaic mirror.

Use In Mosaic Art

The following is how to do the indirect method using our grids and mounting paper:

  1. Place glass mosaic tile into the grid face up, filling up the grid with your design.
  2. Dilute water-soluble glue such as Elmer’s Glue with 3 parts water to 1 part glue.
  3. Paint the water soluble glue onto the mounting paper using a small artists paint brush. Use a light coat to avoid wrinkling the paper.
  4. Lay mounting paper onto the face of the tile, careful to avoid wrinkles.
  5. Allow sheet to dry completely and remove from the grid.
  6. Spread thinset mortar or mosaic adhesive on the surface to be mosaiced.
  7. “Butter” the bottom of the sheet of tile with the same mortar or adhesive. Of coarse, you butter the bare glass bottoms of the tile, not the paper.
  8. Press the sheet of tiles into the adhesive-covered surface with the PAPER ON THE OUTSIDE.
  9. Allow the thinset or adhesive to cure for 24 hours.
  10. Mist the paper until it is soaked and peel it off the tiles.
  11. Grout the mosaic.

How To Make Mosaics

For more advice on designing your mosaic project or cutting and grouting tile, please see our Mosaic Frequently Asked Questions page or our How To Mosaic blog or our Mosaic Information Guide.

Grouting Gloves

Grouting Gloves

Grouting Gloves are heavy-duty latex, and they are puncture resistant and tear resistant (compared to other rubber gloves such as dish-washing gloves). Note that these are not work gloves that should be worn for cutting tile. For cutting and smoothing tile, we wear leather work gloves or vinyl work gloves.

When To Use This Tool

The latex grouting gloves are worn during grouting to protect the skin from abrasive sand and grout, which is mildly caustic. We often use our gloved hands to press the grout between the tiles, but we are careful to rub parallel to the surface of the mosaic and keep our fingertips from pressing between the tiles where the sharp edges are. We also avoid rubbing against the outer edge of the mosaic, which sometimes has sharp edges. Grouting is easier if your outer edges have been smoothed with a marble file and you use a uniform small grout gap of about 1/16 inch or smaller. Wider grout gaps can allow fingertips to press between the tiles.

Product Specifications

  • heavy duty latex
  • 1 pair
  • fits large hands, not made for dexterity or detailed work

Grouting Tips

Grouting outdoors is best, especially some place you can run a water hose and don’t mind a little sand and residue being rinsed. Excess grout can kill grass or plants, so scoop up what you can and wash away what is left.

Grout and concrete harden by BINDING water not by drying out. If you let grout or concrete dry out while it is curing, then it will be soft and crumbly. This also happens if you did not add enough water to the grout when you mixed it up. Cover your mosaic with plastic if you are grouting in strong heat, sunlight, air conditioning, wind, or any other condition that accelerates drying.

Make sure you rinse all the water out of your sponge so that it is moist but not leaving drips of water when you rub it on the mosaic. You do not want to get drips of water in the grout in the gaps when you are rubbing the residue off the faces of the tile.

Do not pour left over grout or grout sludge down plumbing or drains. Grout is concrete and can harden under water. Even sand can clog drains. Instead, pour your grout and grout water into an old plastic container. After it hardens, you can pour off the water and dispose what is left as solid waste.

We use traditional grouts and NOT the new epoxy-grouts, and all our advice is written for traditional grout. If you use the new epoxy-base products, then make sure you read manufacturer recommendations for safety and disposal.

Safety

Always wear safety glasses with side shields when mixing and applying grout. Grouting is a physical process with lots of mixing and rubbing and wiping, and these motions cause pieces of sand and grit to fly unexpectedly.

Grout is mildly caustic and can irritate skin, sometimes severely if you have sensitive skin. The sand and rubbing required in grouting aggravate the problem. Wear rubber gloves while grouting to protect your skin.

Grout contains powdered silica (sand) and is slightly caustic due to the lime it contains. Avoid breathing the dust. Use a dust mask when mixing or use a misting water bottle to avoid creating dust.

How To Make Mosaics

For more advice on designing your mosaic project or mounting, cutting, and grouting tile, please see our page of Mosaic Frequently Asked Questions or our Mosaic Information Guide, which lists instructional pages described by topic. We also post new articles about making mosaics at our How to Mosaic Blog.