

Yellow-Greenish Y43-12mm
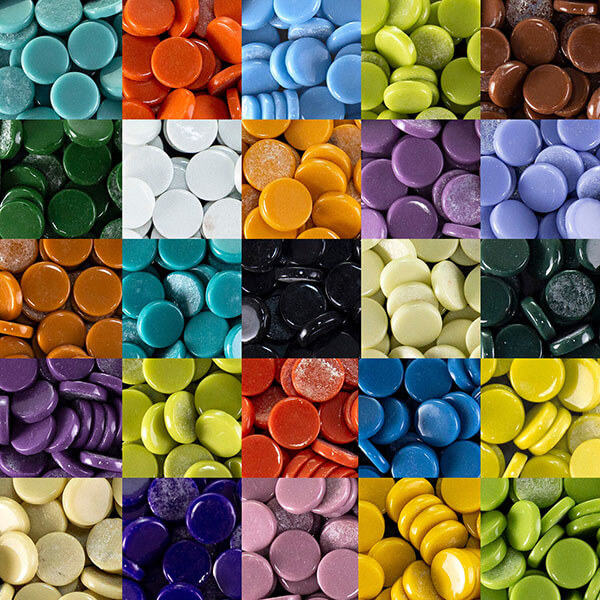
MORJO™ Thinny-Pennies™ are 20mm Penny Round Recycled Glass Tiles. They are sold loose by the 1/2 pound (approximately 70+ pieces), which covers slightly under 1/3 of a square foot (~42 square inches) with a standard grout gap of 1/16 inch. These tiles have a glossy finish, and the glass has solid color throughout (and not just on the tops or bottoms.) They are opaque when mounted on an opaque surface.
The Thinny Pennies are the same thickness as regular glass mosaic tile (4mm or ~1/8 inch) and not fat like glass gems. This makes them much easier to use with other types of glass tile and easier to grout.
The recycled glass is a homogeneous material that cuts cleanly and predictably using the Wheel-bladed Mosaic Glass Cutter. They are hard and durable and UV-resistant and can be used for the exteriors of commercial buildings. The fusing process for making these tiles from powdered recycled glass is referred to as “warm glass” or “enamel glass” or “pate de verre.”
The bottoms of these tiles are left intentionally rough from gritty mold release (chalk) for improved bond strength. In my experience, and rough, scratched, or etched glass is more effective than embossed ridges. Rough bottoms also has another important advantage over embossed ridges: they don’t interfere with cutting.
Each 1/2-pound bag of about 70+ tiles covers just under 1/3 of a square foot (~42 square inches) assuming a standard grout gap of 1/16 inch.
Note that dry indoor mosaics do not have to be grouted (and thus you can simply mount the tiles tightly together), but outdoor and wet mosaics must have grout to prevent water from penetrating behind the tiles. The best way to ensure that the gaps between the tiles is to leave a 1/16-inch gap instead of pressing them tightly together, and this point seems counter-intuitive to some people. Consider this: you can never mount them so closely together that water can’t penetrate it, but you can accidentally put them so close that grout doesn’t get adequately pressed into the crack during the grouting process.
These tiles have a nominal thickness of 1/8 inch (4mm), which is the same nominal thickness as most of the glass tile we sell. You can use these with other brands of recycled glass and even vitreous glass, although the graininess of some vitreous colors might not look good when combined with the homogeneous glassiness of recycled glass tiles.
Recycled glass cuts like butter using the Mosaic Glass Cutters without creating a lot slivers or cutting waste.
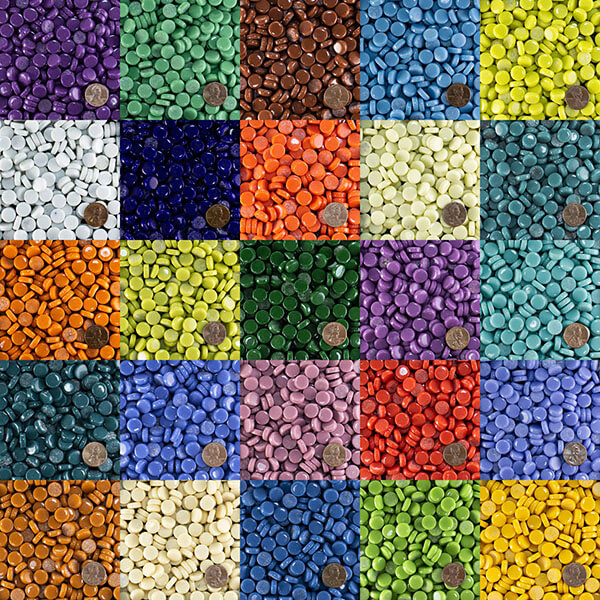
MORJO™ Thinny-Pennies™ 12mm are recycled glass penny round tiles. These flat circular mosaic tiles have a smooth and glossy finish and solid opaque color throughout. Each 1/2-pound bag contains approximately 230 tiles. This amount of tile covers slightly over 1/3 of a square foot (about 49 square inches) with a standard grout gap of 1/16 inch.
Thinny Pennies have the same thickness as regular glass mosaic tile (4mm or 1/8 inch). Unlike glass gems, another common round tile, pennies have a flat and even surface rather than puffed. This makes them much easier to use with other types of glass tile and easier to grout. Our old-version small and large penny rounds have a puffed or “fat” surface.
Recycled glass is a homogenous material made by fusing powdered glass. It has solid and consistent color all the way through and cuts cleanly and predictably using the Wheel-bladed Mosaic Glass Cutter. Hard, durable, and UV-resistant, it is suitable for commercial exteriors and murals.
The bottoms of these tiles are left intentionally rough and chalky from manufacturing for better bonding strength. Rough, scratched, or etched glass bonds more effectively than embossed ridges. Also, while embossed ridges can interfere with cutting, rough bottoms allow smooth controlled cutting.
Each 1/2-pound bag of about 230 tiles covers slightly over 1/3 of a square foot (49 square inches) assuming a standard grout gap of 1/16 inch.
Note that dry indoor mosaics do not require grouting, and so for those you can simply mount the tiles tightly together. On the other hand, wet and outdoor mosaics must have grout to prevent water from penetrating behind the tiles. For those, leaving a 1/16-inch gap allows enough grout to adhere between the tiles.
Like most of the glass tile we sell, flat penny rounds have a nominal thickness of 1/8 inch (4mm).
Recycled glass penny tiles cut easily and efficiently using the Mosaic Glass Cutters.
Use penny round tiles to create dotted patterns, curves, flower shapes, and more. Arrange whole pennies or circular segments into swirls, waves and spirals. Small pieces can be the key to rounded details.

Our Beach Glass Alternative is 1 kg (2.2 lbs) of lightly tumbled stained glass scrap straight from the factory. The glass is minimally tumbled to get rid of most of the sharp edges but NOT tumbled enough to frost most of the surface of the glass to make it look like old beach glass. That isn’t necessarily a bad thing if you are actually using the stuff in a mosaic.
Unlike real beach glass, our beach glass alternative isn’t overly porous and vulnerable to staining by grout. Unlike artificial beach glass made from recycled bottles, our beach glass doesn’t include a lot of pieces too small or too oddly shaped to be used easily in a glue-then-grout mosaic. Instead, our Alternative is mostly flat pieces.
Note that the Beach Glass Alternative does contain some pieces of transparent clear glass and the occasional tile that you might not care to use. We have calculated the price accordingly. Please do not order if that is a problem.
These tumbled shards of stained glass can be cut quickly with minimal force using our Mosaic Glass Cutters. Rubbing Stones and Marble Files can be used to round off sharp points and corners of cut pieces.
Each 2.2-lb bag is approximately 1.5 to 1.8 square feet of glass.
The thickness is approximately 1/8 inch and nominally the same as the 3/8-inch and 3/4-inch glass mosaic tile we sell.
Our Beach Glass Alternative can be cut quickly with minimal force using our Mosaic Glass Cutters.
For more advice on designing your mosaic project or cutting and grouting tile, please see our Mosaic Frequently Asked Questions page or our How To Mosaic blog or our Mosaic Information Guide.
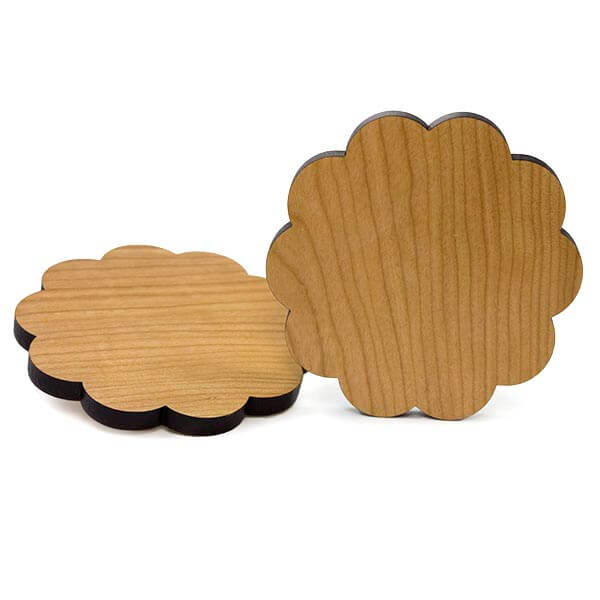
Mosaic Coaster Base Doily THICK 5/16 Inch is made from cherry hardwood right here in the USA. The doily shaped base is 4 inches wide and 5/16 inches thick, which is thicker than the coasters we originally sold. They are cut out with a laser, so the sides have a natural burnt wood color. The bottom and sides have been lacquered. The top surface is bare wood for a good adhesive bond.
Note that the wood is not recessed to form a border for your mosaic. Instead, your mosaic should extend to the edge of the coaster so that the finished coaster looks like a fragment of an ancient mosaic. This is easiest to do when you use tile without a heavy embossed pattern on the underside, and for this reason, we recommend the 8mm Morjo Recycled Glass Mosaic Tile for use with the coasters.
Weldbond adhesive or another high quality PVA glue is recommended for attaching tiles to the coaster base, and there are several options for grouting your mosaic coaster. You can press the tiles closely together instead of leaving a gap, but that requires much more time and effort than leaving an irregular gap and then grouting the mosaic. With an irregular grout gap of 1/16 inch or less, you can use almost every piece of tile you cut because it does not have to be exact. You can also use regular sanded grout to grout it.
Any type of glass mosaic tile could be used with these, but there is no border on the coaster, so your mosaic will go all the way to the edge. If you use a type of glass tile that has coarse embossing or bevels on the underside, then these might look odd at the edge of the mosaic. It is also more difficult to cut a tile into small pieces if the bottom has an embossed pattern. For these reasons, the coasters are best covered with stained glass or the 8mm and 12mm sizes of recycled glass mosaic tile by Morjo. We prefer Morjo to stained glass because stained glass tends to form sharper edges when cut. Whatever tile you decide to use, make sure you file off any sharp edges at the sides of the mosaic using a rough stone or marble file.
The coaster bases can be used any way you want, including simple projects for children with tiles glued randomly with variable grout spacing, and these make great first-time projects because they are small and do not require as much time and material. However, it is possible to create a more sophisticated mosaic design on the coaster using these instructions. Due to the limited space provided by the coaster, one of the most important steps is making sure you can cut tile small enough to render the smallest detail of your design and modifying your design if necessary:
The top surface of a 4-inch doily shaped coaster base has only 12.4 square inches (0.09 square feet) in area. This means you could cover it with 20 to 56 pieces of the 12mm Morjo or 88 to 126 pieces of the 8mm Morjo depending on how you cut and space the tile. In either case, you might want to order more than that to account for the cutting waste, possibly twice as much if you are fitting the tile exactly with no grout gap.
For more advice on designing your mosaic project or mounting, cutting, and grouting tile, please see our page of Mosaic Frequently Asked Questions or our Mosaic Information Guide, which lists instructional pages described by topic. We also post new articles about making mosaics at our How to Mosaic Blog.
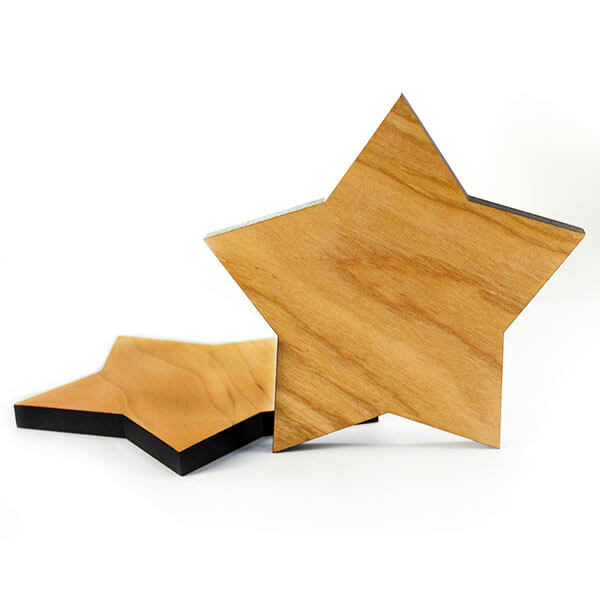
Mosaic Coaster Base star THICK 5/16 Inch is made from cherry hardwood right here in the USA. The star shaped base is 4 inches wide and 5/16 inches thick, which is thicker than the coasters we originally sold. They are cut out with a laser, so the sides have a natural burnt wood color. The bottom and sides have been lacquered. The top surface is bare wood for a good adhesive bond.
Note that the wood is not recessed to form a border for your mosaic. Instead, your mosaic should extend to the edge of the coaster so that the finished coaster looks like a fragment of an ancient mosaic. This is easiest to do when you use tile without a heavy embossed pattern on the underside, and for this reason, we recommend the 8mm Morjo Recycled Glass Mosaic Tile for use with the coasters.
Weldbond adhesive or another high quality PVA glue is recommended for attaching tiles to the coaster base, and there are several options for grouting your mosaic coaster. You can press the tiles closely together instead of leaving a gap, but that requires much more time and effort than leaving an irregular gap and then grouting the mosaic. With an irregular grout gap of 1/16 inch or less, you can use almost every piece of tile you cut because it does not have to be exact. You can also use regular sanded grout to grout it.
Any type of glass mosaic tile could be used with these, but there is no border on the coaster, so your mosaic will go all the way to the edge. If you use a type of glass tile that has coarse embossing or bevels on the underside, then these might look odd at the edge of the mosaic. It is also more difficult to cut a tile into small pieces if the bottom has an embossed pattern. For these reasons, the coasters are best covered with stained glass or the 8mm and 12mm sizes of recycled glass mosaic tile by Morjo. We prefer Morjo to stained glass because stained glass tends to form sharper edges when cut. Whatever tile you decide to use, make sure you file off any sharp edges at the sides of the mosaic using a rough stone or marble file.
The coaster bases can be used any way you want, including simple projects for children with tiles glued randomly with variable grout spacing, and these make great first-time projects because they are small and do not require as much time and material. However, it is possible to create a more sophisticated mosaic design on the coaster using these instructions. Due to the limited space provided by the coaster, one of the most important steps is making sure you can cut tile small enough to render the smallest detail of your design and modifying your design if necessary:
The top surface of a 4-inch star shaped coaster base has only 5.3 square inches (0.04 square feet) in area. This means you could cover it with 20 to 25 pieces of the 12mm Morjo or 38 to 54 pieces of the 8mm Morjo depending on how you cut and space the tile. In either case, you might want to order more than that to account for the cutting waste, possibly twice as much if you are fitting the tile exactly with no grout gap.
For more advice on designing your mosaic project or mounting, cutting, and grouting tile, please see our page of Mosaic Frequently Asked Questions or our Mosaic Information Guide, which lists instructional pages described by topic. We also post new articles about making mosaics at our How to Mosaic Blog.
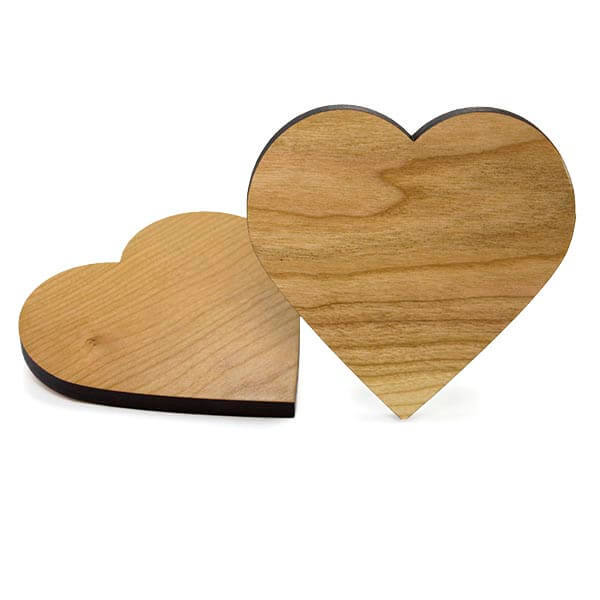
Mosaic Coaster Base Heart THICK 5/16 Inch is made from cherry hardwood right here in the USA. The heart shaped base is 4 inches wide and 5/16 inches thick, which is thicker than the coasters we originally sold. They are cut out with a laser, so the sides have a natural burnt wood color. The bottom and sides have been lacquered. The top surface is bare wood for a good adhesive bond.
Note that the wood is not recessed to form a border for your mosaic. Instead, your mosaic should extend to the edge of the coaster so that the finished coaster looks like a fragment of an ancient mosaic. This is easiest to do when you use tile without a heavy embossed pattern on the underside, and for this reason, we recommend the 8mm Morjo Recycled Glass Mosaic Tile for use with the coasters.
Weldbond adhesive or another high quality PVA glue is recommended for attaching tiles to the coaster base, and there are several options for grouting your mosaic coaster. You can press the tiles closely together instead of leaving a gap, but that requires much more time and effort than leaving an irregular gap and then grouting the mosaic. With an irregular grout gap of 1/16 inch or less, you can use almost every piece of tile you cut because it does not have to be exact. You can also use regular sanded grout to grout it.
Any type of glass mosaic tile could be used with these, but there is no border on the coaster, so your mosaic will go all the way to the edge. If you use a type of glass tile that has coarse embossing or bevels on the underside, then these might look odd at the edge of the mosaic. It is also more difficult to cut a tile into small pieces if the bottom has an embossed pattern. For these reasons, the coasters are best covered with stained glass or the 8mm and 12mm sizes of recycled glass mosaic tile by Morjo. We prefer Morjo to stained glass because stained glass tends to form sharper edges when cut. Whatever tile you decide to use, make sure you file off any sharp edges at the sides of the mosaic using a rough stone or marble file.
The coaster bases can be used any way you want, including simple projects for children with tiles glued randomly with variable grout spacing, and these make great first-time projects because they are small and do not require as much time and material. However, it is possible to create a more sophisticated mosaic design on the coaster using these instructions. Due to the limited space provided by the coaster, one of the most important steps is making sure you can cut tile small enough to render the smallest detail of your design and modifying your design if necessary:
The top surface of a 4-inch heart shaped coaster base has only 10 square inches (0.07 square feet) in area. This means you could cover it with 35 to 45 pieces of the 12mm Morjo or 70 to 100 pieces of the 8mm Morjo depending on how you cut and space the tile. In either case, you might want to order more than that to account for the cutting waste, possibly twice as much if you are fitting the tile exactly with no grout gap.
For more advice on designing your mosaic project or mounting, cutting, and grouting tile, please see our page of Mosaic Frequently Asked Questions or our Mosaic Information Guide, which lists instructional pages described by topic. We also post new articles about making mosaics at our How to Mosaic Blog.
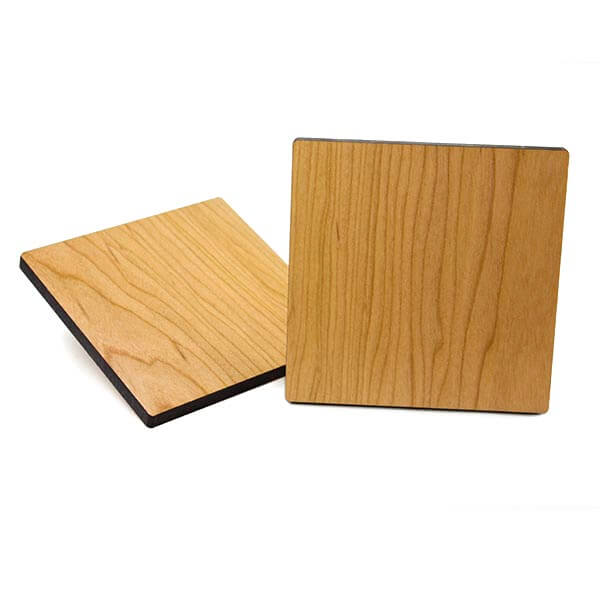
Mosaic Coaster Base Square THICK 5/16 Inch is made from cherry hardwood right here in the USA. The square base is 4 inches wide and 5/16 inches thick, which is thicker than the coasters we originally sold. They are cut out with a laser, so the sides have a natural burnt wood color. The bottom and sides have been lacquered. The top surface is bare wood for a good adhesive bond.
Note that the wood is not recessed to form a border for your mosaic. Instead, your mosaic should extend to the edge of the coaster so that the finished coaster looks like a fragment of an ancient mosaic. This is easiest to do when you use tile without a heavy embossed pattern on the underside, and for this reason, we recommend the 8mm Morjo Recycled Glass Mosaic Tile for use with the coasters.
Weldbond adhesive or another high quality PVA glue is recommended for attaching tiles to the coaster base, and there are several options for grouting your mosaic coaster. You can press the tiles closely together instead of leaving a gap, but that requires much more time and effort than leaving an irregular gap and then grouting the mosaic. With an irregular grout gap of 1/16 inch or less, you can use almost every piece of tile you cut because it does not have to be exact. You can also use regular sanded grout to grout it.
Any type of glass mosaic tile could be used with these, but there is no border on the coaster, so your mosaic will go all the way to the edge. If you use a type of glass tile that has coarse embossing or bevels on the underside, then these might look odd at the edge of the mosaic. It is also more difficult to cut a tile into small pieces if the bottom has an embossed pattern. For these reasons, the coasters are best covered with stained glass or the 8mm and 12mm sizes of recycled glass mosaic tile by Morjo. We prefer Morjo to stained glass because stained glass tends to form sharper edges when cut. Whatever tile you decide to use, make sure you file off any sharp edges at the sides of the mosaic using a rough stone or marble file.
The coaster bases can be used any way you want, including simple projects for children with tiles glued randomly with variable grout spacing, and these make great first-time projects because they are small and do not require as much time and material. However, it is possible to create a more sophisticated mosaic design on the coaster using these instructions. Due to the limited space provided by the coaster, one of the most important steps is making sure you can cut tile small enough to render the smallest detail of your design and modifying your design if necessary:
The top surface of a 4-inch square coaster base has only 16 square inches (0.11 square feet) in area. This means you could cover it with 56 to 72 pieces of the 12mm Morjo or 112 to 161 pieces of the 8mm Morjo depending on how you cut and space the tile. In either case, you might want to order more than that to account for the cutting waste, possibly twice as much if you are fitting the tile exactly with no grout gap.
For more advice on designing your mosaic project or mounting, cutting, and grouting tile, please see our page of Mosaic Frequently Asked Questions or our Mosaic Information Guide, which lists instructional pages described by topic. We also post new articles about making mosaics at our How to Mosaic Blog.
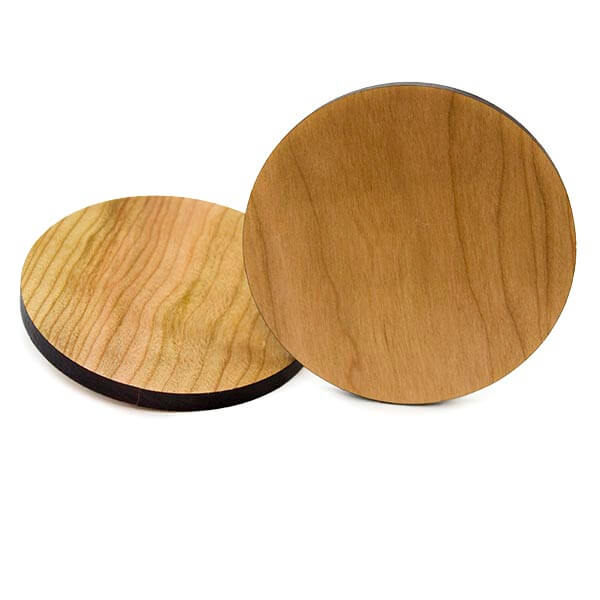
Mosaic Coaster Base Circular Round THICK 5/16 Inch is made from cherry hardwood right here in the USA. The circular base is 4 inches in diameter and 5/16 inches thick, which is thicker than the coasters we originally sold. They are cut out with a laser, so the sides have a natural burnt wood color. The bottom and sides have been lacquered. The top surface is bare wood for a good adhesive bond.
Note that the wood is not recessed to form a border for your mosaic. Instead, your mosaic should extend to the edge of the coaster so that the finished coaster looks like a fragment of an ancient mosaic. This is easiest to do when you use tile without a heavy embossed pattern on the underside, and for this reason, we recommend the 8mm Morjo Recycled Glass Mosaic Tile for use with the coasters.
Weldbond adhesive or another high quality PVA glue is recommended for attaching tiles to the coaster base, and there are several options for grouting your mosaic coaster. You can press the tiles closely together instead of leaving a gap, but that requires much more time and effort than leaving an irregular gap and then grouting the mosaic. With an irregular grout gap of 1/16 inch or less, you can use almost every piece of tile you cut because it does not have to be exact. You can also use regular sanded grout to grout it.
Any type of glass mosaic tile could be used with these, but there is no border on the coaster, so your mosaic will go all the way to the edge. If you use a type of glass tile that has coarse embossing or bevels on the underside, then these might look odd at the edge of the mosaic. It is also more difficult to cut a tile into small pieces if the bottom has an embossed pattern. For these reasons, the coasters are best covered with stained glass or the 8mm and 12mm sizes of recycled glass mosaic tile by Morjo. We prefer Morjo to stained glass because stained glass tends to form sharper edges when cut. Whatever tile you decide to use, make sure you file off any sharp edges at the sides of the mosaic using a rough stone or marble file.
The coaster bases can be used any way you want, including simple projects for children with tiles glued randomly with variable grout spacing, and these make great first-time projects because they are small and do not require as much time and material. However, it is possible to create a more sophisticated mosaic design on the coaster using these instructions. Due to the limited space provided by the coaster, one of the most important steps is making sure you can cut tile small enough to render the smallest detail of your design and modifying your design if necessary:
The top surface of a 4-inch circular coaster base has only 12.6 square inches (0.09 square feet) in area. This means you could cover it with 45 to 60 of the 12mm Morjo or 90 to 130 of the 8mm Morjo depending on how you cut and space the tile. In either case, you might want to order more than that to account for the cutting waste, possibly twice as much if you are fitting the tile exactly with no grout gap.
For more advice on designing your mosaic project or mounting, cutting, and grouting tile, please see our page of Mosaic Frequently Asked Questions or our Mosaic Information Guide, which lists instructional pages described by topic. We also post new articles about making mosaics at our How to Mosaic Blog.
 Red
Red Pink
Pink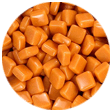 Orange
 Yellow
 Green
Green Teal
Teal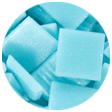 Cyan
Cyan Blue
Blue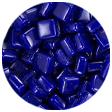 Ultramarine
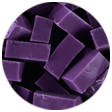 Purple
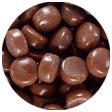 Brown
Brown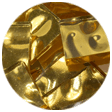 Imitation Gold
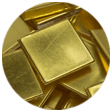 24K Gold
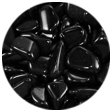 Black
Black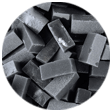 Grey
Grey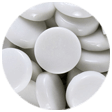 White
White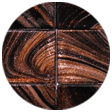 Metallic
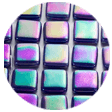 Iridescent
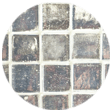 Mirror
 Assortments