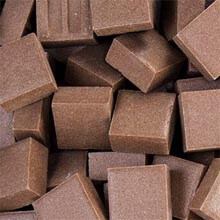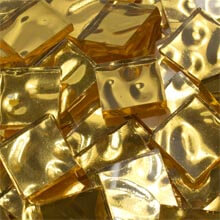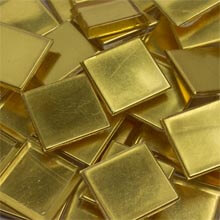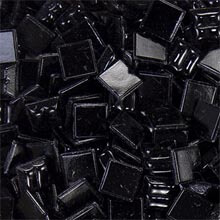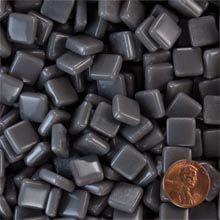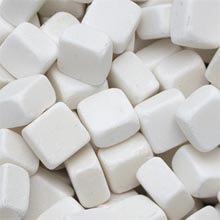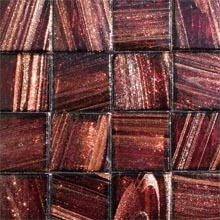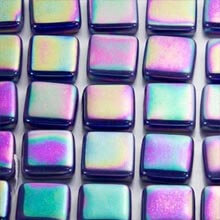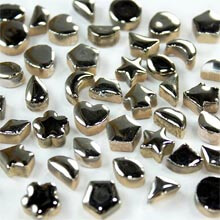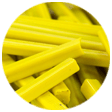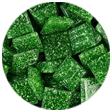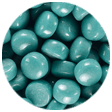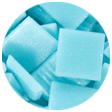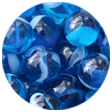
Economy Glass Gems MEDIUM

Economy-Glass-Gems-master-product

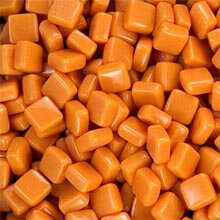
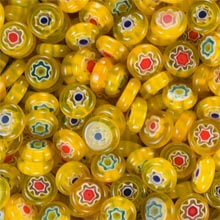
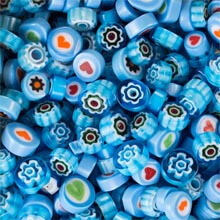
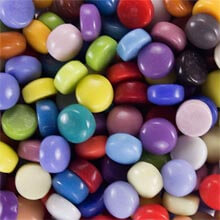
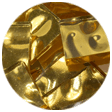
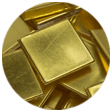
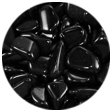
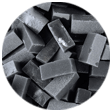
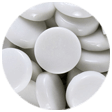
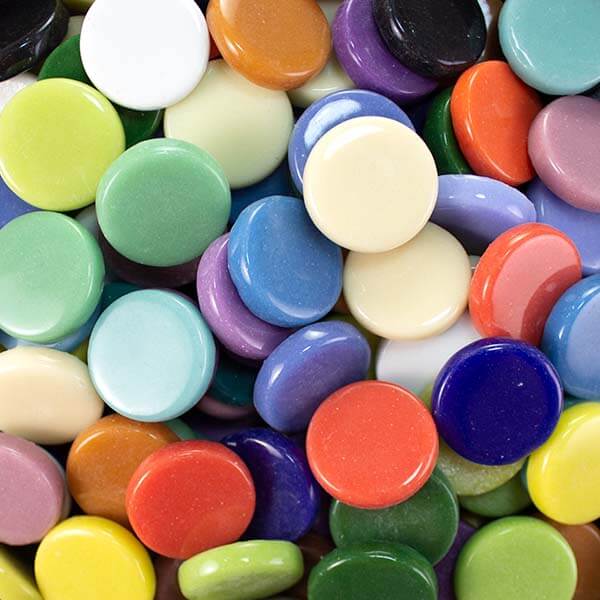
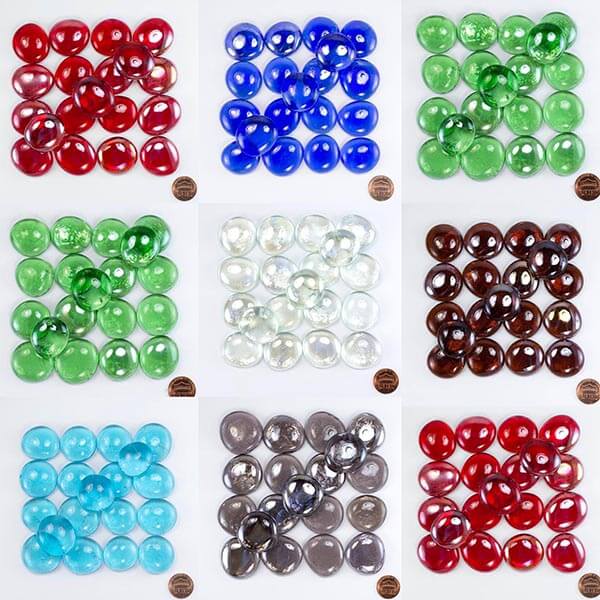
Economy Glass Gems Medium are dome-shaped lumps of colored glass with flat bottoms that can be used as tesserae (tile) in craft projects and mixed-media mosaic. Their shapes are NOT always uniformly circular but are sometimes slightly elliptical. The diameters vary by color and can run anywhere from larger than 1/2 inch to smaller than 3/4 inch depending on the batch. See pictures. Sold by the 1/2 pound.

Economy Glass Gems Medium

  • dome-shaped circular lumps with flat bottoms.
  • size can run anywhere from larger than 1/2 inch to smaller than 3/4 inch. See pics.
  • varies in size and circularity.
  • sold by the 1/2 pound.
  • piece count varies. maybe 50+ as an estimate.

Product Variation

These gems are circular domes of glass, but they vary in size and exact shape. Please do NOT purchase these if you need tightly controlled shapes or sizes. Also, the glass is not optical quality and contains occasional bubbles. We sell these for use as mosaic tile, not covers for photo refrigerator magnets, etc.

Product Coverage

A 1/2-pound bag of glass gems covers approximately 25 square inches, possibly as much as 36 square inches or 1/4 square foot. Glass gems are better used as accents than area coverage because they are circular and can nest together only so tightly. There will always be a larger than desired gap at the juncture between multiple gems.

Compatibility

Glass gems are thicker than most types of glass mosaic tile, which is usually ~1/8 inch thick. The glass gems are about ~3/16 inch thick, but that is approximate and not tightly controlled. The reason to use something like glass gems is precisely BECAUSE you want something that sticks out slightly above the surface of the ordinary tile. This gives the otherwise flat surface of the mosaic an element of texture and dimension, something that can be felt with the hand.

Cutting

Cutting glass gems leaves a sharp edge on an otherwise rounded shape, and for this reason it isn’t commonly done. The sharp edge can be smoothed using the fine side of a marble file, but that only removes the safety issue. Visually, the cut edge will still be sharp compared to the other part of the gem. If you do need to cut the gems, use a mosaic glass cutter.

Use In Mosaic Art

The tops of the glass gems are dome shaped instead of flat surfaces, and this has significant implications for the grouting process. When grouting a mosaic made from glass gems, many novices fail to remove enough grout, leaving most of the glass gem covered. The result is that the finished mosaic appears to be mostly grout with just a little bit of glass peeking out. You have to use your fingertips to remove the grout covering the edges of the gems and make sure that you expose more than just the very tops of the domes.

How To Make Mosaic Art

For more advice on designing your mosaic project or mounting, cutting, and grouting tile, please see our page of Mosaic Frequently Asked Questions or our Mosaic Information Guide, which lists instructional pages described by topic. We also post new articles about making mosaics at our How to Mosaic Blog.
[product_table category=”economy-glass-gems” widths=”auto,auto,12,12,20″]

Economy Glass Gems JUMBO

Economy-Glass-Gems-JUMBO-master-product

Economy Glass Gems JUMBO are dome-shaped lumps of glass with flat bottoms that can be used as tesserae (tile) in craft projects and mixed-media mosaic. They vary in size and shape. The nominal diameter of these MEDIUM gems is 25 to 33mm, which is about 1 to 1.3125 inch. BUT, those are nominal dimensions, and these should not be purchased by people needing gems with exact dimensions or shapes. Sold by the 1/2 pound.

Economy Glass Gems JUMBO

  • dome-shaped circular lumps with flat bottoms.
  • Nominally 1 to 1.3125 inch in diameter with variation.
  • varies in size and circularity.
  • sold by the 1/2 pound.

Product Variation

These gems are circular domes of glass, but they vary in size and exact shape. Please do NOT purchase these if you need tightly controlled shapes or sizes. Also, the glass is not optical quality and contains occasional bubbles. We sell these for use as mosaic tile, not covers for photo refrigerator magnets, etc.

Product Coverage

A 1-pound bag of glass gems covers approximately 30+ square inches. Glass gems are better used as accents than area coverage because they are circular and can nest together only so tightly. There will always be a larger than desired gap at the juncture between multiple gems.

Compatibility

Glass gems are thicker than most types of glass mosaic tile, which is usually ~1/8 inch thick. The glass gems are about ~3/16 inch thick, but that is approximate and not tightly controlled. The reason to use something like glass gems is precisely BECAUSE you want something that sticks out slightly above the surface of the ordinary tile. This gives the otherwise flat surface of the mosaic an element of dimension and texture, something that can be felt with the hand.

Cutting

Cutting glass gems leaves a sharp edge on an otherwise rounded shape, and for this reason it isn’t commonly done. The sharp edge can be smoothed using the fine side of a marble file, but that only removes the safety issue. Visually, the cut edge will still be sharp compared to the other part of the gem. If you do need to cut the gems, use a mosaic glass cutter.

Use In Mosaic Art

The tops of the glass gems are dome shaped instead of flat surfaces, and this has significant implications for the grouting process. When grouting a mosaic made from glass gems, many novices fail to remove enough grout, leaving most of the glass gem covered. The result is that the finished mosaic appears to be mostly grout with just a little bit of glass peeking out. You have to use your fingertips to remove the grout covering the edges of the gems and make sure that you expose more than just the very tops of the domes.

How To Make Mosaic Art

For more advice on designing your mosaic project or mounting, cutting, and grouting tile, please see our page of Mosaic Frequently Asked Questions or our Mosaic Information Guide, which lists instructional pages described by topic. We also post new articles about making mosaics at our How to Mosaic Blog.
Mosaic Tile Mounting Grid 22mm 7/8-inch

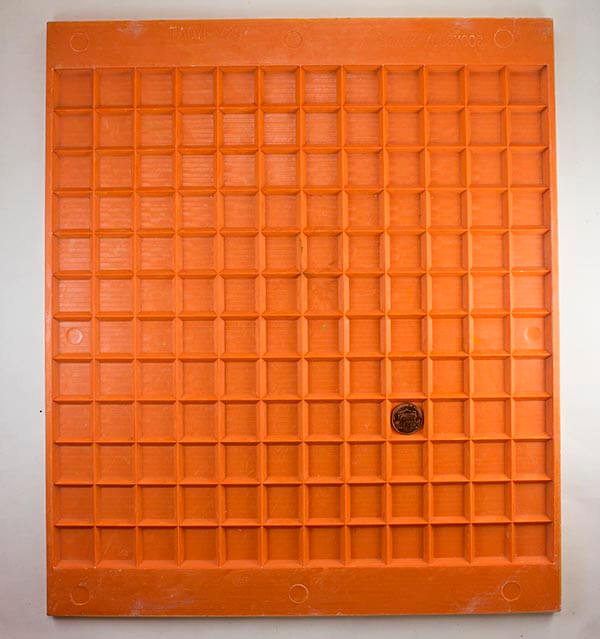
Mounting Grid for 22mm (~7/8 inch) Stained Glass Tile is for temporarily mounting patterns of uncut tile to paper for rapid installation using the indirect method. These are not needed for most projects. Most artists use cut tiles or glue each tile directly on the surface they are covering and do not need grids.

These grids come directly from the factory and show various signs of use. They were made by machining blocks of plastic instead of pressed in a mold, so they look home made to be brutally honest, but they work.

The grid mounts 144 of our 7/8-Inch Stained Glass Tiles on 1 square foot of mosaic mounting paper in a uniform grid of 12 x 12 tiles with a grout gap of approximately 1/16 inch.

Note that these grids were made for 25mm beveled tile, but they work with 22mm (~7/8 inch) tiles with straight (non-beveled) edges. We decided that the grout gap was too small when used with 25mm tile.

Note that the paper we sell is 1.15 square foot, which is larger than these grids but should not pose any problems. (You can always trim away the excess paper after you mount the tiles.)

Mosaic Tile Mounting Grid 22mm

  • grid size: 12 tiles x 12 tiles.
  • grid area: 30cm x 30cm (just under 1 square foot).
  • grout gap: approximately 1/16 inch.
  • tile size: 22mm (~7/8 inch).

Indirect Method

Mosaic tile can be glued one at a time DIRECTLY to a surface, or you can lay your mosaic out on a temporary surface in what is called the “Indirect Method.” Temporary surfaces can include things like fiberglass mesh, paper, adhesive contact paper or trays filled with lime putty. Our grids were made to work with self-adhesive mounting tape or mounting paper that is glued to the faces of the tiles.

Why Use The Indirect Method

Why would you want to use the Indirect Method? It is easier to lay up your mosaic design at your work table than it is to lay it out on a floor or vertical wall. Also, you can work for days or weeks at your work table laying up the mosaic without tying up the location where the mosaic will actually be installed. Again, none of this is necessary for a beginner laying up a small craft project like a trivet or a mosaic mirror.

Use In Mosaic Art

The following is how to do the indirect method using our grids and mounting paper:

  1. Place glass mosaic tile into the grid face up, filling up the grid with your design.
  2. Dilute water-soluble glue such as Elmer’s Glue with 3 parts water to 1 part glue.
  3. Paint the water soluble glue onto the mounting paper using a small artists paint brush. Use a light coat to avoid wrinkling the paper.
  4. Lay mounting paper onto the face of the tile, careful to avoid wrinkles.
  5. Allow sheet to dry completely and remove from the grid.
  6. Spread thinset mortar or mosaic adhesive on the surface to be mosaiced.
  7. “Butter” the bottom of the sheet of tile with the same mortar or adhesive. Of coarse, you butter the bare glass bottoms of the tile, not the paper.
  8. Press the sheet of tiles into the adhesive-covered surface with the PAPER ON THE OUTSIDE.
  9. Allow the thinset or adhesive to cure for 24 hours.
  10. Mist the paper until it is soaked and peel it off the tiles.
  11. Grout the mosaic.

How To Make Mosaics

For more advice on designing your mosaic project or cutting and grouting tile, please see our Mosaic Frequently Asked Questions page or our How To Mosaic blog or our Mosaic Information Guide.

Mosaic Coaster Base Doily THICK 5/16 Inch

Doily Coaster Base 4-inch diameter, 5/16" thick, with lacquer finished back.

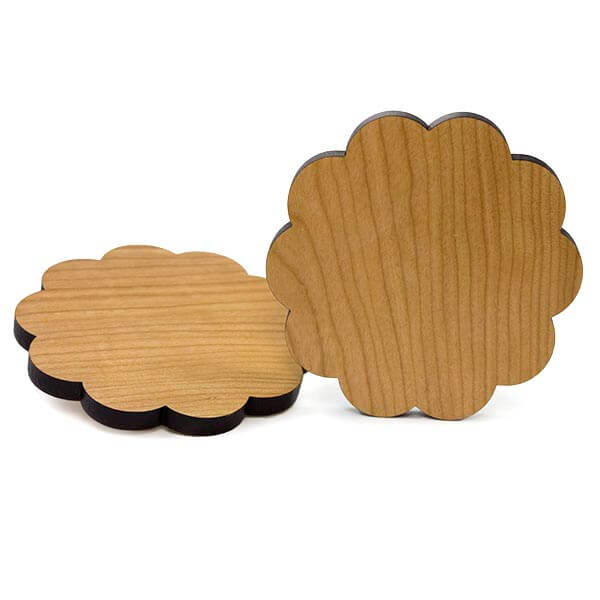
Mosaic Coaster Base Doily THICK 5/16 Inch is made from cherry hardwood right here in the USA. The doily shaped base is 4 inches wide and 5/16 inches thick, which is thicker than the coasters we originally sold. They are cut out with a laser, so the sides have a natural burnt wood color. The bottom and sides have been lacquered. The top surface is bare wood for a good adhesive bond.

Note that the wood is not recessed to form a border for your mosaic. Instead, your mosaic should extend to the edge of the coaster so that the finished coaster looks like a fragment of an ancient mosaic. This is easiest to do when you use tile without a heavy embossed pattern on the underside, and for this reason, we recommend the 8mm Morjo Recycled Glass Mosaic Tile for use with the coasters.

Weldbond adhesive or another high quality PVA glue is recommended for attaching tiles to the coaster base, and there are several options for grouting your mosaic coaster. You can press the tiles closely together instead of leaving a gap, but that requires much more time and effort than leaving an irregular gap and then grouting the mosaic. With an irregular grout gap of 1/16 inch or less, you can use almost every piece of tile you cut because it does not have to be exact. You can also use regular sanded grout to grout it.

Mosaic Art Projects Using Coaster Bases

Product Specifications

  • 1 piece hardwood cherry doily shaped coaster base.
  • wood pattern is natural and varies by piece.
  • width: 4 inches.
  • thickness: 5/16 inches. THICKER than our original coasters.
  • laser cut edges (natural burnt wood finish).
  • lacquered sides and bottoms.
  • bare wood face.
  • made in America

Compatibility

Any type of glass mosaic tile could be used with these, but there is no border on the coaster, so your mosaic will go all the way to the edge. If you use a type of glass tile that has coarse embossing or bevels on the underside, then these might look odd at the edge of the mosaic. It is also more difficult to cut a tile into small pieces if the bottom has an embossed pattern. For these reasons, the coasters are best covered with stained glass or the 8mm and 12mm sizes of recycled glass mosaic tile by Morjo. We prefer Morjo to stained glass because stained glass tends to form sharper edges when cut. Whatever tile you decide to use, make sure you file off any sharp edges at the sides of the mosaic using a rough stone or marble file.

Instructions For Using The Coaster Bases For Detailed Mosaic Art

The coaster bases can be used any way you want, including simple projects for children with tiles glued randomly with variable grout spacing, and these make great first-time projects because they are small and do not require as much time and material. However, it is possible to create a more sophisticated mosaic design on the coaster using these instructions. Due to the limited space provided by the coaster, one of the most important steps is making sure you can cut tile small enough to render the smallest detail of your design and modifying your design if necessary:

  1. Find a design or picture. Google Images is a great source of photos, images, patterns, models to draw from.
  2. Draw a simple cartoon outline of your design.
  3. Try cutting up some tile and arranging it on the cartoon to see how it looks.
  4. Pay special attention to the smallest detail in your design.
  5. If it is not possible to cut tile that small, or the pieces seem too tedious to work with, then simplify your design.
  6. Note that when you start using glue, it will be easier to arrange small pieces because they will not move around as unexpectedly. Tweezers also help.
  7. Once you have you have verified that your design is not too detailed to be rendered in tile, then sketch the cartoon on the coaster in pencil.
  8. You can darken your pencil sketch with a Sharpie brand marker so that glue does not rub it off once you start working.
  9. Wipe Weldbond glue over the face of the coaster and allow to dry to seal the wood. Use a very thin coat to avoid warping the coaster from the moisture in the glue! Remember, the reason you are sealing the coaster in the first place is to avoid warping it later when you use lots of glue for the tiles. Use two light coasts and allow to dry thoroughly between coats.
  10. Start tiling your design from the center and working to the edges.
  11. Leaving an irregular grout gap of 1/16 inch or less is much easier than fitting the tile tightly together.
  12. At the edge of the coaster, cut the tile so that it fits flush with the edge. You can place a tile on the coaster, mark where it should be cut with a Sharpie marker before gluing and then make the cut.
  13. Use the fine side of a marble file or a piece of rough stone to rub the edge of the cut tile so that the edge is not as sharp.
  14. After the glue has completely dried (preferably for 48+ hours) grout your mosaic with sanded grout.

How Much Tile Do I Need For The Coaster Base?

The top surface of a 4-inch doily shaped coaster base has only 12.4 square inches (0.09 square feet) in area. This means you could cover it with 20 to 56 pieces of the 12mm Morjo or 88 to 126 pieces of the 8mm Morjo depending on how you cut and space the tile. In either case, you might want to order more than that to account for the cutting waste, possibly twice as much if you are fitting the tile exactly with no grout gap.

How To Make Mosaic Art

For more advice on designing your mosaic project or mounting, cutting, and grouting tile, please see our page of Mosaic Frequently Asked Questions or our Mosaic Information Guide, which lists instructional pages described by topic. We also post new articles about making mosaics at our How to Mosaic Blog.
Mosaic Coaster Base Star THICK 5/16 Inch

mosaic coaster base star

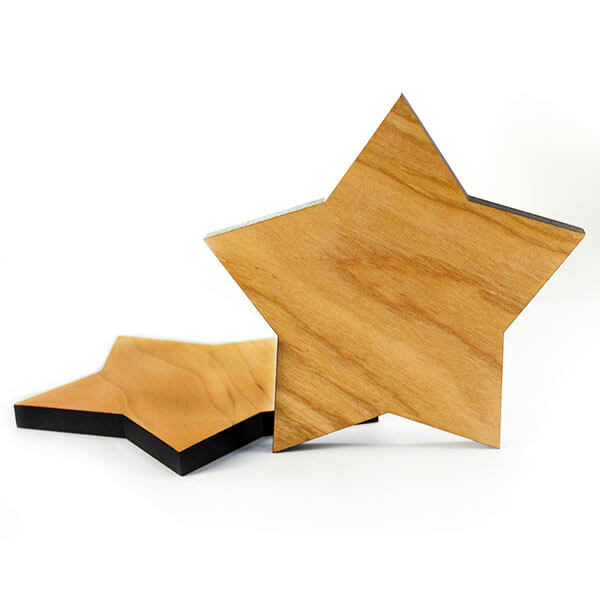
Mosaic Coaster Base star THICK 5/16 Inch is made from cherry hardwood right here in the USA. The star shaped base is 4 inches wide and 5/16 inches thick, which is thicker than the coasters we originally sold. They are cut out with a laser, so the sides have a natural burnt wood color. The bottom and sides have been lacquered. The top surface is bare wood for a good adhesive bond.

Note that the wood is not recessed to form a border for your mosaic. Instead, your mosaic should extend to the edge of the coaster so that the finished coaster looks like a fragment of an ancient mosaic. This is easiest to do when you use tile without a heavy embossed pattern on the underside, and for this reason, we recommend the 8mm Morjo Recycled Glass Mosaic Tile for use with the coasters.

Weldbond adhesive or another high quality PVA glue is recommended for attaching tiles to the coaster base, and there are several options for grouting your mosaic coaster. You can press the tiles closely together instead of leaving a gap, but that requires much more time and effort than leaving an irregular gap and then grouting the mosaic. With an irregular grout gap of 1/16 inch or less, you can use almost every piece of tile you cut because it does not have to be exact. You can also use regular sanded grout to grout it.

Mosaic Art Projects Using Coaster Bases

Product Specifications

  • 1 piece hardwood cherry star shaped coaster base.
  • wood pattern is natural and varies by piece.
  • width: 4 inches.
  • thickness: 5/16 inches. THICKER than our original coasters.
  • laser cut edges (natural burnt wood finish).
  • lacquered sides and bottoms.
  • bare wood face.
  • made in America

Compatibility

Any type of glass mosaic tile could be used with these, but there is no border on the coaster, so your mosaic will go all the way to the edge. If you use a type of glass tile that has coarse embossing or bevels on the underside, then these might look odd at the edge of the mosaic. It is also more difficult to cut a tile into small pieces if the bottom has an embossed pattern. For these reasons, the coasters are best covered with stained glass or the 8mm and 12mm sizes of recycled glass mosaic tile by Morjo. We prefer Morjo to stained glass because stained glass tends to form sharper edges when cut. Whatever tile you decide to use, make sure you file off any sharp edges at the sides of the mosaic using a rough stone or marble file.

Instructions For Using The Coaster Bases For Detailed Mosaic Art

The coaster bases can be used any way you want, including simple projects for children with tiles glued randomly with variable grout spacing, and these make great first-time projects because they are small and do not require as much time and material. However, it is possible to create a more sophisticated mosaic design on the coaster using these instructions. Due to the limited space provided by the coaster, one of the most important steps is making sure you can cut tile small enough to render the smallest detail of your design and modifying your design if necessary:

  1. Find a design or picture. Google Images is a great source of photos, images, patterns, models to draw from.
  2. Draw a simple cartoon outline of your design.
  3. Try cutting up some tile and arranging it on the cartoon to see how it looks.
  4. Pay special attention to the smallest detail in your design.
  5. If it is not possible to cut tile that small, or the pieces seem too tedious to work with, then simplify your design.
  6. Note that when you start using glue, it will be easier to arrange small pieces because they will not move around as unexpectedly. Tweezers also help.
  7. Once you have you have verified that your design is not too detailed to be rendered in tile, then sketch the cartoon on the coaster in pencil.
  8. You can darken your pencil sketch with a Sharpie brand marker so that glue does not rub it off once you start working.
  9. Wipe Weldbond glue over the face of the coaster and allow to dry to seal the wood. Use a very thin coat to avoid warping the coaster from the moisture in the glue! Remember, the reason you are sealing the coaster in the first place is to avoid warping it later when you use lots of glue for the tiles. Use two light coasts and allow to dry thoroughly between coats.
  10. Start tiling your design from the center and working to the edges.
  11. Leaving an irregular grout gap of 1/16 inch or less is much easier than fitting the tile tightly together.
  12. At the edge of the coaster, cut the tile so that it fits flush with the edge. You can place a tile on the coaster, mark where it should be cut with a Sharpie marker before gluing and then make the cut.
  13. Use the fine side of a marble file or a piece of rough stone to rub the edge of the cut tile so that the edge is not as sharp.
  14. After the glue has completely dried (preferably for 48+ hours) grout your mosaic with sanded grout.

How Much Tile Do I Need For The Coaster Base?

The top surface of a 4-inch star shaped coaster base has only 5.3 square inches (0.04 square feet) in area. This means you could cover it with 20 to 25 pieces of the 12mm Morjo or 38 to 54 pieces of the 8mm Morjo depending on how you cut and space the tile. In either case, you might want to order more than that to account for the cutting waste, possibly twice as much if you are fitting the tile exactly with no grout gap.

How To Make Mosaic Art

For more advice on designing your mosaic project or mounting, cutting, and grouting tile, please see our page of Mosaic Frequently Asked Questions or our Mosaic Information Guide, which lists instructional pages described by topic. We also post new articles about making mosaics at our How to Mosaic Blog.
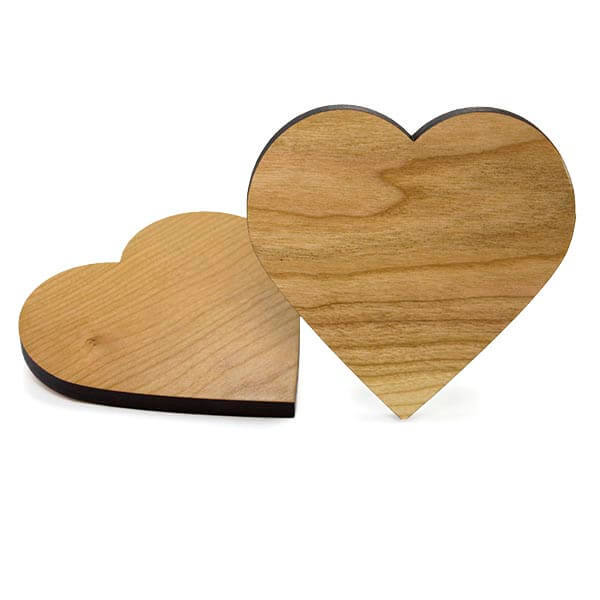
Mosaic Coaster Base Heart THICK 5/16 Inch

Heart Coaster Base ~4-inch across, 5/16" thick, with lacquer finished back.

Mosaic Coaster Base Heart THICK 5/16 Inch is made from cherry hardwood right here in the USA. The heart shaped base is 4 inches wide and 5/16 inches thick, which is thicker than the coasters we originally sold. They are cut out with a laser, so the sides have a natural burnt wood color. The bottom and sides have been lacquered. The top surface is bare wood for a good adhesive bond.

Note that the wood is not recessed to form a border for your mosaic. Instead, your mosaic should extend to the edge of the coaster so that the finished coaster looks like a fragment of an ancient mosaic. This is easiest to do when you use tile without a heavy embossed pattern on the underside, and for this reason, we recommend the 8mm Morjo Recycled Glass Mosaic Tile for use with the coasters.

Weldbond adhesive or another high quality PVA glue is recommended for attaching tiles to the coaster base, and there are several options for grouting your mosaic coaster. You can press the tiles closely together instead of leaving a gap, but that requires much more time and effort than leaving an irregular gap and then grouting the mosaic. With an irregular grout gap of 1/16 inch or less, you can use almost every piece of tile you cut because it does not have to be exact. You can also use regular sanded grout to grout it.

Mosaic Art Projects Using Coaster Bases

Product Specifications

  • 1 piece hardwood cherry heart shaped coaster base.
  • wood pattern is natural and varies by piece.
  • width: 4 inches.
  • thickness: 5/16 inches. THICKER than our original coasters.
  • laser cut edges (natural burnt wood finish).
  • lacquered sides and bottoms.
  • bare wood face.
  • made in America

Compatibility

Any type of glass mosaic tile could be used with these, but there is no border on the coaster, so your mosaic will go all the way to the edge. If you use a type of glass tile that has coarse embossing or bevels on the underside, then these might look odd at the edge of the mosaic. It is also more difficult to cut a tile into small pieces if the bottom has an embossed pattern. For these reasons, the coasters are best covered with stained glass or the 8mm and 12mm sizes of recycled glass mosaic tile by Morjo. We prefer Morjo to stained glass because stained glass tends to form sharper edges when cut. Whatever tile you decide to use, make sure you file off any sharp edges at the sides of the mosaic using a rough stone or marble file.

Instructions For Using The Coaster Bases For Detailed Mosaic Art

The coaster bases can be used any way you want, including simple projects for children with tiles glued randomly with variable grout spacing, and these make great first-time projects because they are small and do not require as much time and material. However, it is possible to create a more sophisticated mosaic design on the coaster using these instructions. Due to the limited space provided by the coaster, one of the most important steps is making sure you can cut tile small enough to render the smallest detail of your design and modifying your design if necessary:

  1. Find a design or picture. Google Images is a great source of photos, images, patterns, models to draw from.
  2. Draw a simple cartoon outline of your design.
  3. Try cutting up some tile and arranging it on the cartoon to see how it looks.
  4. Pay special attention to the smallest detail in your design.
  5. If it is not possible to cut tile that small, or the pieces seem too tedious to work with, then simplify your design.
  6. Note that when you start using glue, it will be easier to arrange small pieces because they will not move around as unexpectedly. Tweezers also help.
  7. Once you have you have verified that your design is not too detailed to be rendered in tile, then sketch the cartoon on the coaster in pencil.
  8. You can darken your pencil sketch with a Sharpie brand marker so that glue does not rub it off once you start working.
  9. Wipe Weldbond glue over the face of the coaster and allow to dry to seal the wood. Use a very thin coat to avoid warping the coaster from the moisture in the glue! Remember, the reason you are sealing the coaster in the first place is to avoid warping it later when you use lots of glue for the tiles. Use two light coasts and allow to dry thoroughly between coats.
  10. Start tiling your design from the center and working to the edges.
  11. Leaving an irregular grout gap of 1/16 inch or less is much easier than fitting the tile tightly together.
  12. At the edge of the coaster, cut the tile so that it fits flush with the edge. You can place a tile on the coaster, mark where it should be cut with a Sharpie marker before gluing and then make the cut.
  13. Use the fine side of a marble file or a piece of rough stone to rub the edge of the cut tile so that the edge is not as sharp.
  14. After the glue has completely dried (preferably for 48+ hours) grout your mosaic with sanded grout.

How Much Tile Do I Need For The Coaster Base?

The top surface of a 4-inch heart shaped coaster base has only 10 square inches (0.07 square feet) in area. This means you could cover it with 35 to 45 pieces of the 12mm Morjo or 70 to 100 pieces of the 8mm Morjo depending on how you cut and space the tile. In either case, you might want to order more than that to account for the cutting waste, possibly twice as much if you are fitting the tile exactly with no grout gap.

How To Make Mosaic Art

For more advice on designing your mosaic project or mounting, cutting, and grouting tile, please see our page of Mosaic Frequently Asked Questions or our Mosaic Information Guide, which lists instructional pages described by topic. We also post new articles about making mosaics at our How to Mosaic Blog.
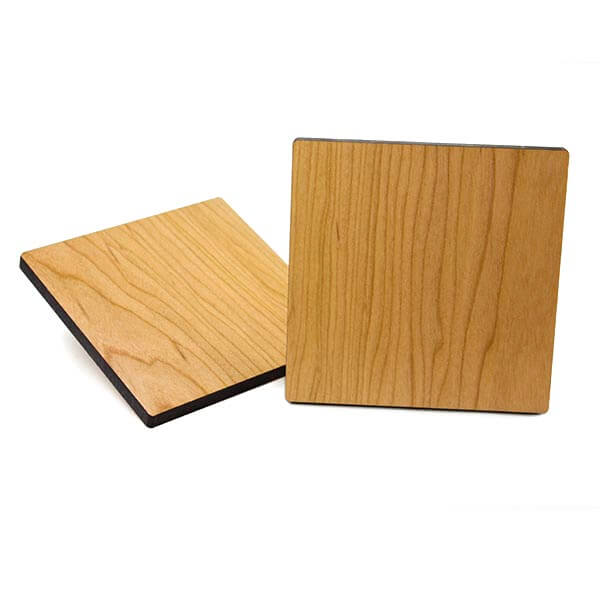
Mosaic Coaster Base Square THICK 5/16 Inch

Square Coaster Base 4-inch across, 5/16" thick, with lacquer finished back.

Mosaic Coaster Base Square THICK 5/16 Inch is made from cherry hardwood right here in the USA. The square base is 4 inches wide and 5/16 inches thick, which is thicker than the coasters we originally sold. They are cut out with a laser, so the sides have a natural burnt wood color. The bottom and sides have been lacquered. The top surface is bare wood for a good adhesive bond.

Note that the wood is not recessed to form a border for your mosaic. Instead, your mosaic should extend to the edge of the coaster so that the finished coaster looks like a fragment of an ancient mosaic. This is easiest to do when you use tile without a heavy embossed pattern on the underside, and for this reason, we recommend the 8mm Morjo Recycled Glass Mosaic Tile for use with the coasters.

Weldbond adhesive or another high quality PVA glue is recommended for attaching tiles to the coaster base, and there are several options for grouting your mosaic coaster. You can press the tiles closely together instead of leaving a gap, but that requires much more time and effort than leaving an irregular gap and then grouting the mosaic. With an irregular grout gap of 1/16 inch or less, you can use almost every piece of tile you cut because it does not have to be exact. You can also use regular sanded grout to grout it.

Mosaic Art Projects Using Coaster Bases

Product Specifications

  • 1 piece hardwood cherry square coaster base.
  • wood pattern is natural and varies by piece.
  • width: 4 inches.
  • thickness: 5/16 inches. THICKER than our original coasters.
  • laser cut edges (natural burnt wood finish).
  • lacquered sides and bottoms.
  • bare wood face.
  • made in America

Compatibility

Any type of glass mosaic tile could be used with these, but there is no border on the coaster, so your mosaic will go all the way to the edge. If you use a type of glass tile that has coarse embossing or bevels on the underside, then these might look odd at the edge of the mosaic. It is also more difficult to cut a tile into small pieces if the bottom has an embossed pattern. For these reasons, the coasters are best covered with stained glass or the 8mm and 12mm sizes of recycled glass mosaic tile by Morjo. We prefer Morjo to stained glass because stained glass tends to form sharper edges when cut. Whatever tile you decide to use, make sure you file off any sharp edges at the sides of the mosaic using a rough stone or marble file.

Instructions For Using The Coaster Bases For Detailed Mosaic Art

The coaster bases can be used any way you want, including simple projects for children with tiles glued randomly with variable grout spacing, and these make great first-time projects because they are small and do not require as much time and material. However, it is possible to create a more sophisticated mosaic design on the coaster using these instructions. Due to the limited space provided by the coaster, one of the most important steps is making sure you can cut tile small enough to render the smallest detail of your design and modifying your design if necessary:

  1. Find a design or picture. Google Images is a great source of photos, images, patterns, models to draw from.
  2. Draw a simple cartoon outline of your design.
  3. Try cutting up some tile and arranging it on the cartoon to see how it looks.
  4. Pay special attention to the smallest detail in your design.
  5. If it is not possible to cut tile that small, or the pieces seem too tedious to work with, then simplify your design.
  6. Note that when you start using glue, it will be easier to arrange small pieces because they will not move around as unexpectedly. Tweezers also help.
  7. Once you have you have verified that your design is not too detailed to be rendered in tile, then sketch the cartoon on the coaster in pencil.
  8. You can darken your pencil sketch with a Sharpie brand marker so that glue does not rub it off once you start working.
  9. Wipe Weldbond glue over the face of the coaster and allow to dry to seal the wood. Use a very thin coat to avoid warping the coaster from the moisture in the glue! Remember, the reason you are sealing the coaster in the first place is to avoid warping it later when you use lots of glue for the tiles. Use two light coasts and allow to dry thoroughly between coats.
  10. Start tiling your design from the center and working to the edges.
  11. Leaving an irregular grout gap of 1/16 inch or less is much easier than fitting the tile tightly together.
  12. At the edge of the coaster, cut the tile so that it fits flush with the edge. You can place a tile on the coaster, mark where it should be cut with a Sharpie marker before gluing and then make the cut.
  13. Use the fine side of a marble file or a piece of rough stone to rub the edge of the cut tile so that the edge is not as sharp.
  14. After the glue has completely dried (preferably for 48+ hours) grout your mosaic with sanded grout.

How Much Tile Do I Need For The Coaster Base?

The top surface of a 4-inch square coaster base has only 16 square inches (0.11 square feet) in area. This means you could cover it with 56 to 72 pieces of the 12mm Morjo or 112 to 161 pieces of the 8mm Morjo depending on how you cut and space the tile. In either case, you might want to order more than that to account for the cutting waste, possibly twice as much if you are fitting the tile exactly with no grout gap.

How To Make Mosaic Art

For more advice on designing your mosaic project or mounting, cutting, and grouting tile, please see our page of Mosaic Frequently Asked Questions or our Mosaic Information Guide, which lists instructional pages described by topic. We also post new articles about making mosaics at our How to Mosaic Blog.
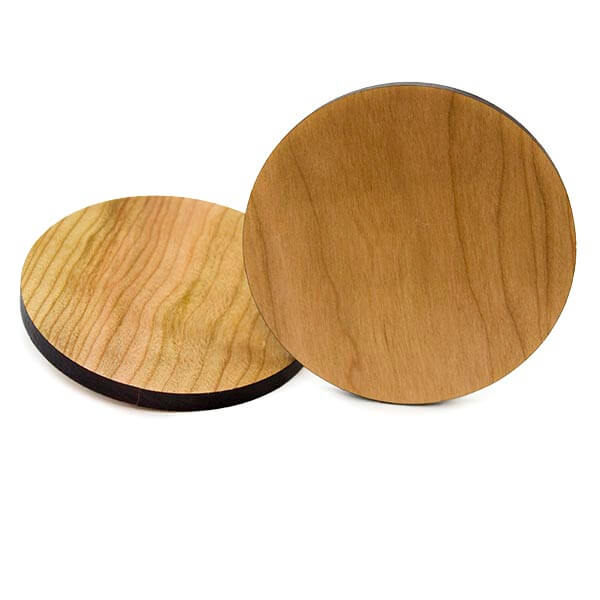
Mosaic Coaster Base Circular Round THICK 5/16 Inch

Circular Coaster Base 4-inch diameter, 5/16" thick, with lacquer finished back.

Mosaic Coaster Base Circular Round THICK 5/16 Inch is made from cherry hardwood right here in the USA. The circular base is 4 inches in diameter and 5/16 inches thick, which is thicker than the coasters we originally sold. They are cut out with a laser, so the sides have a natural burnt wood color. The bottom and sides have been lacquered. The top surface is bare wood for a good adhesive bond.

Note that the wood is not recessed to form a border for your mosaic. Instead, your mosaic should extend to the edge of the coaster so that the finished coaster looks like a fragment of an ancient mosaic. This is easiest to do when you use tile without a heavy embossed pattern on the underside, and for this reason, we recommend the 8mm Morjo Recycled Glass Mosaic Tile for use with the coasters.

Weldbond adhesive or another high quality PVA glue is recommended for attaching tiles to the coaster base, and there are several options for grouting your mosaic coaster. You can press the tiles closely together instead of leaving a gap, but that requires much more time and effort than leaving an irregular gap and then grouting the mosaic. With an irregular grout gap of 1/16 inch or less, you can use almost every piece of tile you cut because it does not have to be exact. You can also use regular sanded grout to grout it.

Mosaic Art Projects Using Coaster Bases

Product Specifications

  • 1 piece hardwood cherry circular coaster base.
  • wood pattern is natural and varies by piece.
  • diameter: 4 inches.
  • thickness: 5/16 inches. THICKER than our original coasters.
  • laser cut edges (natural burnt wood finish).
  • lacquered sides and bottoms.
  • bare wood face.
  • made in America

Compatibility

Any type of glass mosaic tile could be used with these, but there is no border on the coaster, so your mosaic will go all the way to the edge. If you use a type of glass tile that has coarse embossing or bevels on the underside, then these might look odd at the edge of the mosaic. It is also more difficult to cut a tile into small pieces if the bottom has an embossed pattern. For these reasons, the coasters are best covered with stained glass or the 8mm and 12mm sizes of recycled glass mosaic tile by Morjo. We prefer Morjo to stained glass because stained glass tends to form sharper edges when cut. Whatever tile you decide to use, make sure you file off any sharp edges at the sides of the mosaic using a rough stone or marble file.

Instructions For Using The Coaster Bases For Detailed Mosaic Art

The coaster bases can be used any way you want, including simple projects for children with tiles glued randomly with variable grout spacing, and these make great first-time projects because they are small and do not require as much time and material. However, it is possible to create a more sophisticated mosaic design on the coaster using these instructions. Due to the limited space provided by the coaster, one of the most important steps is making sure you can cut tile small enough to render the smallest detail of your design and modifying your design if necessary:

  1. Find a design or picture. Google Images is a great source of photos, images, patterns, models to draw from.
  2. Draw a simple cartoon outline of your design.
  3. Try cutting up some tile and arranging it on the cartoon to see how it looks.
  4. Pay special attention to the smallest detail in your design.
  5. If it is not possible to cut tile that small, or the pieces seem too tedious to work with, then simplify your design.
  6. Note that when you start using glue, it will be easier to arrange small pieces because they will not move around as unexpectedly. Tweezers also help.
  7. Once you have you have verified that your design is not too detailed to be rendered in tile, then sketch the cartoon on the coaster in pencil.
  8. You can darken your pencil sketch with a Sharpie brand marker so that glue does not rub it off once you start working.
  9. Wipe Weldbond glue over the face of the coaster and allow to dry to seal the wood. Use a very thin coat to avoid warping the coaster from the moisture in the glue! Remember, the reason you are sealing the coaster in the first place is to avoid warping it later when you use lots of glue for the tiles. Use two light coasts and allow to dry thoroughly between coats.
  10. Start tiling your design from the center and working to the edges.
  11. Leaving an irregular grout gap of 1/16 inch or less is much easier than fitting the tile tightly together.
  12. At the edge of the coaster, cut the tile so that it fits flush with the edge. You can place a tile on the coaster, mark where it should be cut with a Sharpie marker before gluing and then make the cut.
  13. Use the fine side of a marble file or a piece of rough stone to rub the edge of the cut tile so that the edge is not as sharp.
  14. After the glue has completely dried (preferably for 48+ hours) grout your mosaic with sanded grout.

How Much Tile Do I Need For The Coaster Base?

The top surface of a 4-inch circular coaster base has only 12.6 square inches (0.09 square feet) in area. This means you could cover it with 45 to 60 of the 12mm Morjo or 90 to 130 of the 8mm Morjo depending on how you cut and space the tile. In either case, you might want to order more than that to account for the cutting waste, possibly twice as much if you are fitting the tile exactly with no grout gap.

How To Make Mosaic Art

For more advice on designing your mosaic project or mounting, cutting, and grouting tile, please see our page of Mosaic Frequently Asked Questions or our Mosaic Information Guide, which lists instructional pages described by topic. We also post new articles about making mosaics at our How to Mosaic Blog.
February 2018 Promotion


This promotion is no longer active – please subscribe to our newsletter to receive future promotions!

Use coupon code ” 10Feb2018 ” at check-out to receive 10% off orders $100 or more in value.
*Excludes sale items *Not for use in combination with other sales, discounts or promotions.
Offer Expires 3/1/2018.

How to use this coupon code:
Copy the coupon code: 10Feb2018
Add $100 minimum in items to your cart.
Proceed to check-out.
Paste the code into the blank under “Coupon or Professional Wholesale Order Code” and click “Apply Coupon.”


Now You Can Shop by Color!