Mosaic techniques for outdoor table tops, patio floors, fountains or birdbaths

Indoor vs. Outdoor
Our regular mosaic instructions page is written for indoor mosaics not subject to standing water such as a shower floor. For these indoor mosaics, wood can be used as a backer, and we recommend the “glue-then-grout” method using Weldbond glue, a water-based PVA adhesive with no fumes.
However, outdoor mosaics and wet mosaics like pools and fountains require different backers and cements. First, wood should never be used as a backer for outdoor mosaics, even those kept relatively dry. The reason is that wood swells and contracts due to humidity changes in the air, and tiles will start to fall off eventually, and usually sooner than expected. Instead of wood, use 1/4″ concrete backer board for your outdoor mosaic projects. For attaching the tiles, use thinset mortar instead of adhesive. Thinset and concrete backer board is available at building material stores.
We carry convenience sized thinset mortar here.
All that being said, if you do want to mosaic something wooden for outdoors, such as a mosaic birdhouse, use thinset mortar to attach the tiles and make sure that every surface of the birdhouse not covered in mosaic is covered in multiple coats of exterior paint. You should seal the mosaic with multiple applications of a tile and grout sealer a few days after the grout cures. Even then, the life expectancy of such a project will be relatively short if exposed to the elements.
Outdoor Backers
Do not use wood as a backer for outdoor mosaics. Use 1/4″ concrete backer board, which is available at building material stores and is cut by scoring with box cutter and snapped along a straight edge. Masonry, concrete and stone are also good outdoor mosaic backers. Masonry can be smoother by plastering with thinset a few days (preferably 2 weeks) before the mosaic is applied. Fieldstone and pre-made concrete stepping stones from the lawn and garden center are good for smaller projects such as mosaic plaques and mosaic stepping stones. All stone, masonry and concrete should be scoured with a wire brush prior to applying thinset in order to remove contaminant and invisible concrete sealers which could interfere with bonding.
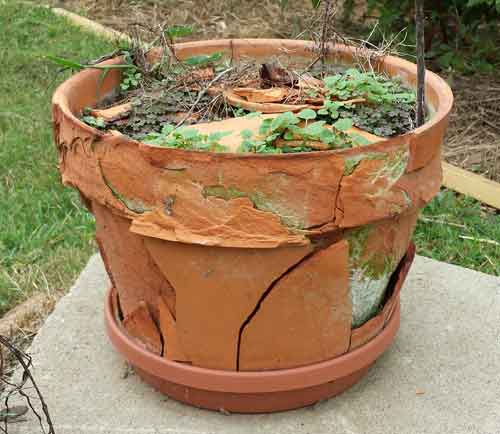
Avoid the use of terracotta bases for outdoor mosaics, as they can be extremely susceptible to freezing damage.

Read more about outdoor backer materials and methods in our article, “Backers for Outdoor Garden Mosaics.”
Outdoor Adhesives
Use thinset mortar instead of adhesives for outdoor mosaics. Most people find it is easier to mix up small batches of thinset than it is to use a solvent-based adhesive.
We use Versabond brand thinset which comes in a 50-pound bag. Buy a 5-gallon plastic bucket with lid at the same store you buy the thinset and put the bag directly into the bucket without emptying it (which would create an enormous amount of dust). The bucket helps contain dust and keeps humidity from ruining the mortar over time. Slit the top of the bag and use a long-handle spoon or garden shovel or ice scoop to take out what you need. The mixing ratio is 1/4 cup water per pound. Wear a dust mask and scoop and mix the thinset outdoors.
I have written some instructions for how to use thinset for detailed mosaic artwork where the artist wants to mount one tile at a time.
Outdoor Grouting
For outdoor projects, we will often use thinset mortar for grouting. We do this for two reasons: the thinset will match any thinset that squeezed up between the tiles, and thinset is harder than grout.
Outdoor Tiles
Glass tile is impervious to moisture penetration and therefore resistant to freeze damage. On the other hand, unglazed ceramic and tumble-finished stone are porous and highly susceptible to freeze damage. We avoid soft ceramics for use outdoors and always seal our finished mosaic with multiple applications of sealer to prevent damage. Even if glass tile is used, the porous grout is still vulnerable, so we always seal with multiple applications.
Outdoor Sealers
Outdoor mosaics should be sealed to protect against staining and freeze damage. There are two types of tile and grout sealers: penetrating pore sealer and coatings that form a membrane on the surface. Penetrating sealers soak into the pores of the grout, stone and ceramic. These pore sealers are usually made of latex or silicone, and they’re invisible. The membrane-forming sealers are coatings that create a hard, glossy finish and may change the color of the grout (usually by making it look darker). Concrete sealers tend to be of this second type.
TileLab SurfaceGard Penetrating Sealer made by Custom Building Products is a high-quality penetrating sealer. It’s water based, easy to apply, cleans up easily, and repels dirt, water, oil and stains. When applying a sealer, let it dry for two hours and then apply a drop of water to a grout line. If the water beads instead of soaking in, the grout is adequately sealed, which can usually be accomplished in two coats. I always put one additional coat to help ensure I plug any random pinholes.
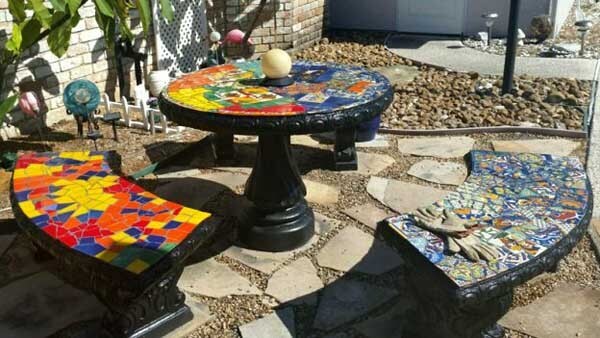
Outdoor mosaic tables are often made by covering metal patio tables with concrete backer board insets which are then covered in mosaic. For any project using concrete backer board that is left exposed, it is important to seal the bottom and edges of the backer board to prevent water from penetrating the porous concrete. NOTE: You never want to seal any surface before mosaic is applied to it because the sealer will interfere with bonding.
Further Reading
We have tons more info on outdoor mosaic on our blog.
We recommend the following book for more information on outdoor mosaics:
Outdoor Mosaic: Original Weather-Proof Designs to Brighten Any Exterior Space
by Emma Biggs and Tessa Hunkin