Tips for creating mosaic sculptures using improvised and re-purposed bases.
I have also written a separate page for how to create concrete sculptures as bases for mosaic art. The material below focuses on the use of found and repurposed objects as bases for mosaic sculpture.

Improvised objects that are popular bases for mosaic sculpture:
- lamps
- bicycle frames
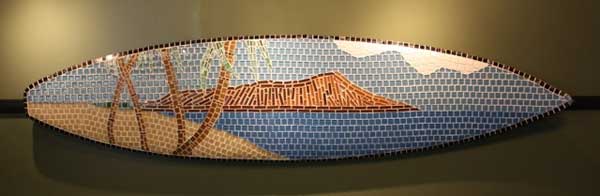
- surfboards
- skateboards
- mannequins
- garden water fountains
- vases
- dressers
- bowling balls
- garden gazing spheres
- flower pots
- concrete garden ornaments
- chairs
- columns
Selecting a Mosaic Base
Mosaic work takes an investment of time and effort on the part of the artist, and there is also the environmental costs of producing the tile using fossil fuels and mined minerals. It only makes sense to select a base that is durable, especially if the mosaic is to be displayed outdoors, and to use an adhesive or cement that is appropriate. Any sense of being “green” by using repurposed materials goes right out the window if you don’t make the mosaic in a way that ensures it will last.
In addition to durability, safety is an important issue when making mosaic sculptures. Specifically, you need to make sure that the considerable added weight of tile and grout do not make your sculpture unstable. A bistro table may be safely covered mosaic tile if done in the right way using thin glass tile, but if you use thick stone on a table that is more tall than wide, then you are making a top-heavy hazard that could fall over and break someone’s foot, injure a child, etc. No amount of written instruction can ever replace your own good judgment when you make your project. Make sure the base you choose is stong enough and stable enough to support the weight of a mosaic. Anchor your sculpture on a metal or concrete platform if needed. Think about how the base will be mounted before you start the mosaic work, especially if welding will be needed.
Outdoor mosaics should be made on metal, cement, terracotta and other materials that are resistant to moisture. Wood should only be used for indoor mosaics because wood expands and contracts with daily changes in humidity, and your mosaic tile will fall off over time, usually more rapidly than you would think.
Increasingly people are using fiberglass, plastic and composite materials for mosaic bases. After all, it’s hard to avoid these materials because that is what surfboards, mannequins and bowling balls are made of. However, if you use these materials, you need to use an adhesive which bonds to them, and that means something like and epoxy or a solvent-based adhesive like Liquid Nails Outdoor Formulation. These adhesives have fumes, but they are necessary to bond adequately to plastic bases. It is also essential to prepare the surface before mounting tile to it.
Preparing the Surface
Surfaces must be free of paint, wallpaper, dirt and grease. If there is grease or oil, remove these first with detergent and water first before scraping or sanding because these mechanical processes will only spread the contamination. Use a paint scraper or coarse-grit sandpaper to remove paint and “dead” plastic or wood and get down to fresh material. Coarse-grit sandpaper is very important for scoring fiberglass and plastic bases so that the adhesive grips them securely.
Direct Method
The direct method is simply attaching tesserae directly to the surface one at a time. The direct method is typically the best method for irregular mosaic bases and curved surfaces for obvious reasons. Create a workspace in your garage or basement so that you can move the base inside and work on it over time instead of trying to work in intense sessions outdoors.
For larger sculptures, it is usually worth the investment of time to create some sort of cradle out of 2x4s or sawhorses or even crushed cardboard boxes. That way you can lay your sculpture over in the cradle and work on a horizontal surface, rotating the sculpture in the cradle as needed to turn up unexposed surfaces still needing to be covered. Tip: let one surface harden overnight before rotating, and pad your cradle with old towels to prevent it from damaging tile.
Attaching Tesserae
A general rule of thumb for working with curved surfaces is: the smaller the pieces, the more snug they will fit to the curved surface. Gentle curves are easier, while extreme curves can require very small pieces. It may help to hold tile on the uncovered surface and play with different configurations before you begin gluing them down.
If you are having trouble with tile sliding down a surface, let the glue set a minute and become tacky before pressing the tile into it. Again, it really helps to have some sort of adjustable “cradle” where the base can be rotated so that you are always gluing to a horizontal surface. A cradle can be as simple as a pile of old towels or cardboard.
Additional Help
For tips on how to cut and mount tile and grout mosaics, please see our Mosaic Frequently-Asked Questions page and our Mosaic Information Guide. I have also written a page for how to use thinset for detailed mosaic artwork.