
Most surviving ancient mosaic art is architectural in nature. One instantly thinks of the designs found in Roman baths or Turkish mosques. Today, the interiors of houses are usually made with wood and drywall, and are therefore unsuitable for heavy mosaic art. The sturdy brick and stone architecture of the ancients was ideal for the mosaicists of the time.
To decorate walls we often turn to paintings because they can be easily mounted on a modern interior wall. Mosaic “plaques” fill the same role as a painting. However, as mosaics increase in size their weight can become an issue for not just the wall, but also for themselves. Mosaic art must be very rigid so that cracks don’t appear over time. Larger pieces are more susceptible to warping so they need a sturdier construction.

Reinforced Concrete Backer Board
In this tutorial I will describe how to use 1/2 inch Concrete Backer Board (CBB) and wood to build a sturdy foundation for a large wall-mounted mosaic. Mosaics a square foot in size or smaller can be built with a less substantial backer, but this technique should be considered for pieces in the 2 square foot to 8 square-foot range. At 8 square feet and beyond mosaics will become prohibitively heavy and should instead be built into the wall instead of mounted upon the wall.
Getting Started
Concrete backer board is notoriously dusty. You should wear a dust mask when cutting it to the size you need. The N95 Dust Masks we sell are suitable. Cut the CBB outdoors if you can. It can be cut by scoring it multiple times with a box cutter or by using a simple hand saw. Once you have it cut to the right size glue the sides with Weldbond.
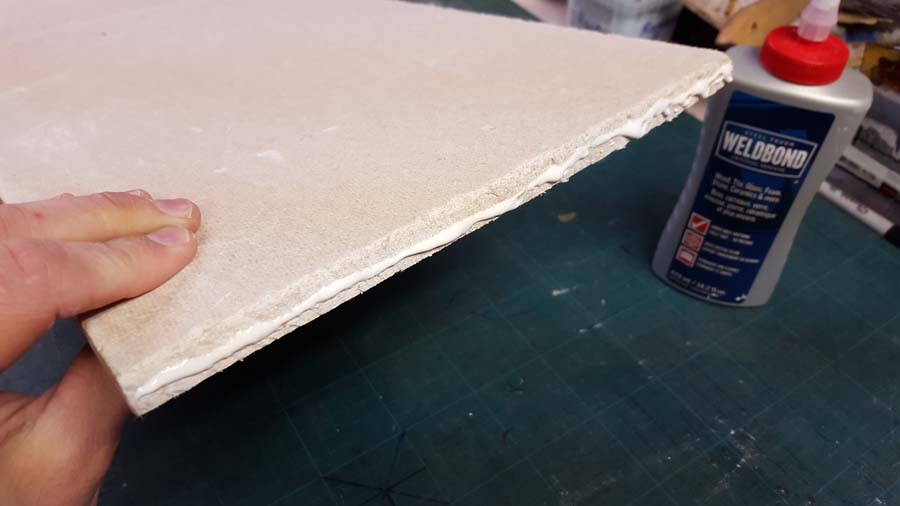
The purpose of the glue is to seal the edges to prevent them from leaving more dust as you work.
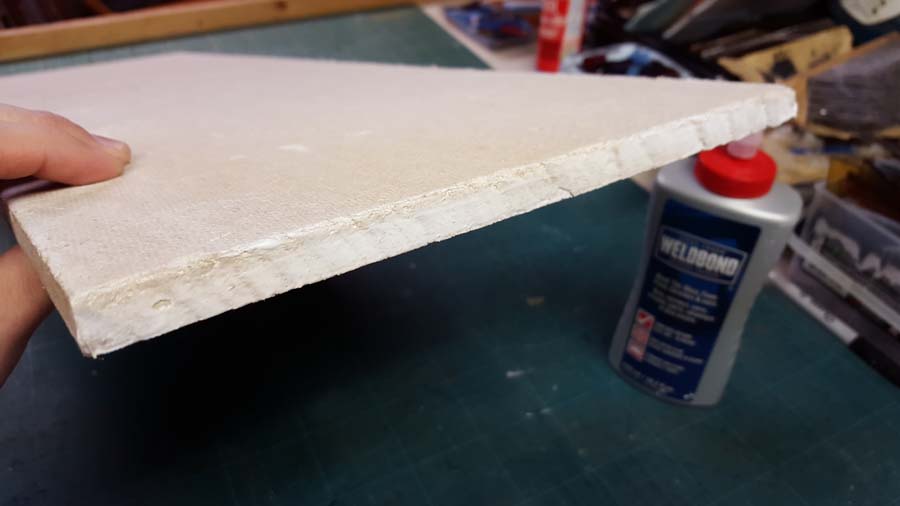
Smear the glue with your finger until it is a nice flat application as seen above. This should be dry enough to work with very quickly.
Reinforce the Back with Wood
I like to use pine. Any lumber store or big-box home improvement store should have suitable wood. You can also ask a carpenter friend for scraps. What we’re going to do is make a frame-like structure on the back of the CBB by putting wood around the edges. For smaller CBB-backed mosaics it is easier to simply laminate the back of the CBB with plywood to create a decent structure. However, to save weight on larger projects like this we can create a frame which won’t weigh as much but will still help us out. Mounting hardware can’t be affixed directly to the CBB because it can break under the localized stress of the screws. Wood will not break under that pressure. The wood can also support an external frame if desired.
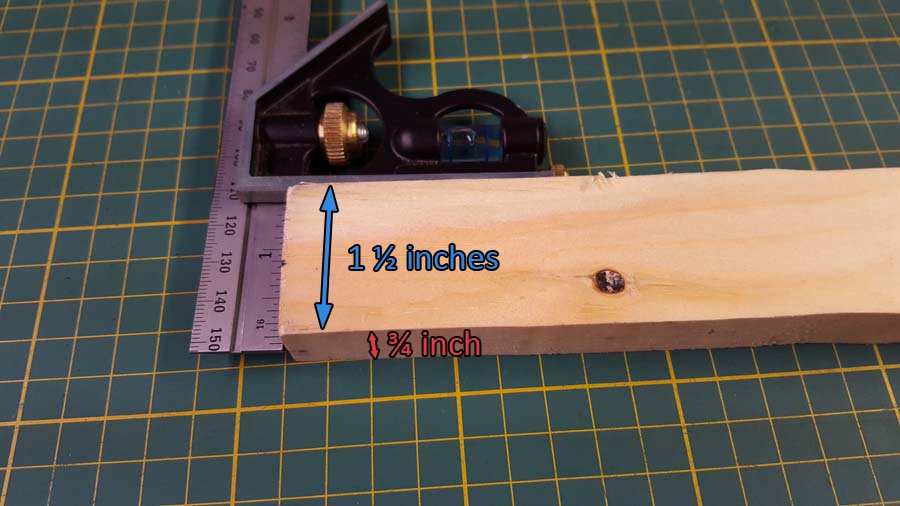
For this mosaic I used pine with actual dimensions of 1.5 inches by 3/4 of an inch. At the lumber store they will call this something else. It comes in a hard edge variety as seen here, or with rounded edges. I prefer the hard edges, but it’s up to you.
Cut the First Piece
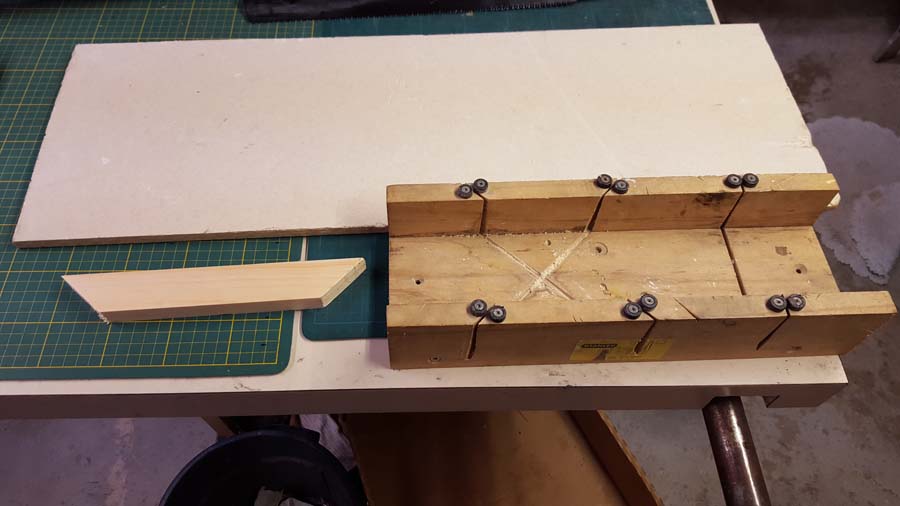
Choose which side you want to work with and cut a piece. I used mitre cuts because they look nicer, but if you want to do this on the quick you can cut right angles and butt the ends up against eachother.
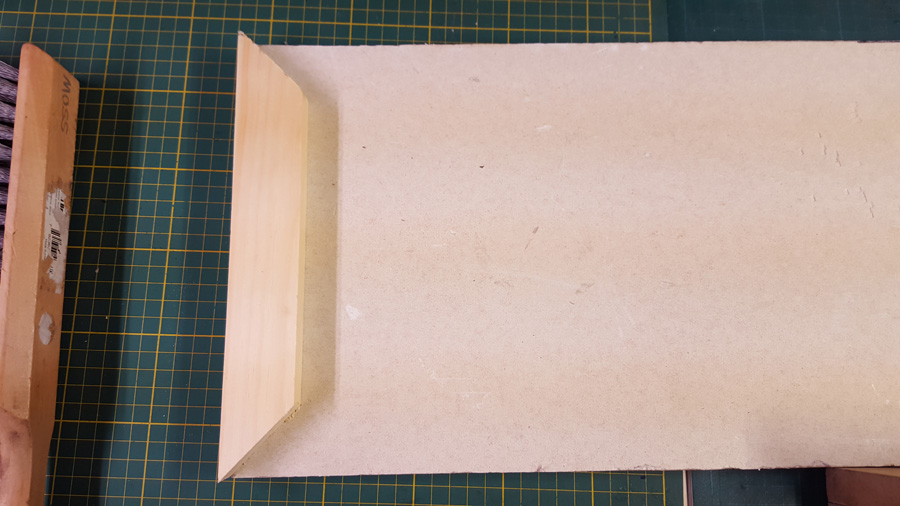
Make sure the wood is placed so it meets or slightly exceeds the dimensions of the concrete backer board. Sometimes CBB can have gnarled corners or uneven edges from sawing it or cutting it. The wood should be either flush with the edges or slightly hang past it.
In this example, one of the corners is broken. Make sure the wood overhangs it enough to form a right angle with the other side.
Cut the Other Pieces
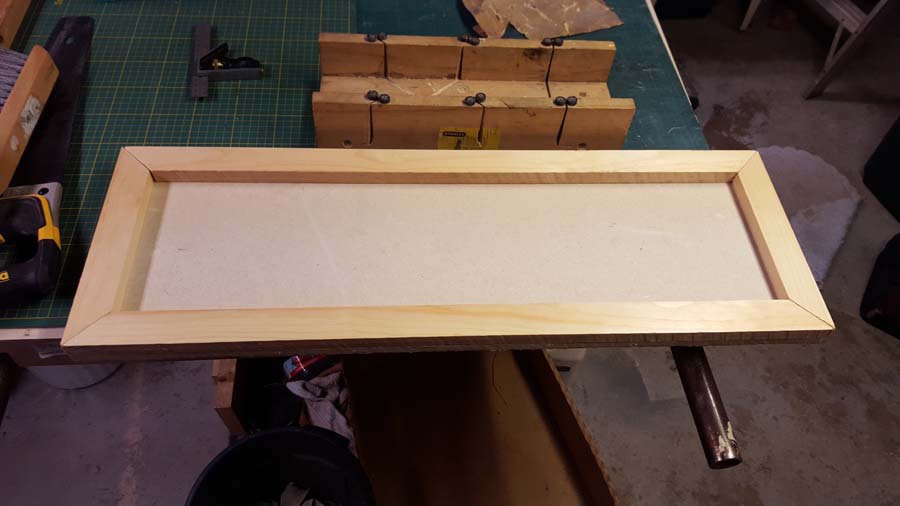
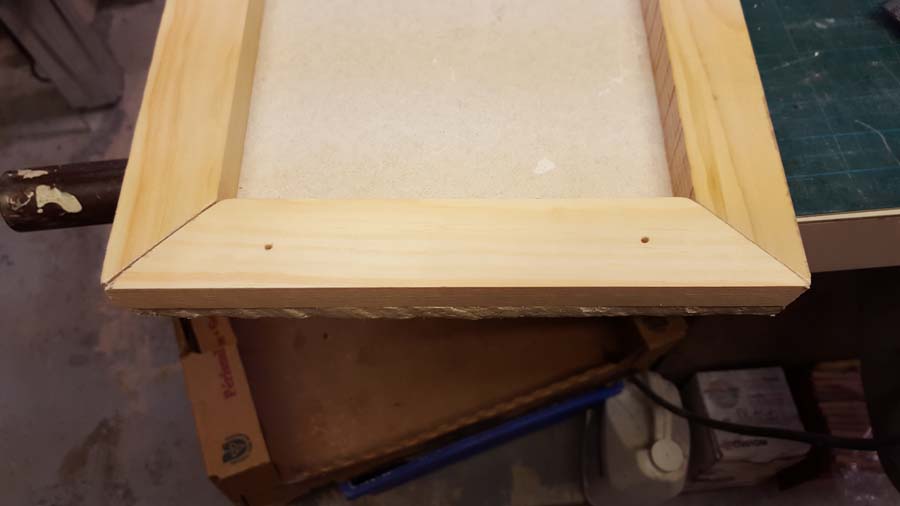
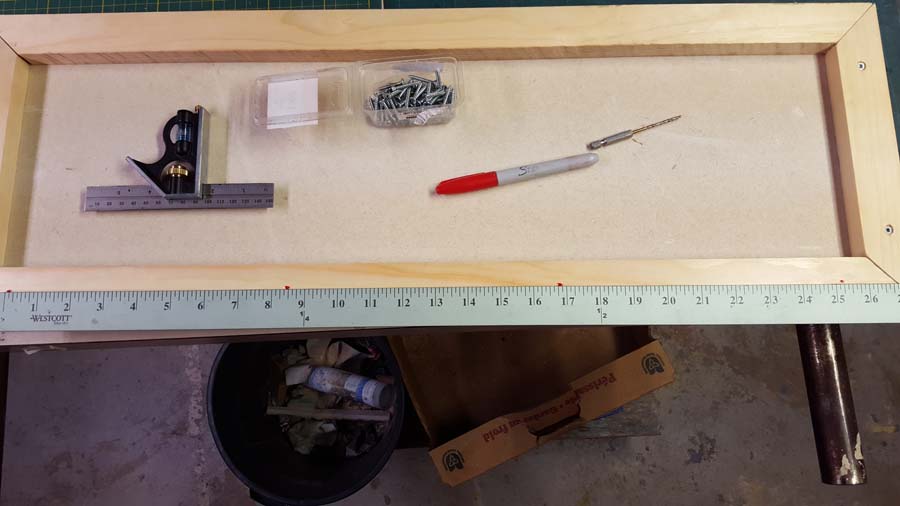
With the fitment of the first piece confirmed cut the other three pieces of wood to the appropriate sizes and try to line them up. It should look like this:
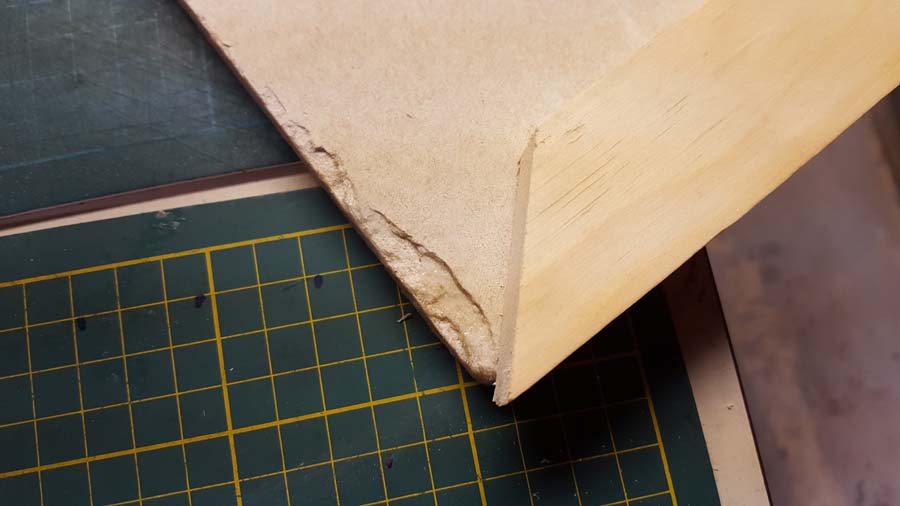
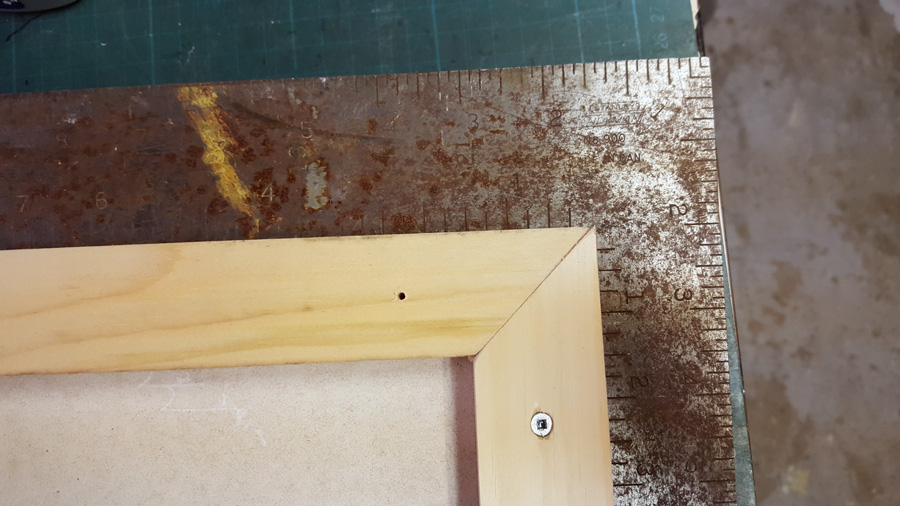
Take a look at each of the corners and make sure everything is lined up well.
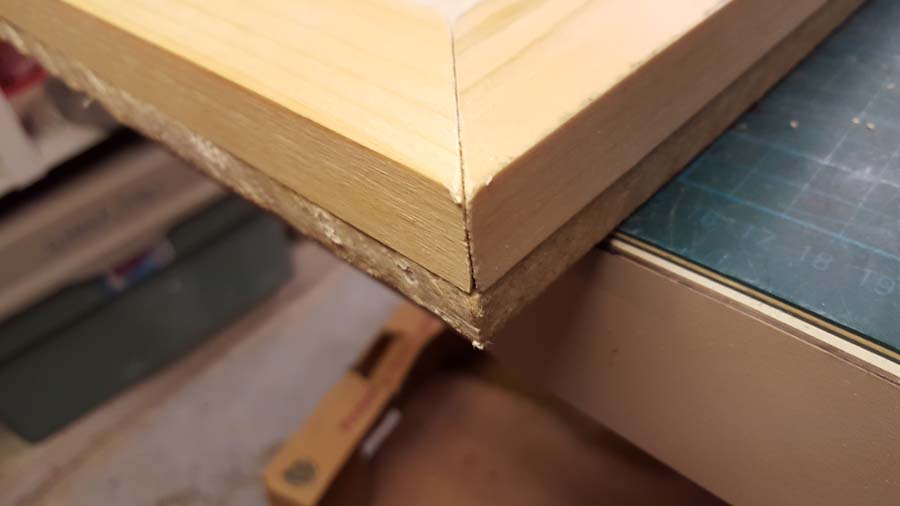
Here you can see that the corners of the wood is aligned directly with the corner of the CBB. The wood has the slightest overhang, which you can see in the photo if you look at the shadow where the wood and CBB meet. This overhang is probably only about 1 millimeter, or just over 1/64th of an inch, it is very small, but you can feel it if you touch the sides. It’s okay if they are totally flush, but if it’s hard to make it exact err on the side of making the wood slightly larger than the backer board as in this example.
We’re now almost ready to permanently affix the wood to the backer board. Double-check using a square that all of the angles are correct and then you’re ready to move on.
Attach the First Piece of the Wooden Frame
You’re going to need some screws and some wood glue or Weldbond. Weldbond is an excellent adhesive for this application.
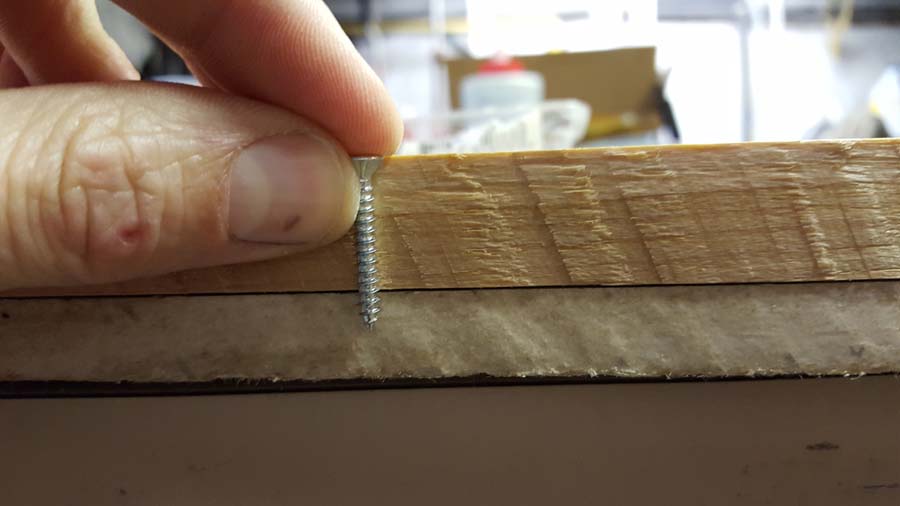
I am going to use these exact screws. Notice how the screw will not protrude from the face of the CBB even if I tighten it a little too far. I want screws with this style of head because they can be screwed just past the surface of the wood which will keep them from scratching the wall once the mosaic is complete. In this case the screws are 1 inch long.
These pilot holes are in the middle of the wood, and 2.25 inches in from the sides. This measurement looked nice, but has no other real significance.
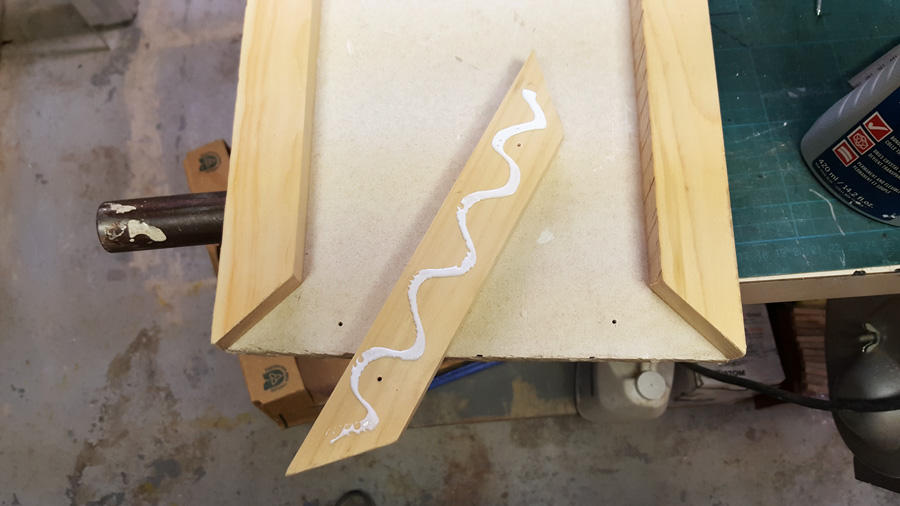
Flip the piece over and add some glue.
Put it back in place and screw it down. Now this piece can be used with a square to ensure the next pieces will be at right angles.
Attach the Rest of the Frame
Start by deciding where to put the screws.
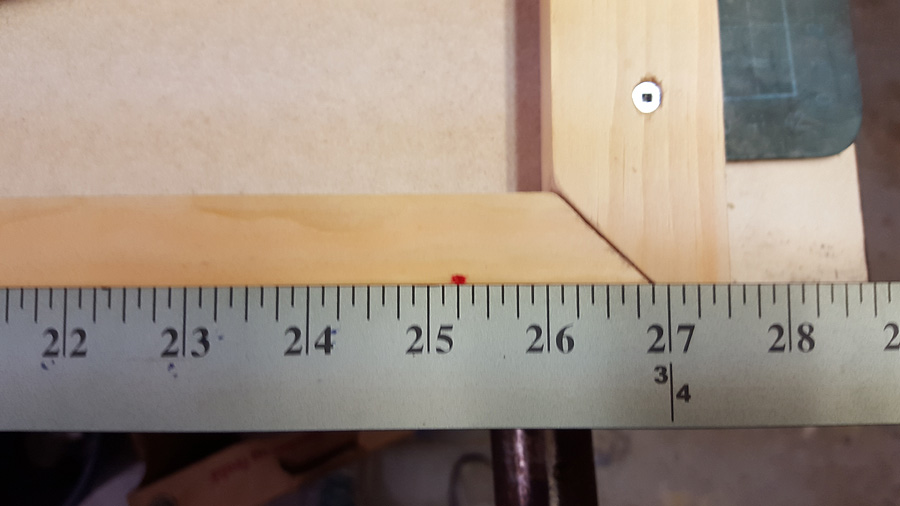
Determining the screw positions for the other sides will be a little more tricky because of how long they are. The additional length means they will need more screws to hold them in position. In this case I started with the same 2.25 inch measurement as was used for the screws on the small piece. This will help everything look uniform when it’s completed.
With the end screw locations established by using the 2.25 inch measurement we have to decide where to put the other two screws. In this case there was 25.25 inches between the two end screws. Divided into 3 that becomes 8.4166 inches, or just less than 8 and a half inches, so that’s where I put the two central screws.
Making the screws even like this is simply a matter of workmanship. It isn’t essential that you have equal gaps between each screw, but if you want it to look nice then you can do it this way.
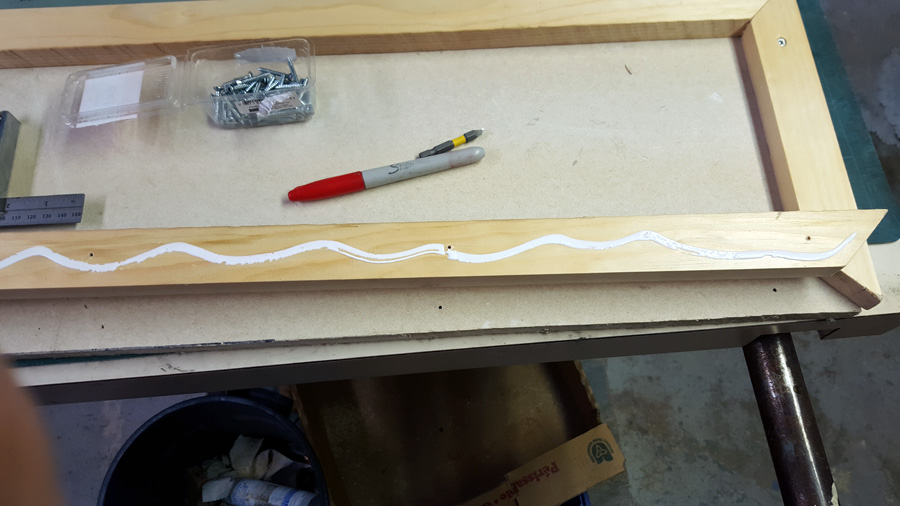
Pre-drill everything and apply the glue. I have been using a 7/32 inch drill bit for all of the pilot holes.
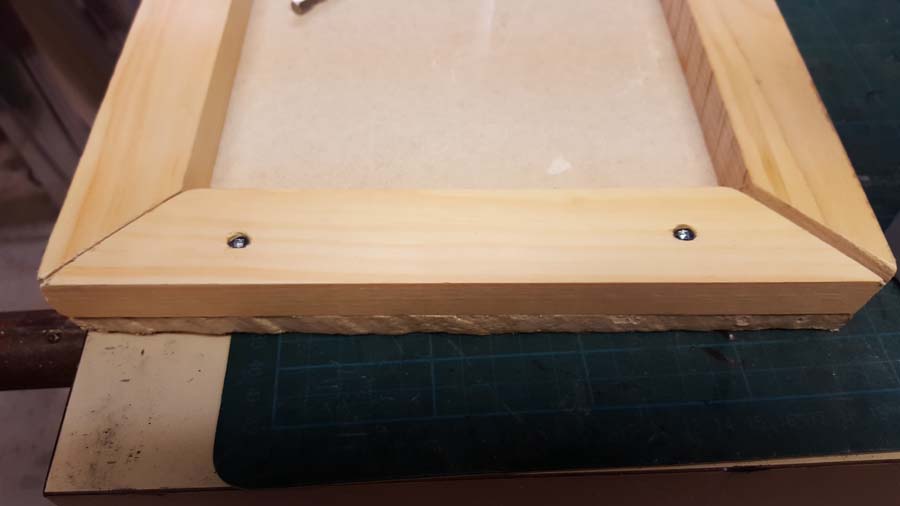
Affix the second piece in the same manner as the first.
Finishing Up
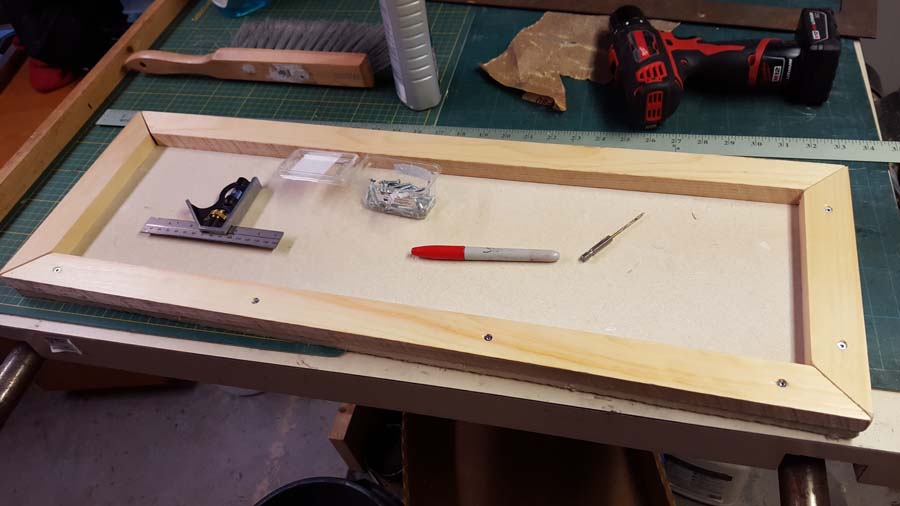
You can move on to one of the other sides. Use the same measurements for the screw locations. Be sure to check the angles with a square as you go along.
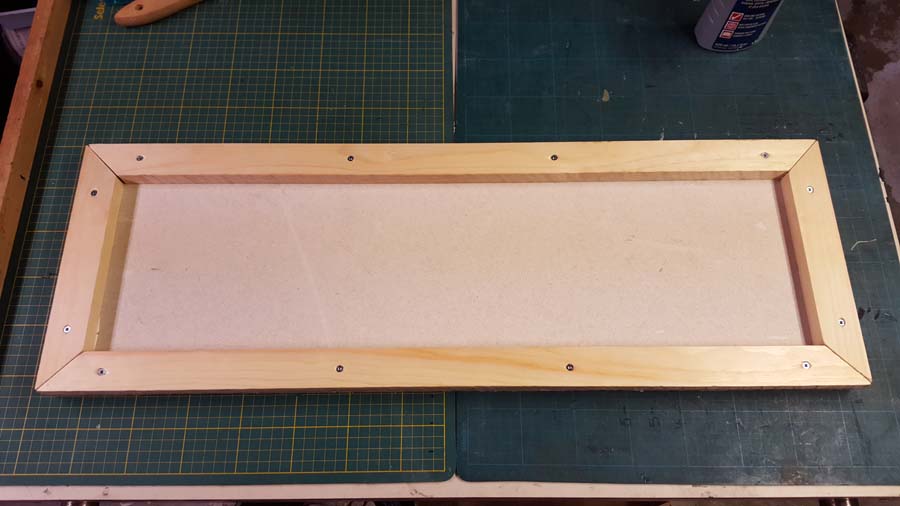
Once you put in the last screw you’re done.

Now that this is finished you can make a mosaic and know with confidence that it will survive a very long time. The wood frame gives you some options when selecting hanging hardware that will allow for a flush fit with the wall. This reinforcement also allows for different possibilities when deciding to either frame or mosaic the sides.
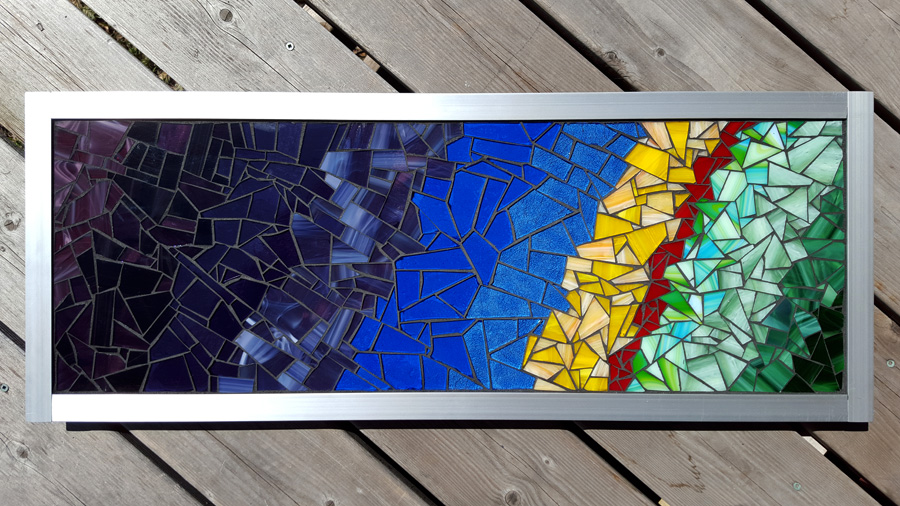
The finished mosaic after being grouted and framed. Most of the glass is Spectrum brand stained glass.