How To Make A Mosaic
These instructions are for an indoor mosaic not subjected to excess moisture. The mosaic process is similar for outdoor mosaics (such as pools and fountains) but thinset mortar is used outdoors instead of Weldbond adhesive. For wet mosaics such as shower floors, you also need to use thinset. Thinset is a sticky concrete with polymers added for strength, adhesion and water resistance.
More information on outdoor mosaics, specialized topics and advanced mosaic methods can be found on our Outdoor Mosaic Guide.
Our FAQ page also contains additional mosaic instructions, tips on using thinset and answers to many specific mosaic questions. It is constantly being expanded and has solutions for many common mosaic problems. Also, here are some tips on how to avoid disasters while grouting.
For an indoor project not subjected to moisture, it is very simple:
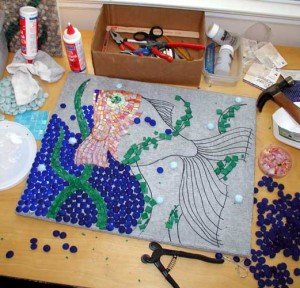
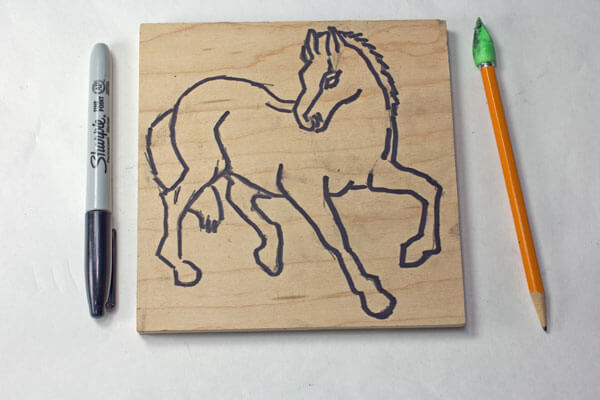
1. Draw a simple “cartoon” (outline) on the mosaic surface. You can copy a mosaic pattern from a coloring book or your favorite pattern of china or fabric. See our blog article on creating easy mosaic art patterns from photos and images.
2. Decide what size mosaic tiles are most appropriate for the level of detail in the design (don’t use 1″ tiles to make details that are 1/2″). Lay a few tiles down just to make sure the colors look right together.
It’s better to take a loose, creative approach to picking colors and textures for your mosaic – a variety of surfaces and color often delights the eye more than even fields of color. Have a look at our Mosaic Artists Gallery for inspiration!
3. Glue the tiles to the surface one at a time. We recommend Weldbond Adhesive. Make sure the gaps between the tiles are about 1/8 inch or less.
We’ve extensively tested Weldbond, and consider it the most practical adhesive for indoor mosaic projects.
For outdoor projects, other considerations are required. See our comprehensive guide to outdoor mosaic for more details.
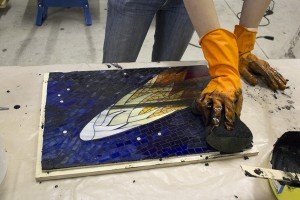
4. After the glue cures for 24 hours, grout the mosaic with regular tile grout. Follow our comprehensive guide to grouting, “How To Grout Mosaic Art“.
For more complicated designs, you can lay the project up on fiberglass mesh (by gluing sparingly with Weldbond adhesive), or you can pick up the tiles with clear contact paper. In either case, the next step would be to spread glue or cement on the surface and press the sheet of mosaic onto the glue or cement.
We have even more information, advice and how-to’s on our Frequently Asked Mosaic Questions page.
We carry everything you might need to make a mosaic:
See the Mosaic Tips below for more help with your mosaic.
Mosaic Tips from Our Resident Mosaic Artist
- Start simple.
- Make a small mosaic plaque before you mosaic a wall or floor. That way you can work out your materials and methods before the big job.
- How can you draw a design? Simple drawings like those in a coloring book work best. The color and the details come when you add the tile and glass. I always sketch something on paper and then come home and draw a simple cartoon on my plywood or concrete board using a magic marker. If drawing is a sore spot, you can create mosaic patterns easily without drawing as well.
- My first rule of grouts is to choose a contrasting color. If you use white grout with white tile or grey grout with grey tiles, then the tiles don’t stand out from the grout, and most of the detail of your design will be lost. When in doubt, black grout is usually the answer.
- My personal second rule of grouts is that DARKER GROUTS ALMOST ALWAYS LOOK BETTER. I have almost always been disappointed when using plain white grout. White grout makes a nice mosaic look like a summer camp project! Try an off-white or light beige if you think you need a light color. Also remember that grouts are much darker while they are wet and get lighter as they cure.
- Don’t know anything about glues, grouts or tiling? Your local hardware store or handyman is a mosaic expert even though they’ve never made one. (You might not know anyone who has made a mosaic, but you probably know someone who has tiled a bathroom or kitchen. The technical skills are very similar.)
- Use a wheeled glass cutter to cut glass and smalti. Use a tile nipper to cut ceramic tiles, china and other dishes.
- Always wear safety glasses when cutting tile or glass or mixing grout. (Grout is mildly caustic and has sand and grit in it.) Making a mosaic can be fun but you should always be careful.
- Grout mosaics outside. It’s a messy process. Look at books on home improvement for basic techniques of grouting if you’re not sure. Keep grout damp as it cures and do not allow it to dry out rapidly, otherwise it will crumble. Remember, the grout is binding water internally in a chemical process as it cure. It is NOT drying.
- Keep mosaic tiles and supplies out of reach of children. Use caution when handling the broken glass and ceramics.
- Spend a little more time on your mosaic. Don’t rush and don’t think about what you want to make next. It can make a world of difference in your satisfaction.
- Avoid plywood as a backer unless you can seal the edges and bottom. Wood materials absorb water over time and warp, and then grout and tiles pop off. You might not be trying to recreate a timeless Roman mosaic that will endure for centuries, but at least make something that will last 2 or 3 years. Use plywood at least 1/2″ thick inside and concrete or concrete board outside. Always use concrete or concrete board as the base of any mosaic that will be walked on. Concrete board can be purchased from building material stores. A common brand name is Wonderboard. For my indoor mosaics, I laminate 1/4″ Wonderboard to cabinet grade plywood backers.
- The best all-around glue for making mosaics is Weldbond. It is a water-based adhesive that looks and handles just like plain white glue, yet it cures stronger than many of the smelly solvent-based glues. The manufacturer’s brochure calls it “the most versatile, non-toxic, non-flammable adhesive on the North American market.” I agree. It bonds to hundreds of different materials and is very water-resistant once it dries. It cleans up easy with soap and water.
- If you make a mistake, don’t be afraid to pry some of the tiles off if you don’t like what you see. (Wear goggles or safety glasses with side shields.)
- I always wait for a week or two before I grout a piece. That way I have a chance to change things before they are literally set in concrete.
- Simple and crude can also be noble. It’s ok if your art has blemishes and mistakes. That’s what makes it interesting and keeps it from looking like it was made on an assembly line. Don’t try to make it a perfect reproduction of anything, and you’ll probably be much happier with the time spent and the results.
- Avoid making copies of phony arts-n-crafts stuff. There’s way too much of that around. Make your mosaic YOUR way and it will be genuine art in the highest sense of the word.
Legal Disclaimer and Copyright Information
No warranty is implied by these instructions. Use at your own risk. Please wear goggles when cutting mosaic materials or mixing grout. Mosaic materials are often sharp. Keep out of reach of children. Do not overload patio tables with mosaic materials so that the table becomes unstable (top heavy). You should also make sure that the table frame can support the overall weight. Copyright 2009 J.E. Moorman. Please link to these instructions freely, but email us if you would like to reproduce them for classes, etc.
