Fiberglass Mesh
Mosaics are sometimes laid up on a thin and flexible fiberglass mesh for rapid installation. Tiles are glued to the mesh using a white PVA adhesive such as the Weldbond brand adhesive we sell. Once the mosaic is assembled on the mesh, the mosaic artwork can be pressed into thinset mortar or adhesive and mounted to the surface to be covered.
Our mesh is sold in uncut lengths like fabric in linear feet. The roll is 38 inches wide, so each linear foot actually gives you 3 square feet of mesh.
When Not To Use Mesh
If your mosaic will be in a pool or shower floor, you may want to avoid mesh because it involves glue to attach the tile to the mesh. For these “wet” mosaics, you lay them up face down on mounting paper using a temporary glue such as Elmer’s School Glue in what is called the “reverse method” because you glue the tiles upside down on paper. These finished sheets are pressed into thinset mortar, which is allowed to harden overnight, and the next day the paper is misted and removed. Note that this is different from how fiberglass mesh is used, which goes underneath the tile and is permanent. Most people prefer mesh to paper because the “reverse method” of using paper means that you have to lay out your mosaic upside down.
When You Can Use Mesh
Note that mesh and glue CAN be used on kitchen and bathroom back-splashes and other vertical surfaces where water does not pool. You CAN use mesh for dry indoor floors, walls, etc. You CAN use mesh for mosaic tables and plaques, but why would you? Sometimes it makes sense to draw your pattern on the surface to be mosaiced and simply start gluing tile to it.

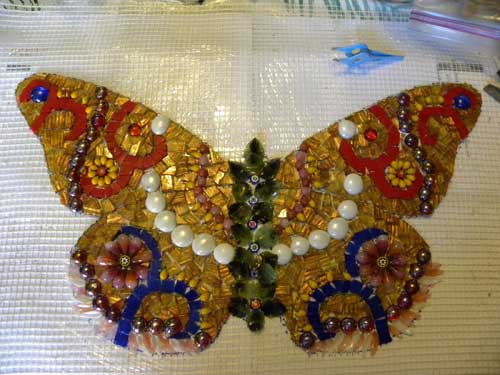
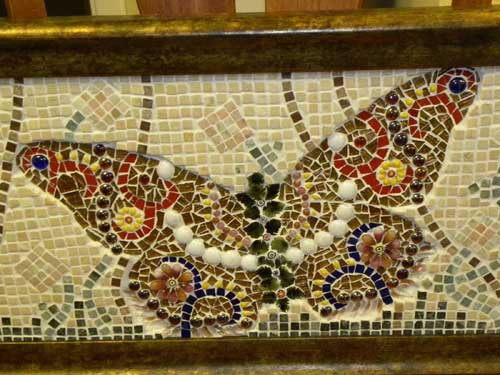
Caroline laid this butterfly mosaic up on fiberglass mesh. It is ready to be installed. In this instance, the artist glued the background tile around the butterfly on the same mesh. However, if she wasn’t doing that sort of background she could have trimmed away the surrounding mesh and used the mosaic butterfly as an insert into a space in existing tiling.

Tips for using mosaic tile mesh:
- Tape a piece of clear plastic or kitchen wrap over the top of your pattern so that you don’t accidentally glue the mosaic tile mesh to the pattern or work table.
- It may be easier to work in small sections, such as 1 ft x 1 ft, than to lay the entire mosaic on one piece of mesh
- Some people lay the mosaic on one large sheet of mesh, and then cut this sheet with a box cutter to make it easier to mount to the wall.