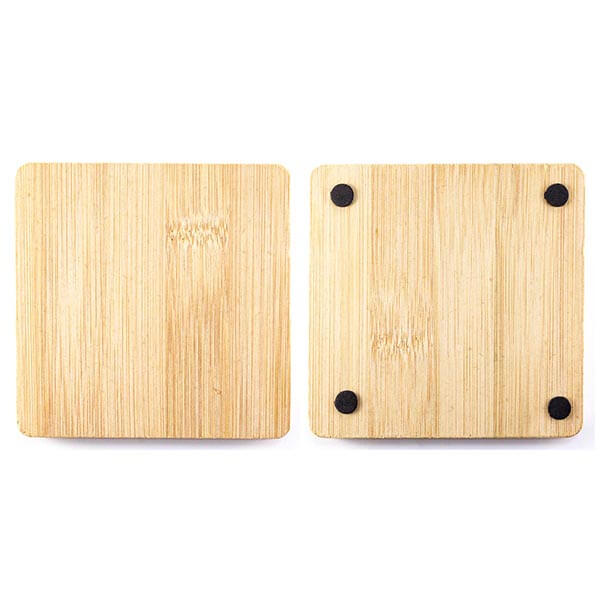
Mosaic Coaster Base – Square BAMBOO

Mosaic Coaster Base – Square BAMBOO

Our Mosaic Coaster Base – Square Bamboo has a square base that is ~3.93 inches (100 millimeters) wide and ~0.39 inches (10 millimeters) thick. The bamboo material of this square coaster provides it with both durability and a unique finish. The built in coaster bumpers underneath provide a tactile grip that reduces sliding. Unlike our other Mosaic Coaster Base varieties our Mosaic Coaster Base – Square Bamboo has rounded corners for a softer appearance.

Note that the wood is not recessed to form a border for your mosaic. Instead, your mosaic should extend to the edge of the coaster so that the finished coaster looks like a fragment of an ancient mosaic. This is easiest to do when you use tile without a heavy embossed pattern on the underside, and for this reason, we recommend the 8mm Morjo Recycled Glass Mosaic Tile for use with the coasters.

Weldbond adhesive or another high quality PVA glue is recommended for attaching tiles to the coaster base, and there are several options for grouting your mosaic coaster. You can press the tiles closely together instead of leaving a gap, but that requires much more time and effort than leaving an irregular gap and then grouting the mosaic. With an irregular grout gap of 1/16 inch or less, you can use almost every piece of tile you cut because it does not have to be exact. You can also use regular sanded grout to grout it.

Mosaic Art Projects Using Coaster Bases

Product Specifications

  • 1 piece of bamboo square coaster base
  • wood pattern is natural and varies by piece.
  • width: ~3.93 inches (100 millimeters)
  • thickness: ~0.39 inches (10 millimeters)
  • coaster bumpers on bottom side
  • bare wood face
  • rounded corners

Compatibility

Any type of glass mosaic tile could be used with these, but there is no border on the coaster, so your mosaic will go all the way to the edge. If you use a type of glass tile that has coarse embossing or bevels on the underside, then these might look odd at the edge of the mosaic. It is also more difficult to cut a tile into small pieces if the bottom has an embossed pattern. For these reasons, the coasters are best covered with stained glass or the 8mm and 12mm sizes of recycled glass mosaic tile by Morjo. We prefer Morjo to stained glass because stained glass tends to form sharper edges when cut. Whatever tile you decide to use, make sure you file off any sharp edges at the sides of the mosaic using a rough stone or marble file.

Instructions For Using The Coaster Bases For Detailed Mosaic Art

The coaster bases can be used any way you want, including simple projects for children with tiles glued randomly with variable grout spacing, and these make great first-time projects because they are small and do not require as much time and material. However, it is possible to create a more sophisticated mosaic design on the coaster using these instructions. Due to the limited space provided by the coaster, one of the most important steps is making sure you can cut tile small enough to render the smallest detail of your design and modifying your design if necessary:

  1. Find a design or picture. Google Images is a great source of photos, images, patterns, models to draw from.
  2. Draw a simple cartoon outline of your design.
  3. Try cutting up some tile and arranging it on the cartoon to see how it looks.
  4. Pay special attention to the smallest detail in your design.
  5. If it is not possible to cut tile that small, or the pieces seem too tedious to work with, then simplify your design.
  6. Note that when you start using glue, it will be easier to arrange small pieces because they will not move around as unexpectedly. Tweezers also help.
  7. Once you have you have verified that your design is not too detailed to be rendered in tile, then sketch the cartoon on the coaster in pencil.
  8. You can darken your pencil sketch with a Sharpie brand marker so that glue does not rub it off once you start working.
  9. Wipe Weldbond glue over the face of the coaster and allow to dry to seal the wood. Use a very thin coat to avoid warping the coaster from the moisture in the glue! Remember, the reason you are sealing the coaster in the first place is to avoid warping it later when you use lots of glue for the tiles. Use two light coasts and allow to dry thoroughly between coats.
  10. Start tiling your design from the center and working to the edges.
  11. Leaving an irregular grout gap of 1/16 inch or less is much easier than fitting the tile tightly together.
  12. At the edge of the coaster, cut the tile so that it fits flush with the edge. You can place a tile on the coaster, mark where it should be cut with a Sharpie marker before gluing and then make the cut.
  13. Use the fine side of a marble file or a piece of rough stone to rub the edge of the cut tile so that the edge is not as sharp.
  14. After the glue has completely dried (preferably for 48+ hours) grout your mosaic with sanded grout.

How Much Tile Do I Need For The Coaster Base?

The top surface of a ~3.93 inch square coaster base has only ~15.44 square inches (~0.11 square feet) in area. This means you could cover it with ~56 to ~72 pieces of the 12mm Morjo or ~112 to ~161 pieces of the 8mm Morjo depending on how you cut and space the tile. In either case, you might want to order more than that to account for the cutting waste, possibly twice as much if you are fitting the tile exactly with no grout gap.

How To Make Mosaic Art

For more advice on designing your mosaic project or mounting, cutting, and grouting tile, please see our page of Mosaic Frequently Asked Questions or our Mosaic Information Guide, which lists instructional pages described by topic. We also post new articles about making mosaics at our How to Mosaic Blog.
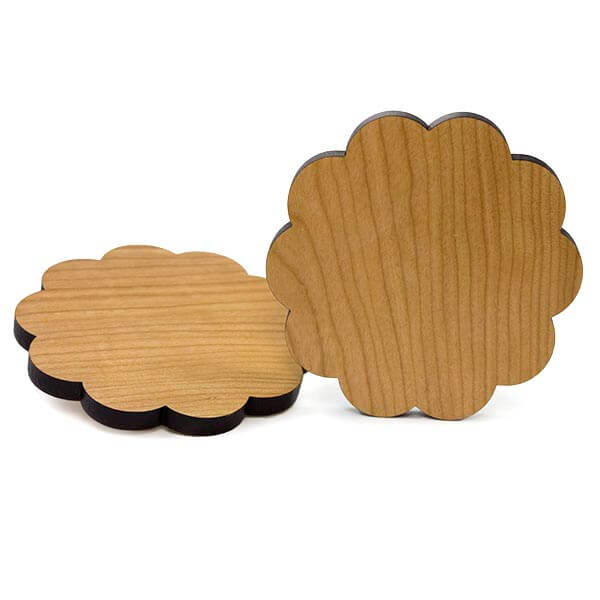
Mosaic Coaster Base Doily THICK 5/16 Inch

Doily Coaster Base 4-inch diameter, 5/16" thick, with lacquer finished back.

Mosaic Coaster Base Doily THICK 5/16 Inch is made from cherry hardwood right here in the USA. The doily shaped base is 4 inches wide and 5/16 inches thick, which is thicker than the coasters we originally sold. They are cut out with a laser, so the sides have a natural burnt wood color. The bottom and sides have been lacquered. The top surface is bare wood for a good adhesive bond.

Note that the wood is not recessed to form a border for your mosaic. Instead, your mosaic should extend to the edge of the coaster so that the finished coaster looks like a fragment of an ancient mosaic. This is easiest to do when you use tile without a heavy embossed pattern on the underside, and for this reason, we recommend the 8mm Morjo Recycled Glass Mosaic Tile for use with the coasters.

Weldbond adhesive or another high quality PVA glue is recommended for attaching tiles to the coaster base, and there are several options for grouting your mosaic coaster. You can press the tiles closely together instead of leaving a gap, but that requires much more time and effort than leaving an irregular gap and then grouting the mosaic. With an irregular grout gap of 1/16 inch or less, you can use almost every piece of tile you cut because it does not have to be exact. You can also use regular sanded grout to grout it.

Mosaic Art Projects Using Coaster Bases

Product Specifications

  • 1 piece hardwood cherry doily shaped coaster base.
  • wood pattern is natural and varies by piece.
  • width: 4 inches.
  • thickness: 5/16 inches. THICKER than our original coasters.
  • laser cut edges (natural burnt wood finish).
  • lacquered sides and bottoms.
  • bare wood face.
  • made in America

Compatibility

Any type of glass mosaic tile could be used with these, but there is no border on the coaster, so your mosaic will go all the way to the edge. If you use a type of glass tile that has coarse embossing or bevels on the underside, then these might look odd at the edge of the mosaic. It is also more difficult to cut a tile into small pieces if the bottom has an embossed pattern. For these reasons, the coasters are best covered with stained glass or the 8mm and 12mm sizes of recycled glass mosaic tile by Morjo. We prefer Morjo to stained glass because stained glass tends to form sharper edges when cut. Whatever tile you decide to use, make sure you file off any sharp edges at the sides of the mosaic using a rough stone or marble file.

Instructions For Using The Coaster Bases For Detailed Mosaic Art

The coaster bases can be used any way you want, including simple projects for children with tiles glued randomly with variable grout spacing, and these make great first-time projects because they are small and do not require as much time and material. However, it is possible to create a more sophisticated mosaic design on the coaster using these instructions. Due to the limited space provided by the coaster, one of the most important steps is making sure you can cut tile small enough to render the smallest detail of your design and modifying your design if necessary:

  1. Find a design or picture. Google Images is a great source of photos, images, patterns, models to draw from.
  2. Draw a simple cartoon outline of your design.
  3. Try cutting up some tile and arranging it on the cartoon to see how it looks.
  4. Pay special attention to the smallest detail in your design.
  5. If it is not possible to cut tile that small, or the pieces seem too tedious to work with, then simplify your design.
  6. Note that when you start using glue, it will be easier to arrange small pieces because they will not move around as unexpectedly. Tweezers also help.
  7. Once you have you have verified that your design is not too detailed to be rendered in tile, then sketch the cartoon on the coaster in pencil.
  8. You can darken your pencil sketch with a Sharpie brand marker so that glue does not rub it off once you start working.
  9. Wipe Weldbond glue over the face of the coaster and allow to dry to seal the wood. Use a very thin coat to avoid warping the coaster from the moisture in the glue! Remember, the reason you are sealing the coaster in the first place is to avoid warping it later when you use lots of glue for the tiles. Use two light coasts and allow to dry thoroughly between coats.
  10. Start tiling your design from the center and working to the edges.
  11. Leaving an irregular grout gap of 1/16 inch or less is much easier than fitting the tile tightly together.
  12. At the edge of the coaster, cut the tile so that it fits flush with the edge. You can place a tile on the coaster, mark where it should be cut with a Sharpie marker before gluing and then make the cut.
  13. Use the fine side of a marble file or a piece of rough stone to rub the edge of the cut tile so that the edge is not as sharp.
  14. After the glue has completely dried (preferably for 48+ hours) grout your mosaic with sanded grout.

How Much Tile Do I Need For The Coaster Base?

The top surface of a 4-inch doily shaped coaster base has only 12.4 square inches (0.09 square feet) in area. This means you could cover it with 20 to 56 pieces of the 12mm Morjo or 88 to 126 pieces of the 8mm Morjo depending on how you cut and space the tile. In either case, you might want to order more than that to account for the cutting waste, possibly twice as much if you are fitting the tile exactly with no grout gap.

How To Make Mosaic Art

For more advice on designing your mosaic project or mounting, cutting, and grouting tile, please see our page of Mosaic Frequently Asked Questions or our Mosaic Information Guide, which lists instructional pages described by topic. We also post new articles about making mosaics at our How to Mosaic Blog.
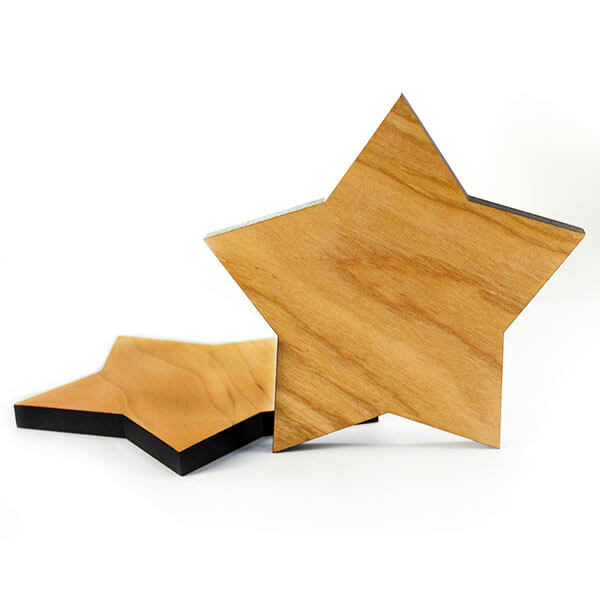
Mosaic Coaster Base Star THICK 5/16 Inch

mosaic coaster base star

Mosaic Coaster Base star THICK 5/16 Inch is made from cherry hardwood right here in the USA. The star shaped base is 4 inches wide and 5/16 inches thick, which is thicker than the coasters we originally sold. They are cut out with a laser, so the sides have a natural burnt wood color. The bottom and sides have been lacquered. The top surface is bare wood for a good adhesive bond.

Note that the wood is not recessed to form a border for your mosaic. Instead, your mosaic should extend to the edge of the coaster so that the finished coaster looks like a fragment of an ancient mosaic. This is easiest to do when you use tile without a heavy embossed pattern on the underside, and for this reason, we recommend the 8mm Morjo Recycled Glass Mosaic Tile for use with the coasters.

Weldbond adhesive or another high quality PVA glue is recommended for attaching tiles to the coaster base, and there are several options for grouting your mosaic coaster. You can press the tiles closely together instead of leaving a gap, but that requires much more time and effort than leaving an irregular gap and then grouting the mosaic. With an irregular grout gap of 1/16 inch or less, you can use almost every piece of tile you cut because it does not have to be exact. You can also use regular sanded grout to grout it.

Mosaic Art Projects Using Coaster Bases

Product Specifications

  • 1 piece hardwood cherry star shaped coaster base.
  • wood pattern is natural and varies by piece.
  • width: 4 inches.
  • thickness: 5/16 inches. THICKER than our original coasters.
  • laser cut edges (natural burnt wood finish).
  • lacquered sides and bottoms.
  • bare wood face.
  • made in America

Compatibility

Any type of glass mosaic tile could be used with these, but there is no border on the coaster, so your mosaic will go all the way to the edge. If you use a type of glass tile that has coarse embossing or bevels on the underside, then these might look odd at the edge of the mosaic. It is also more difficult to cut a tile into small pieces if the bottom has an embossed pattern. For these reasons, the coasters are best covered with stained glass or the 8mm and 12mm sizes of recycled glass mosaic tile by Morjo. We prefer Morjo to stained glass because stained glass tends to form sharper edges when cut. Whatever tile you decide to use, make sure you file off any sharp edges at the sides of the mosaic using a rough stone or marble file.

Instructions For Using The Coaster Bases For Detailed Mosaic Art

The coaster bases can be used any way you want, including simple projects for children with tiles glued randomly with variable grout spacing, and these make great first-time projects because they are small and do not require as much time and material. However, it is possible to create a more sophisticated mosaic design on the coaster using these instructions. Due to the limited space provided by the coaster, one of the most important steps is making sure you can cut tile small enough to render the smallest detail of your design and modifying your design if necessary:

  1. Find a design or picture. Google Images is a great source of photos, images, patterns, models to draw from.
  2. Draw a simple cartoon outline of your design.
  3. Try cutting up some tile and arranging it on the cartoon to see how it looks.
  4. Pay special attention to the smallest detail in your design.
  5. If it is not possible to cut tile that small, or the pieces seem too tedious to work with, then simplify your design.
  6. Note that when you start using glue, it will be easier to arrange small pieces because they will not move around as unexpectedly. Tweezers also help.
  7. Once you have you have verified that your design is not too detailed to be rendered in tile, then sketch the cartoon on the coaster in pencil.
  8. You can darken your pencil sketch with a Sharpie brand marker so that glue does not rub it off once you start working.
  9. Wipe Weldbond glue over the face of the coaster and allow to dry to seal the wood. Use a very thin coat to avoid warping the coaster from the moisture in the glue! Remember, the reason you are sealing the coaster in the first place is to avoid warping it later when you use lots of glue for the tiles. Use two light coasts and allow to dry thoroughly between coats.
  10. Start tiling your design from the center and working to the edges.
  11. Leaving an irregular grout gap of 1/16 inch or less is much easier than fitting the tile tightly together.
  12. At the edge of the coaster, cut the tile so that it fits flush with the edge. You can place a tile on the coaster, mark where it should be cut with a Sharpie marker before gluing and then make the cut.
  13. Use the fine side of a marble file or a piece of rough stone to rub the edge of the cut tile so that the edge is not as sharp.
  14. After the glue has completely dried (preferably for 48+ hours) grout your mosaic with sanded grout.

How Much Tile Do I Need For The Coaster Base?

The top surface of a 4-inch star shaped coaster base has only 5.3 square inches (0.04 square feet) in area. This means you could cover it with 20 to 25 pieces of the 12mm Morjo or 38 to 54 pieces of the 8mm Morjo depending on how you cut and space the tile. In either case, you might want to order more than that to account for the cutting waste, possibly twice as much if you are fitting the tile exactly with no grout gap.

How To Make Mosaic Art

For more advice on designing your mosaic project or mounting, cutting, and grouting tile, please see our page of Mosaic Frequently Asked Questions or our Mosaic Information Guide, which lists instructional pages described by topic. We also post new articles about making mosaics at our How to Mosaic Blog.
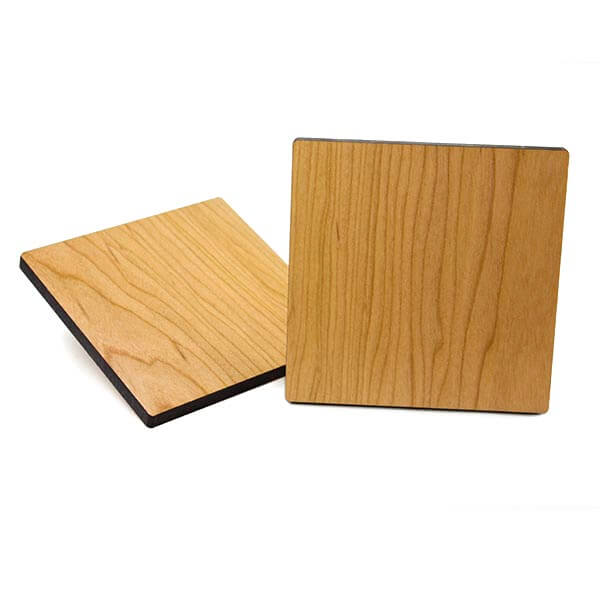
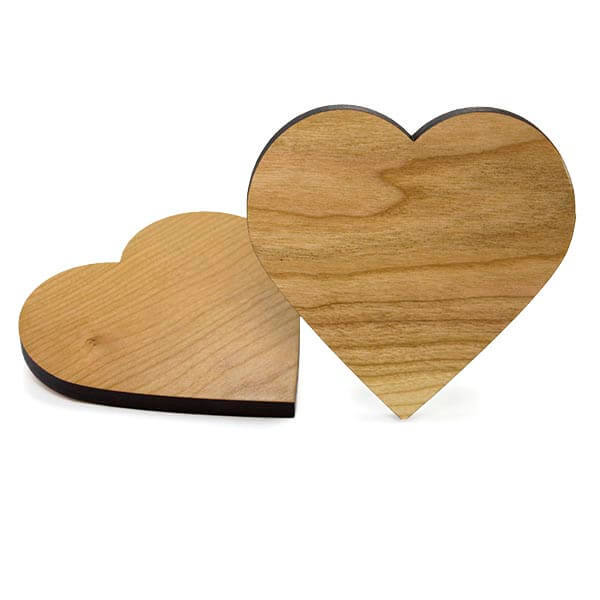
Mosaic Coaster Base Heart THICK 5/16 Inch

Heart Coaster Base ~4-inch across, 5/16" thick, with lacquer finished back.

Mosaic Coaster Base Heart THICK 5/16 Inch is made from cherry hardwood right here in the USA. The heart shaped base is 4 inches wide and 5/16 inches thick, which is thicker than the coasters we originally sold. They are cut out with a laser, so the sides have a natural burnt wood color. The bottom and sides have been lacquered. The top surface is bare wood for a good adhesive bond.

Note that the wood is not recessed to form a border for your mosaic. Instead, your mosaic should extend to the edge of the coaster so that the finished coaster looks like a fragment of an ancient mosaic. This is easiest to do when you use tile without a heavy embossed pattern on the underside, and for this reason, we recommend the 8mm Morjo Recycled Glass Mosaic Tile for use with the coasters.

Weldbond adhesive or another high quality PVA glue is recommended for attaching tiles to the coaster base, and there are several options for grouting your mosaic coaster. You can press the tiles closely together instead of leaving a gap, but that requires much more time and effort than leaving an irregular gap and then grouting the mosaic. With an irregular grout gap of 1/16 inch or less, you can use almost every piece of tile you cut because it does not have to be exact. You can also use regular sanded grout to grout it.

Mosaic Art Projects Using Coaster Bases

Product Specifications

  • 1 piece hardwood cherry heart shaped coaster base.
  • wood pattern is natural and varies by piece.
  • width: 4 inches.
  • thickness: 5/16 inches. THICKER than our original coasters.
  • laser cut edges (natural burnt wood finish).
  • lacquered sides and bottoms.
  • bare wood face.
  • made in America

Compatibility

Any type of glass mosaic tile could be used with these, but there is no border on the coaster, so your mosaic will go all the way to the edge. If you use a type of glass tile that has coarse embossing or bevels on the underside, then these might look odd at the edge of the mosaic. It is also more difficult to cut a tile into small pieces if the bottom has an embossed pattern. For these reasons, the coasters are best covered with stained glass or the 8mm and 12mm sizes of recycled glass mosaic tile by Morjo. We prefer Morjo to stained glass because stained glass tends to form sharper edges when cut. Whatever tile you decide to use, make sure you file off any sharp edges at the sides of the mosaic using a rough stone or marble file.

Instructions For Using The Coaster Bases For Detailed Mosaic Art

The coaster bases can be used any way you want, including simple projects for children with tiles glued randomly with variable grout spacing, and these make great first-time projects because they are small and do not require as much time and material. However, it is possible to create a more sophisticated mosaic design on the coaster using these instructions. Due to the limited space provided by the coaster, one of the most important steps is making sure you can cut tile small enough to render the smallest detail of your design and modifying your design if necessary:

  1. Find a design or picture. Google Images is a great source of photos, images, patterns, models to draw from.
  2. Draw a simple cartoon outline of your design.
  3. Try cutting up some tile and arranging it on the cartoon to see how it looks.
  4. Pay special attention to the smallest detail in your design.
  5. If it is not possible to cut tile that small, or the pieces seem too tedious to work with, then simplify your design.
  6. Note that when you start using glue, it will be easier to arrange small pieces because they will not move around as unexpectedly. Tweezers also help.
  7. Once you have you have verified that your design is not too detailed to be rendered in tile, then sketch the cartoon on the coaster in pencil.
  8. You can darken your pencil sketch with a Sharpie brand marker so that glue does not rub it off once you start working.
  9. Wipe Weldbond glue over the face of the coaster and allow to dry to seal the wood. Use a very thin coat to avoid warping the coaster from the moisture in the glue! Remember, the reason you are sealing the coaster in the first place is to avoid warping it later when you use lots of glue for the tiles. Use two light coasts and allow to dry thoroughly between coats.
  10. Start tiling your design from the center and working to the edges.
  11. Leaving an irregular grout gap of 1/16 inch or less is much easier than fitting the tile tightly together.
  12. At the edge of the coaster, cut the tile so that it fits flush with the edge. You can place a tile on the coaster, mark where it should be cut with a Sharpie marker before gluing and then make the cut.
  13. Use the fine side of a marble file or a piece of rough stone to rub the edge of the cut tile so that the edge is not as sharp.
  14. After the glue has completely dried (preferably for 48+ hours) grout your mosaic with sanded grout.

How Much Tile Do I Need For The Coaster Base?

The top surface of a 4-inch heart shaped coaster base has only 10 square inches (0.07 square feet) in area. This means you could cover it with 35 to 45 pieces of the 12mm Morjo or 70 to 100 pieces of the 8mm Morjo depending on how you cut and space the tile. In either case, you might want to order more than that to account for the cutting waste, possibly twice as much if you are fitting the tile exactly with no grout gap.

How To Make Mosaic Art

For more advice on designing your mosaic project or mounting, cutting, and grouting tile, please see our page of Mosaic Frequently Asked Questions or our Mosaic Information Guide, which lists instructional pages described by topic. We also post new articles about making mosaics at our How to Mosaic Blog.
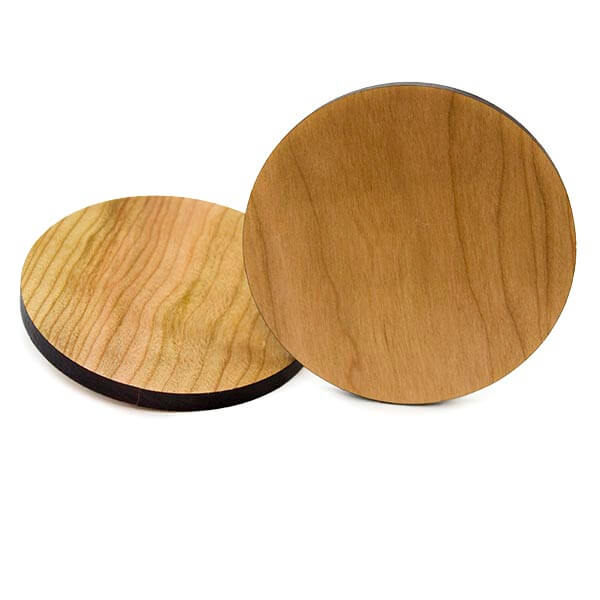
Mosaic Coaster Base Square THICK 5/16 Inch

Square Coaster Base 4-inch across, 5/16" thick, with lacquer finished back.

Mosaic Coaster Base Square THICK 5/16 Inch is made from cherry hardwood right here in the USA. The square base is 4 inches wide and 5/16 inches thick, which is thicker than the coasters we originally sold. They are cut out with a laser, so the sides have a natural burnt wood color. The bottom and sides have been lacquered. The top surface is bare wood for a good adhesive bond.

Note that the wood is not recessed to form a border for your mosaic. Instead, your mosaic should extend to the edge of the coaster so that the finished coaster looks like a fragment of an ancient mosaic. This is easiest to do when you use tile without a heavy embossed pattern on the underside, and for this reason, we recommend the 8mm Morjo Recycled Glass Mosaic Tile for use with the coasters.

Weldbond adhesive or another high quality PVA glue is recommended for attaching tiles to the coaster base, and there are several options for grouting your mosaic coaster. You can press the tiles closely together instead of leaving a gap, but that requires much more time and effort than leaving an irregular gap and then grouting the mosaic. With an irregular grout gap of 1/16 inch or less, you can use almost every piece of tile you cut because it does not have to be exact. You can also use regular sanded grout to grout it.

Mosaic Art Projects Using Coaster Bases

Product Specifications

  • 1 piece hardwood cherry square coaster base.
  • wood pattern is natural and varies by piece.
  • width: 4 inches.
  • thickness: 5/16 inches. THICKER than our original coasters.
  • laser cut edges (natural burnt wood finish).
  • lacquered sides and bottoms.
  • bare wood face.
  • made in America

Compatibility

Any type of glass mosaic tile could be used with these, but there is no border on the coaster, so your mosaic will go all the way to the edge. If you use a type of glass tile that has coarse embossing or bevels on the underside, then these might look odd at the edge of the mosaic. It is also more difficult to cut a tile into small pieces if the bottom has an embossed pattern. For these reasons, the coasters are best covered with stained glass or the 8mm and 12mm sizes of recycled glass mosaic tile by Morjo. We prefer Morjo to stained glass because stained glass tends to form sharper edges when cut. Whatever tile you decide to use, make sure you file off any sharp edges at the sides of the mosaic using a rough stone or marble file.

Instructions For Using The Coaster Bases For Detailed Mosaic Art

The coaster bases can be used any way you want, including simple projects for children with tiles glued randomly with variable grout spacing, and these make great first-time projects because they are small and do not require as much time and material. However, it is possible to create a more sophisticated mosaic design on the coaster using these instructions. Due to the limited space provided by the coaster, one of the most important steps is making sure you can cut tile small enough to render the smallest detail of your design and modifying your design if necessary:

  1. Find a design or picture. Google Images is a great source of photos, images, patterns, models to draw from.
  2. Draw a simple cartoon outline of your design.
  3. Try cutting up some tile and arranging it on the cartoon to see how it looks.
  4. Pay special attention to the smallest detail in your design.
  5. If it is not possible to cut tile that small, or the pieces seem too tedious to work with, then simplify your design.
  6. Note that when you start using glue, it will be easier to arrange small pieces because they will not move around as unexpectedly. Tweezers also help.
  7. Once you have you have verified that your design is not too detailed to be rendered in tile, then sketch the cartoon on the coaster in pencil.
  8. You can darken your pencil sketch with a Sharpie brand marker so that glue does not rub it off once you start working.
  9. Wipe Weldbond glue over the face of the coaster and allow to dry to seal the wood. Use a very thin coat to avoid warping the coaster from the moisture in the glue! Remember, the reason you are sealing the coaster in the first place is to avoid warping it later when you use lots of glue for the tiles. Use two light coasts and allow to dry thoroughly between coats.
  10. Start tiling your design from the center and working to the edges.
  11. Leaving an irregular grout gap of 1/16 inch or less is much easier than fitting the tile tightly together.
  12. At the edge of the coaster, cut the tile so that it fits flush with the edge. You can place a tile on the coaster, mark where it should be cut with a Sharpie marker before gluing and then make the cut.
  13. Use the fine side of a marble file or a piece of rough stone to rub the edge of the cut tile so that the edge is not as sharp.
  14. After the glue has completely dried (preferably for 48+ hours) grout your mosaic with sanded grout.

How Much Tile Do I Need For The Coaster Base?

The top surface of a 4-inch square coaster base has only 16 square inches (0.11 square feet) in area. This means you could cover it with 56 to 72 pieces of the 12mm Morjo or 112 to 161 pieces of the 8mm Morjo depending on how you cut and space the tile. In either case, you might want to order more than that to account for the cutting waste, possibly twice as much if you are fitting the tile exactly with no grout gap.

How To Make Mosaic Art

For more advice on designing your mosaic project or mounting, cutting, and grouting tile, please see our page of Mosaic Frequently Asked Questions or our Mosaic Information Guide, which lists instructional pages described by topic. We also post new articles about making mosaics at our How to Mosaic Blog.
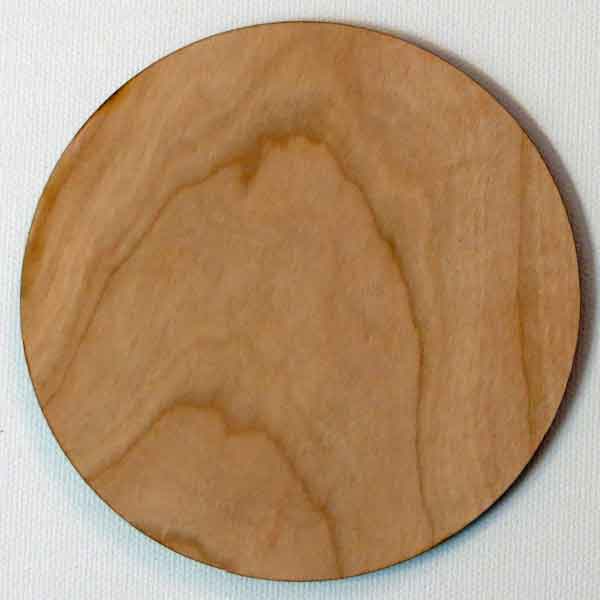
Mosaic Coaster Base Circular Round THICK 5/16 Inch

Circular Coaster Base 4-inch diameter, 5/16" thick, with lacquer finished back.

Mosaic Coaster Base Circular Round THICK 5/16 Inch is made from cherry hardwood right here in the USA. The circular base is 4 inches in diameter and 5/16 inches thick, which is thicker than the coasters we originally sold. They are cut out with a laser, so the sides have a natural burnt wood color. The bottom and sides have been lacquered. The top surface is bare wood for a good adhesive bond.

Note that the wood is not recessed to form a border for your mosaic. Instead, your mosaic should extend to the edge of the coaster so that the finished coaster looks like a fragment of an ancient mosaic. This is easiest to do when you use tile without a heavy embossed pattern on the underside, and for this reason, we recommend the 8mm Morjo Recycled Glass Mosaic Tile for use with the coasters.

Weldbond adhesive or another high quality PVA glue is recommended for attaching tiles to the coaster base, and there are several options for grouting your mosaic coaster. You can press the tiles closely together instead of leaving a gap, but that requires much more time and effort than leaving an irregular gap and then grouting the mosaic. With an irregular grout gap of 1/16 inch or less, you can use almost every piece of tile you cut because it does not have to be exact. You can also use regular sanded grout to grout it.

Mosaic Art Projects Using Coaster Bases

Product Specifications

  • 1 piece hardwood cherry circular coaster base.
  • wood pattern is natural and varies by piece.
  • diameter: 4 inches.
  • thickness: 5/16 inches. THICKER than our original coasters.
  • laser cut edges (natural burnt wood finish).
  • lacquered sides and bottoms.
  • bare wood face.
  • made in America

Compatibility

Any type of glass mosaic tile could be used with these, but there is no border on the coaster, so your mosaic will go all the way to the edge. If you use a type of glass tile that has coarse embossing or bevels on the underside, then these might look odd at the edge of the mosaic. It is also more difficult to cut a tile into small pieces if the bottom has an embossed pattern. For these reasons, the coasters are best covered with stained glass or the 8mm and 12mm sizes of recycled glass mosaic tile by Morjo. We prefer Morjo to stained glass because stained glass tends to form sharper edges when cut. Whatever tile you decide to use, make sure you file off any sharp edges at the sides of the mosaic using a rough stone or marble file.

Instructions For Using The Coaster Bases For Detailed Mosaic Art

The coaster bases can be used any way you want, including simple projects for children with tiles glued randomly with variable grout spacing, and these make great first-time projects because they are small and do not require as much time and material. However, it is possible to create a more sophisticated mosaic design on the coaster using these instructions. Due to the limited space provided by the coaster, one of the most important steps is making sure you can cut tile small enough to render the smallest detail of your design and modifying your design if necessary:

  1. Find a design or picture. Google Images is a great source of photos, images, patterns, models to draw from.
  2. Draw a simple cartoon outline of your design.
  3. Try cutting up some tile and arranging it on the cartoon to see how it looks.
  4. Pay special attention to the smallest detail in your design.
  5. If it is not possible to cut tile that small, or the pieces seem too tedious to work with, then simplify your design.
  6. Note that when you start using glue, it will be easier to arrange small pieces because they will not move around as unexpectedly. Tweezers also help.
  7. Once you have you have verified that your design is not too detailed to be rendered in tile, then sketch the cartoon on the coaster in pencil.
  8. You can darken your pencil sketch with a Sharpie brand marker so that glue does not rub it off once you start working.
  9. Wipe Weldbond glue over the face of the coaster and allow to dry to seal the wood. Use a very thin coat to avoid warping the coaster from the moisture in the glue! Remember, the reason you are sealing the coaster in the first place is to avoid warping it later when you use lots of glue for the tiles. Use two light coasts and allow to dry thoroughly between coats.
  10. Start tiling your design from the center and working to the edges.
  11. Leaving an irregular grout gap of 1/16 inch or less is much easier than fitting the tile tightly together.
  12. At the edge of the coaster, cut the tile so that it fits flush with the edge. You can place a tile on the coaster, mark where it should be cut with a Sharpie marker before gluing and then make the cut.
  13. Use the fine side of a marble file or a piece of rough stone to rub the edge of the cut tile so that the edge is not as sharp.
  14. After the glue has completely dried (preferably for 48+ hours) grout your mosaic with sanded grout.

How Much Tile Do I Need For The Coaster Base?

The top surface of a 4-inch circular coaster base has only 12.6 square inches (0.09 square feet) in area. This means you could cover it with 45 to 60 of the 12mm Morjo or 90 to 130 of the 8mm Morjo depending on how you cut and space the tile. In either case, you might want to order more than that to account for the cutting waste, possibly twice as much if you are fitting the tile exactly with no grout gap.

How To Make Mosaic Art

For more advice on designing your mosaic project or mounting, cutting, and grouting tile, please see our page of Mosaic Frequently Asked Questions or our Mosaic Information Guide, which lists instructional pages described by topic. We also post new articles about making mosaics at our How to Mosaic Blog.
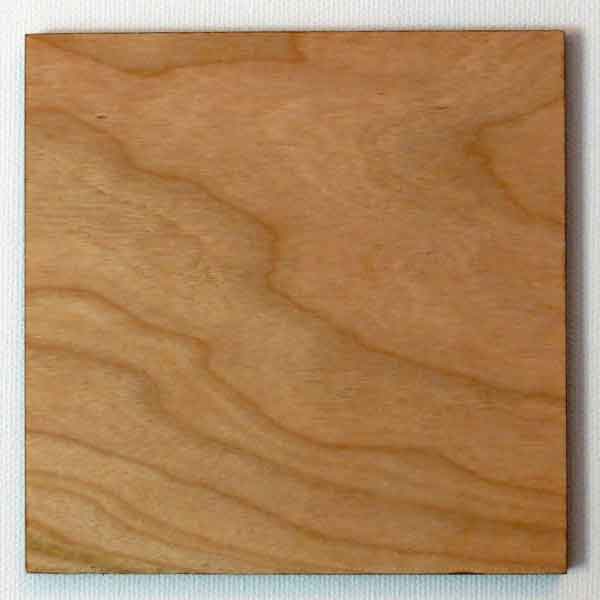
Mosaic Coaster Base Circular Round

circular coaster base hardwood

Circular Mosaic Coaster Base is made from cherry hardwood right here in the USA. The circular base is 4 inches in diameter and 3/16 inches thick. They are cut out with a laser, so the sides have a natural burnt wood color that could be lacquered. Note that the wood is not recessed to form a border for your mosaic. Instead, your mosaic should extend to the edge of the coaster so that the finished coaster looks like a fragment of an ancient mosaic. This is easiest to do when you use tile without a heavy embossed pattern on the underside, and for this reason, we recommend the 12mm Elementile Recycled Glass Mosaic Tile for use with the coasters.

Weldbond adhesive or another high quality PVA glue is recommended for attaching tiles to the coaster base, and there are several options for grouting your mosaic coaster. You can press the tiles closely together instead of leaving a gap, but that requires much more time and effort than leaving an irregular gap and then grouting the mosaic. With an irregular grout gap of 1/16 inch or less, you can use almost every piece of tile you cut because it does not have to be exact. You can also use regular sanded grout to grout it.

Mosaic Art Projects Using Coaster Bases

Product Specifications

  • 1 piece hardwood cherry circular coaster base.
  • wood pattern is natural and varies by piece.
  • diameter: 4 inches.
  • thickness: 3/16 inches.
  • laser cut edges (natural burnt wood finish).
  • unvarnished, unlacquered.
  • made in America
  • Removable paper tape protects the best face of the coaster.
  • The reverse side of the coaster may have occasional singes from the cutting laser, but these are superficial and can be covered by mosaic.

Compatibility

Any type of glass mosaic tile could be used with these, but there is no border on the coaster, so your mosaic will go all the way to the edge. If you use a type of glass tile that has coarse embossing or bevels on the underside, then these might look odd at the edge of the mosaic. It is also more difficult to cut a tile into small pieces if the bottom has an embossed pattern. For these reasons, the coasters are best covered with stained glass or the 8mm and 12mm sizes of recycled glass mosaic tile by Elementile. We prefer Elementile to stained glass because stained glass tends to form sharper edges when cut. Whatever tile you decide to use, make sure you file off any sharp edges at the sides of the mosaic using a rough stone or marble file.

Instructions For Using The Coaster Bases For Detailed Mosaic Art

The coaster bases can be used any way you want, including simple projects for children with tiles glued randomly with variable grout spacing, and these make great first-time projects because they are small and do not require as much time and material. However, it is possible to create a more sophisticated mosaic design on the coaster using these instructions. Due to the limited space provided by the coaster, one of the most important steps is making sure you can cut tile small enough to render the smallest detail of your design and modifying your design if necessary:

  1. Find a design or picture. Google Images is a great source of photos, images, patterns, models to draw from.
  2. Draw a simple cartoon outline of your design.
  3. Try cutting up some tile and arranging it on the cartoon to see how it looks.
  4. Pay special attention to the smallest detail in your design.
  5. If it is not possible to cut tile that small, or the pieces seem too tedious to work with, then simplify your design.
  6. Note that when you start using glue, it will be easier to arrange small pieces because they will not move around as unexpectedly. Tweezers also help.
  7. Once you have you have verified that your design is not too detailed to be rendered in tile, then sketch the cartoon on the coaster in pencil.
  8. You can darken your pencil sketch with a Sharpie brand marker so that glue does not rub it off once you start working.
  9. Wipe Weldbond glue over the face of the coaster and allow to dry to seal the wood. Use a very thin coat to avoid warping the coaster from the moisture in the glue! Remember, the reason you are sealing the coaster in the first place is to avoid warping it later when you use lots of glue for the tiles. Use two light coasts and allow to dry thoroughly between coats.
  10. Start tiling your design from the center and working to the edges.
  11. Leaving an irregular grout gap of 1/16 inch or less is much easier than fitting the tile tightly together.
  12. At the edge of the coaster, cut the tile so that it fits flush with the edge. You can place a tile on the coaster, mark where it should be cut with a Sharpie marker before gluing and then make the cut.
  13. Use the fine side of a marble file or a piece of rough stone to rub the edge of the cut tile so that the edge is not as sharp.
  14. After the glue has dried (preferably for 48+ hours) grout your mosaic with sanded grout.
  15. We recommend sealing the edges and bottoms of the coasters to protect from spills and condensation that could split or warp the wood.
  16. Deft Clear Wood finish in a spray can is sold by Home Depot and can be used for this.

How Much Tile Do I Need For The Coaster Base?

The top surface of a 4-inch circular coaster base has only 12.6 square inches (0.09 square feet) in area. This means you could cover it with 45 to 60 of the 12mm Elementile or 90 to 130 of the 8mm Elementile depending on how you cut and space the tile. In either case, one bag of tile would be more than enough to cover the coaster. However, you will want to order more than that to account for the cutting waste, possibly twice as much if you are fitting the tile exactly with no grout gap.

How To Make Mosaic Art

For more advice on designing your mosaic project or mounting, cutting, and grouting tile, please see our page of Mosaic Frequently Asked Questions or our Mosaic Information Guide, which lists instructional pages described by topic. We also post new articles about making mosaics at our How to Mosaic Blog.
Mosaic Coaster Base Square

square mosaic coaster base

Square Mosaic Coaster Base is made from cherry hardwood right here in the USA. The square base is 4 inches wide and 3/16 inches thick. They are cut out with a laser, so the sides have a natural burnt wood color that could be lacquered. Note that the wood is not recessed to form a border for your mosaic. Instead, your mosaic should extend to the edge of the coaster so that the finished coaster looks like a fragment of an ancient mosaic. This is easiest to do when you use tile without a heavy embossed pattern on the underside, and for this reason, we recommend the 12mm Elementile Recycled Glass Mosaic Tile for use with the coasters.

Weldbond adhesive or another high quality PVA glue is recommended for attaching tiles to the coaster base, and there are several options for grouting your mosaic coaster. You can press the tiles closely together instead of leaving a gap, but that requires much more time and effort than leaving an irregular gap and then grouting the mosaic. With an irregular grout gap of 1/16 inch or less, you can use almost every piece of tile you cut because it does not have to be exact. You can also use regular sanded grout to grout it.

Mosaic Art Projects Using Coaster Bases

Product Specifications

  • 1 piece hardwood cherry square coaster base.
  • wood pattern is natural and varies by piece.
  • width: 4 inches.
  • thickness: 3/16 inches.
  • laser cut edges (natural burnt wood finish).
  • unvarnished, unlacquered.
  • made in America
  • Removable paper tape protects the best face of the coaster.
  • The reverse side of the coaster may have occasional singes from the cutting laser, but these are superficial and can be covered by mosaic.

Compatibility

Any type of glass mosaic tile could be used with these, but there is no border on the coaster, so your mosaic will go all the way to the edge. If you use a type of glass tile that has coarse embossing or bevels on the underside, then these might look odd at the edge of the mosaic. It is also more difficult to cut a tile into small pieces if the bottom has an embossed pattern. For these reasons, the coasters are best covered with stained glass or the 8mm and 12mm sizes of recycled glass mosaic tile by Elementile. We prefer Elementile to stained glass because stained glass tends to form sharper edges when cut. Whatever tile you decide to use, make sure you file off any sharp edges at the sides of the mosaic using a rough stone or marble file.

Instructions For Using The Coaster Bases For Detailed Mosaic Art

The coaster bases can be used any way you want, including simple projects for children with tiles glued randomly with variable grout spacing, and these make great first-time projects because they are small and do not require as much time and material. However, it is possible to create a more sophisticated mosaic design on the coaster using these instructions. Due to the limited space provided by the coaster, one of the most important steps is making sure you can cut tile small enough to render the smallest detail of your design and modifying your design if necessary:

  1. Find a design or picture. Google Images is a great source of photos, images, patterns, models to draw from.
  2. Draw a simple cartoon outline of your design.
  3. Try cutting up some tile and arranging it on the cartoon to see how it looks.
  4. Pay special attention to the smallest detail in your design.
  5. If it is not possible to cut tile that small, or the pieces seem too tedious to work with, then simplify your design.
  6. Note that when you start using glue, it will be easier to arrange small pieces because they will not move around as unexpectedly. Tweezers also help.
  7. Once you have you have verified that your design is not too detailed to be rendered in tile, then sketch the cartoon on the coaster in pencil.
  8. You can darken your pencil sketch with a Sharpie brand marker so that glue does not rub it off once you start working.
  9. Wipe Weldbond glue over the face of the coaster and allow to dry to seal the wood. Use a very thin coat to avoid warping the coaster from the moisture in the glue! Remember, the reason you are sealing the coaster in the first place is to avoid warping it later when you use lots of glue for the tiles. Use two light coasts and allow to dry thoroughly between coats.
  10. Start tiling your design from the center and working to the edges.
  11. Leaving an irregular grout gap of 1/16 inch or less is much easier than fitting the tile tightly together.
  12. At the edge of the coaster, cut the tile so that it fits flush with the edge. You can place a tile on the coaster, mark where it should be cut with a Sharpie marker before gluing and then make the cut.
  13. Use the fine side of a marble file or a piece of rough stone to rub the edge of the cut tile so that the edge is not as sharp.
  14. After the glue has dried (preferably for 48+ hours) grout your mosaic with sanded grout.
  15. We recommend sealing the edges and bottoms of the coasters to protect from spills and condensation that could split or warp the wood.
  16. Deft Clear Wood finish in a spray can is sold by Home Depot and can be used for this.

How Much Tile Do I Need For The Coaster Base?

The top surface of a 4-inch square coaster base has only 16 square inches (0.1 square feet) in area. This means you could cover it with 56 to 72 of the 12mm Elementile or 113 to 162 of the 8mm Elementile depending on how you cut and space the tile. In either case, one bag of tile would be more than enough to cover the coaster. However, you will want to order more than that to account for the cutting waste, possibly twice as much if you are fitting the tile exactly with no grout gap.

How To Make Mosaic Art

For more advice on designing your mosaic project or mounting, cutting, and grouting tile, please see our page of Mosaic Frequently Asked Questions or our Mosaic Information Guide, which lists instructional pages described by topic. We also post new articles about making mosaics at our How to Mosaic Blog.

Canadian Pasta Box 12mm U-Mix [44+74+75]

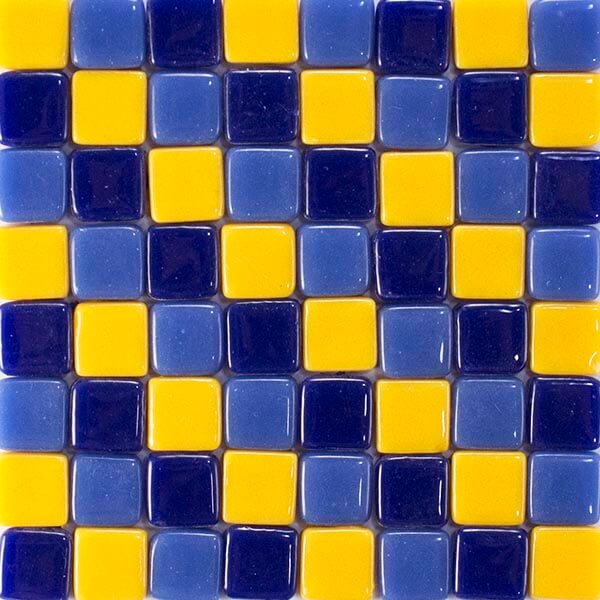
canadian pasta boxCanadian Pasta Box 12mm U-Mix [44+74+75] Mosaic Tile Assortment is a bundle of 3 tile colors (0.55 lb each) that you mix yourself to create an assortment. You receive 3 bags of mosaic tile (approx 175 pieces per bag), adding up to over 500 tiles total. This amount covers approximately 1 square foot with a standard grout gap of 1/16 inch. The numbers in the assortment name indicate each color in the mix. These assortments come as separate individual colors so that artists can tweak the ratios while mixing or arranging in gradients to create unique results.
Colors included: 44-Indian Yellow, 74-Ultramarine Blue, and 75-Ultramarine Blue Dark. Shop individual 12mm glass mosaic tile colors here.

3-Color U-Mix 12mm Mosaic Tile Assortment

  • tile size: 12mm (~1/2 inch)
  • thickness: 1/8 nominal (4mm). Compatible with other brands.
  • sales unit: (3) 1/2-lb bags of individual colors
  • yield: 1.65-lb assortment, 500+ tiles.
  • material: glass
  • variety: recycled glass
  • pigments: colorfast, UV resistant
  • durability: frost-proof, impervious to liquid
  • usage: suitable for indoor and outdoor use

Coverage

The complete 1.65-lb tile assortment covers about 1 square foot with a standard grout gap of 1/16 inch.

Compatibility

These recycled glass tiles have a nominal industry-standard thickness of 1/8 inch (4mm) and therefore can combine with most other tile types and brands.

Cutting Morjo 12mm Glass Mosaic Tile

Morjo Recycled Glass Tile cuts like butter into tiny pieces using a pair of Mosaic Glass Cutters. You can make tiny cubes without a lot slivers or cutting waste. This makes them ideal for mini mosaics or rendering small details in larger work. See our square coasters for a mini mosaic base!

Making Mosaic Art with U-Mix Assortments

U-Mix tile assortments give artists the unique option to customize their color blend between 3 separate colors. They provide an inspiring range of mosaic color palettes including landscape, monochromatic, pastel, and colorful themes to start a new project.

How To Make Mosaics

For more advice on making mosaic art, please see our Mosaic Frequently Asked Questions page, the How To Mosaic blog, or our Mosaic Information Guide.

Sunflower River 12mm U-Mix [44+74+118]

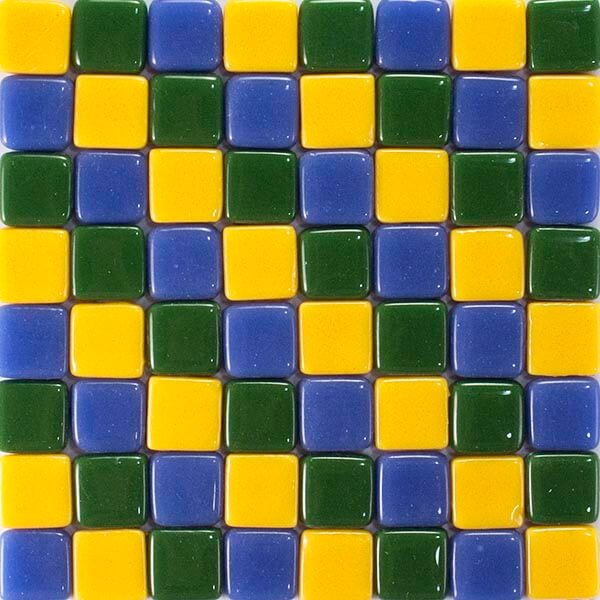
Sunflower River 12mm U-Mix [44+74+118] Mosaic Tile Assortment is a bundle of 3 tile colors (0.55 lb each) that you mix yourself to create an assortment. You receive 3 bags of mosaic tile (approx 175 pieces per bag), adding up to over 500 tiles total. This amount covers approximately 1 square foot with a standard grout gap of 1/16 inch. The numbers in the assortment name indicate each color in the mix. These assortments come as separate individual colors so that artists can tweak the ratios while mixing or arranging in gradients to create unique results.

Colors included: 44-Indian Yellow, 74-Ultramarine Blue, and 118-Leaf Green Deep. Shop individual 12mm glass mosaic tile colors here.

3-Color U-Mix 12mm Mosaic Tile Assortment

  • tile size: 12mm (~1/2 inch)
  • thickness: 1/8 nominal (4mm). Compatible with other brands.
  • sales unit: (3) 1/2-lb bags of individual colors
  • yield: 1.65-lb assortment, 500+ tiles.
  • material: glass
  • variety: recycled glass
  • pigments: colorfast, UV resistant
  • durability: frost-proof, impervious to liquid
  • usage: suitable for indoor and outdoor use

Coverage

The complete 1.65-lb tile assortment covers about 1 square foot with a standard grout gap of 1/16 inch.

Compatibility

These recycled glass tiles have a nominal industry-standard thickness of 1/8 inch (4mm) and therefore can combine with most other tile types and brands.

Cutting Morjo 12mm Glass Mosaic Tile

Morjo Recycled Glass Tile cuts like butter into tiny pieces using a pair of Mosaic Glass Cutters. You can make tiny cubes without a lot slivers or cutting waste. This makes them ideal for mini mosaics or rendering small details in larger work. See our square coasters for a mini mosaic base!

Making Mosaic Art with U-Mix Assortments

U-Mix tile assortments give artists the unique option to customize their color blend between 3 separate colors. They provide an inspiring range of mosaic color palettes including landscape, monochromatic, pastel, and colorful themes to start a new project.

How To Make Mosaics

For more advice on making mosaic art, please see our Mosaic Frequently Asked Questions page, the How To Mosaic blog, or our Mosaic Information Guide.